272: Setting Up Assets and Data Streams Quickly
This course is for Platform Administrators who need to create many assets and data streams without doing one-by-one setup.
By the end, you will be able to create asset types, prepare valid CSV files, import assets and data streams, handle validation errors, and finish with a clean bulk rollout.
Where this course fits
This is the second course in your Platform Administrator setup path.
- Hardware and platform foundations -- clusters, edge, and baseline setup (coming soon)
- This course -- model setup with asset types, assets, semantics, units, and data streams
- Connect data and enforce quality -- connectors, data quality, and guardrails (coming soon)
Note
This course assumes your platform is already reachable and you can access the Administration area in the Kelvin UI.
End-to-end flow
Use this exact order. It prevents most validation failures.
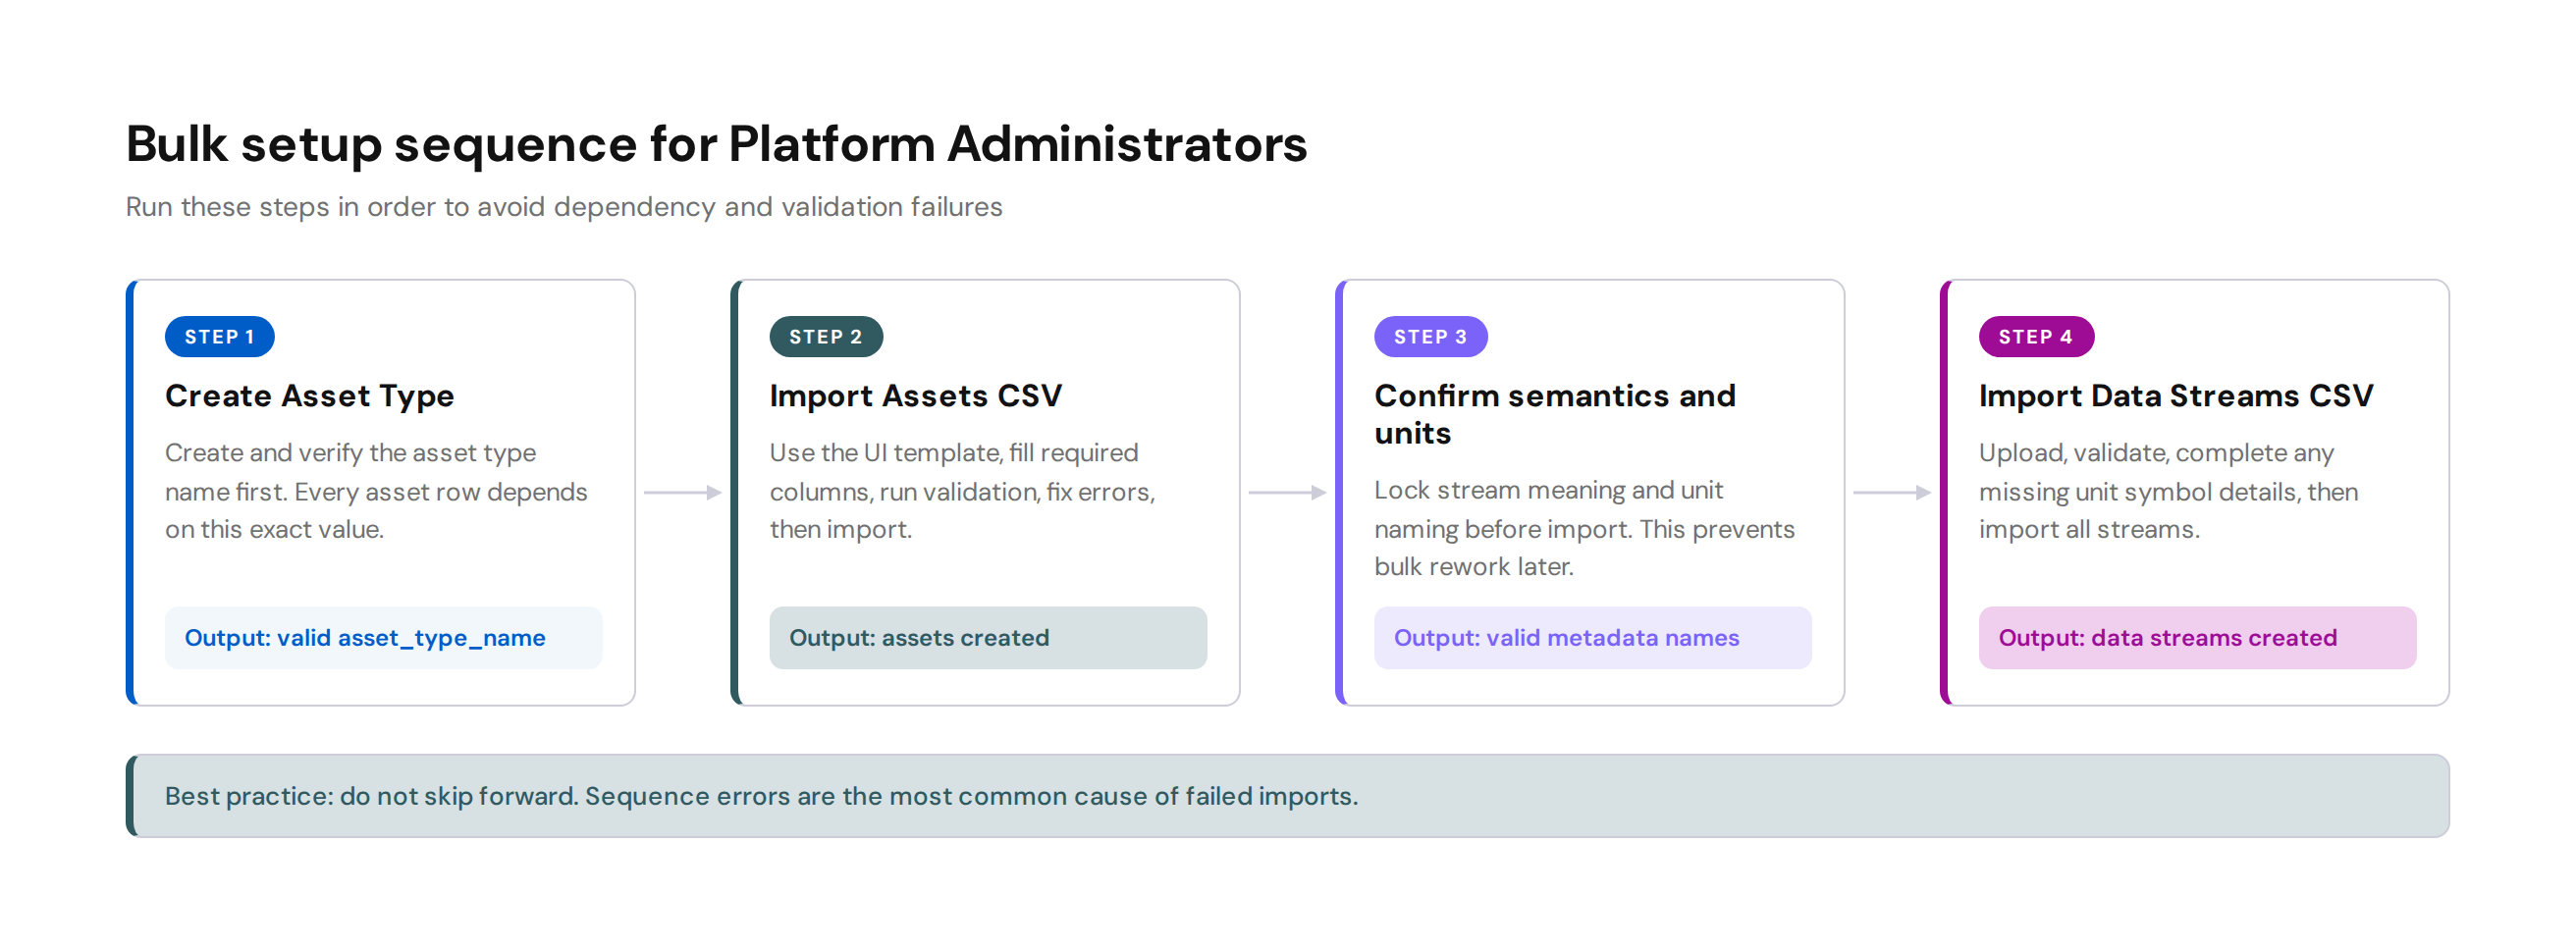
| Step | Output |
|---|---|
| 1. Create Asset Type | A valid asset_type_name for your asset CSV |
| 2. Bulk import Assets | Your assets are created and visible in Administration |
| 3. Confirm Semantics and Units | Your stream metadata names are valid before import |
| 4. Bulk import Data Streams | Your streams are created with correct type, semantic, and unit mapping |
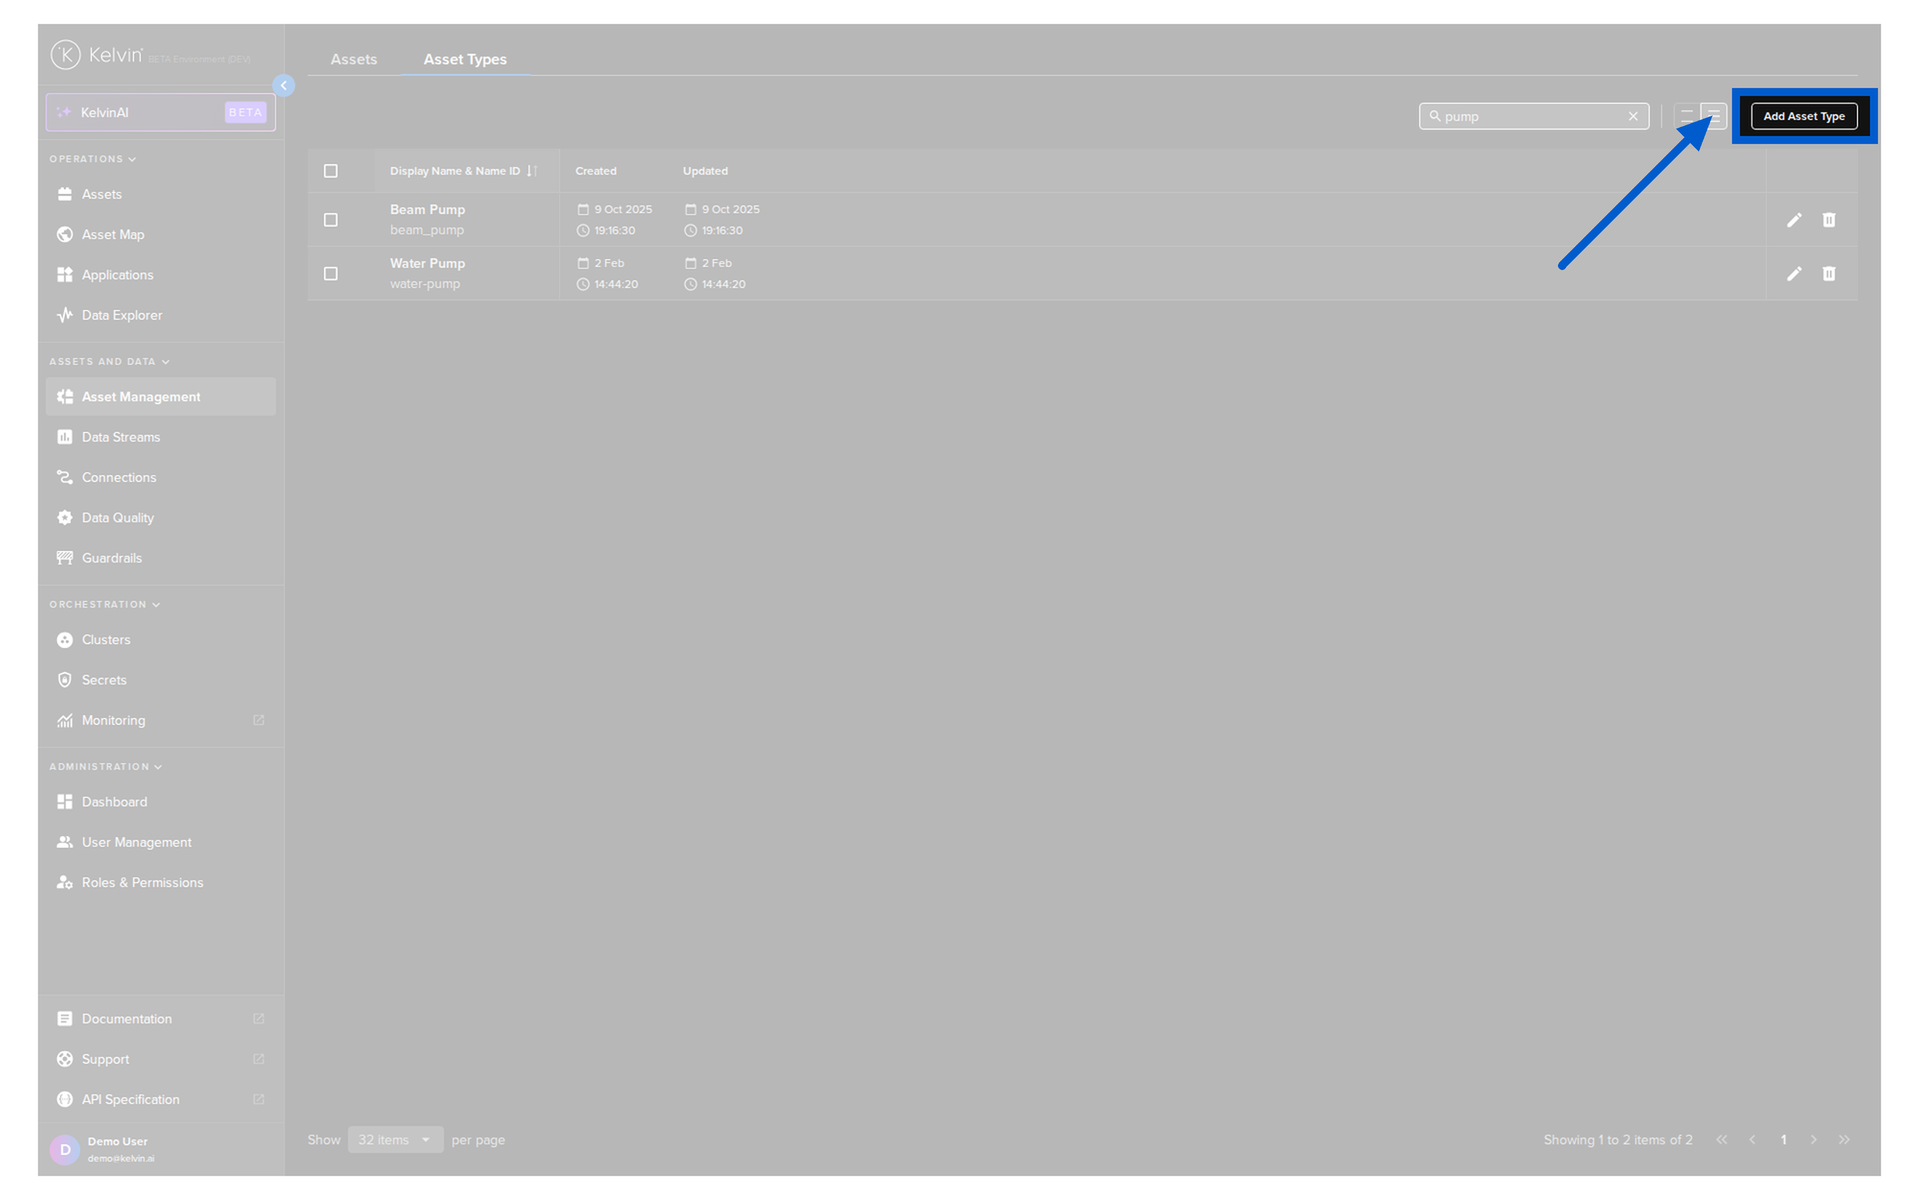
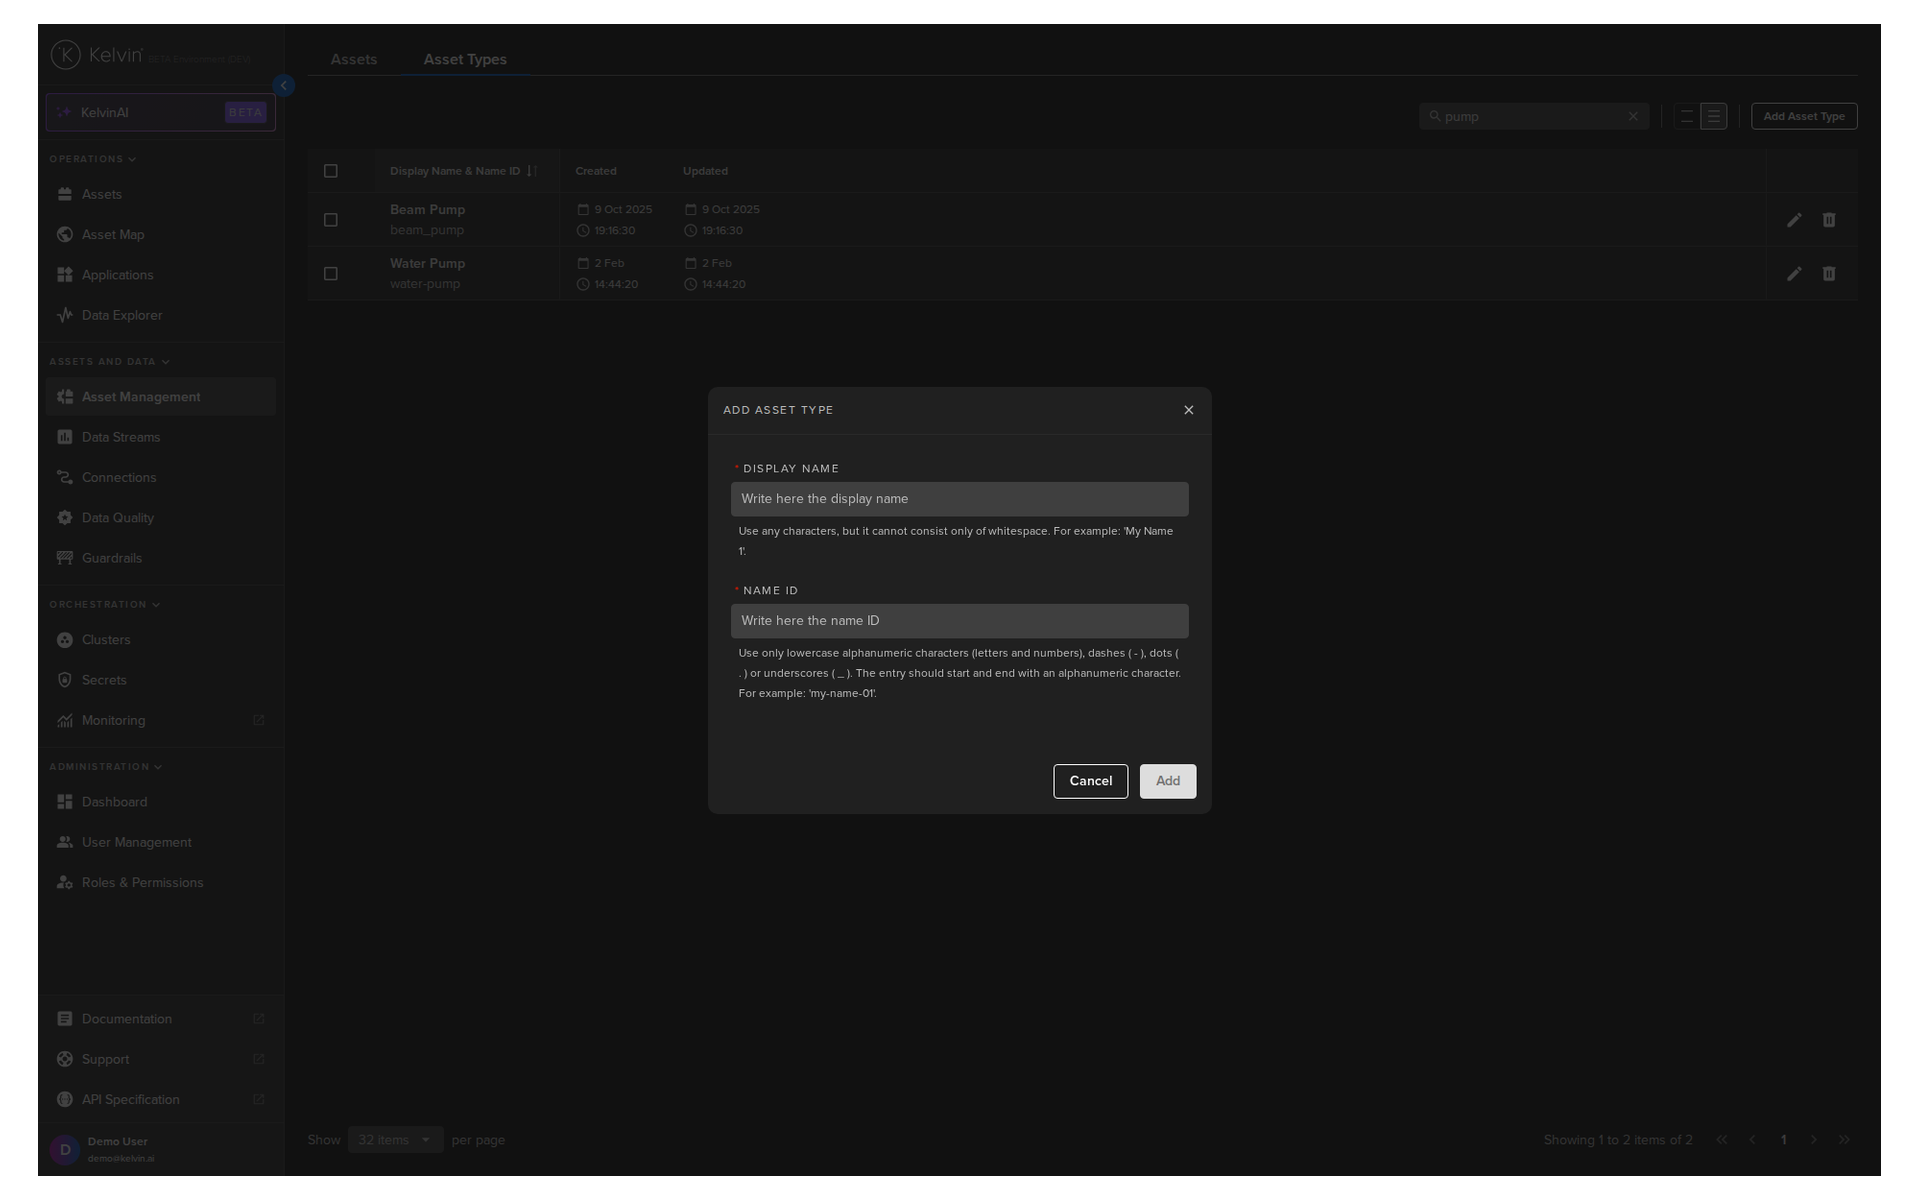
Step 1: Create the Asset Type first
Your asset import depends on Asset Type name matching exactly. If the type does not exist, import fails.
For this step, use Kelvin API Client (Python) as the primary path in this course.
Warning
Name ID format is strict. Use lowercase alphanumeric characters. You may use ., _, and - as separators, but never at the beginning or end.
Step 2: Prepare and import the Assets CSV
This is where most teams get blocked. Use the template and follow field rules exactly.
2.1 Start from the CSV template
Get the latest template from the Kelvin UI Import Assets flow. Do not build your own from memory.
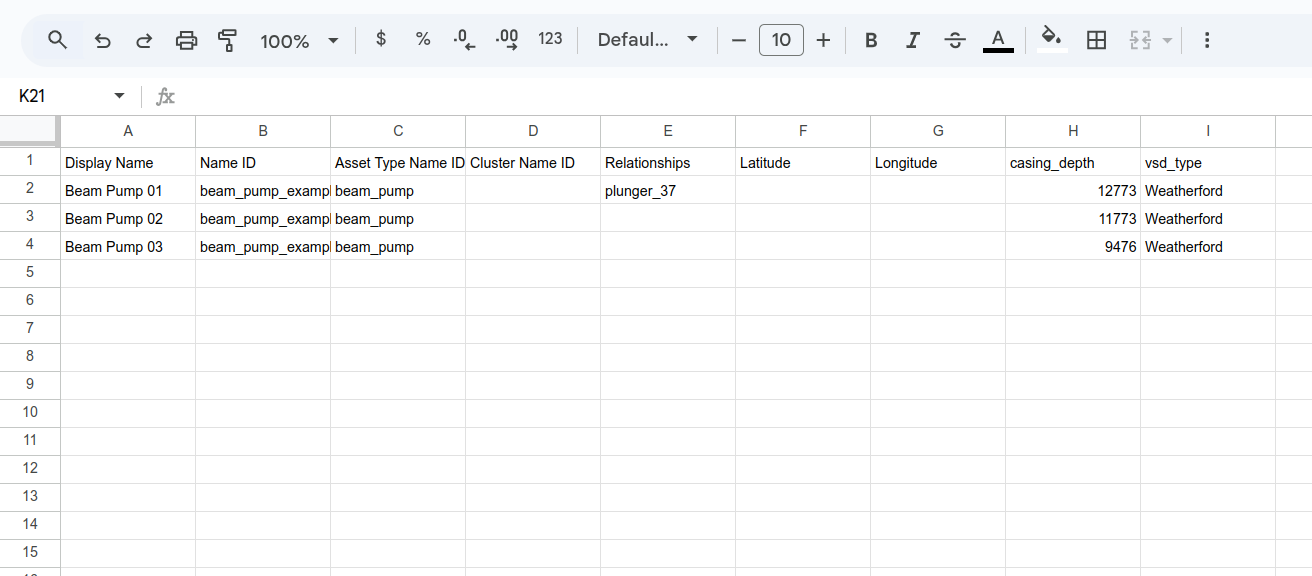
2.2 Fill the CSV with correct columns
| CSV Field | Required | What to put |
|---|---|---|
| Name (Name ID) | Yes | Unique machine name, lowercase format only |
| Title (Display Name) | Yes | Human-friendly name shown in Kelvin UI |
| Asset Type Name | Yes | Must match existing Asset Type name exactly |
| Properties columns | No | Optional metadata such as location, PLC type, manufacturer |
| Cluster Name ID | No | Reserved for internal Asset Maps usage |
| Relationships | No | Related asset Name IDs for Asset Maps |
| Latitude | No | GPS latitude for map placement |
| Longitude | No | GPS longitude for map placement |
Any extra columns after Asset Type Name are treated as asset properties in the import process.
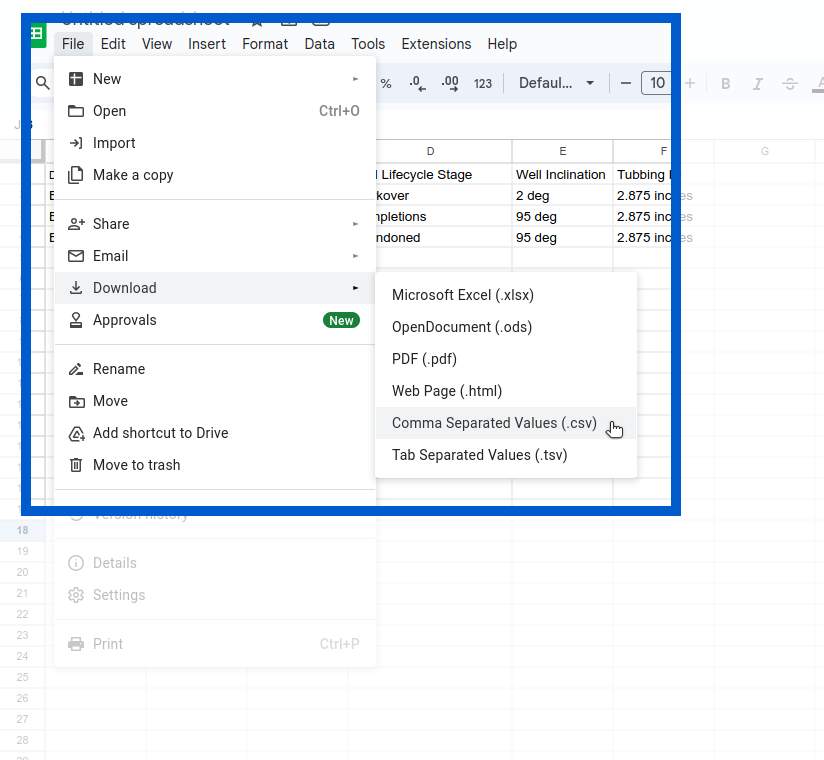
2.3 Save the file correctly
Save as .csv, comma-delimited, UTF-8.
2.4 Run the import in UI
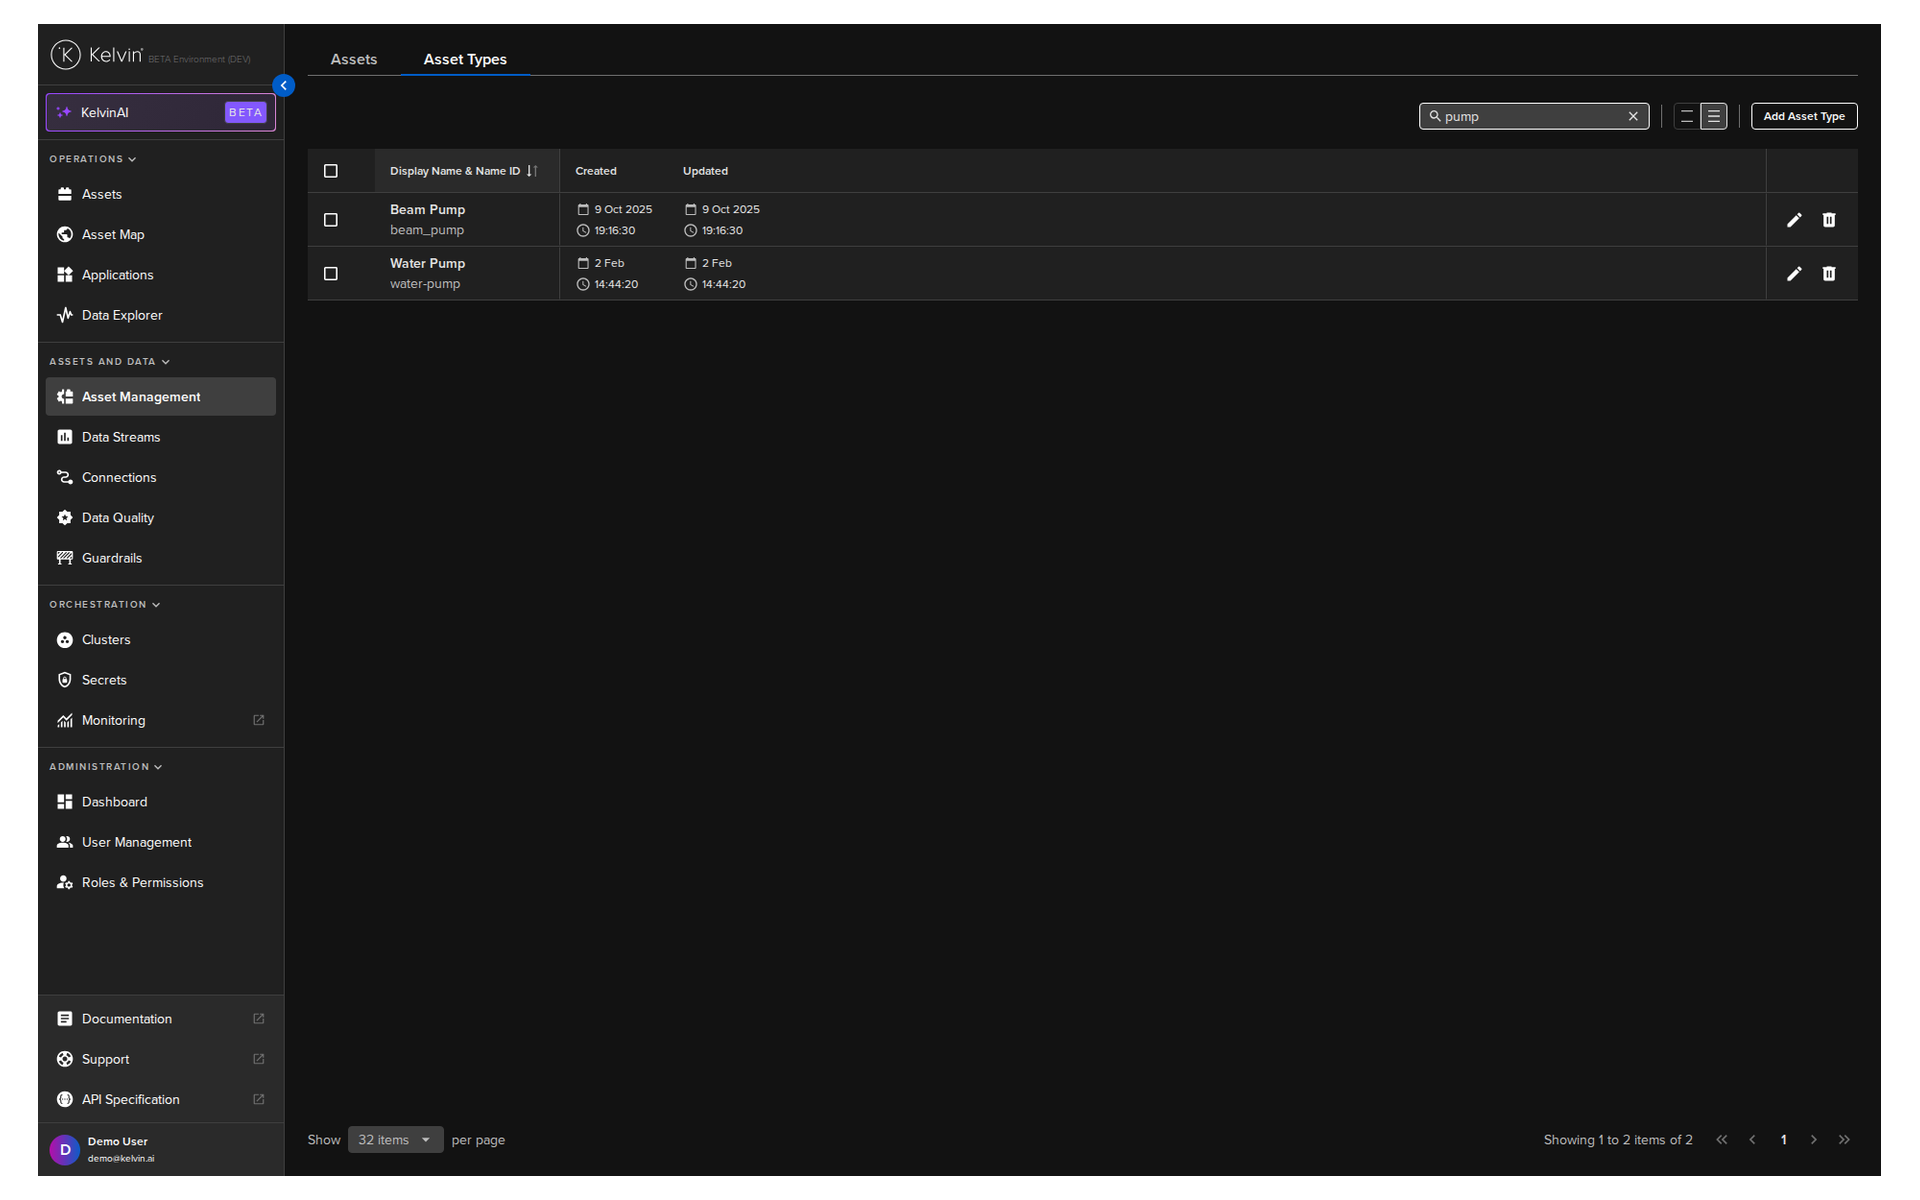
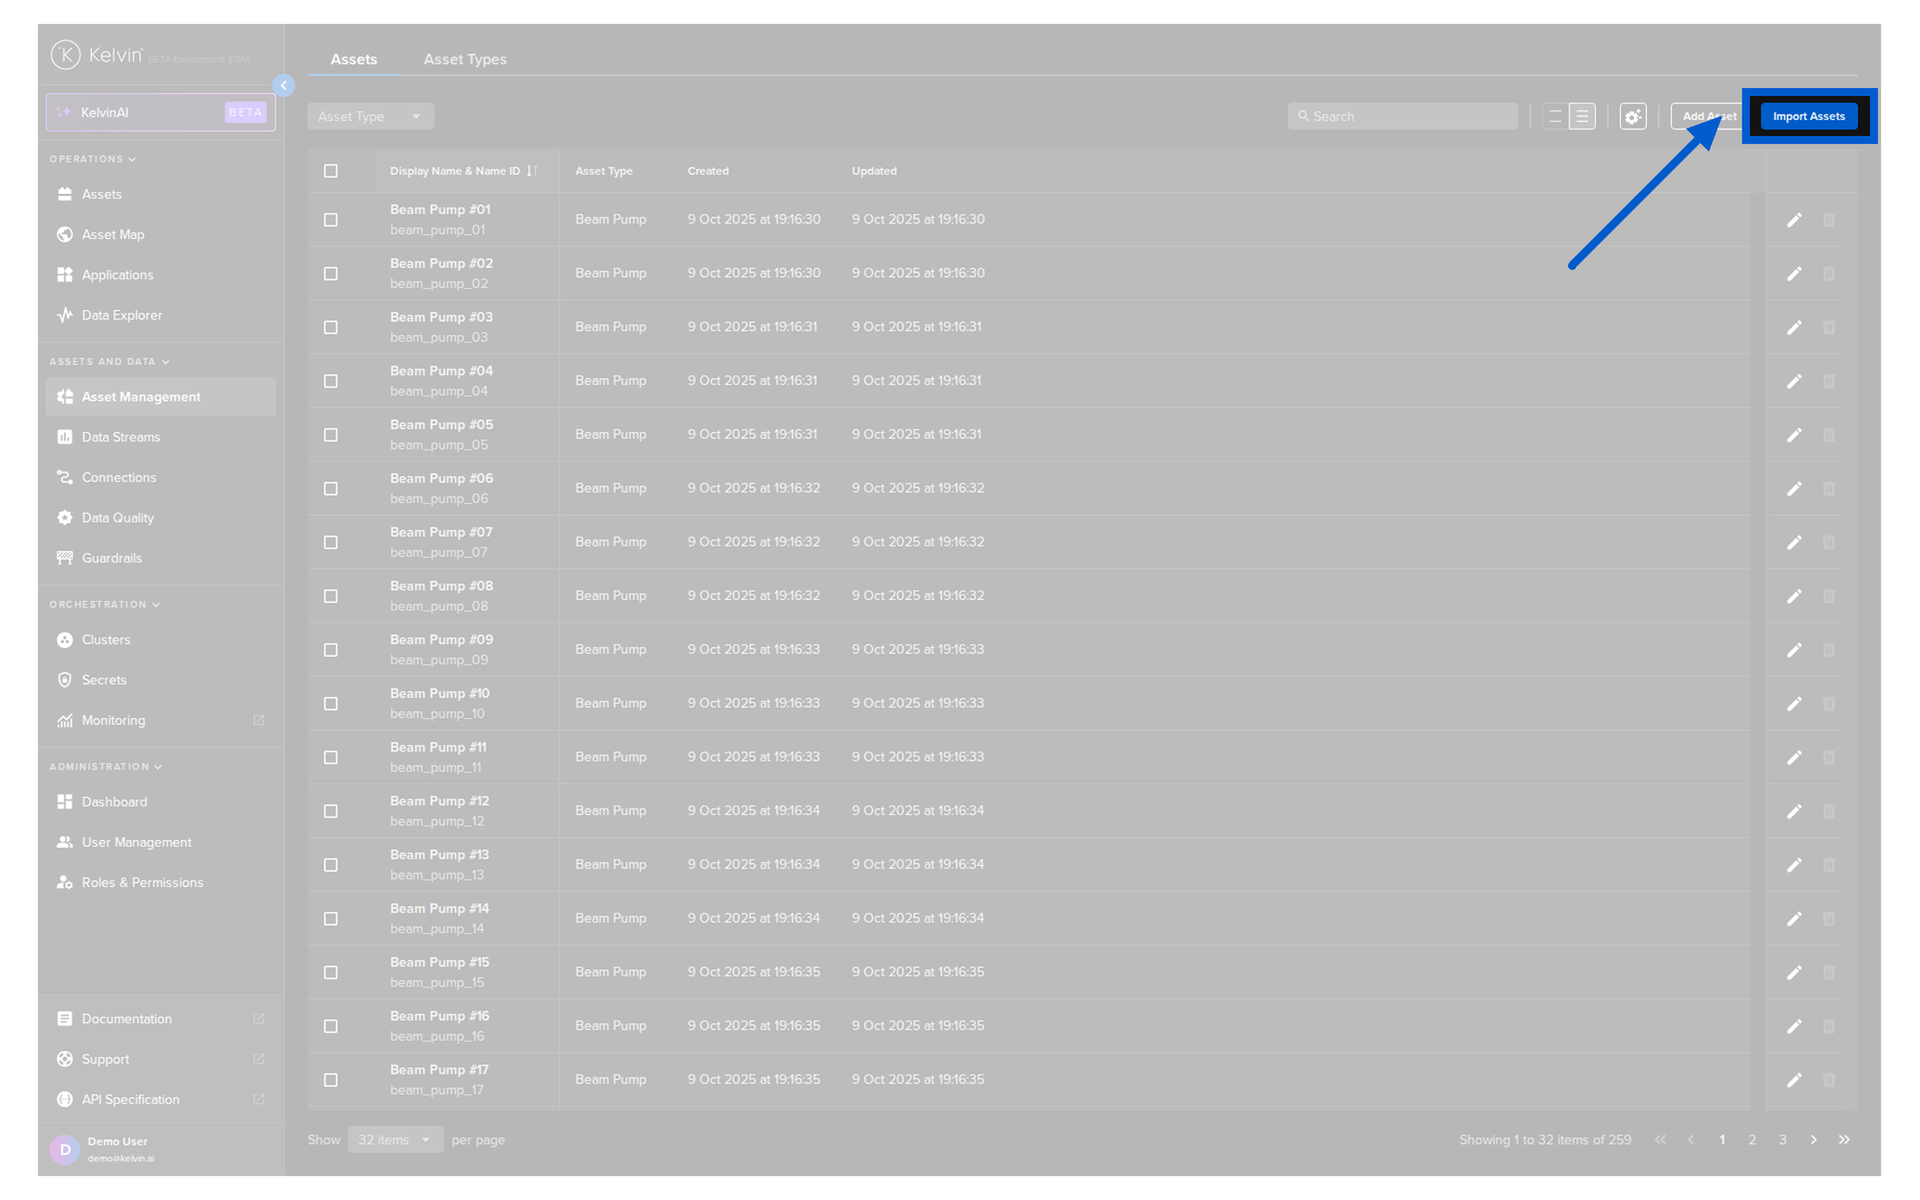
- Open Administration -> Assets.
- Click Import Assets.
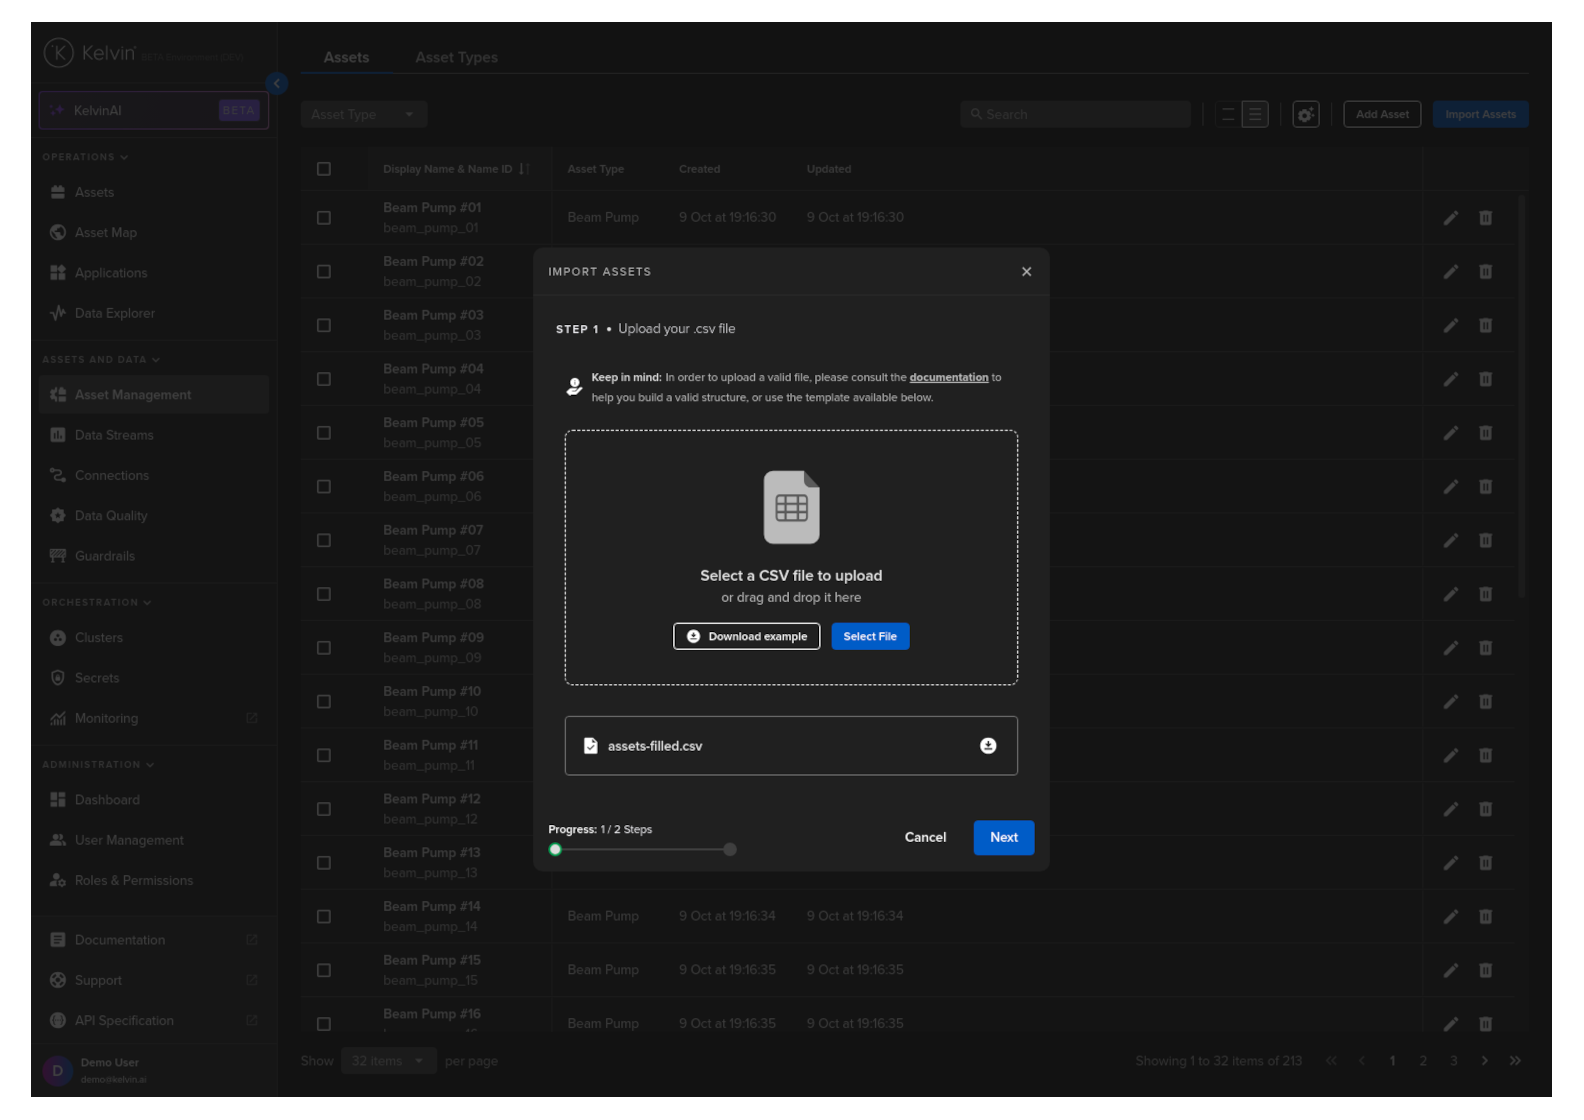
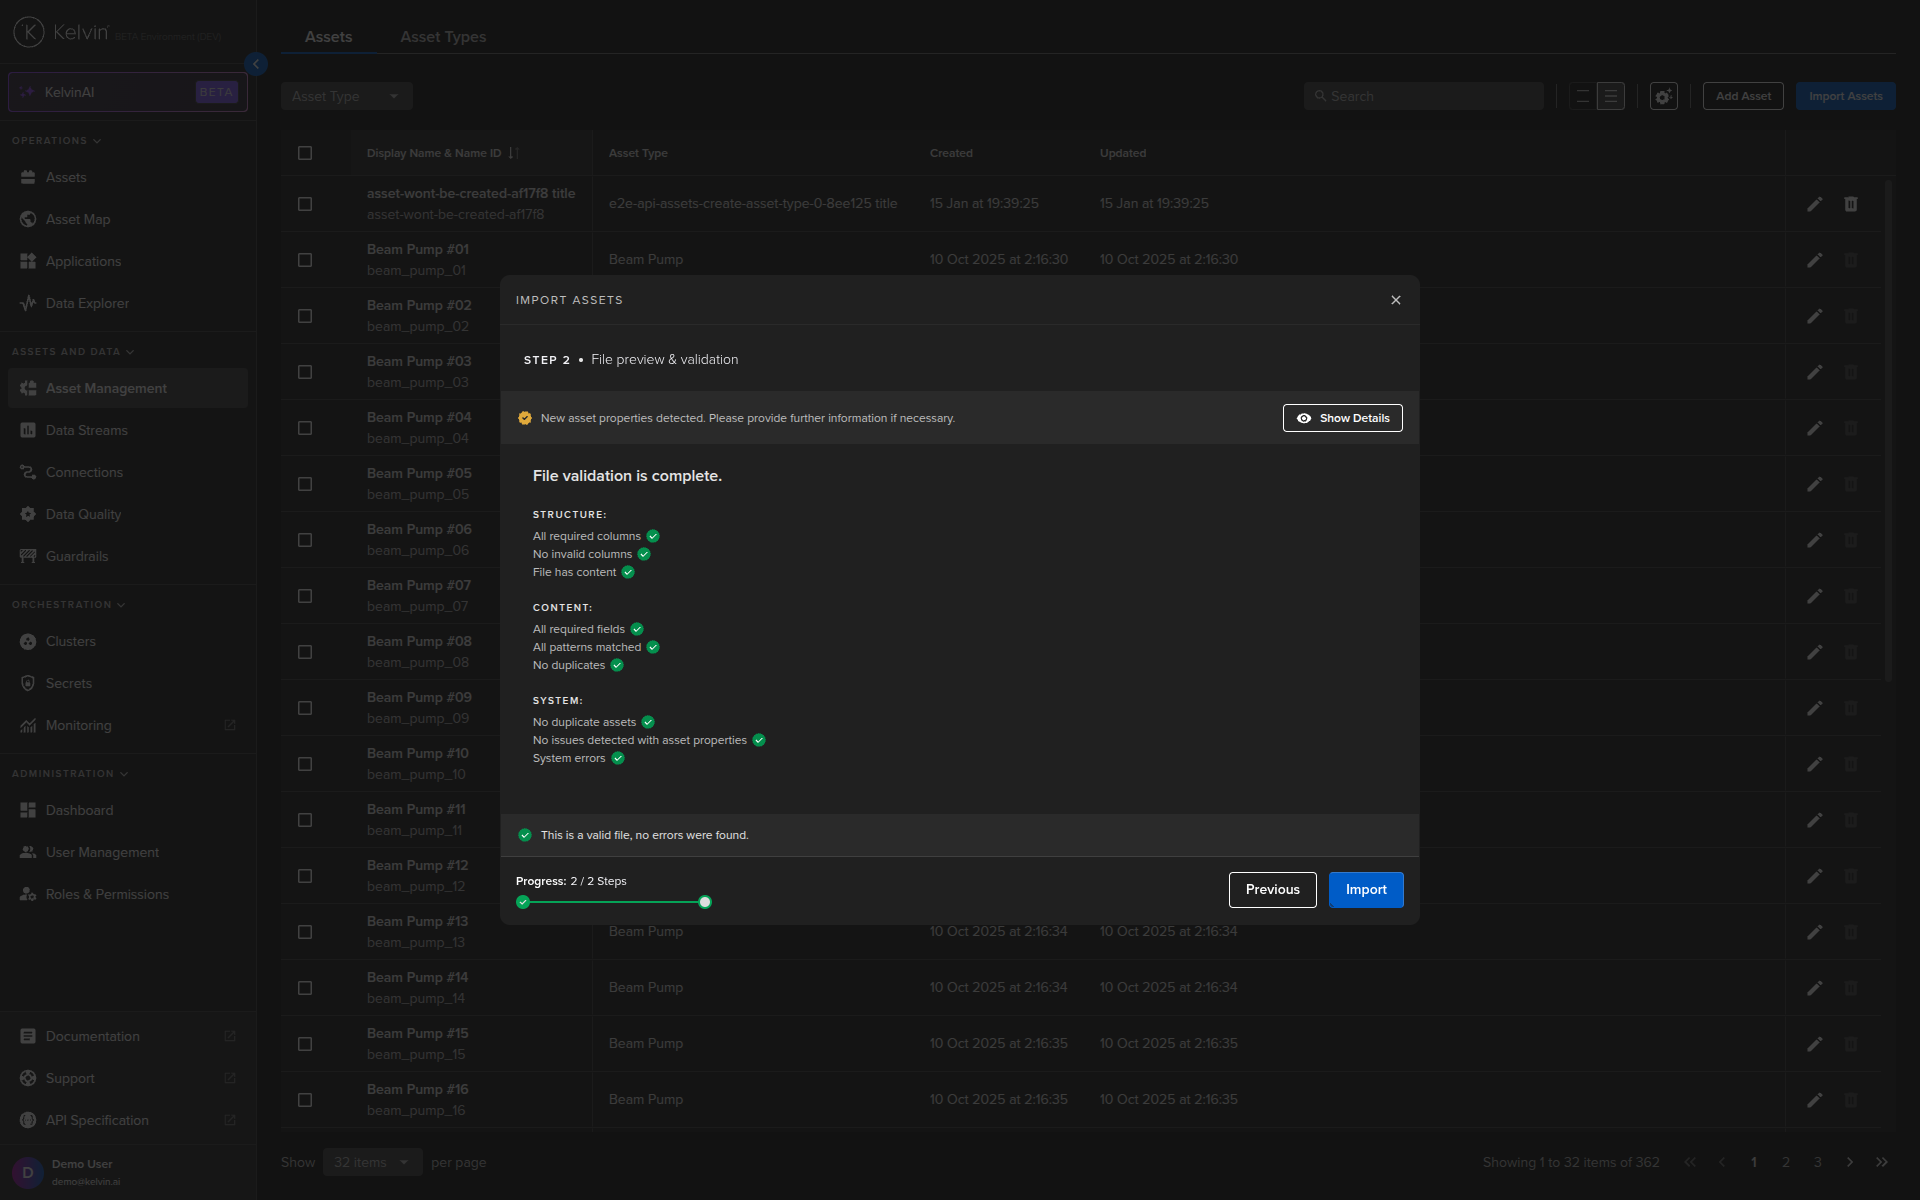
- Upload your CSV and click Next.
- Fix validation errors if shown.
- Re-upload and validate again.
- Click Import when checks pass.

Step 3: Set semantics and units before stream import
Before importing data streams, finalize your semantic and unit names. Do this first so you do not correct hundreds of rows later.

| Data Stream metadata | Why it matters |
|---|---|
type |
Defines stream role such as measurement or set_point |
data_type_name |
Defines value shape such as number, boolean, string, object |
semantic_type_name |
Defines meaning, for example pressure or temperature |
unit_name |
Defines engineering unit, for example pound_per_square_inch |
Note
For SDK/API workflows, use semantic and unit names exactly as defined in the platform references.
Step 4: Prepare and import the Data Streams CSV
After your semantics and units are confirmed, import data streams in bulk.
4.1 Build the data stream file from template format
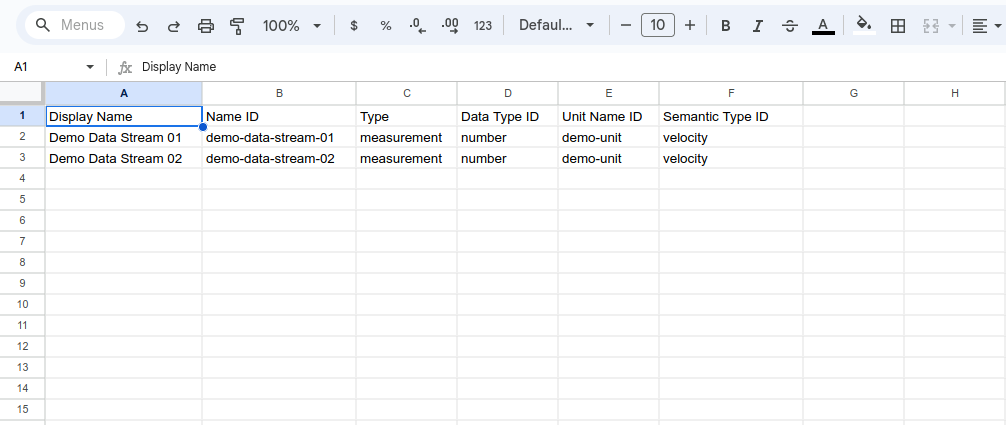
Use these fields:
| CSV Field | Required | Rules |
|---|---|---|
| Name | Yes | Lowercase Name ID format |
| Title | Yes | Display name in UI |
| Description | No | Up to 200 characters |
| Type | Yes | measurement, computed, data_quality, or set_point |
| Data Type | Yes | boolean, number, object, or string |
| Semantic Type | No | Use valid semantic type name |
| Unit | No | Use valid unit name |
4.2 Run the data stream import
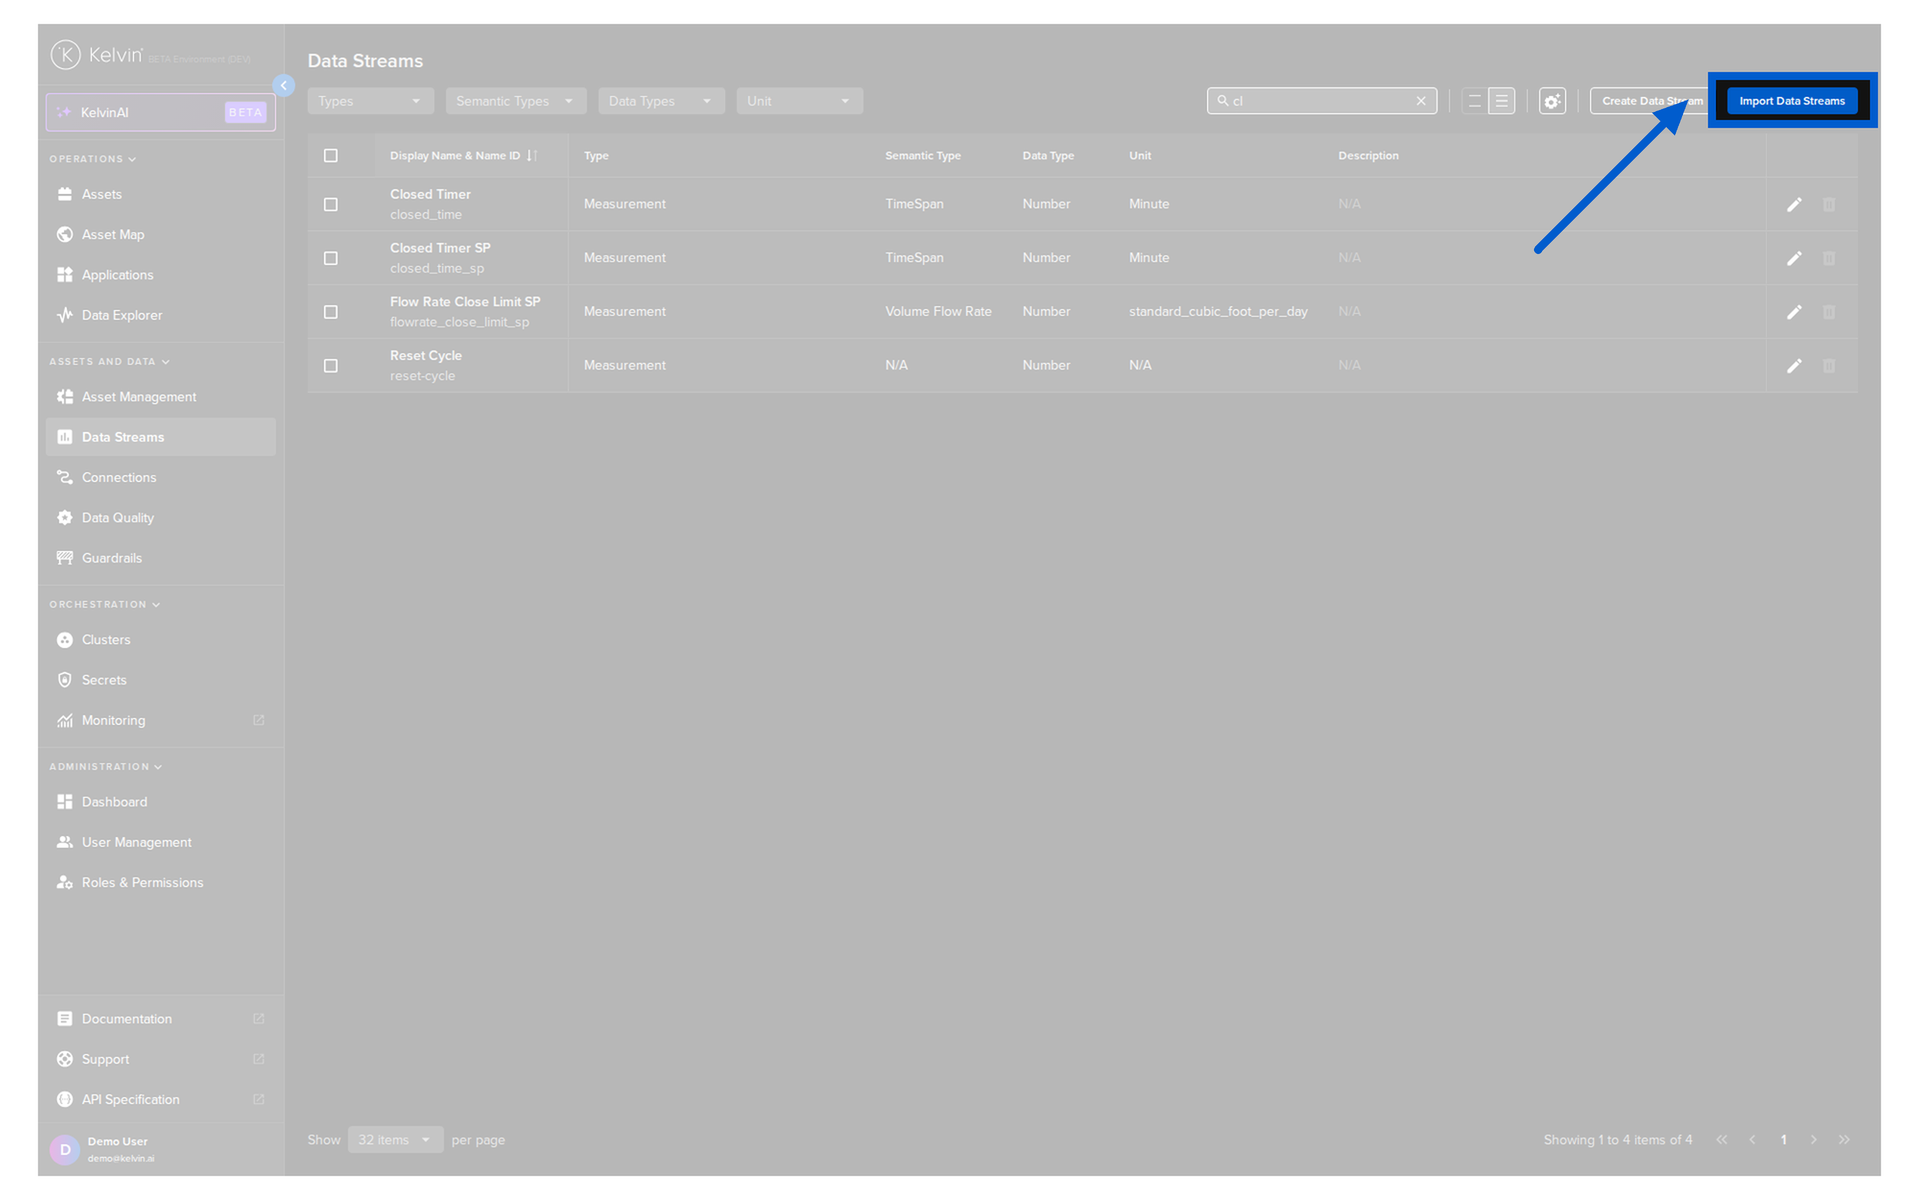
- Open Administration -> Data Streams.
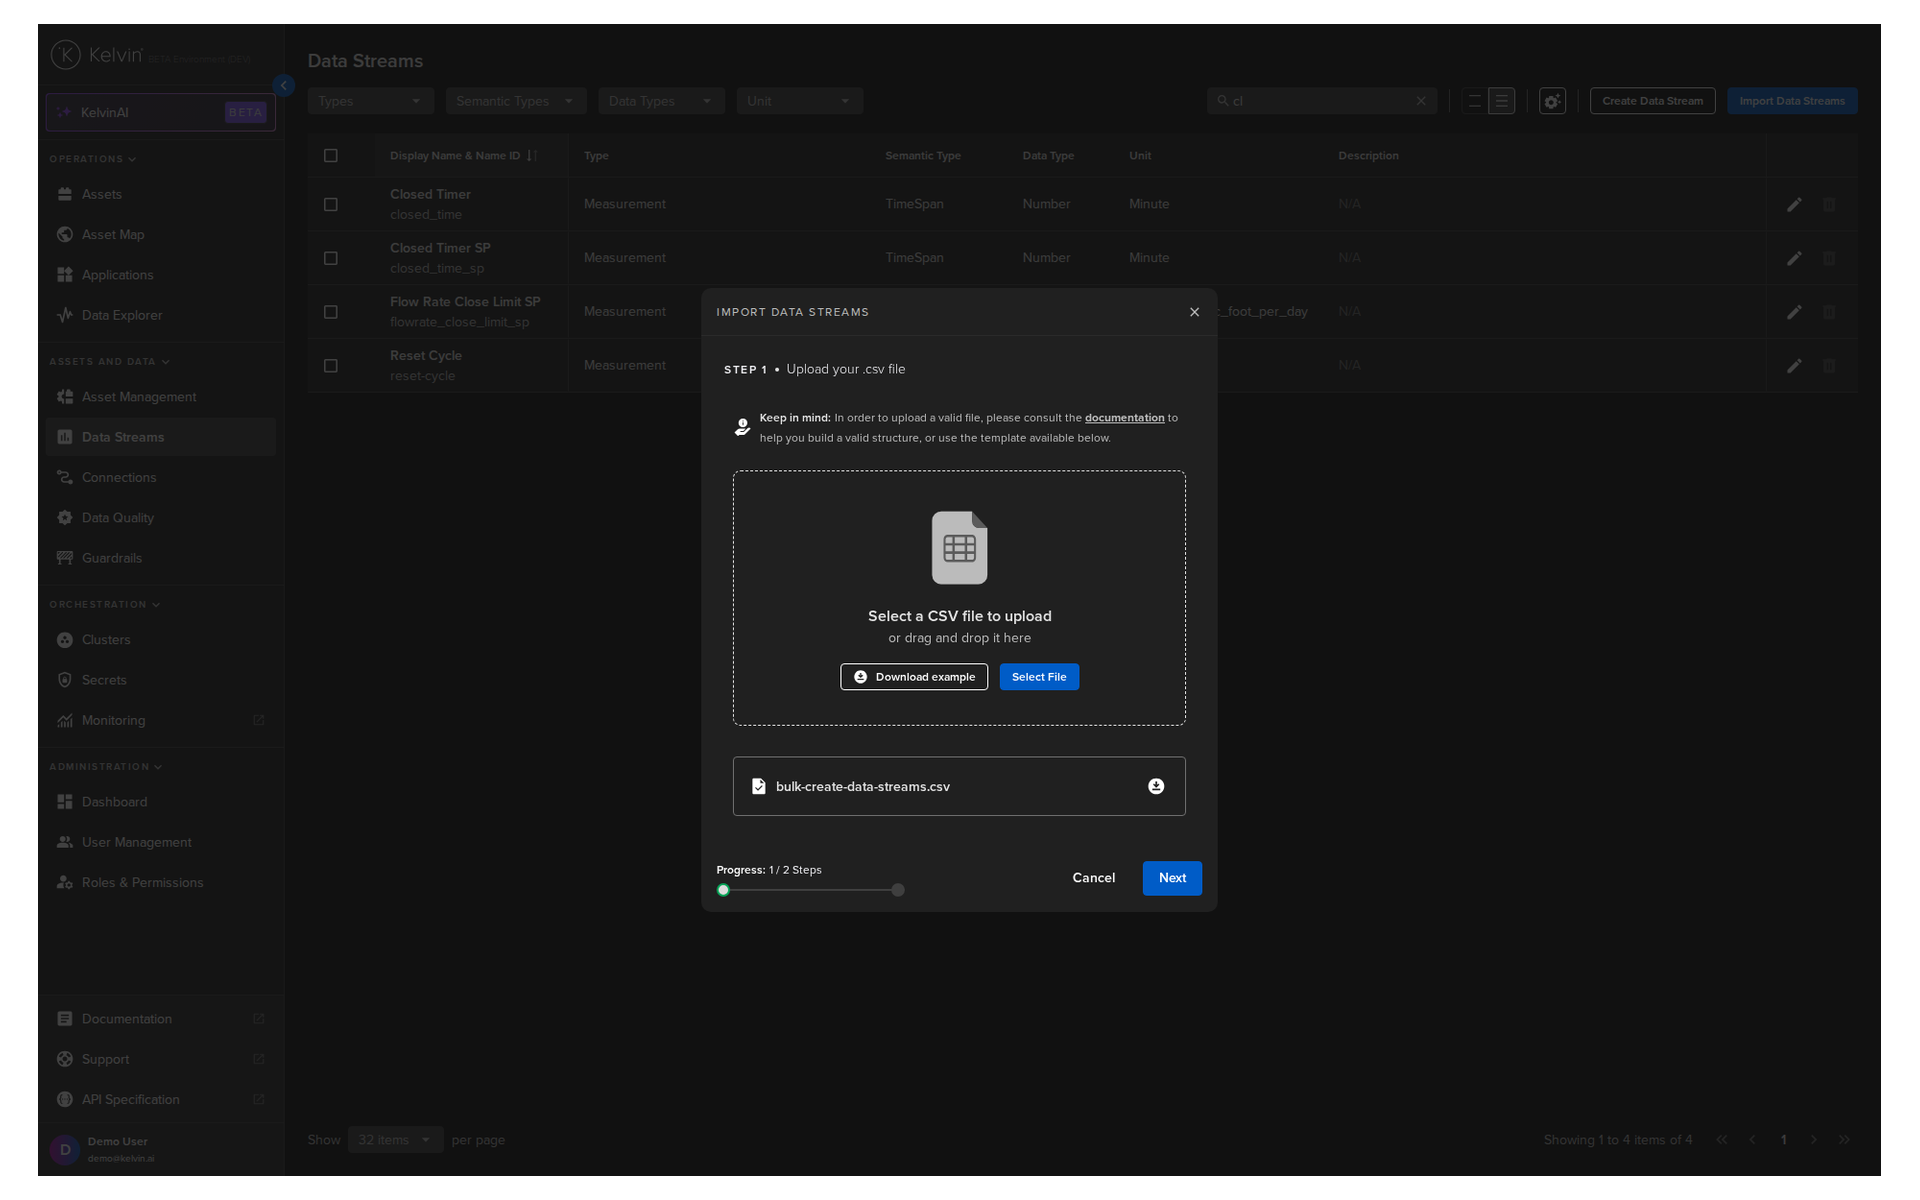
- Click Import Data Streams.
- Upload CSV in Step 1.
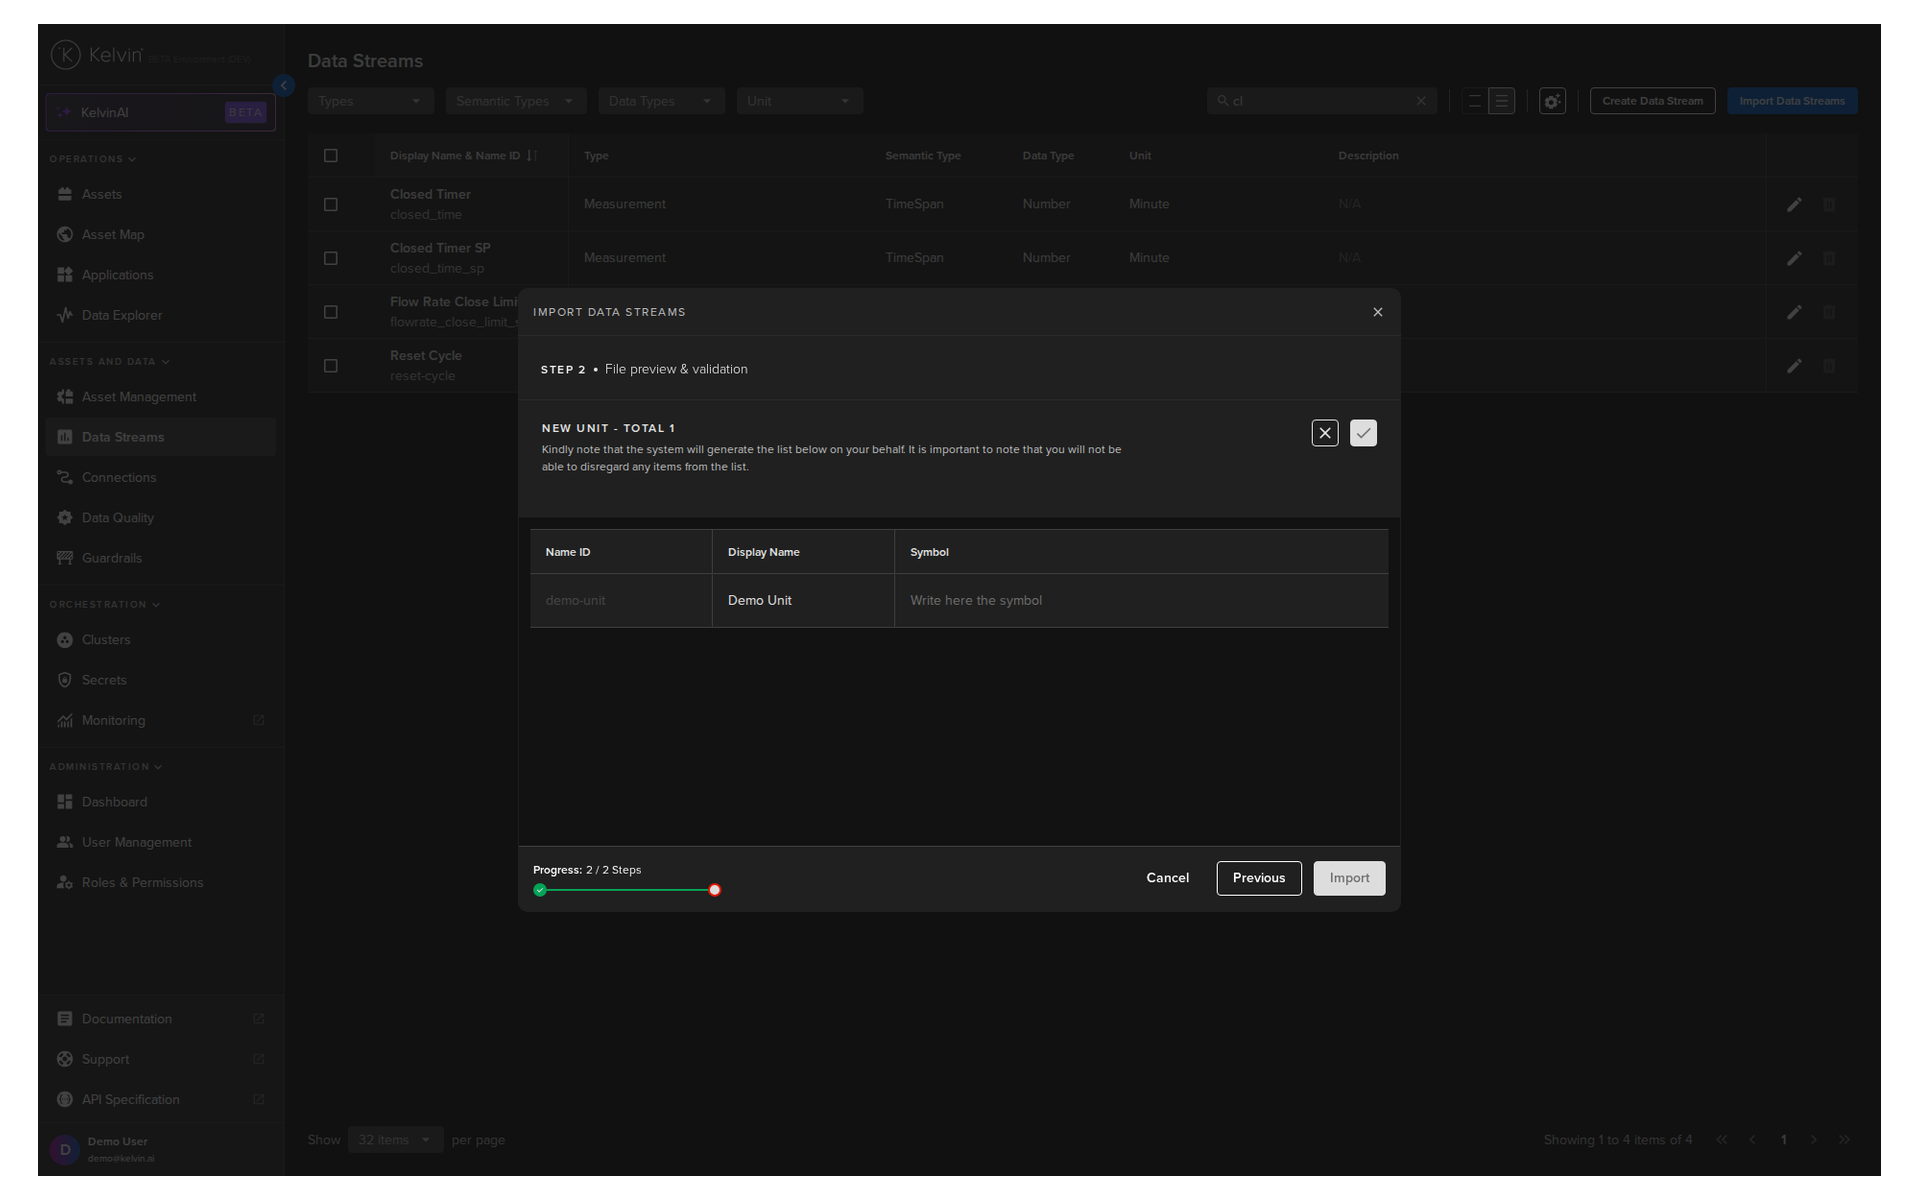
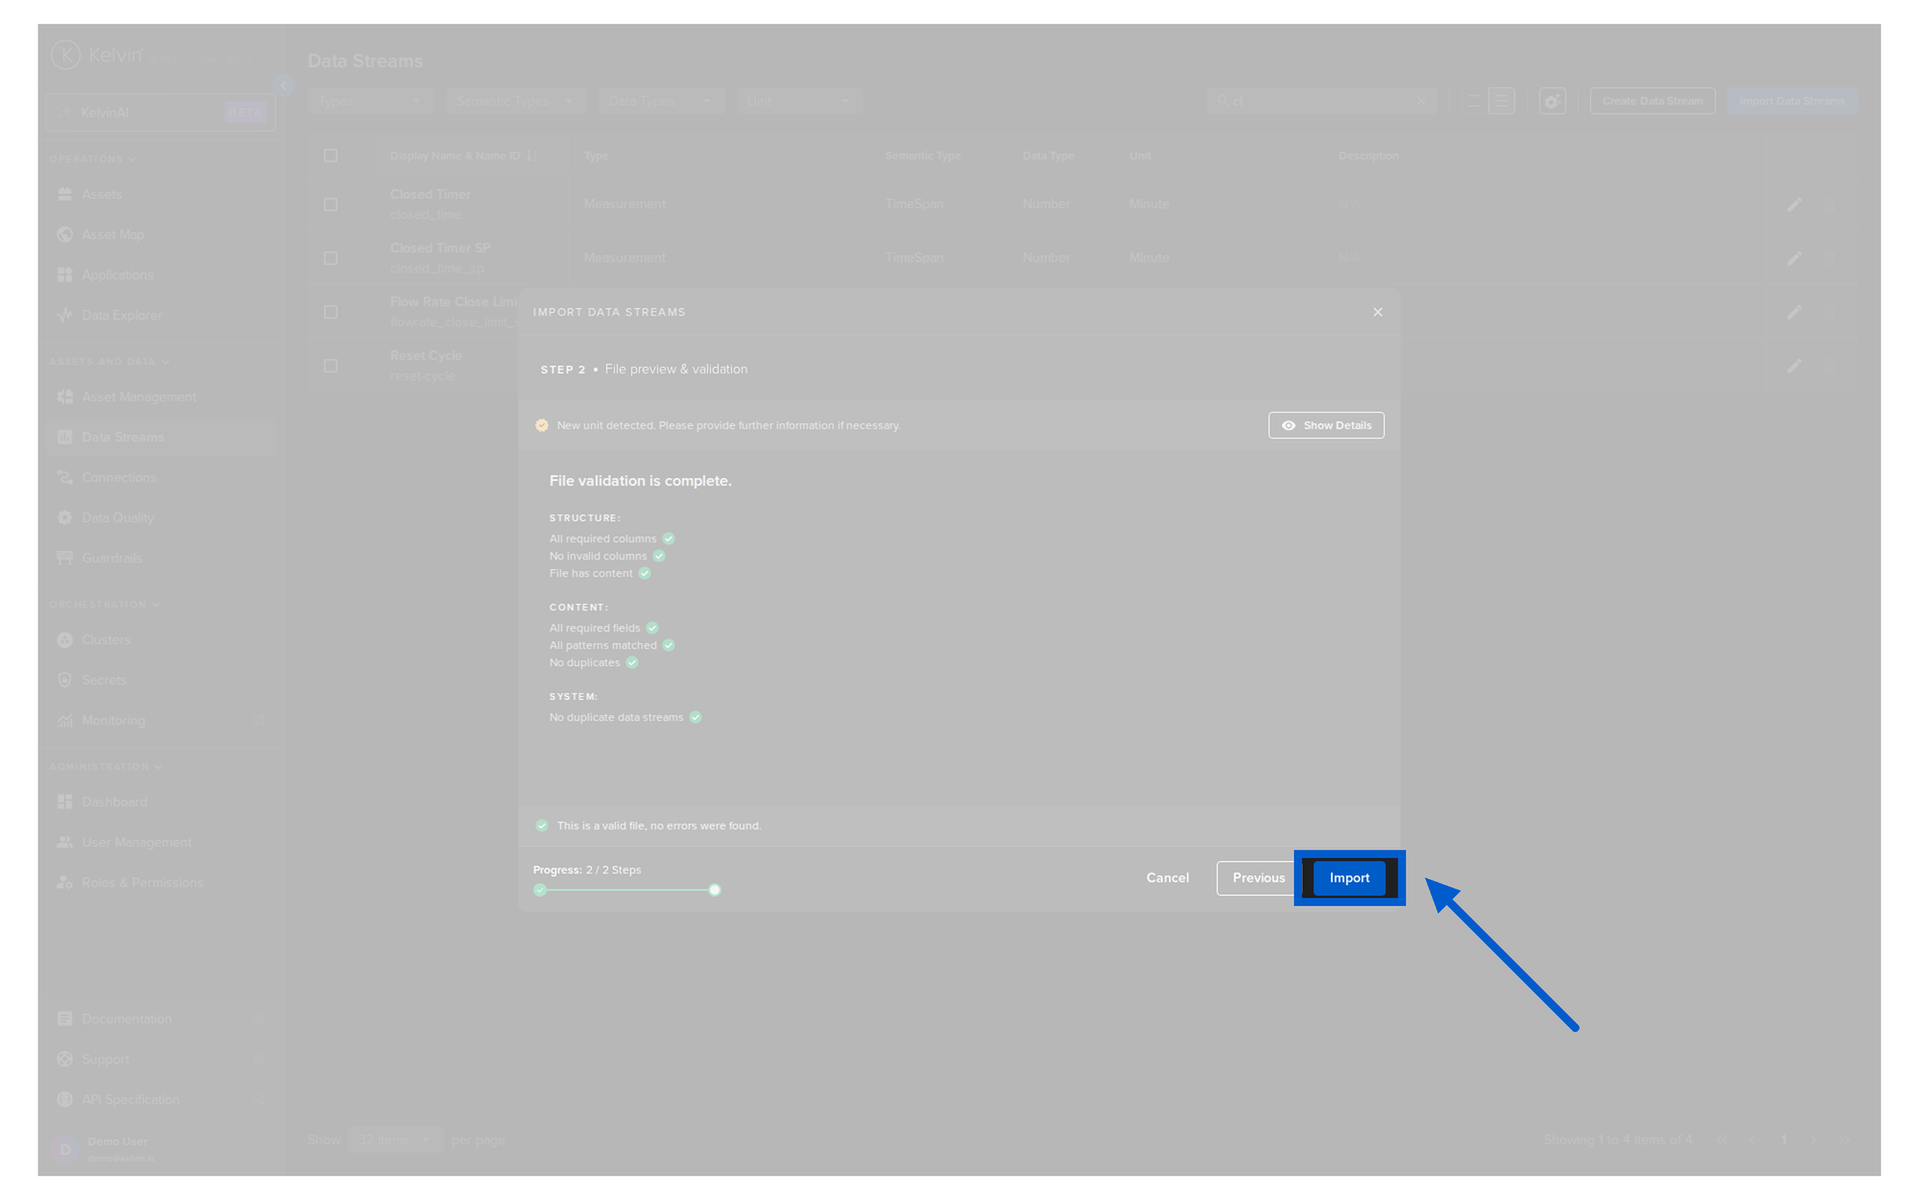
- Review validation checklist in Step 2.
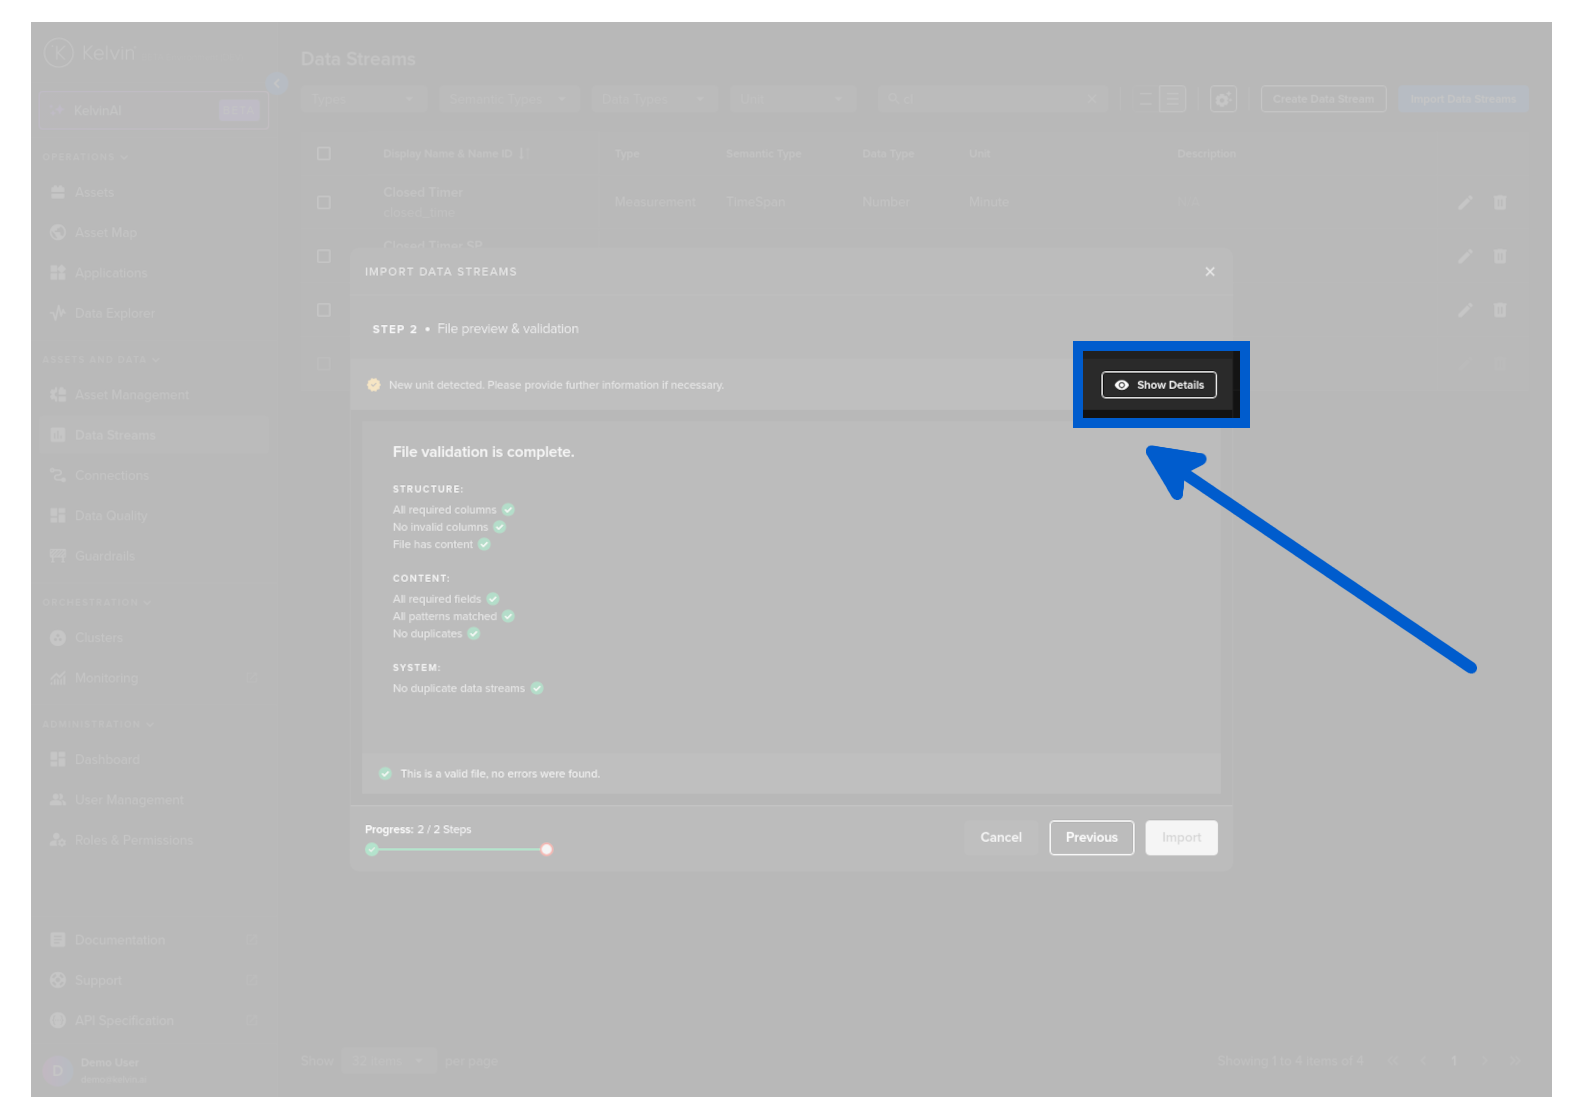
- If new units are detected in UI import, open details and fill required unit symbols.
- Click Import when checks pass.
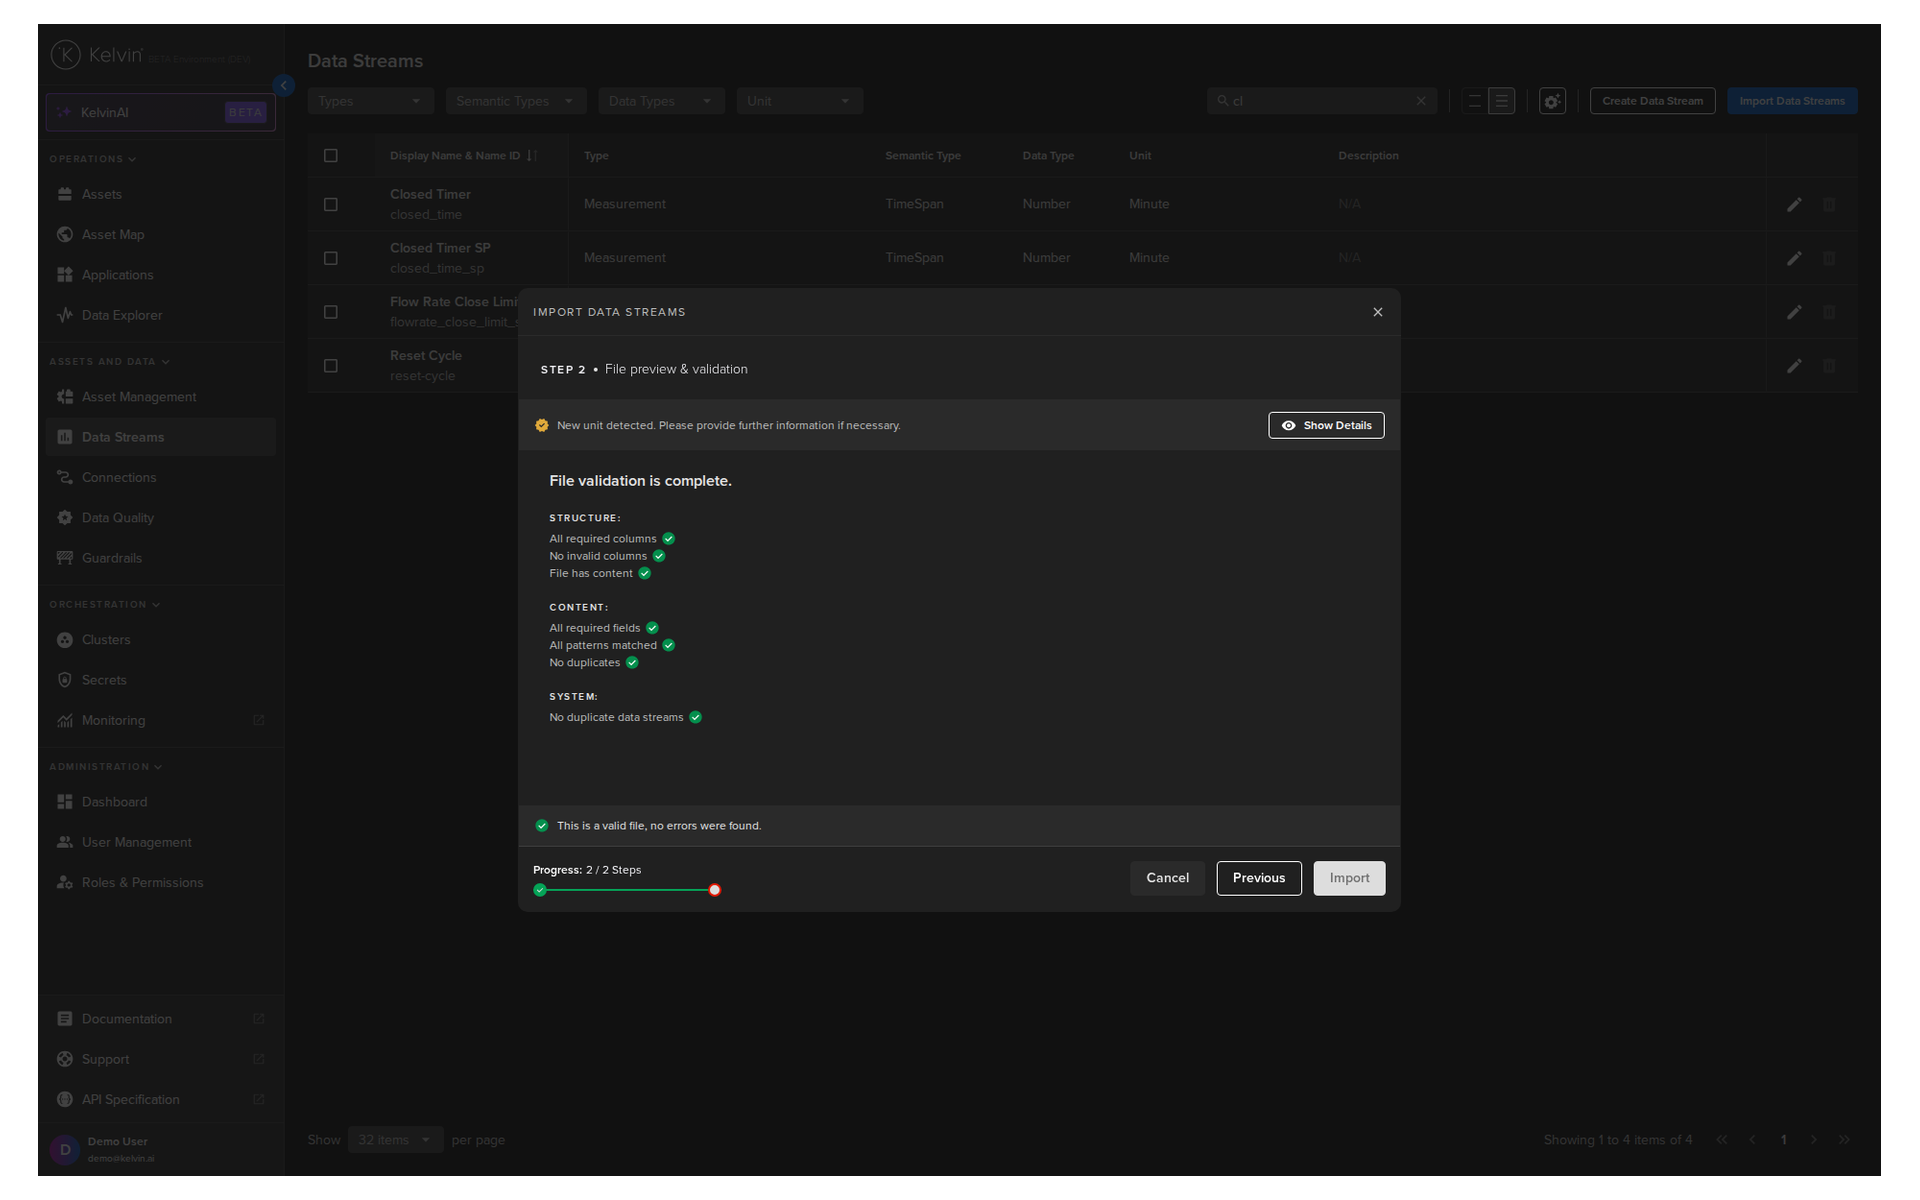
Warning
UI bulk import can create missing units during validation flow. API/SDK bulk endpoints do not auto-create units, so pre-create units when using automation.
Troubleshooting guide
| Problem | Typical cause | Fix |
|---|---|---|
| Asset import rejects rows | Asset Type name mismatch | Create/fix Asset Type and re-upload CSV |
| Name format errors | Uppercase, spaces, or invalid separators | Convert to lowercase Name ID format |
| Data stream validation fails | Invalid type or data_type_name values |
Use allowed values exactly |
| Unit-related import block | Unit missing or symbol missing in UI validation | Add unit details in validation flow or pre-create units |
| Partial rollout confusion | Imported one file but not the dependent model | Re-run in order: type -> assets -> semantics/units -> streams |
Quick Quiz
Quiz 1: Why must Asset Types be created before importing assets?
Answer: Each asset row references an Asset Type by name. If it does not exist first, validation fails.
Quiz 2: What are the three minimum columns needed for the Assets CSV?
Answer: Name (Name ID), Title (Display Name), and Asset Type Name.
Quiz 3: If import validation fails, what is the correct action?
Answer: Correct the CSV, re-upload the file, and run validation again before importing.
Quiz 4: Which fields are mandatory for a Data Stream row?
Answer: Name, Title, Type, and Data Type.
Quiz 5: In UI bulk data stream import, what extra step may be required when new units are detected?
Answer: Open details, fill required unit symbols for new units, confirm them, then proceed with import.
Summary
You now have a complete, practical sequence for bulk onboarding: create Asset Types, import Assets with a valid template, confirm semantics and units, and import Data Streams with validation.
The key things to remember:
- Use the UI templates and do not guess the CSV structure
- Follow strict Name ID rules for assets and data streams
- Validate and re-upload until checks pass before pressing Import
- Keep setup order strict to avoid dependency errors
For full documentation, visit:
Good luck and Happy Learning !