Cluster Management - How To
Installation
You can use you own kubernetes cluster or let Kelvin install a k3s cluster onto a bare metal VM or physical machine.
If you let kelvin do the k3s installation, then you will also have the kelvin-provision tools on the VM/machine to perform many operations locally from the command line.
You can install Kelvin on many different flavors of kubernetes. Here we walk you through k3s and three others.
- Let Kelvin install k3s on a bare metal VM/machine
- Install Kelvin on a standard kuberenetes cluster
- Install Kelvin on a AWS EKS cluster
- Install Kelvin on a Azure AKS cluster
Set the Default Cluster
For each Instance you can set one default cluster. The default cluster will be used for any Kelvin SmartApps™ deployments.
| Field | Description |
|---|---|
| cluster | The name of the default Cluster for Kelvin SmartApps™ deployment. The ., _ and - characters are also allowed to separate words instead of a space but not at the beginning or end). |
| max_resources | The maximum number of Assets that can be assigned to each Workload. When the max number is reached, a new workload will be automatically deployed for Kelvin SmartApps™ and the new Assets. |
This can not be set in the Kelvin UI.
curl -X "POST" \
"https://<url.kelvin.ai>/api/v4/instance/settings/app-manager-planner-rules/update" \
-H "Authorization: Bearer <Your Current Token>" \
-H "Accept: application/json" \
-H "Content-Type: application/json" \
-d '{
"payload": {
  "cluster": "aws-cluster",
  "max_resources": 1
  }
}'
from kelvin.api.client import Client

# Login
client = Client(config={"url": "https://<url.kelvin.ai>", "username": "<your_username>"})
client.login(password="<your_password>")

# Set or Update the Default Cluster in an Instance
response = client.instance.update_instance_settings_app_manager_planner_rules(data={
  "payload": {
    "cluster": "aws-cluster",
    "max_resources": 16
  }
})

print(f'Updated planner rules with default cluster {response.payload.cluster} with a maximum resource limit of {response.payload.max_resources}')
You will receive an output like this;
Updated planner rules with default cluster aws-cluster with a maximum resource limit of 16
Workloads Overview
When you first look at a Cluster in Kelvin UI you will see the workloads running on any Worker Node in the Cluster.
Workloads are Kelvin SmartApps™, Docker Apps and Connectors that you have deployed to the Cluster.
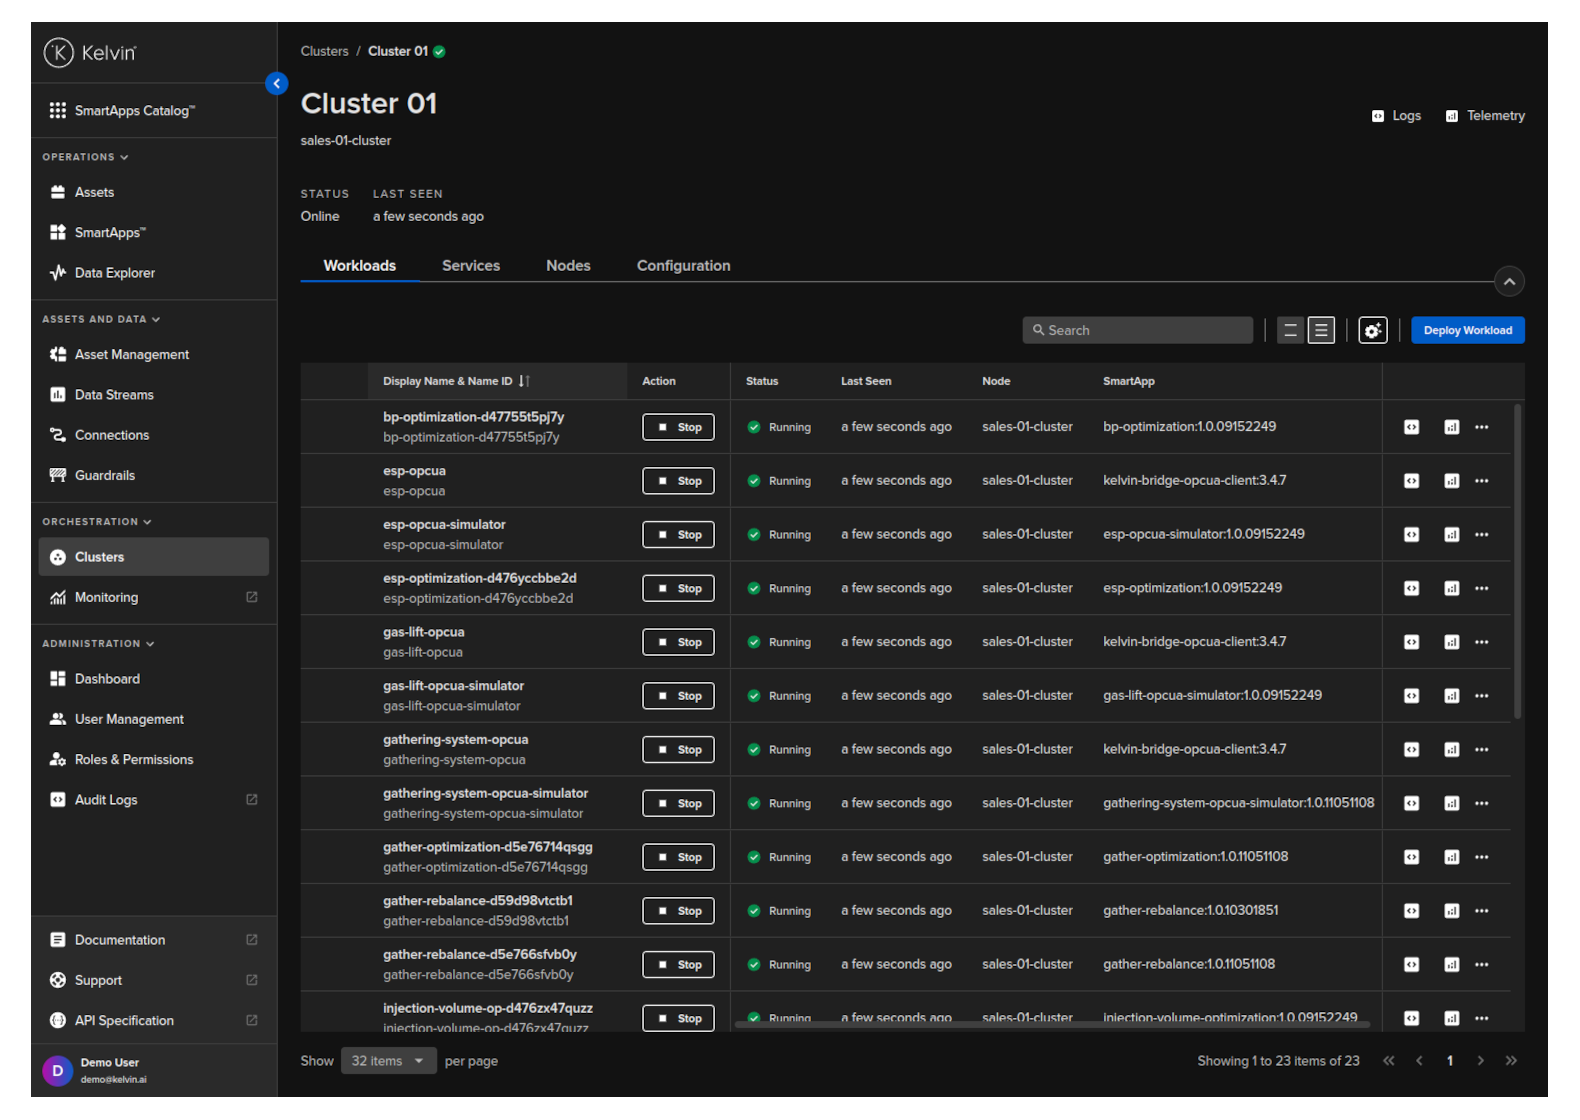
From this screen you can do the following actions;
- Start / Stop a workload
- Deploy a new workload
- Download an image for offline deployment
- Edit a workload's configuration file
- Delete a workload
Full details on deploying and managing Workloads can be found in Developer Tools section under How To → Deploy.
Nodes (Horizontal Scale Cluster)
At any time you can horizontally scale your Cluster by adding or deleting Nodes.
This can be done at any time while in the Cluster is running and will not affect any Workloads currently running on the Cluster.
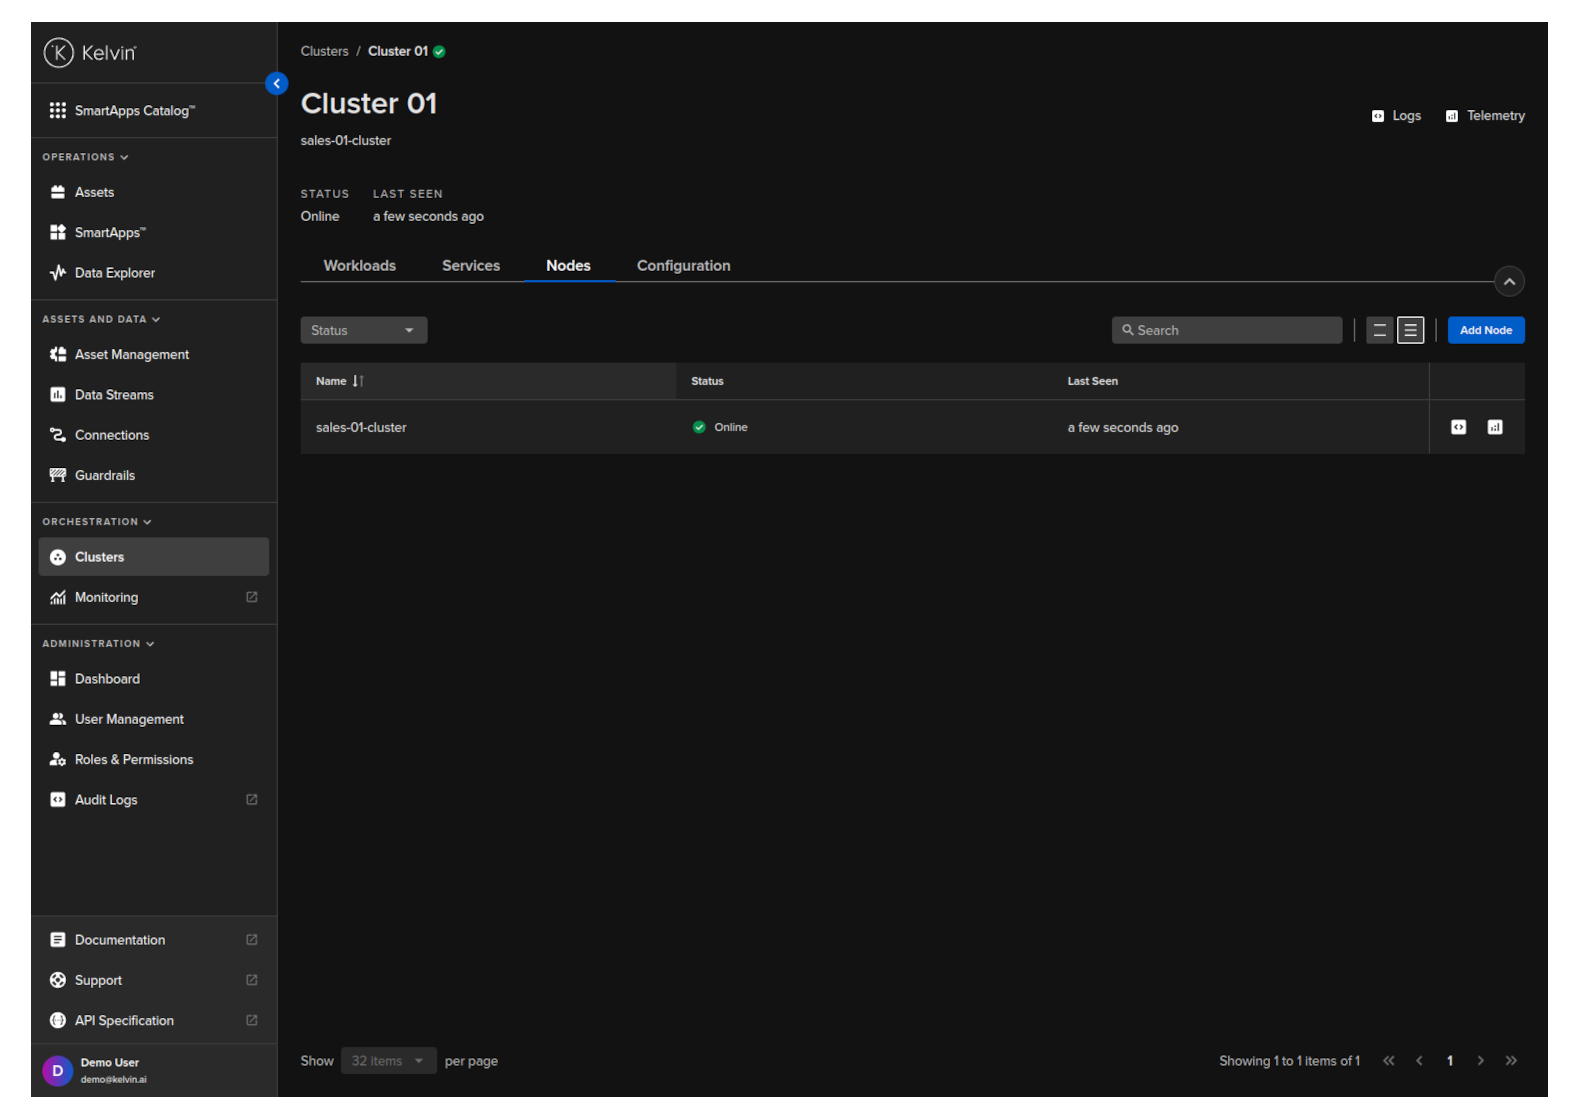
Nodes Status
In a Cluster you can have many Nodes available. In this section you can see all the Nodes in the Cluster and the current status of each Node.
If communications to one or more nodes has been lost, then the status of the affected Nodes will be updated to read "Not Ready".
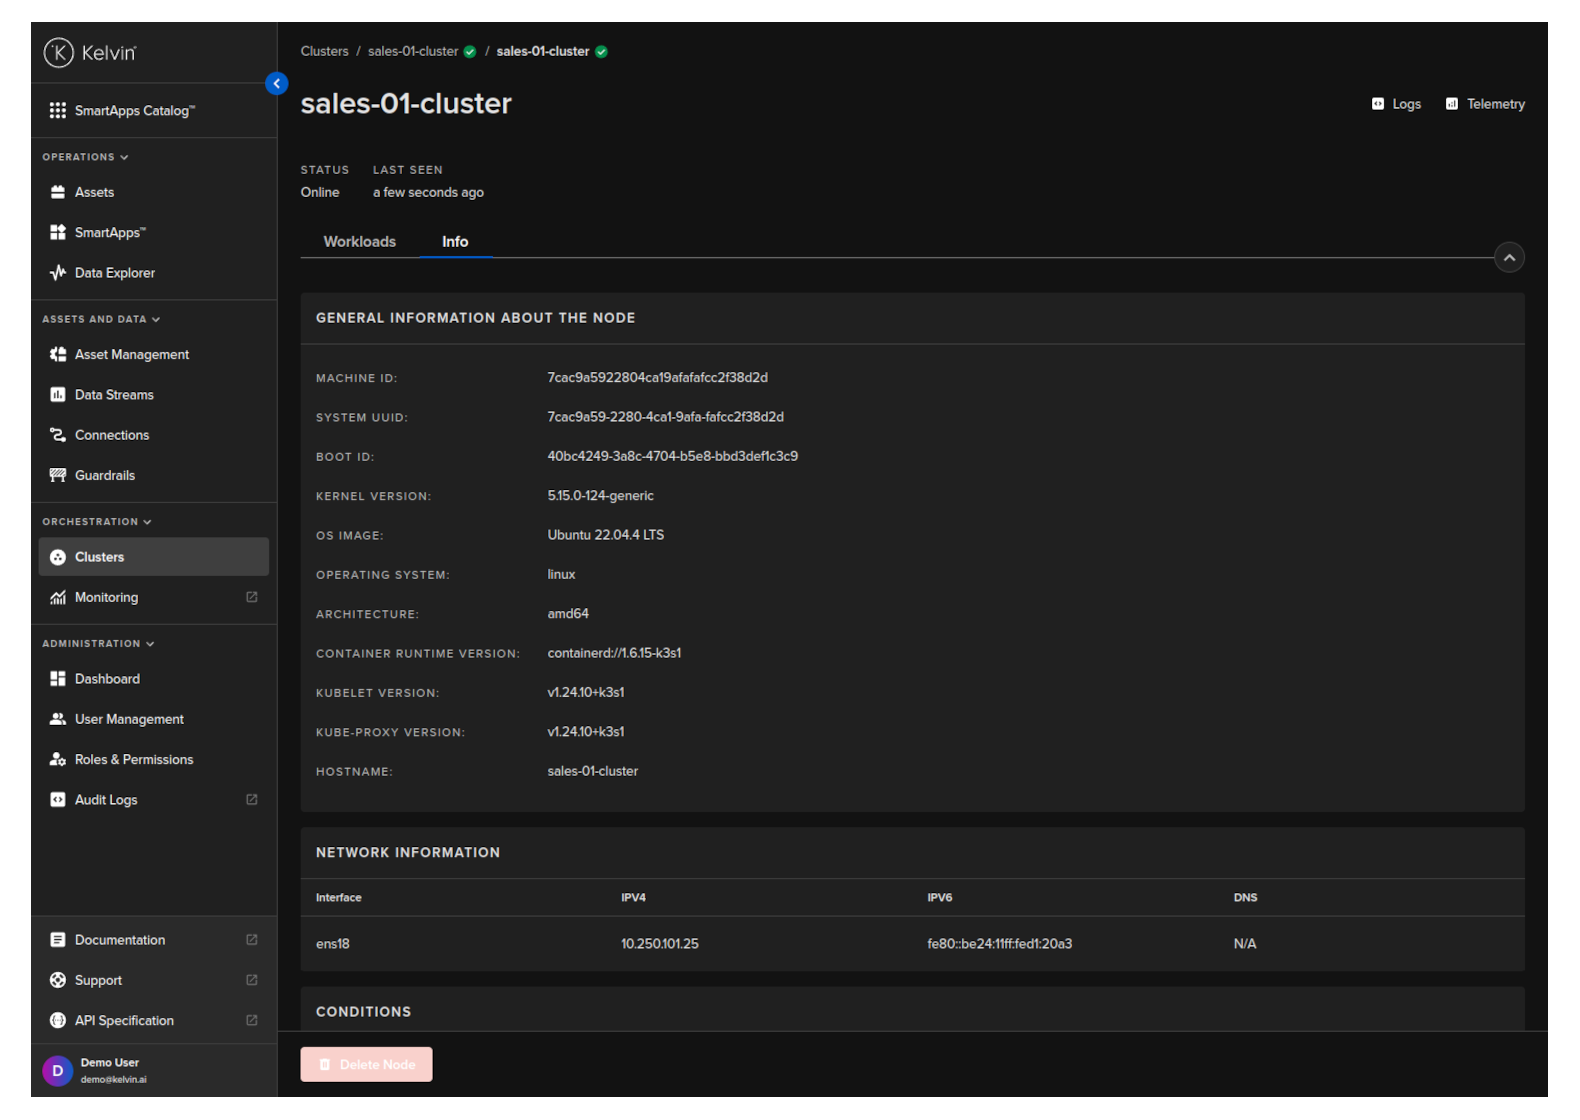
Node Details
If you click on a Node, then you can see more details about the individual Node and the workloads running on the Node.
Details on the workloads screen is the same as the workloads screen for the Cluster.

and the general information and health of the Node.
Configuration
Configuration has a few features;
Auto Update
From Orchestration menu click on a single Cluster, then under the Configuration tab you can set or disable the auto update feature and the frequency to check for updates.
Remember to click save after changing any settings otherwise you will lose those changes.
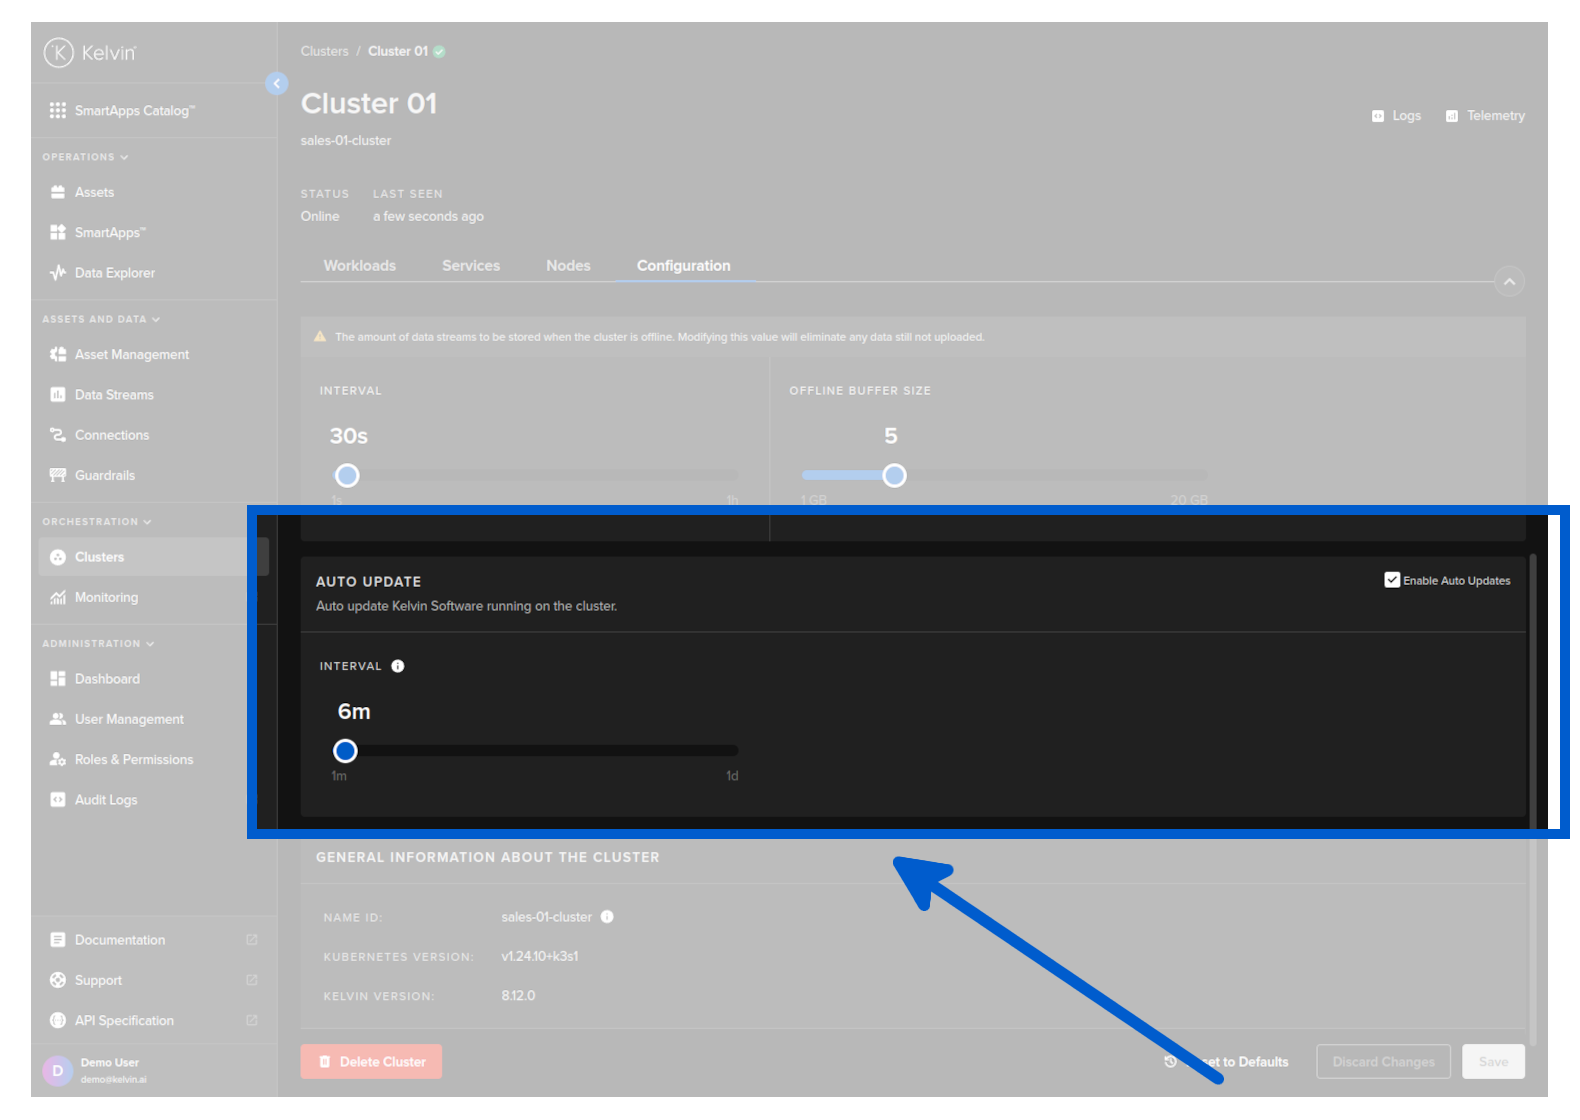
General Software Versions
From Orchestration menu click on a single Cluster, then under the Configuration tab you can see the software versions on the node for Kubernetes and Kelvin core services.
