Bulk Create Assets
Reference:
| Field | Description |
|---|---|
| Name (Name ID) | Unique name identifier. It must contain only lowercase alphanumeric characters. The characters ., _ and - are allowed to separate words instead of a space BUT can not be at the beginning or end of the name. |
| Title (Display Name) | The display name to show on the Kelvin UI. It can contain any characters, including spaces. |
| Asset Type | The name of the Asset Type that this Asset belongs to. This must be a valid Asset Type name. |
| Properties | A list of key/value pairs that define custom properties of the asset. Use this to define attributes like: Location, Site, PLC Type, Manufacturer, Serial Number, etc. |
Bulk Create Assets
If you need to create multiple Assets at once, you can use the following example to create them in bulk.
You can create Assets in bulk using the import Assets option in Assets.
You can watch this short demo video or read the full step-by step written tutorial below.
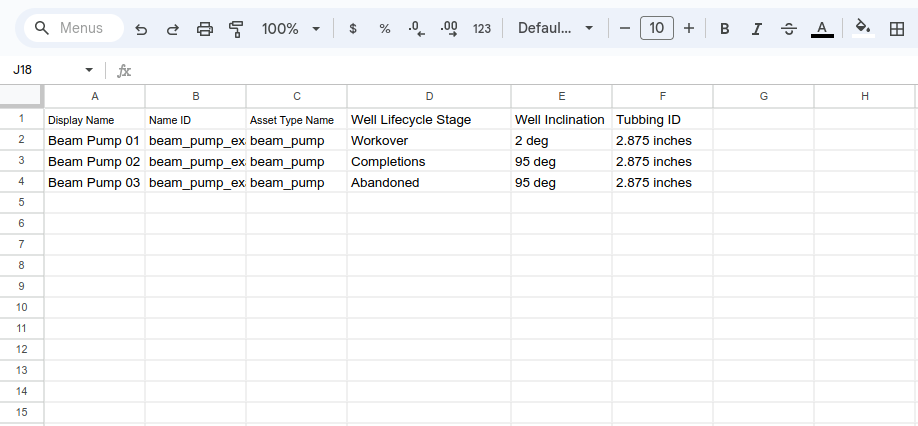
To start you need to create your Asset list in Excel, Google Sheets or any program that can save to a CSV file format.
You can get the latest template from the Kelvin UI. Read further down to . You can have as many headings after the Asset Type Name and each one will be treated as a new Asset Property.
Name ID and Asset Type Name values must follow the name format which must contain only lowercase alphanumeric characters. The ., _ and - characters are also allowed to separate words instead of a space but not at the beginning or end.
When finished, make sure you save it in a CSV file format using comma to define the field delimiter and UTF-8 as the Character set. This is usually the default settings. This is an example location for saving csv files in Google Sheets.
In Google Sheets, there are no options and will save with the defaults we mention above.

Once you have a filled in template file available locally on your machine, you can initiate the bulk create Assets as follows;
First go to the Assets under Administration.
Do not get confused with the Asset management in the Operations section which is designed for the Production Engineers.
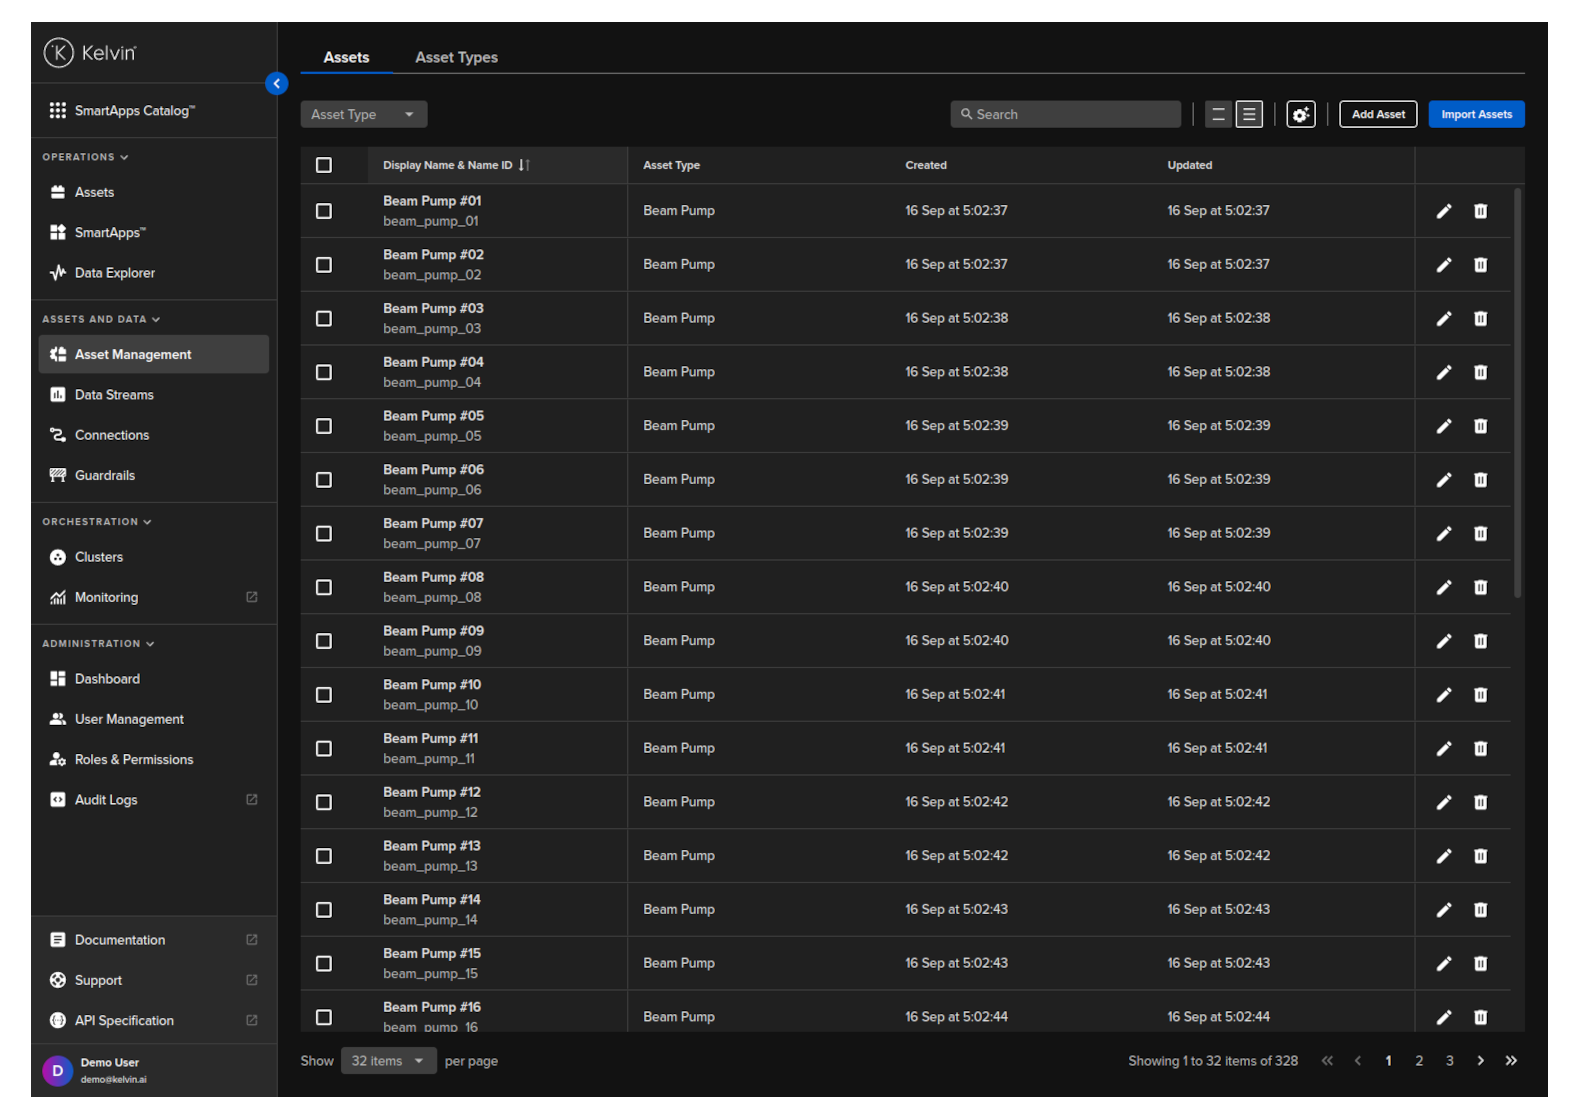
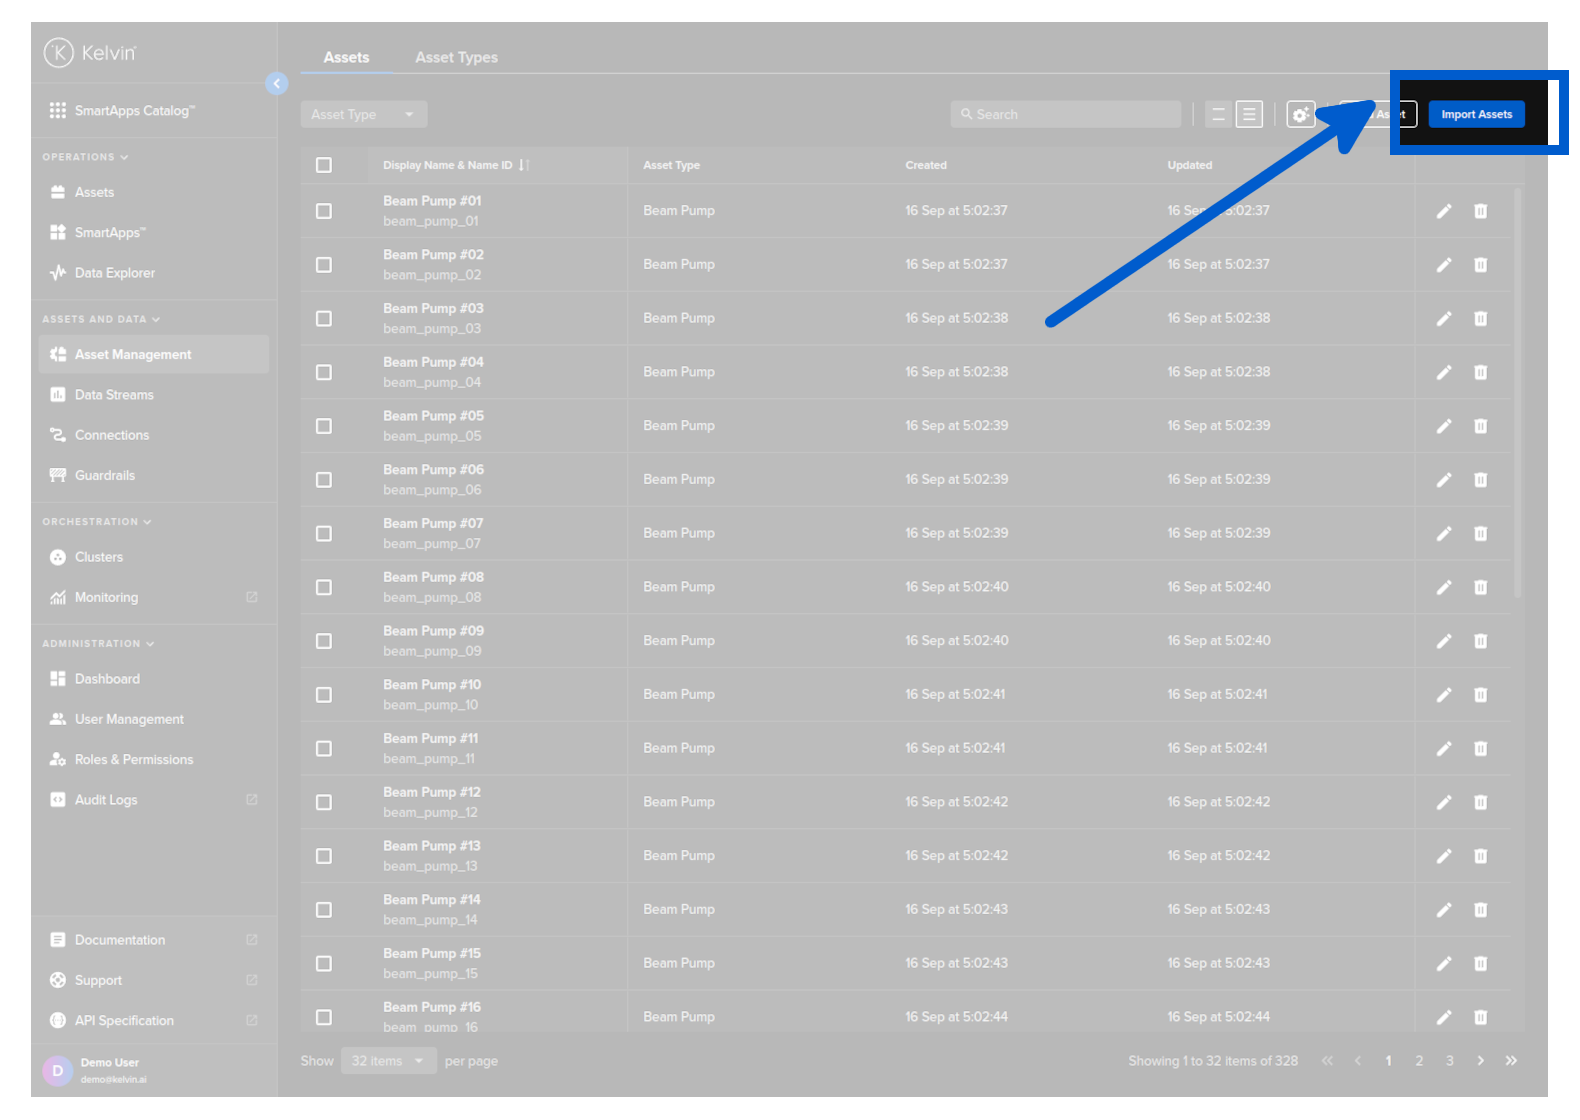
Click on the Import Assets button.
Either select the CSV file you have created or drag and drop it into the box and click Next.
This will only accept files with a CSV extension.

Wait for the file and data verification process to be completed. If there are any issues, check and correct the issues, go back to step 1 and reupload the file for a recheck.

When all is ok, click on the Import button and all your Assets will be created.
This request will create 2 Assets.
curl -X "POST" \
  "https://<url.kelvin.ai>/api/v4/assets/bulk/create" \
  -H "Authorization: Bearer <Your Current Token>" \
  -H "Accept: application/json" \
  -H "Content-Type: application/json" \
  -d '{
        "assets": [
            {
                "name": "doc_demo_asset_01",
                "title": "Documentation Demo Asset 01",
                "asset_type_name": "pcp",
                "properties": [
                    {
                        "name": "plc_manufacturer",
                        "title": "PLC Manufacturer",
                        "value": "Siemens"
                    }
                ]
            },
            {
                "name": "doc_demo_asset_02",
                "title": "Documentation Demo Asset 02",
                "asset_type_name": "pcp",
                "properties": [
                    {
                        "name": "plc_manufacturer",
                        "title": "PLC Manufacturer",
                        "value": "Siemens"
                    }
                ]
            }
        ]
    }'
This script will create 2 Assets.
from kelvin.api.client import Client

# Login
client = Client(config={"url": "https://<url.kelvin.ai>", "username": "<your_username>"})
client.login(password="<your_password>")

# Create Assets in Bulk
response = client.asset.create_asset_bulk(
    dry_run=False,
    data={
        "assets": [
            {
                "name": "doc_demo_asset_01",
                "title": "Documentation Demo Asset 01",
                "asset_type_name": "pcp",
                "properties": [
                    {
                        "name": "plc_manufacturer",
                        "title": "PLC Manufacturer",
                        "value": "Siemens",
                    }
                ],
            },
            {
                "name": "doc_demo_asset_02",
                "title": "Documentation Demo Asset 02",
                "asset_type_name": "pcp",
                "properties": [
                    {
                        "name": "plc_manufacturer",
                        "title": "PLC Manufacturer",
                        "value": "Siemens",
                    }
                ],
            },
        ]
    },
)

print(response)
You will not receive a response;