6. Deploy

Now that you have your first SmartApp uploaded, you can deploy it to the assets that you previously created in your Kelvin Cloud instance.
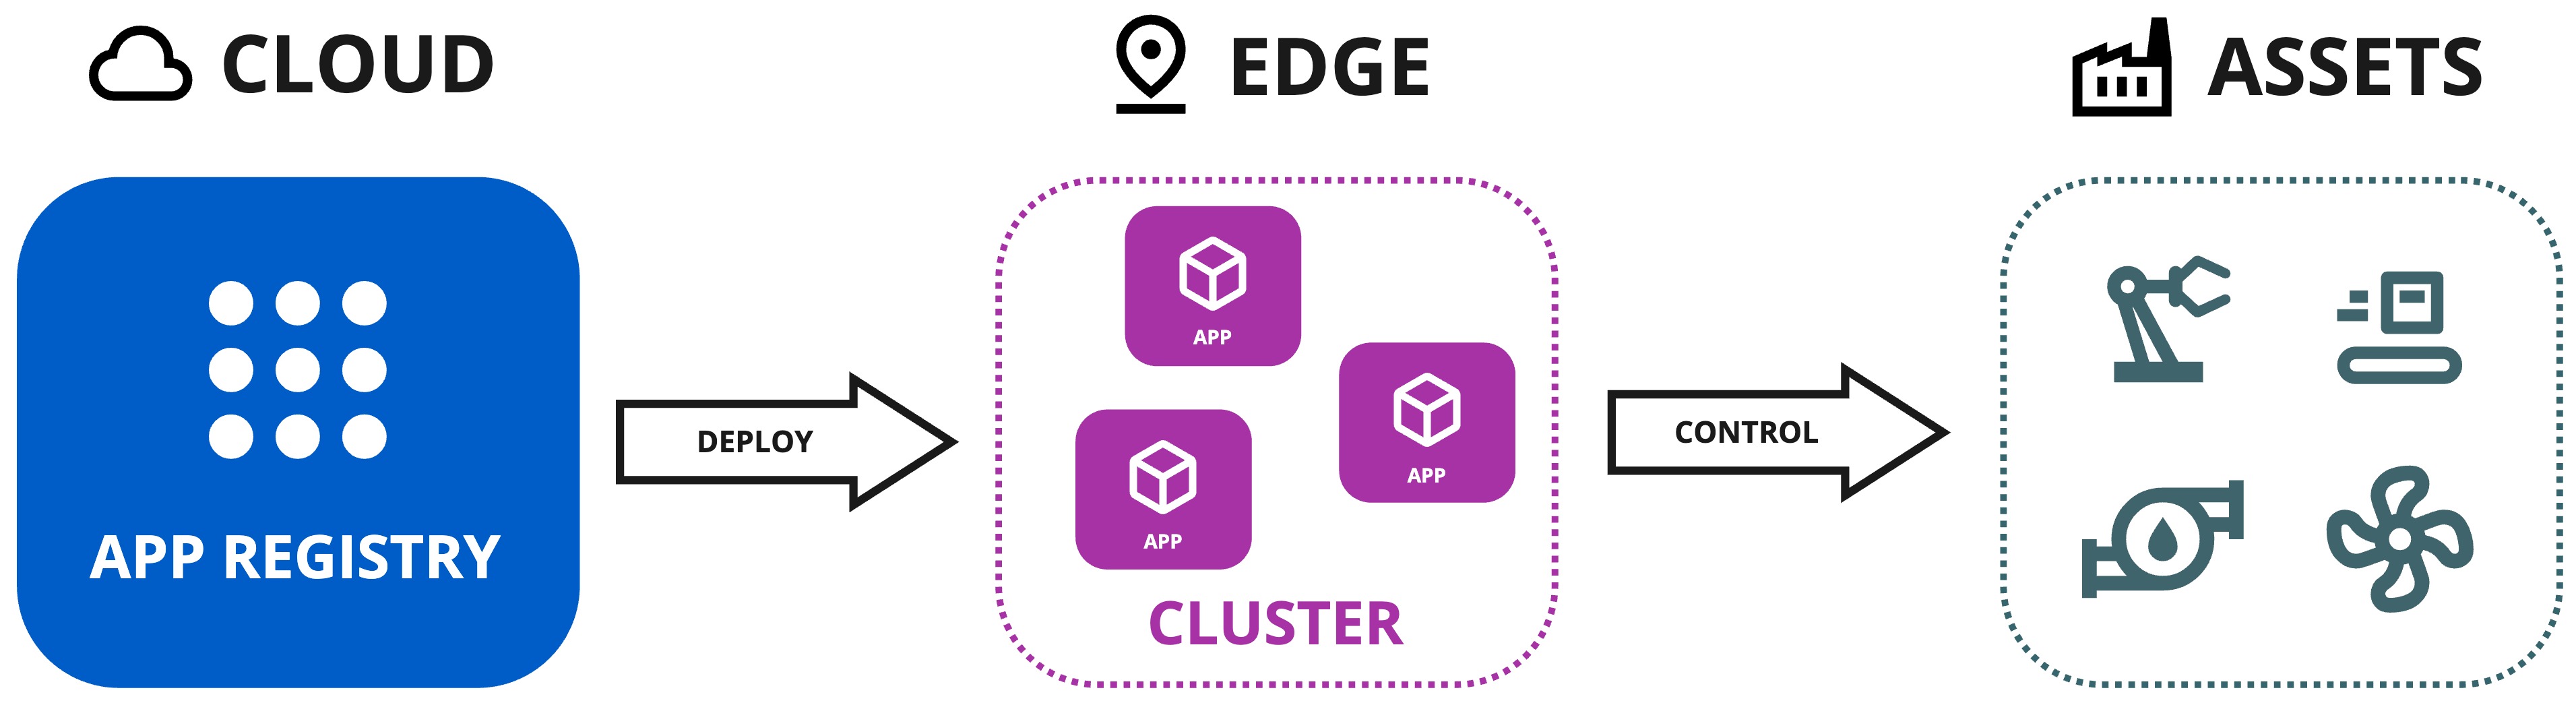
Before proceeding to add Assets to SmartApp in the Kelvin UI (which deploys a Workload to a Cluster in the background), make sure you have an active Cluster on your Instance and the default Cluster setting for Kelvin SmartApps™ deployment is set.
This demonstration video was done in v5.9.
There may be slight differences with the latest version.
Check the latest documentation for the specific tasks should any feature not quite work as expected.
Video Guide
Watch this quick start guide performed in real time in less than 2 minutes.
Written Guide
Open your browser and navigate to https://<instance>.kelvin.ai. Login with your credentials and you will be presented with the Kelvin UI.
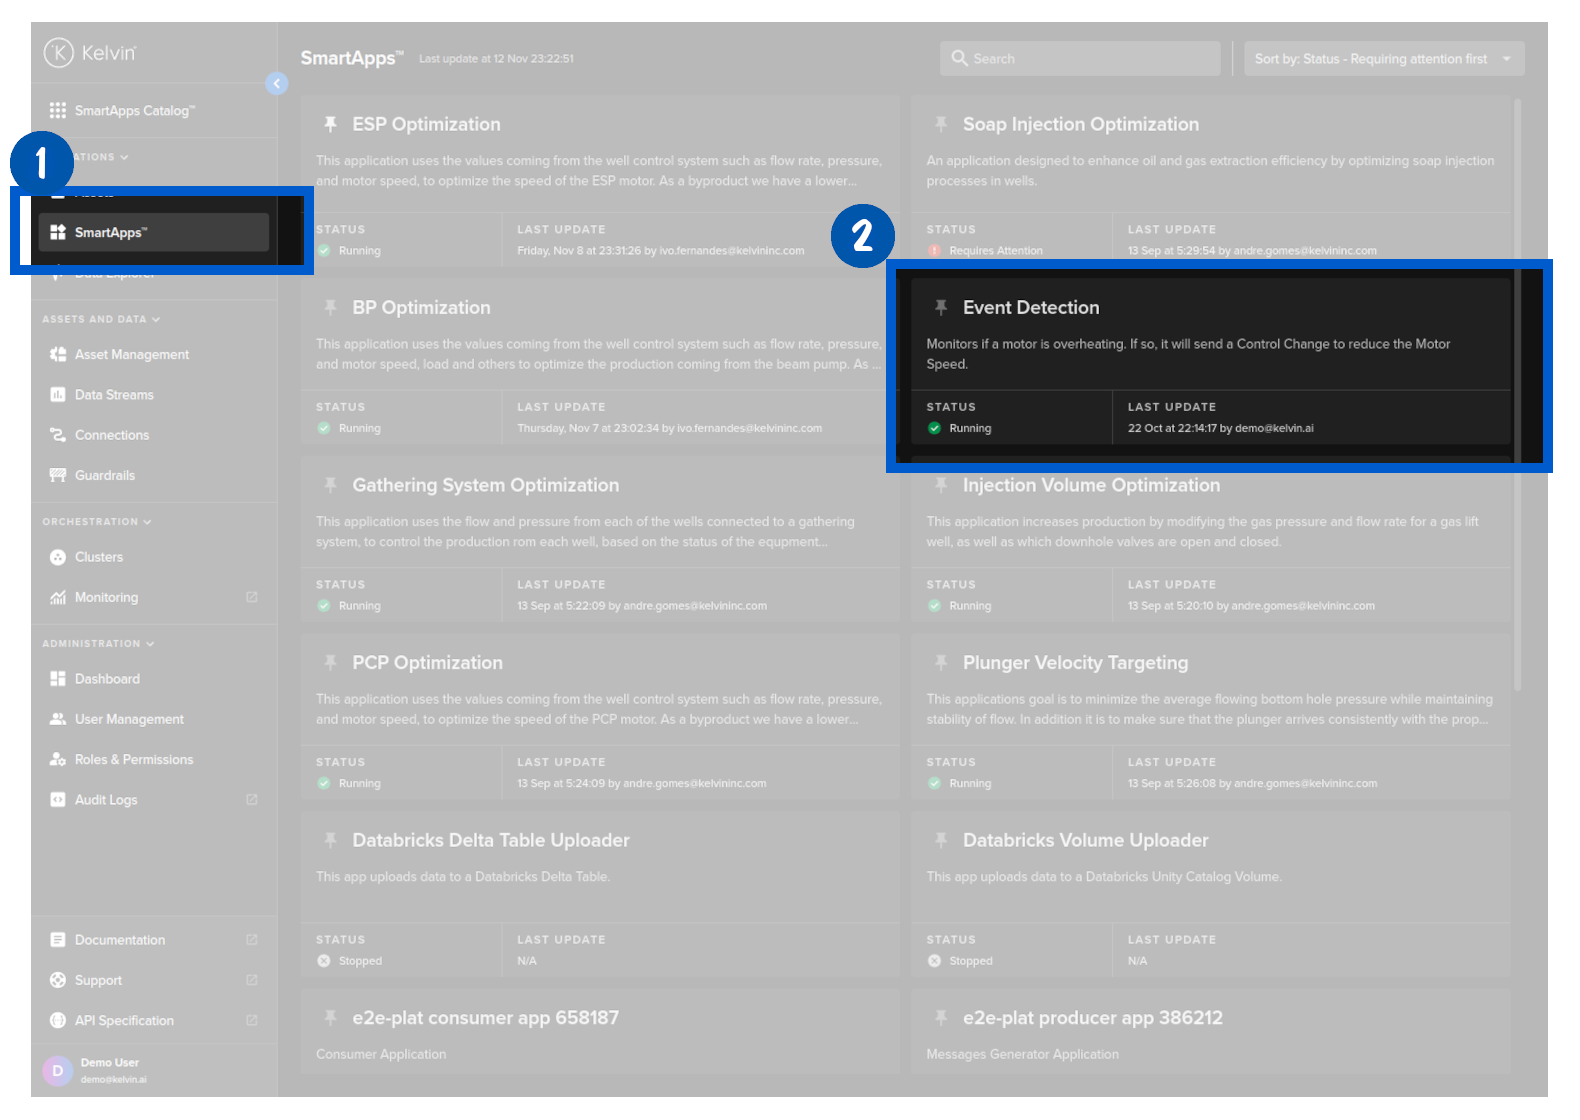
Go to SmartApps and select the Event Detection app you just uploaded.
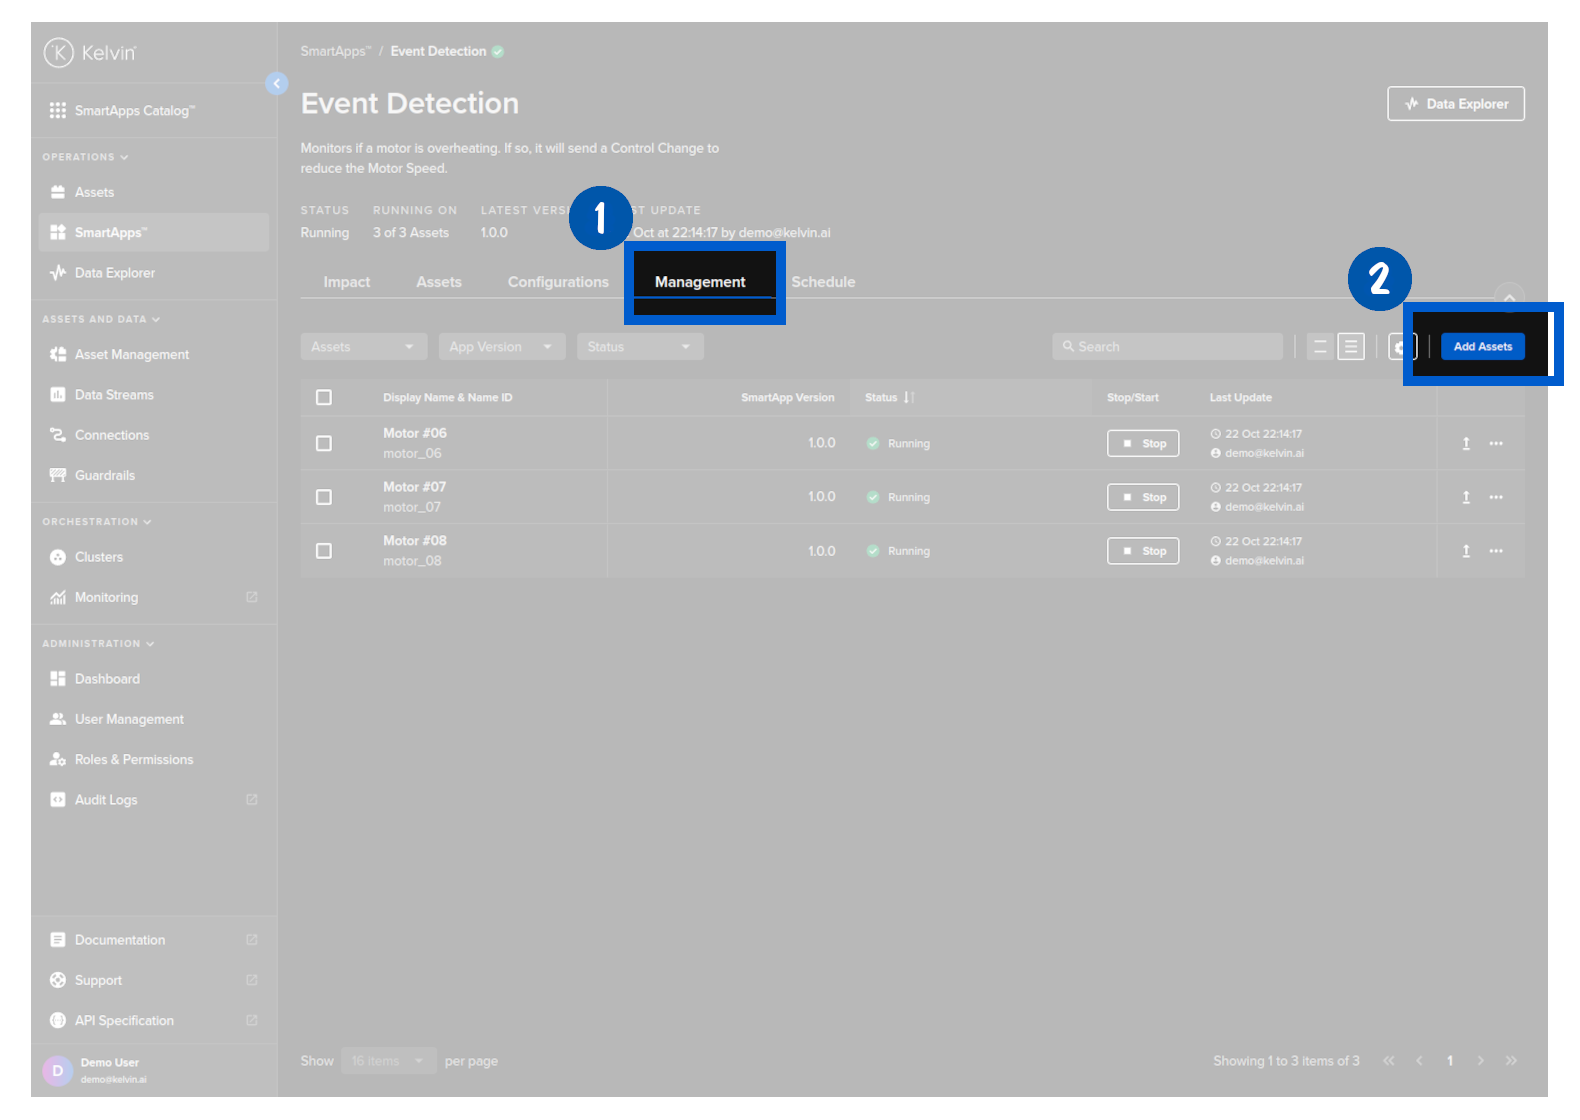
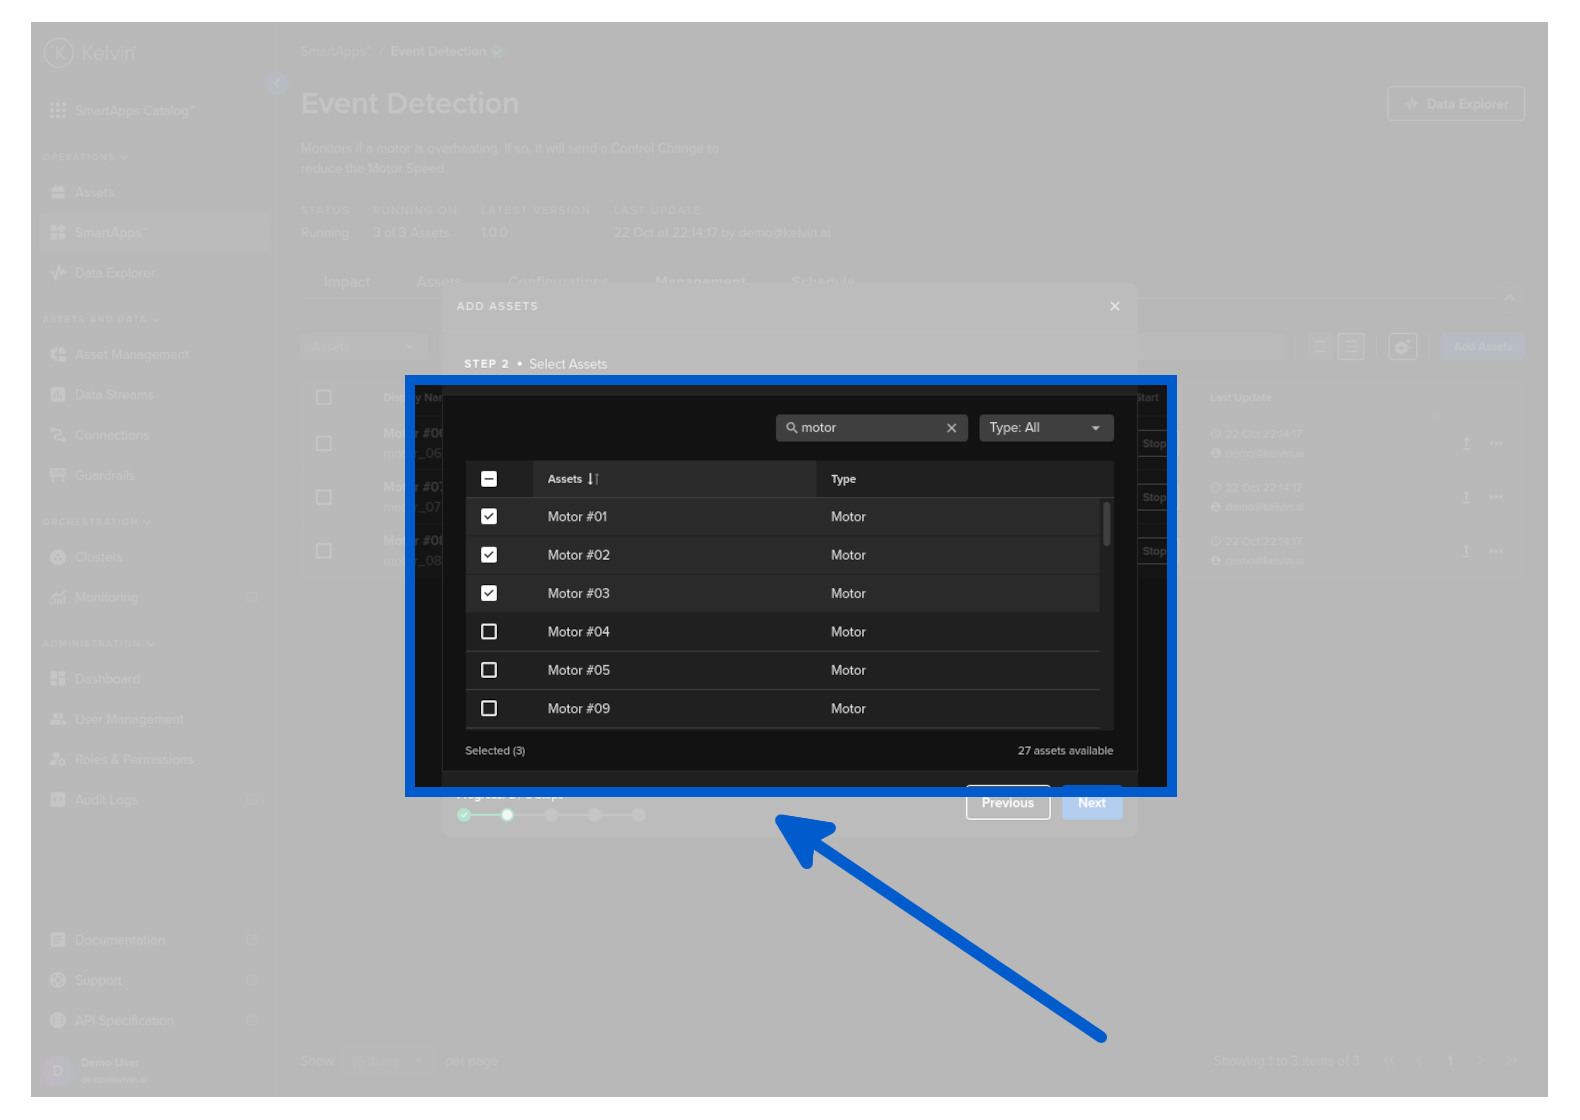
The next step is to deploy the app to assets. Click on the Management tab an then on the Add Assets button.
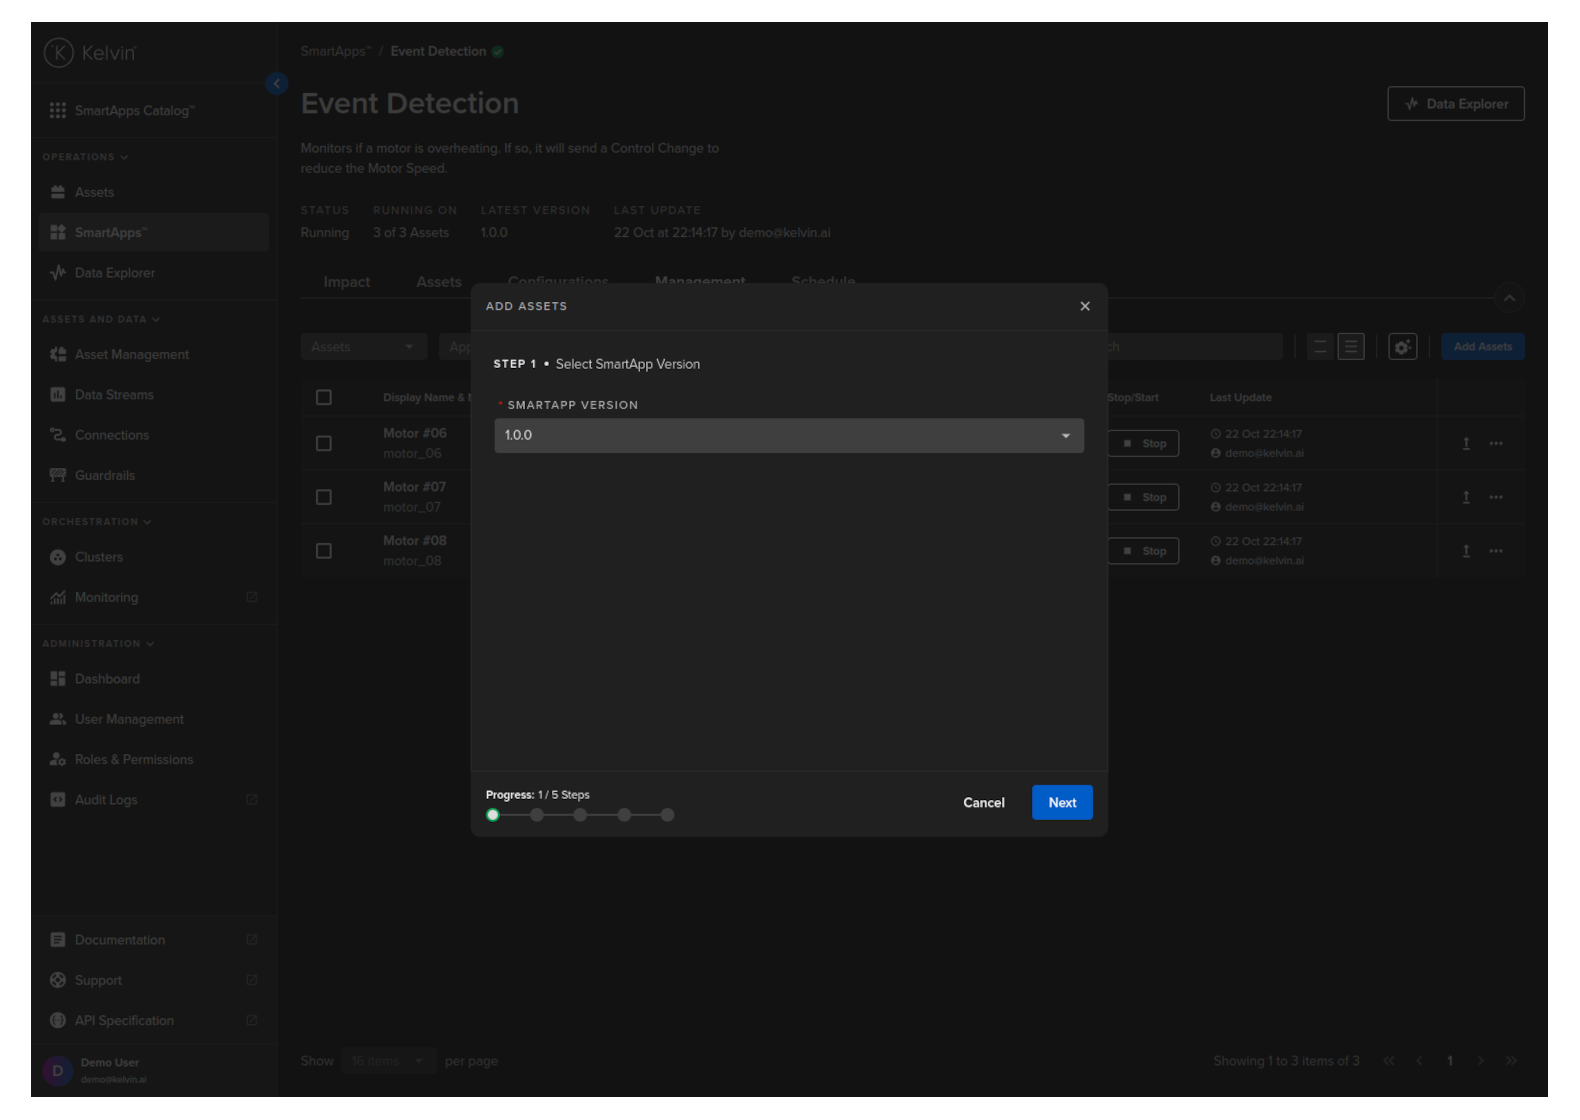
Choose the app latest version.
Select the assets you want to deploy to the app. In this case we will select the assets with the name PCP #N.
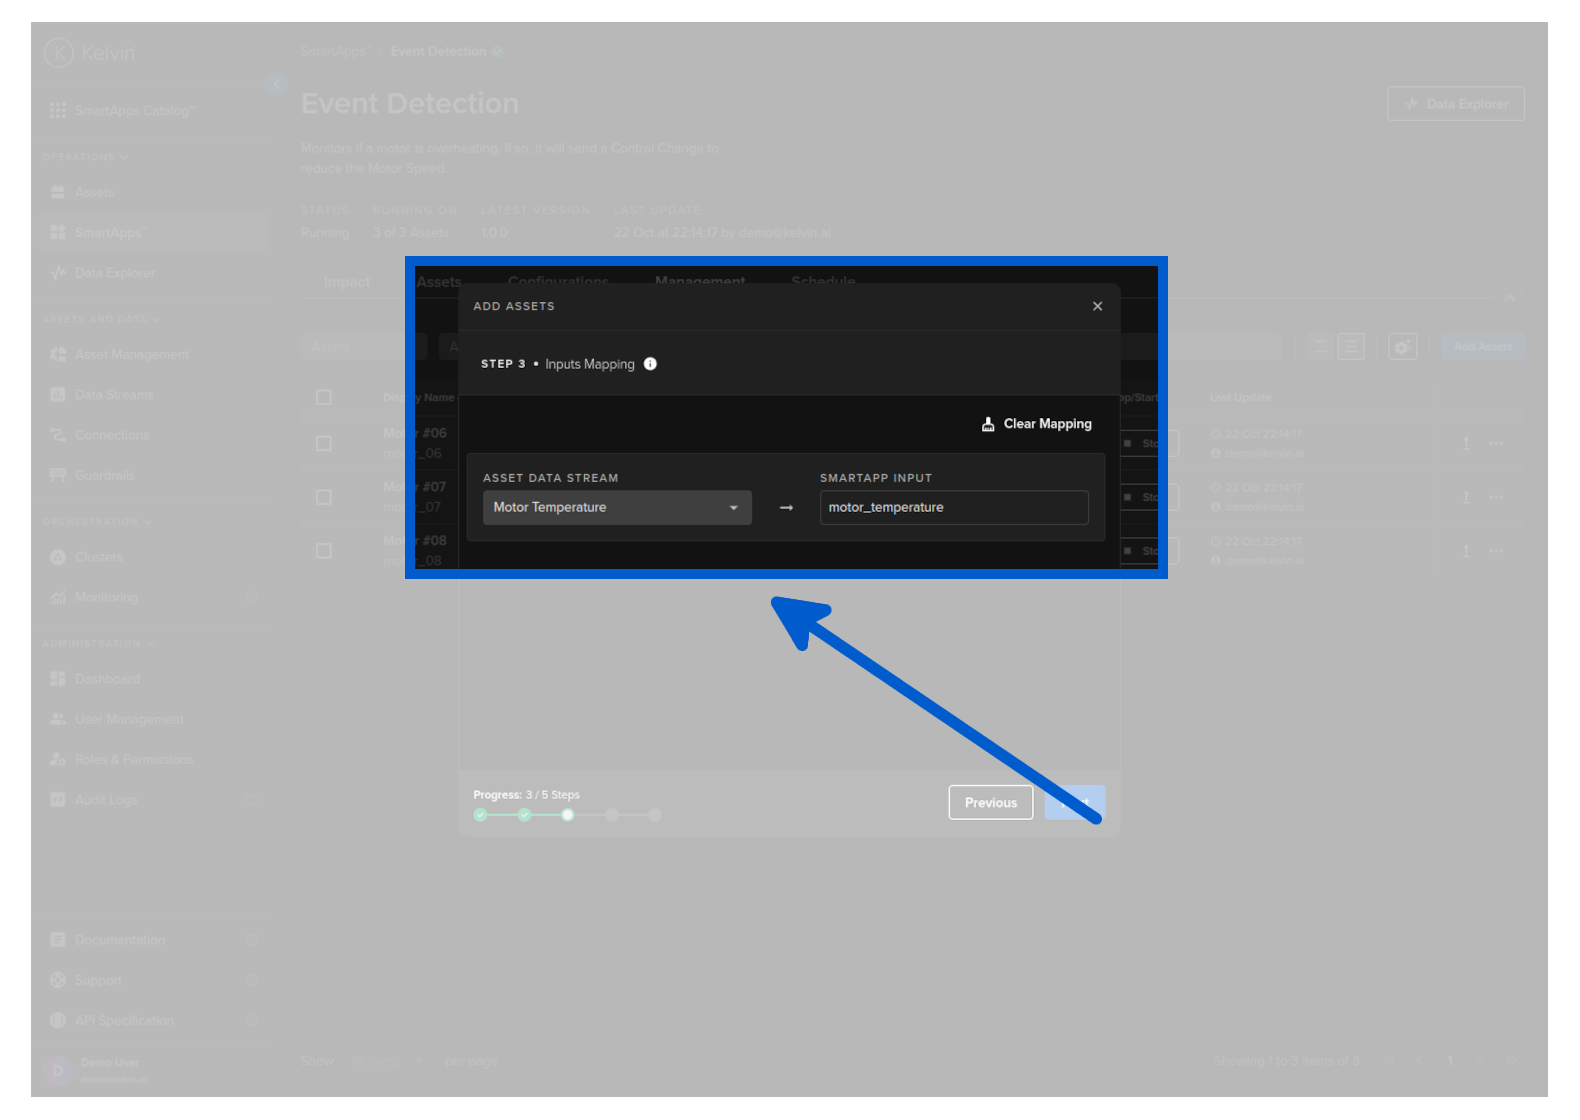
In the next step, we'll map the asset data streams to the SmartApp inputs. This entails channeling the live data from the assets directly into the application.
Kelvin will oversee the data routing to the SmartApp; your role is to ensure the correct data stream is selected to feed into the SmartApp inputs.
For the Event Detection SmartApp, we have a singular input named motor_temperature. Thus, we'll be selecting the Motor Temperature data stream from the asset.
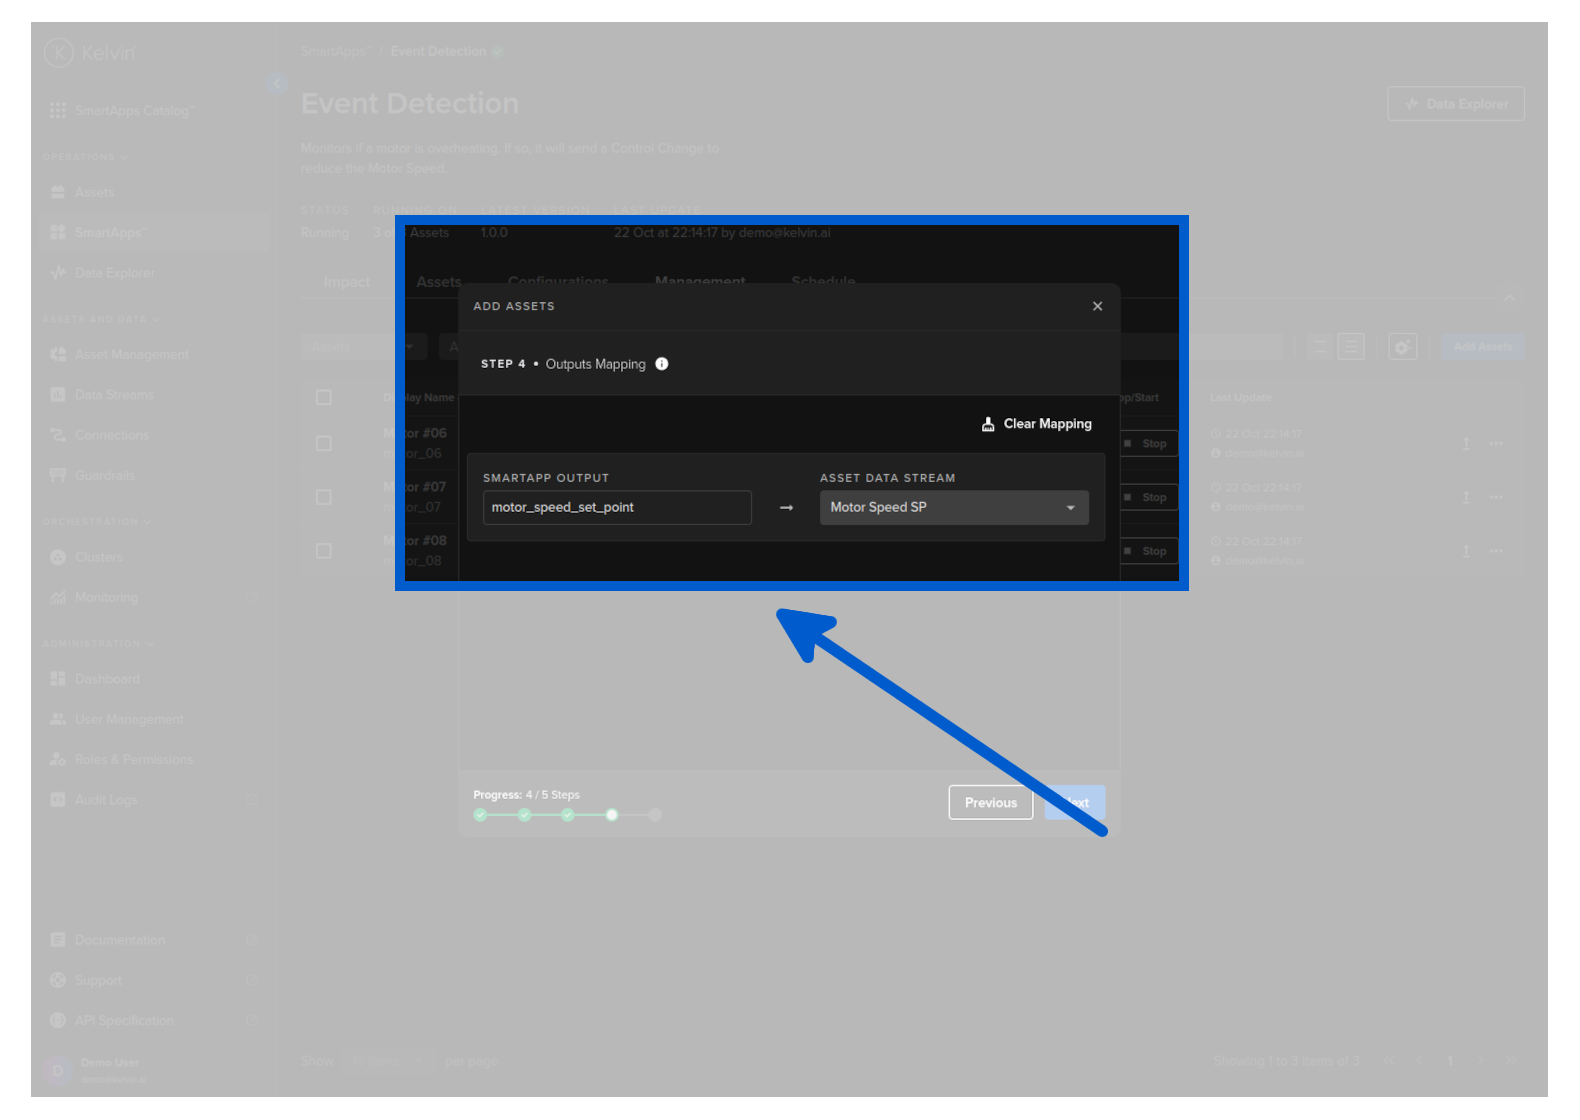
We also need to map the SmartApp outputs to the asset's data streams. This entails that any data generated by the app is routed back to the asset.
For the Event Detection SmartApp, we have a singular output named motor_speed_set_point. Thus, we'll be selecting the Motor Speed Set Point data stream from the asset. Every time the app generates a new motor_speed_set_point output, it will be routed back to the asset as a control change.
And the final step is to click on the Submit button to deploy the app to the assets.
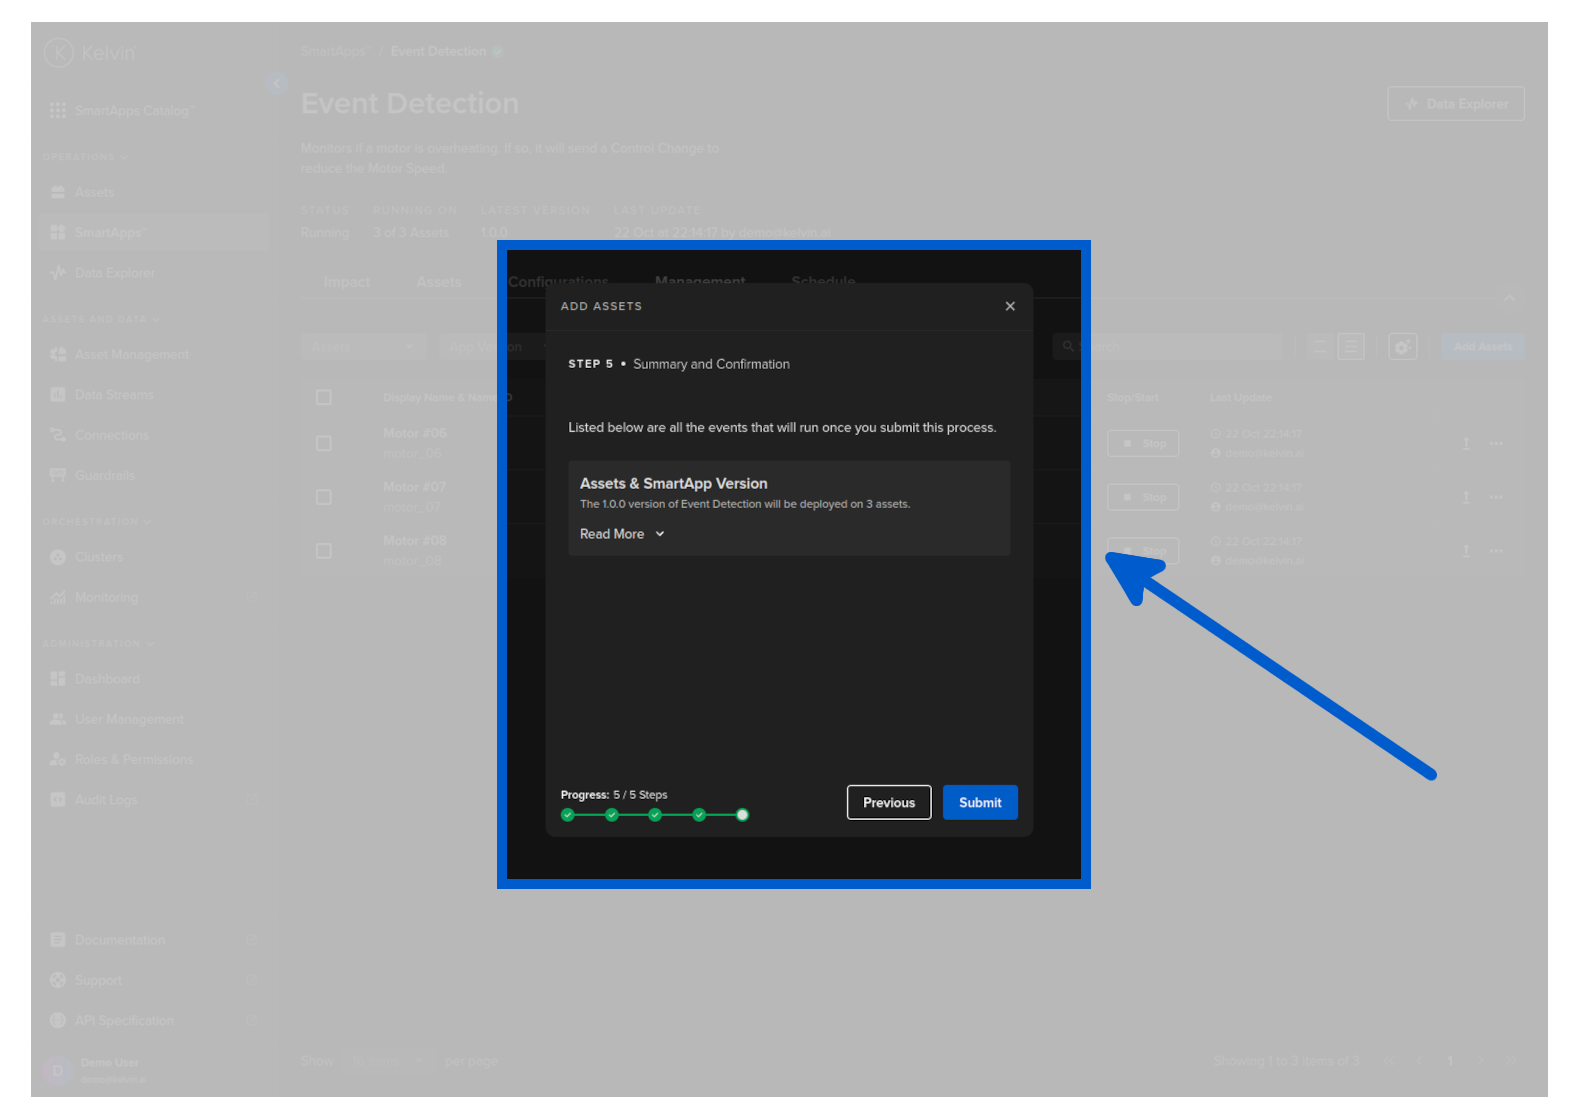
You can observe the app being deployed to the assets. And in a couple of seconds the app will be running for the assets.
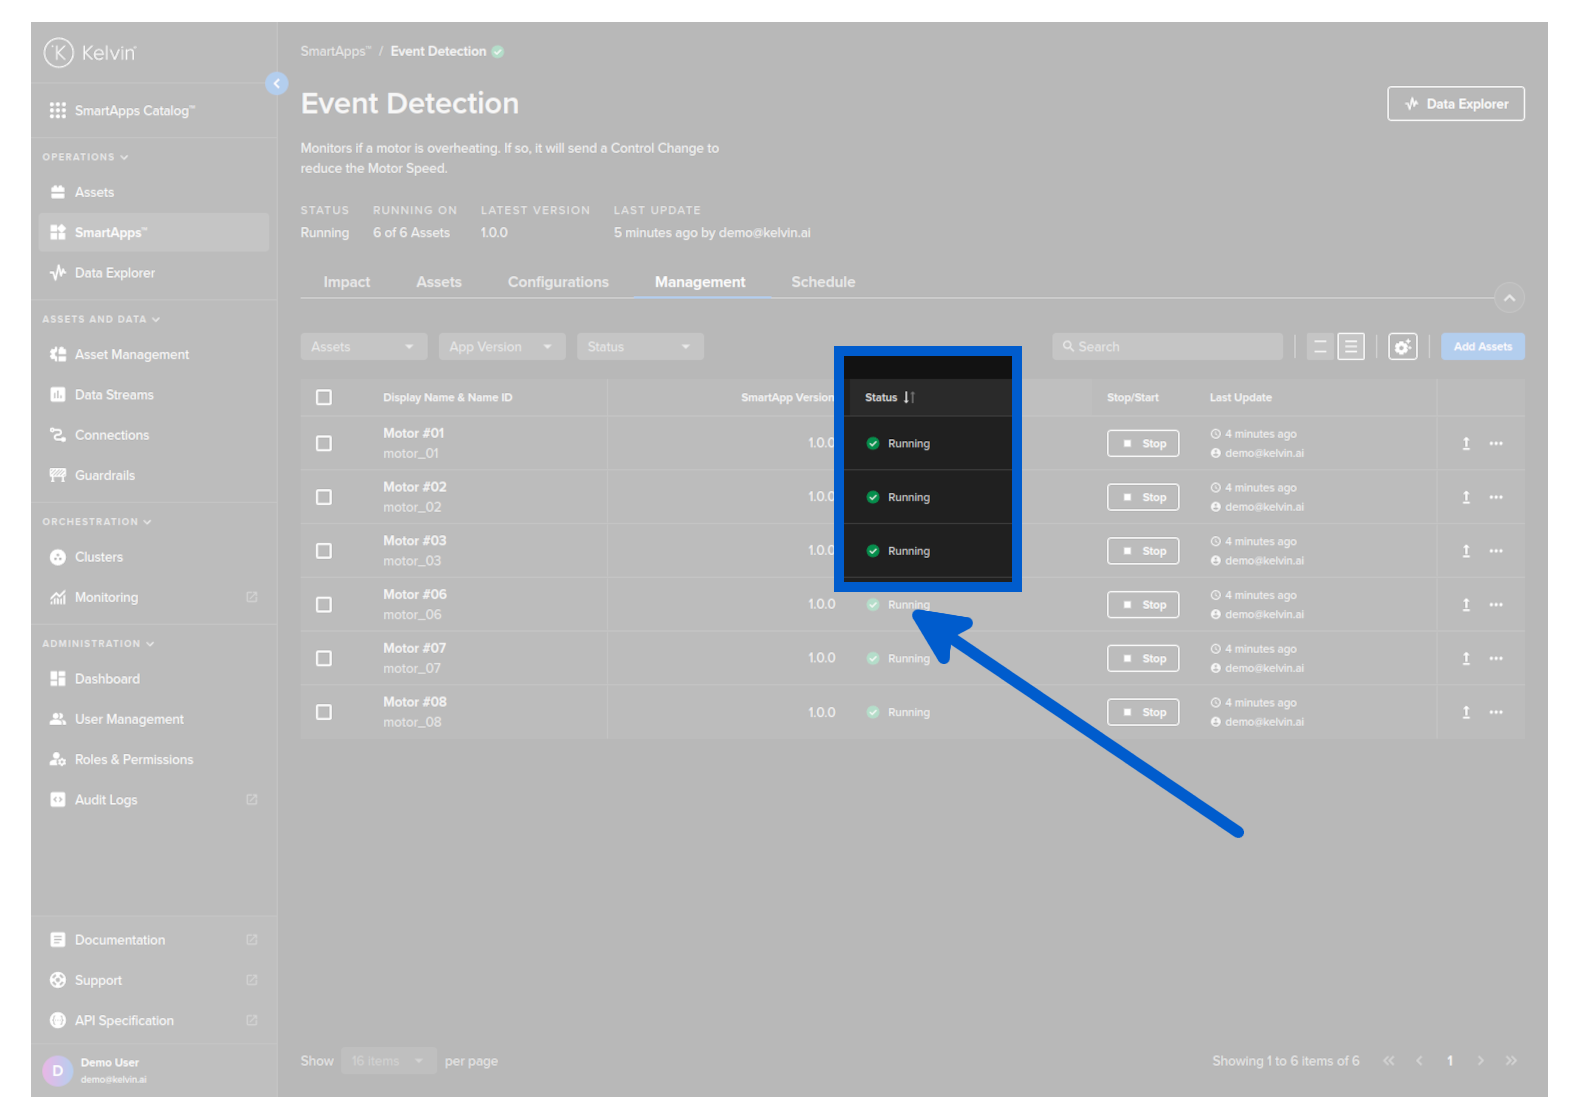
Congratulations! You've successfully deployed your SmartApp to your assets.
Next Step
Now that you have your first Kelvin SmartApp™ deployed to your assets, you can visualize the recommendations, control changes and monitor the logs and telemetry of your app.