Manual Controls
On this page you will learn about monitoring live values and changing values of Data Streams related to the selected Asset in Manual Controls in Kelvin UI.
Overview
Control Change allows you to send variable changes to the edge devices such as PLC's or HMI's from the Kelvin Cloud.
This process is different from a standard Read/Write data variable as the change at the edge will be written and the control change manager at the edge will communicate with the Connections to ensure the write is completed and verified.
The process itself is explained in this infographic;
A lot happens here to ensure a write succeeds or a failure is confirmed.
Not shown in this infographic is the failure cases. There are two cases where the Control Change Manager will stop trying and return a failure status.
Changing a value is described later on this page. When changing the value you can either allow the defaults or go to advance settings and choose your own failure settings.
- The number of retries to communicate from the Control Change Manager to the Connection is exceeded. This is a variable you can set.
- The expiration date passes waiting to get an "Applied" status from the Connection to the Control Change Manager. This is a variable you can set.
Manual Controls Page
The Assets page is the first page you will see when you log into the Kelvin UI. You can also go there by clicking on the Asset option in the left sidebar.
Here you have a list of all Assets registered in Kelvin. From here you can see the Assets and associated information.
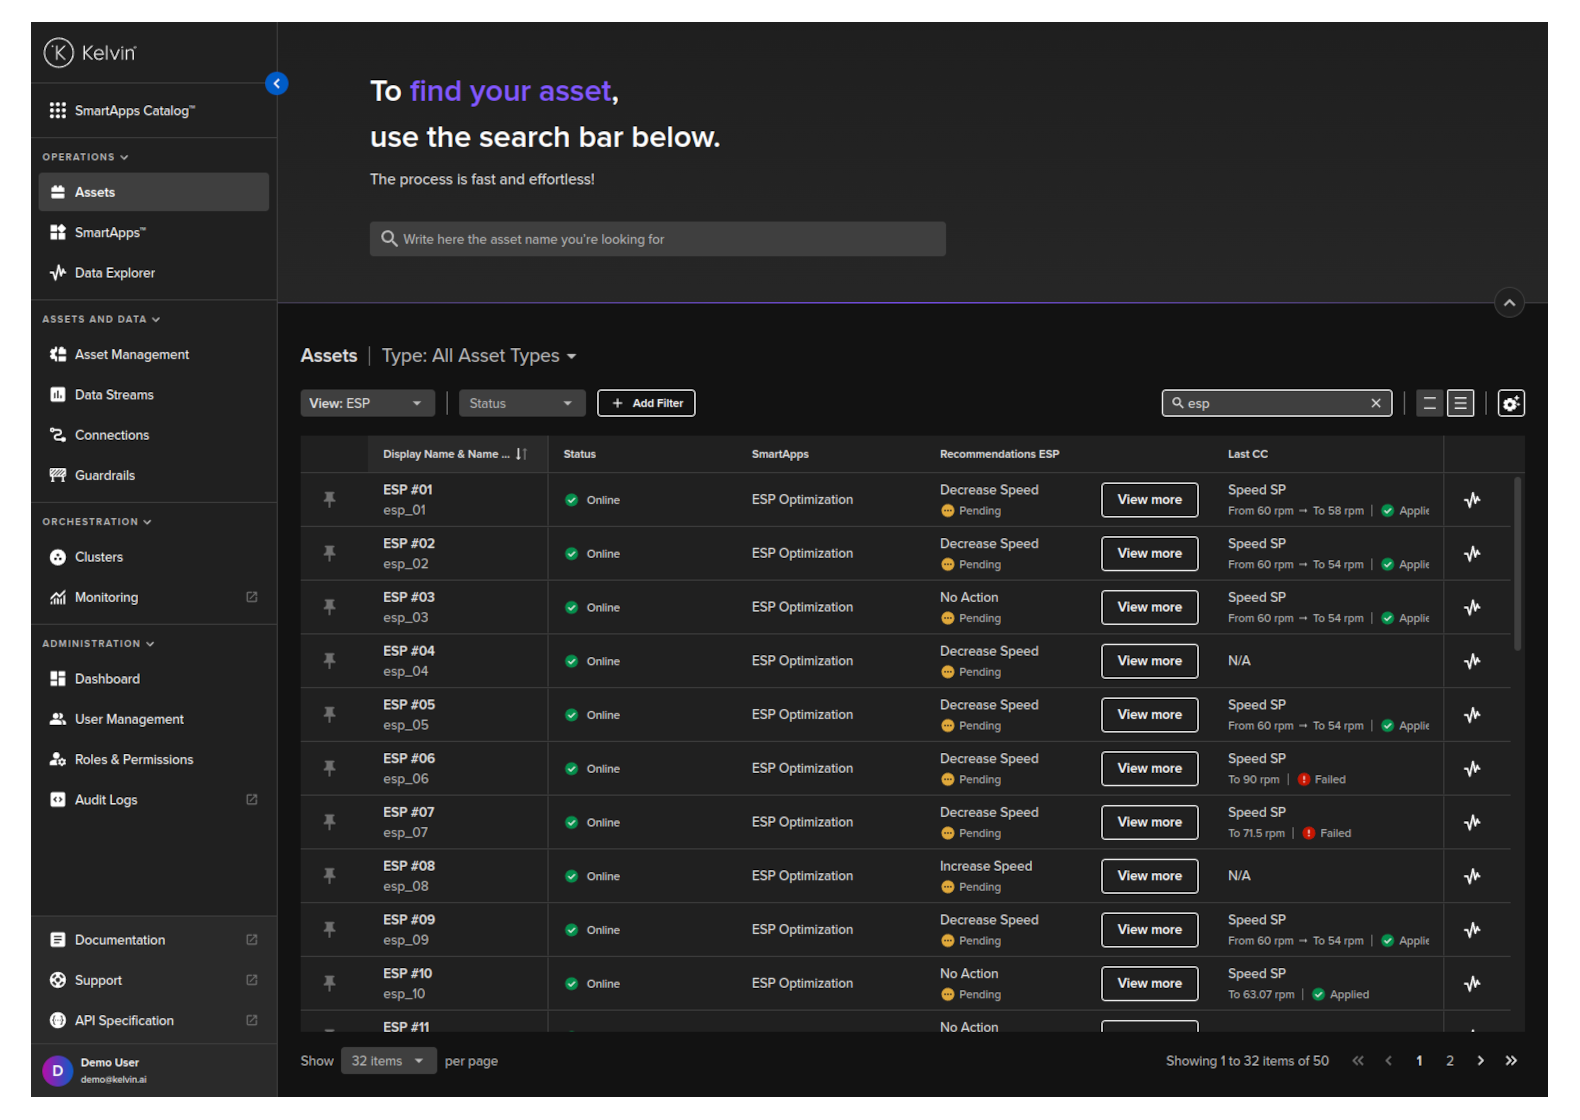
When you click on an Asset you will see a new page will all the details about the Asset.

When you are finished you can click on the back button next to the Manual Controls title.
Manual Controls
When you click on the Manual Controls button;
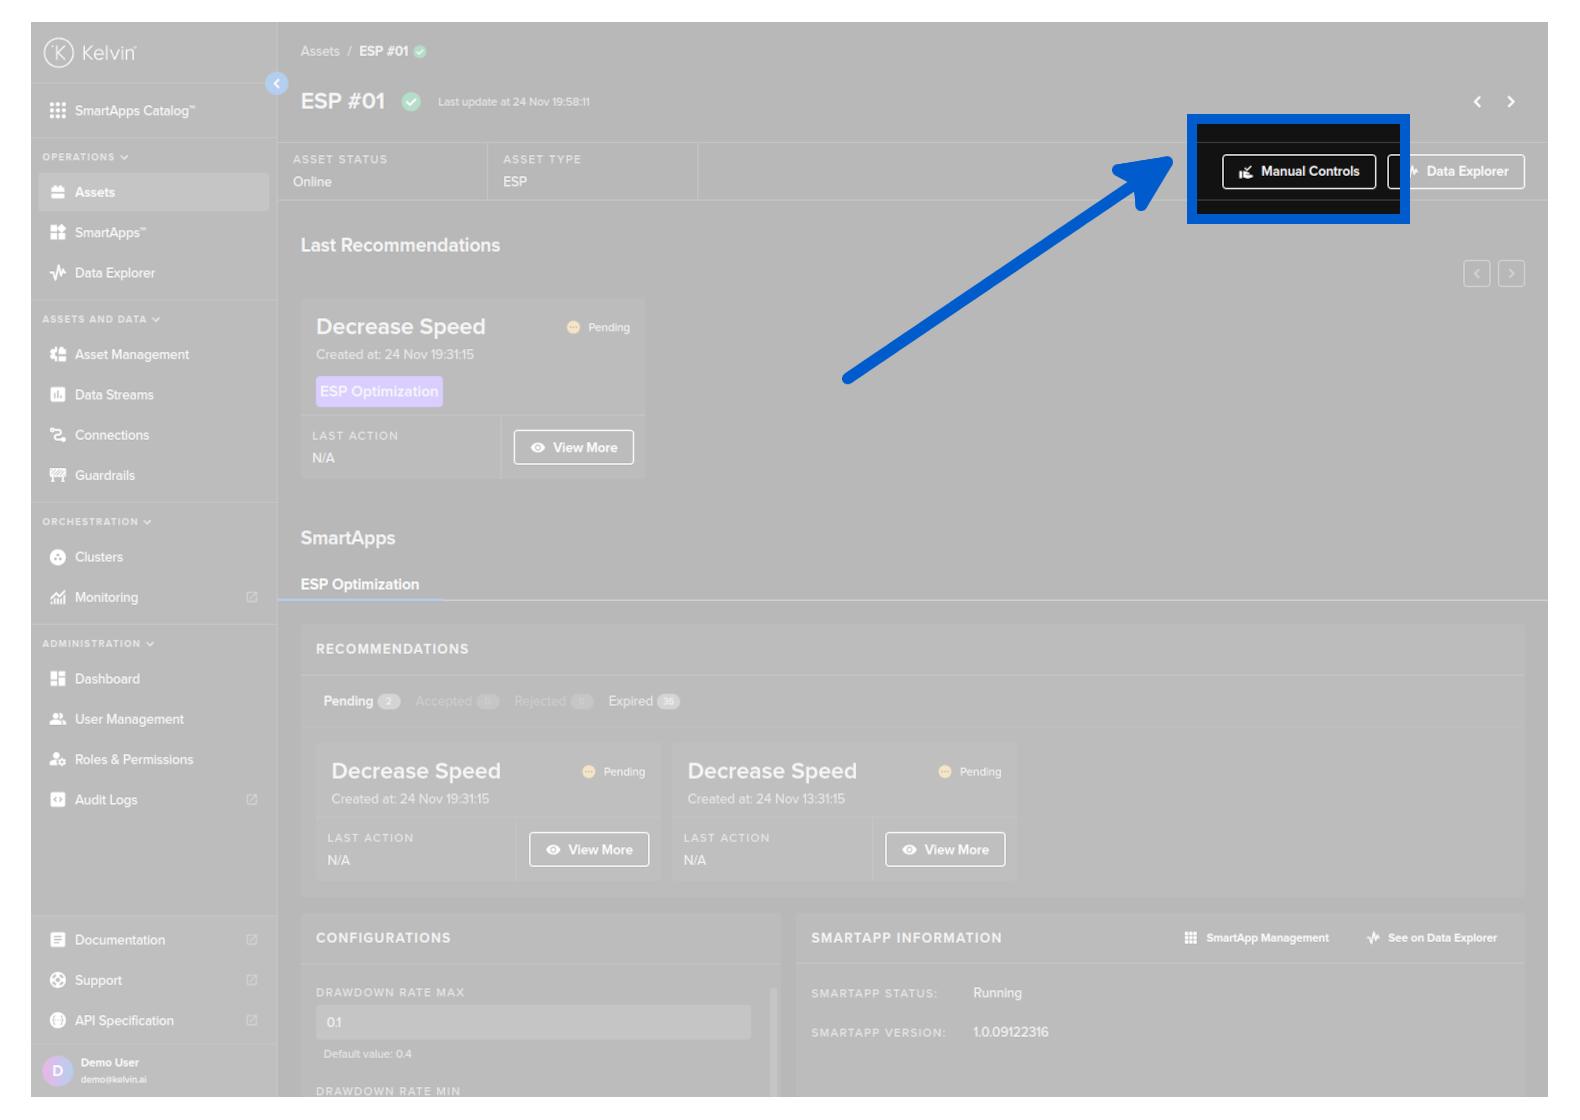
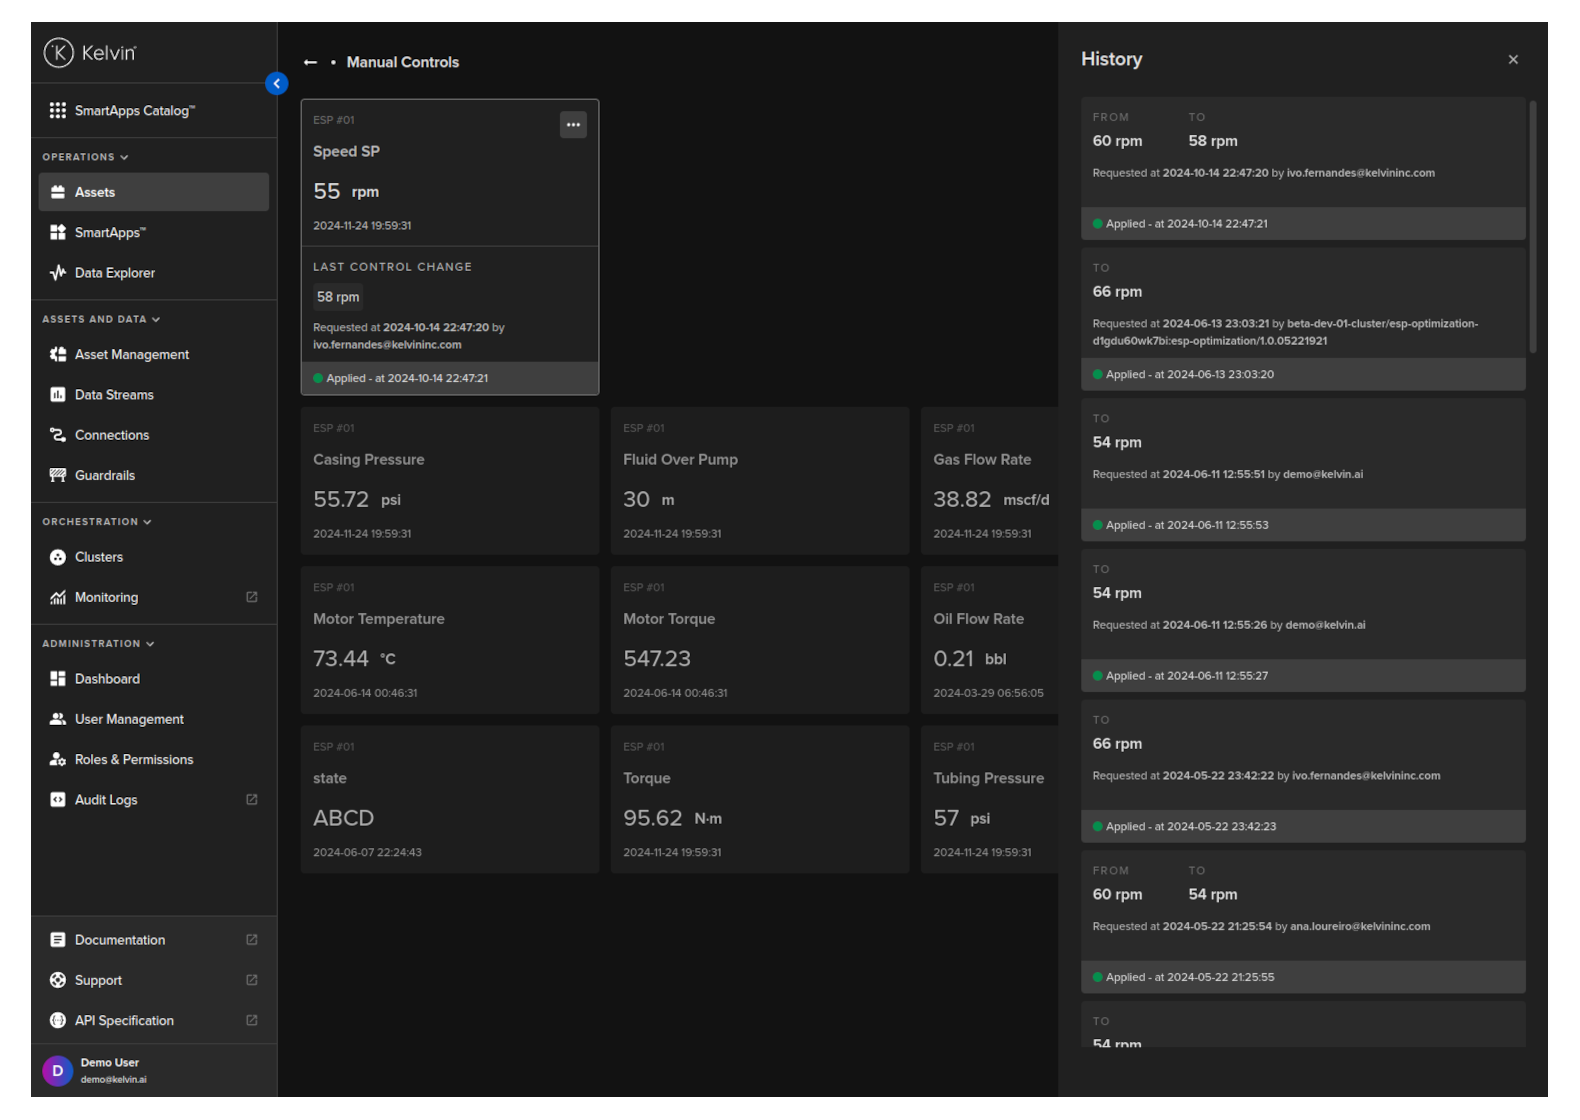
And go to the Manual Controls page, you will see all the Data Streams and their latest value for this Asset.
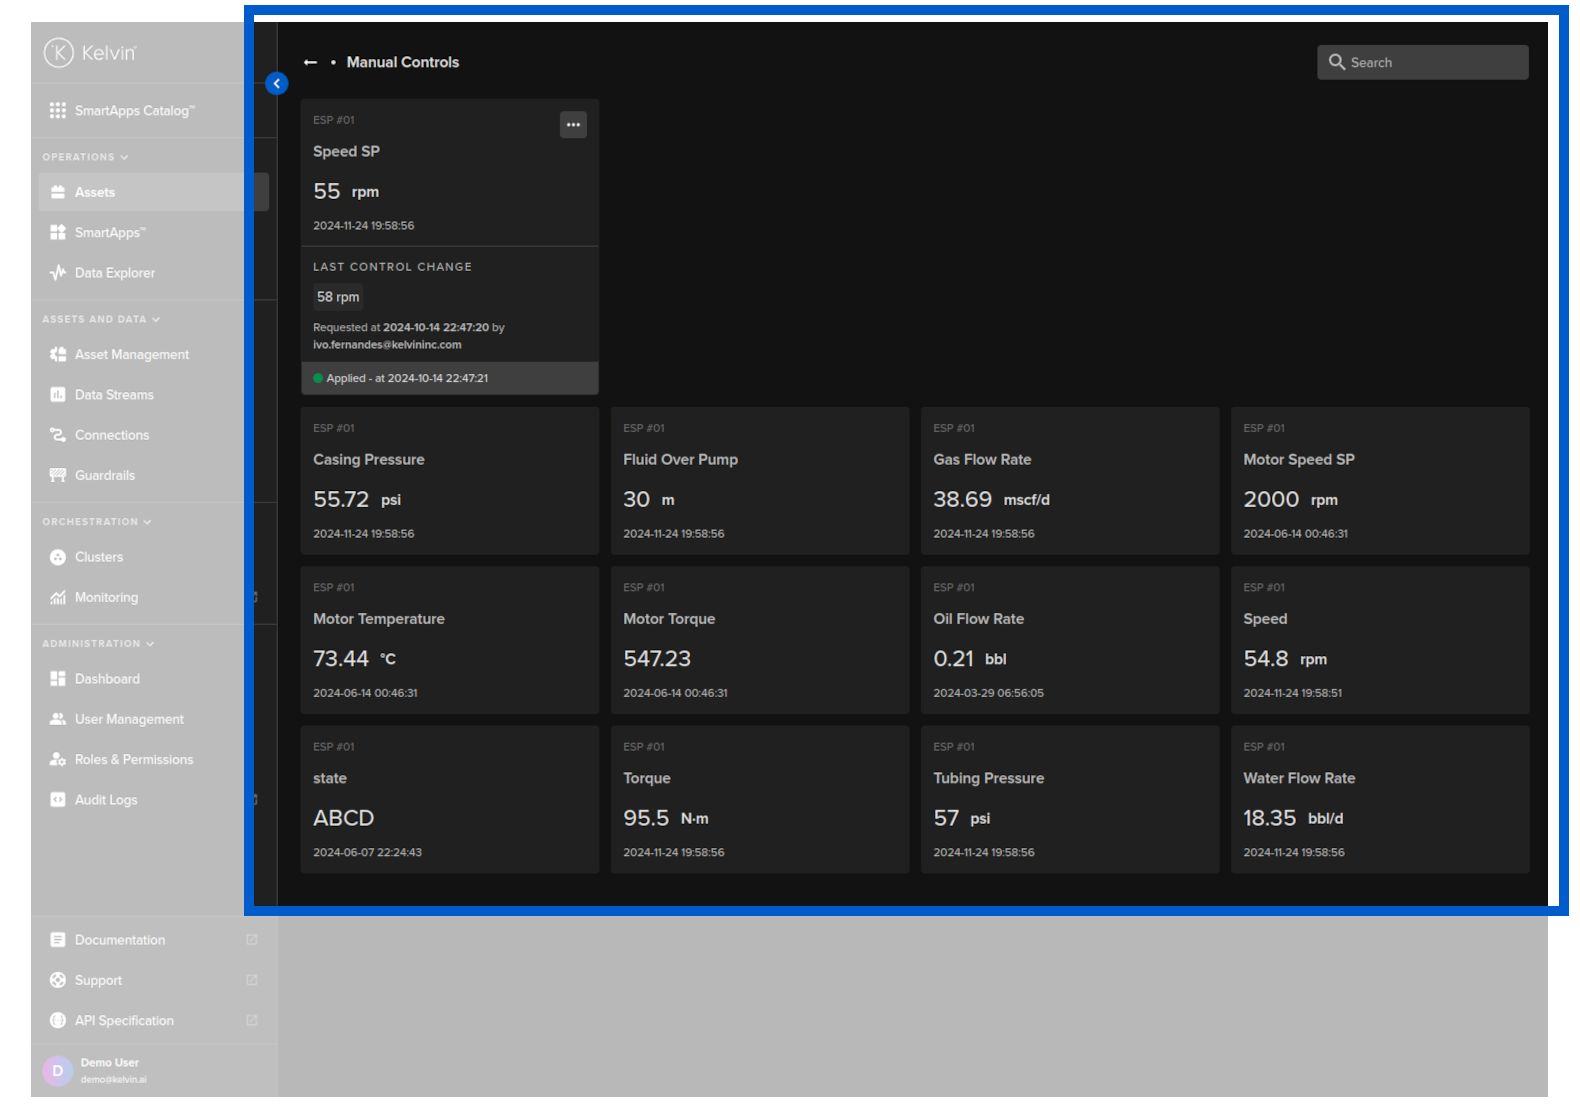
For the read-only Data Streams you will only see this information.
Change Values
For read-write Data Streams you will also see information about the last Control Change that has been performed and the status of that action. You can also send a new value to the Asset / Data Stream pair by clicking on the three dot button in the top right corner of the Data Stream card and select New Value.
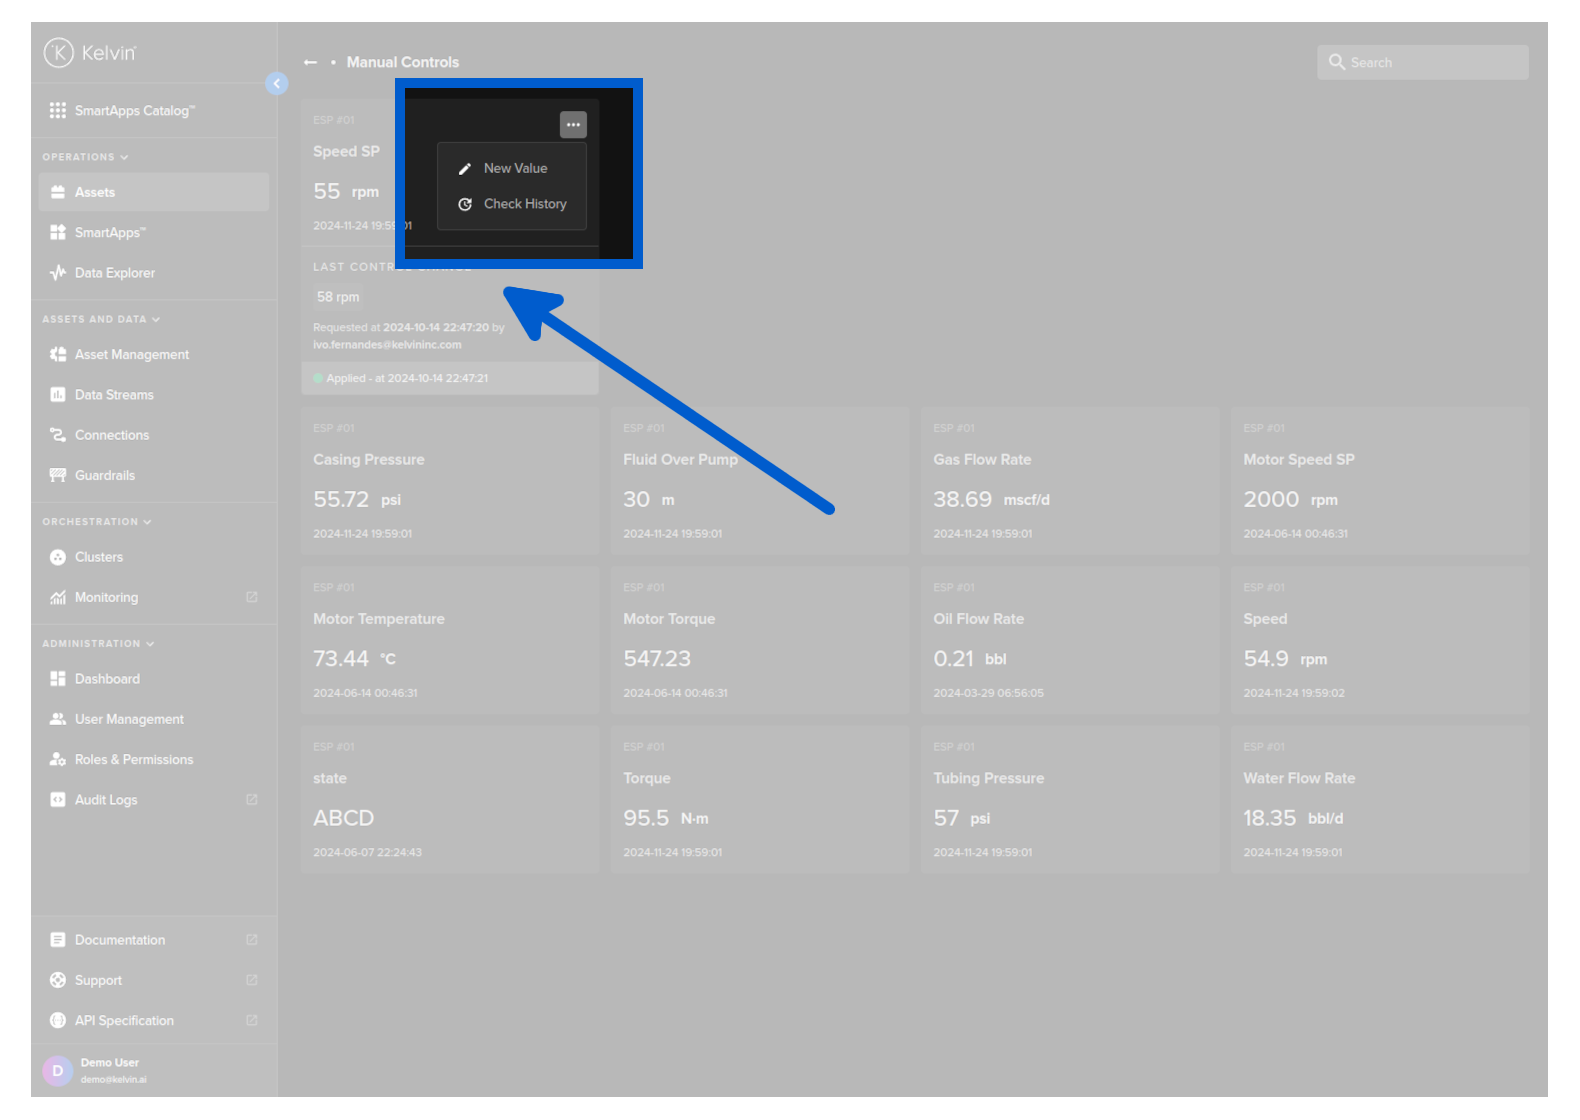
To change a Read/Write data value, click on the hamburger menu in the card containing the data value of interest and then click on the New Value option. A popup will appear where you can change the value and if necessary you can change the default control change parameters as well in advanced settings (such as how many times to retry writing to the asset when there is a failure or timeout).
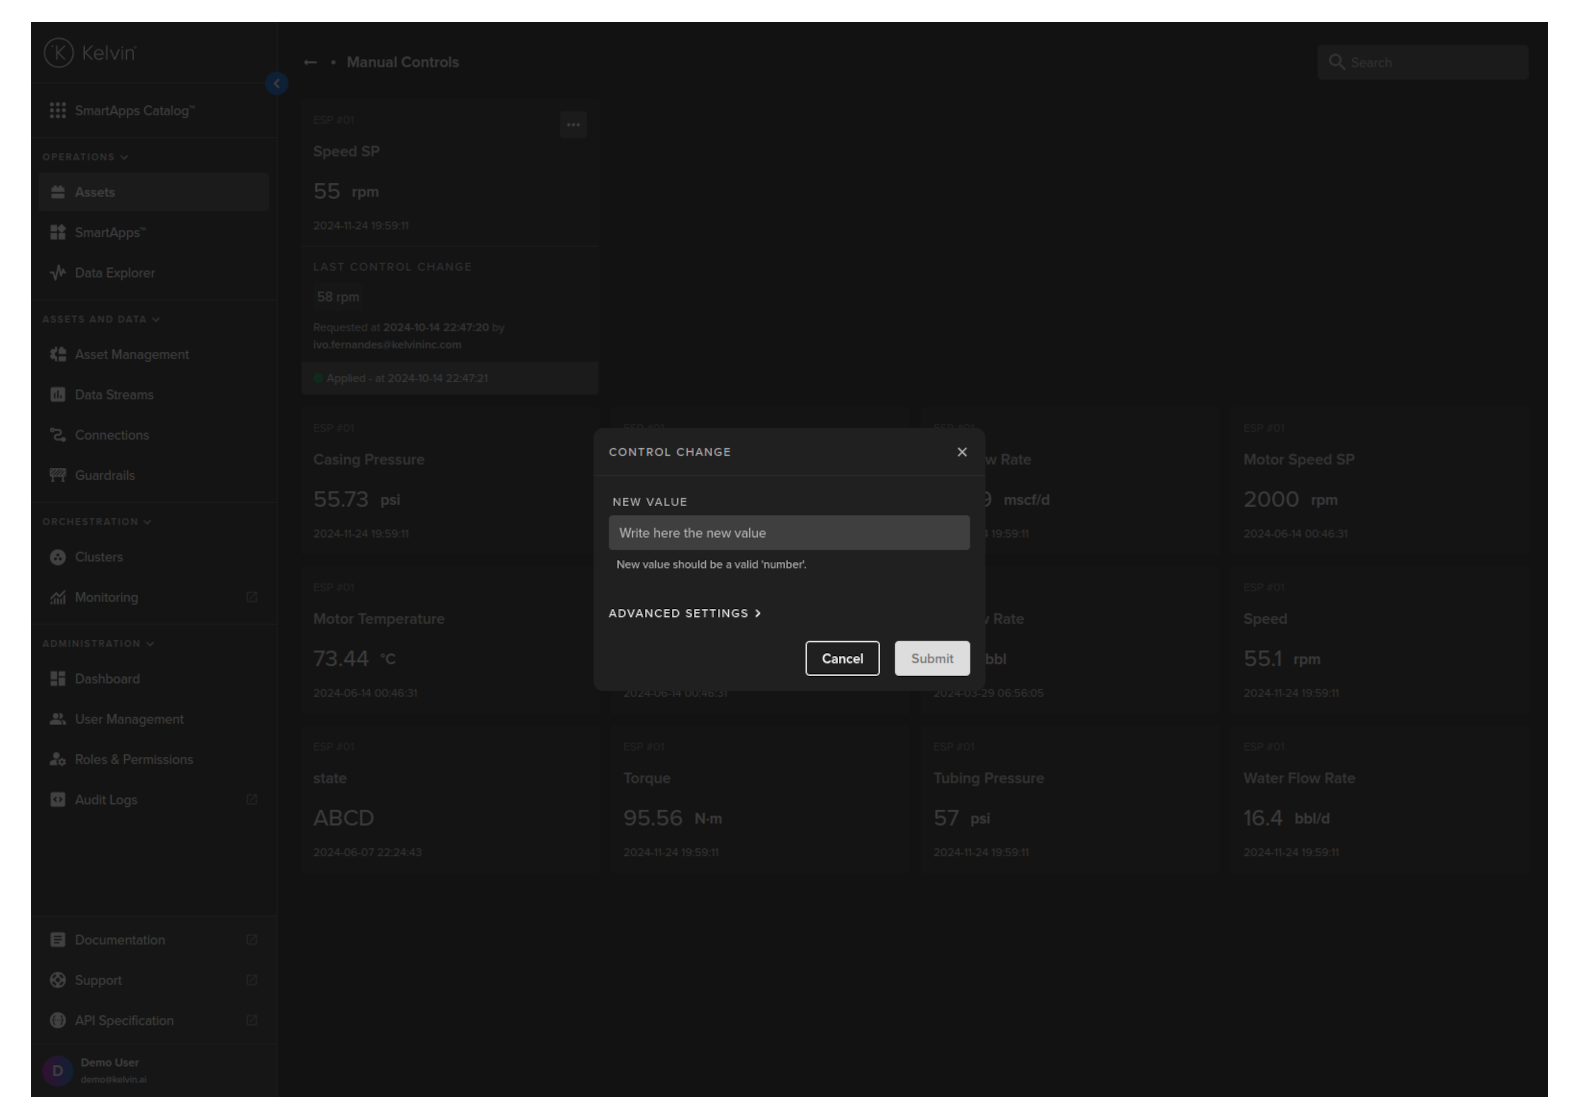
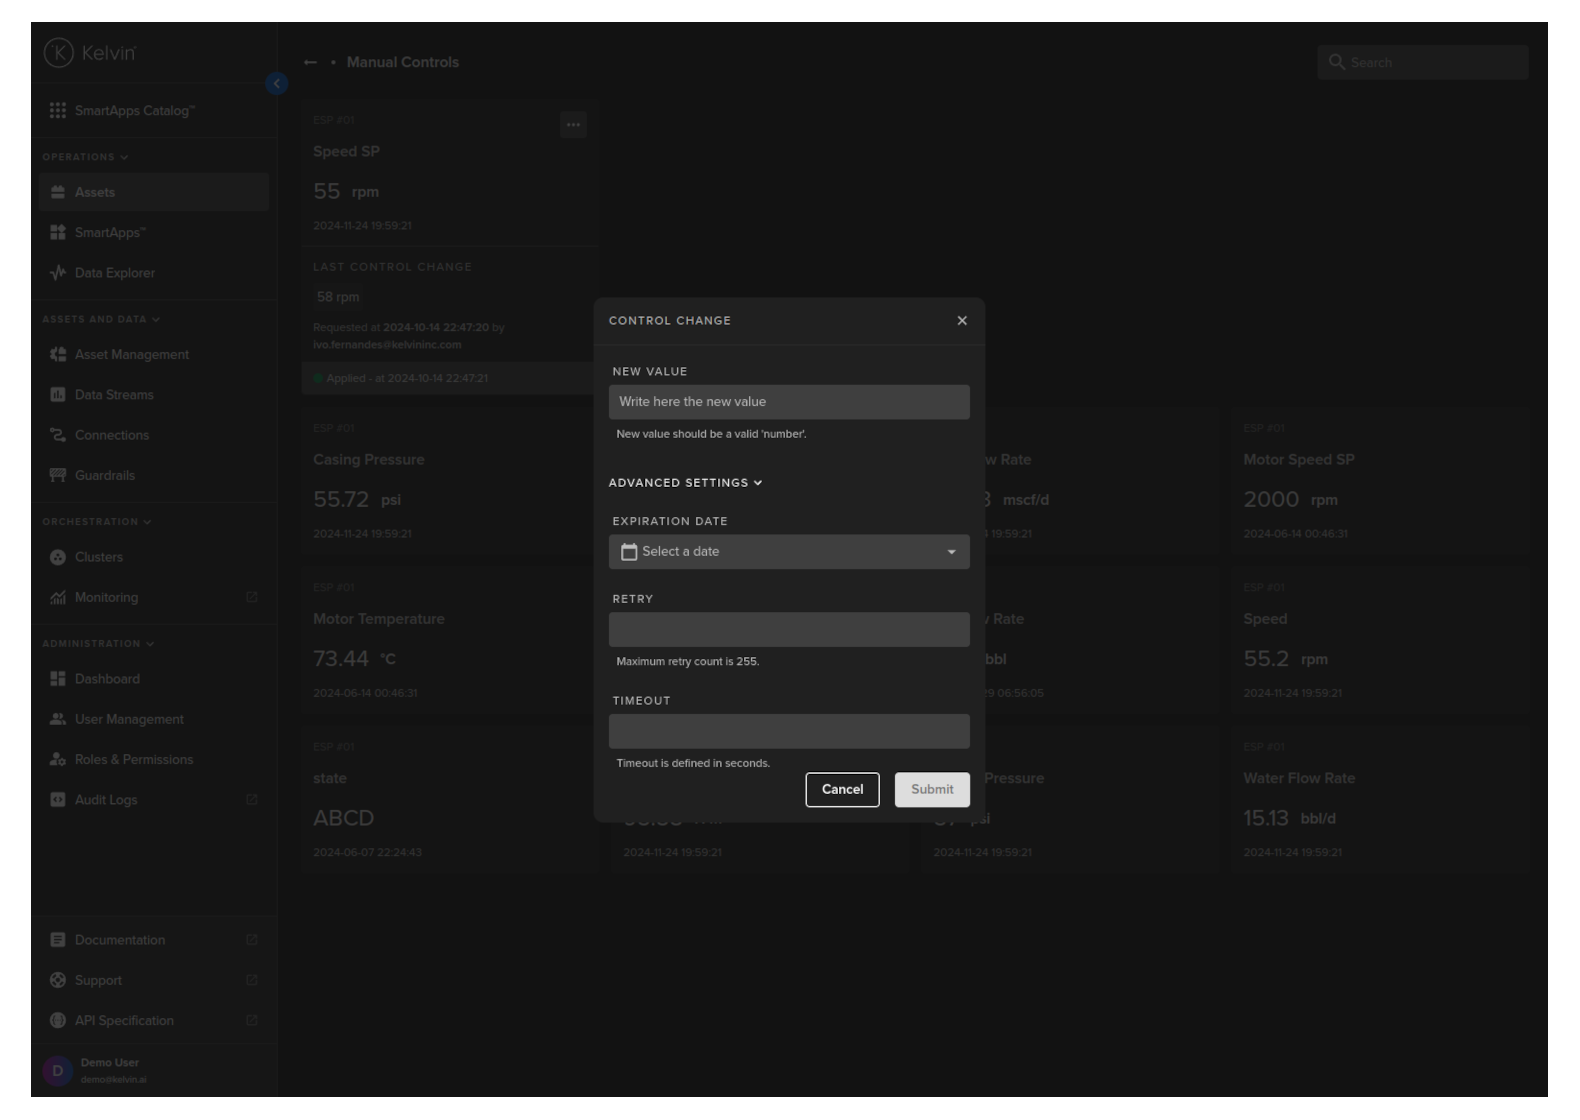
There are also some advanced settings which will override the default control change settings.
Unless instructed these settings normally do not need to be changed from the defaults.
The Control Change manager directly sends new values to the asset and waits for confirmation from the regular readings by the Connection. If discrepancies are found between the new values and the regular readings, the manager will repeatedly attempt synchronization until consistency is achieved or a failure is determined, based on the advanced settings.
| Title | Description |
|---|---|
| Expiration Date | This is the final date when all attempts to change the value is abandoned |
| Retry | How many times to retry writing the new value before giving up |
| Timeout | How long to wait and monitor the Connection values for synchronization before trying to write to the asset again |
Change History
To see the history of Control Changes for a particular Asset / Data Stream pair, click on the hamburger menu in the card containing the data value of interest and then click on the Check History option. A side bar will appear on the right showing you the information of the full history of Control Changes.