Kelvin SmartApps™ Monitoring
On this page you will learn about the concept and important features of Kelvin SmartApps™ for Operations Engineers .
Dashboard
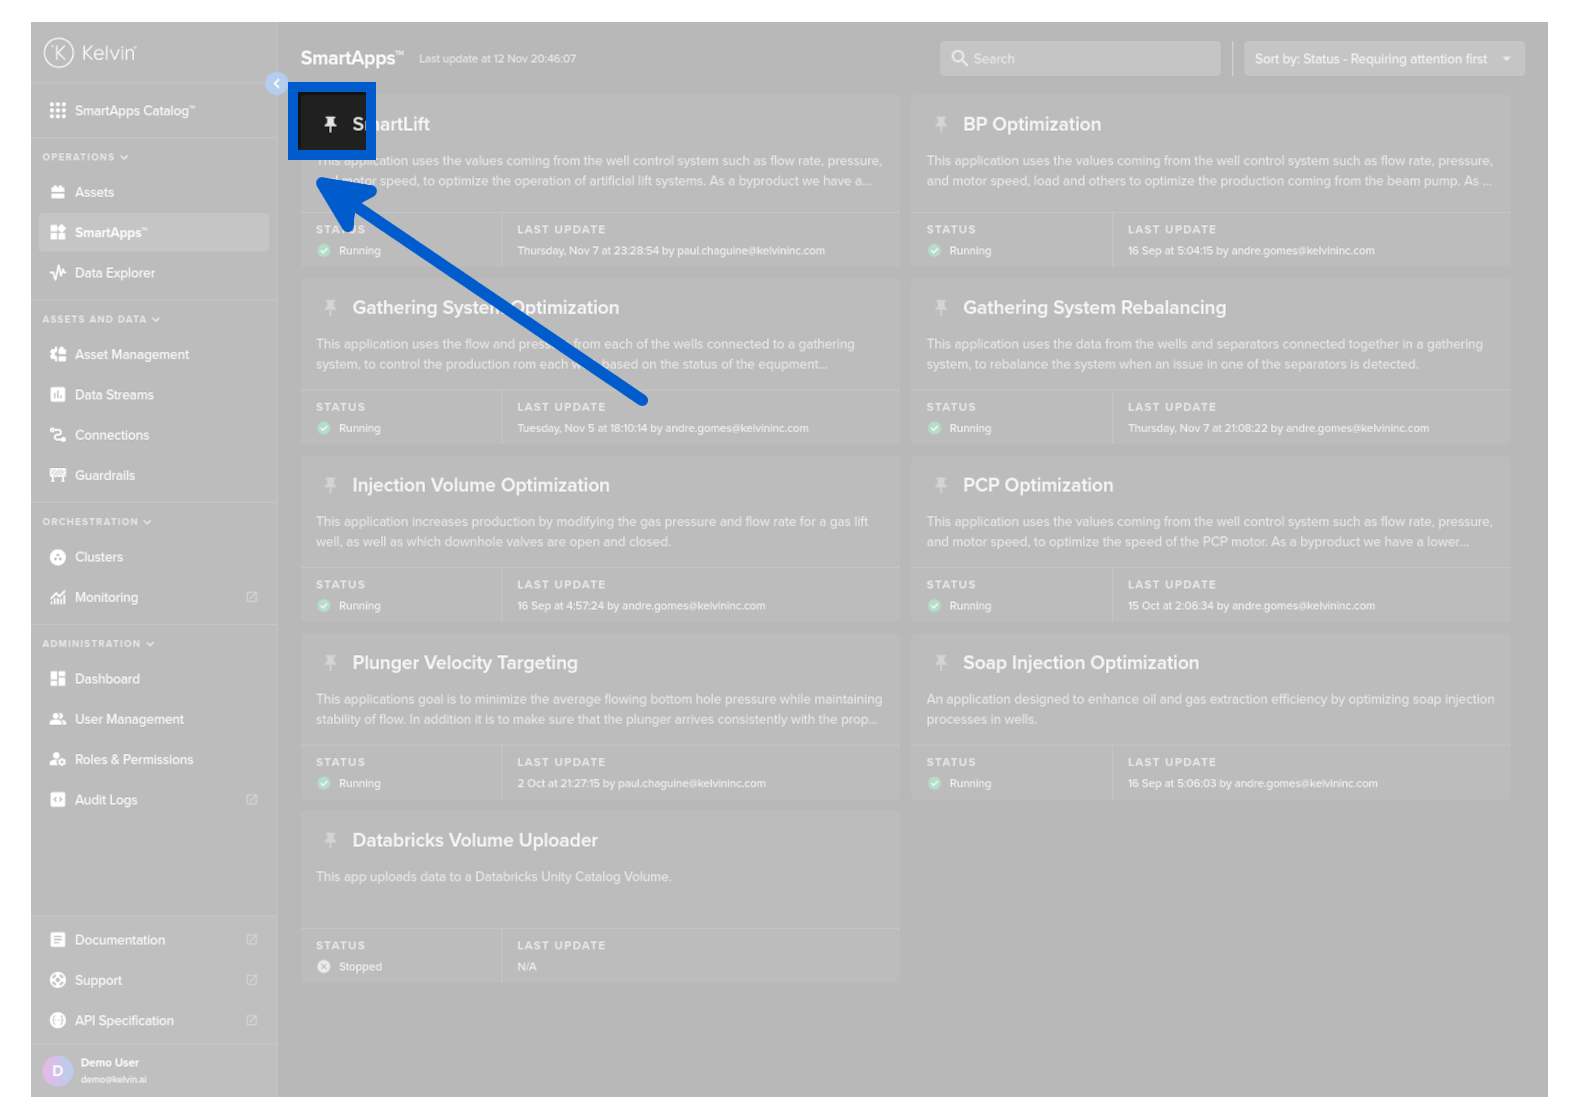
When you go to Kelvin SmartApps™ dashboard page you will see all the Kelvin SmartApp™ stored in the App Registry.
For any application that have been deployed as Kelvin SmartApps™, you will see the status, how many Assets that have been deployed and the total number running status and its last update.
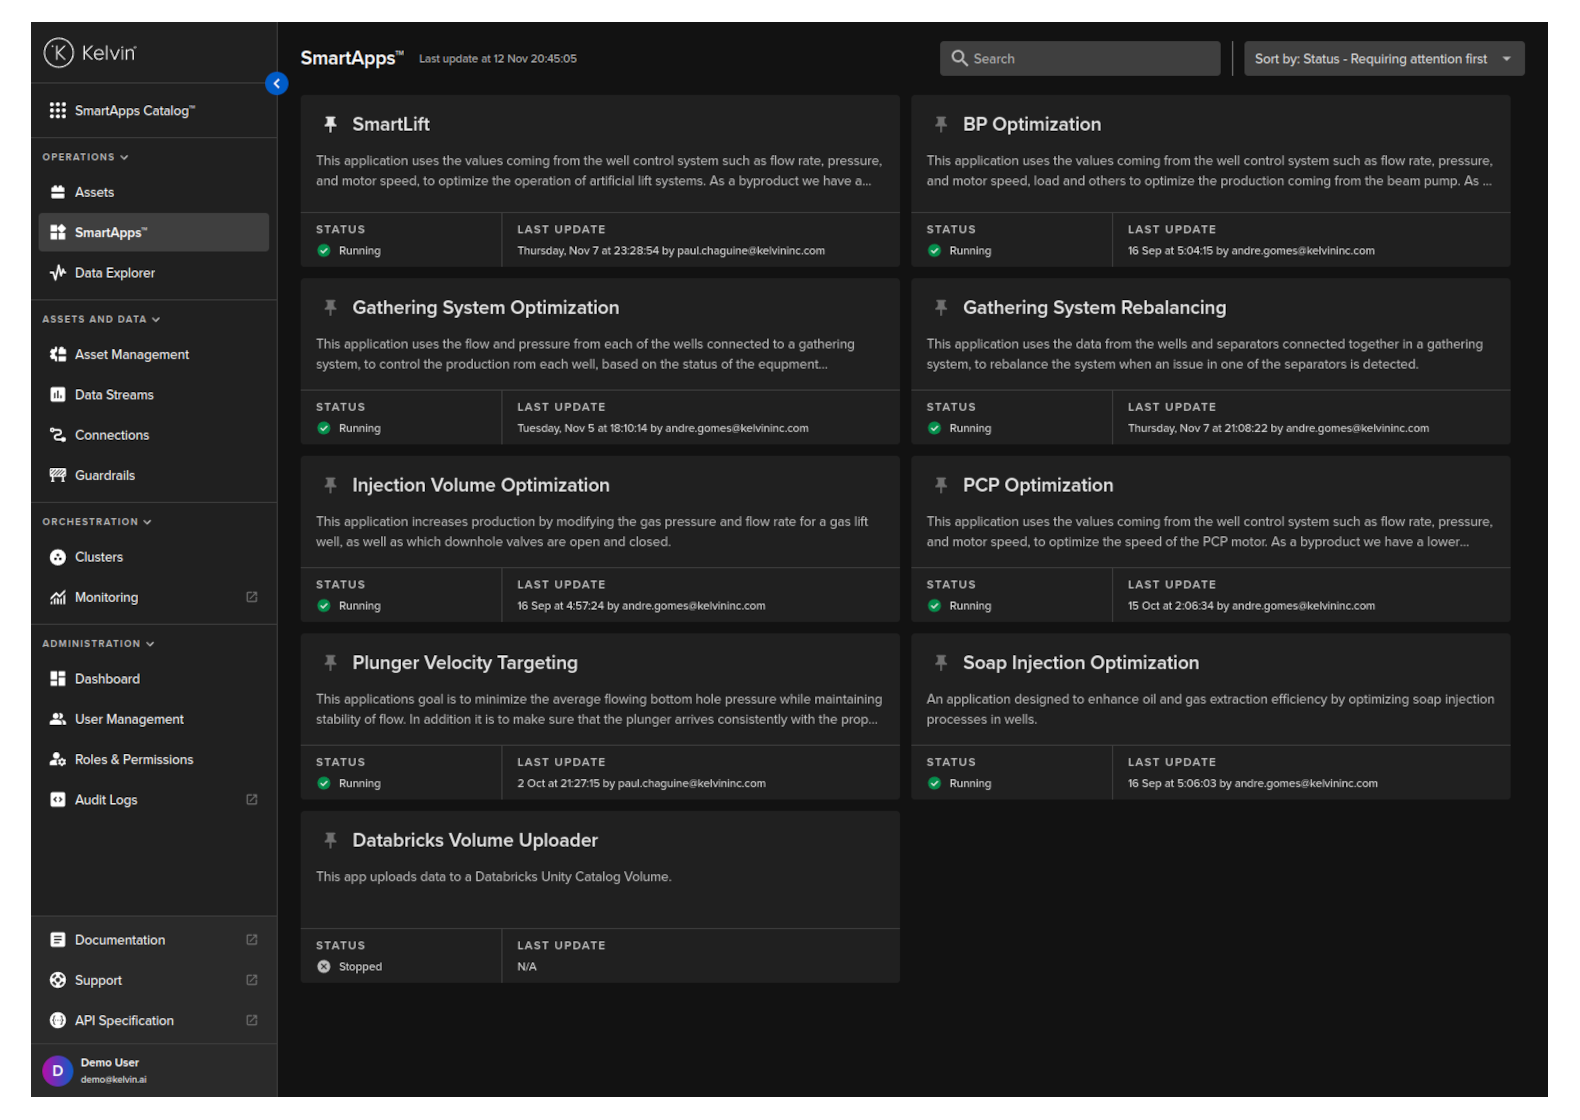
Each Kelvin SmartApps™ is represented by a card style information display.
| Card Section | Description |
|---|---|
| Title / Name | This is the title and the name of the Kelvin SmartApp™ in the App Registry. You can click on this to go into Kelvin SmartApps™ details page related to this Kelvin SmartApp™. |
| Status | This will tell you the overall status of all Workloads deployed under Kelvin SmartApps™ procedure. If any need attention, this will change red and alert the user that attention is required. |
| Running On | This will tell you how many Assets have been deployed using Kelvin SmartApps™ method and associated with the Kelvin SmartApp™. |
| Last Update | This will show you the date of the last action taken on Kelvin SmartApps™, whether that be a new deploy, an update to an existing deploy or an undeploy of an Asset. |
You have a few basic options to customize your view of Kelvin SmartApps™ cards.
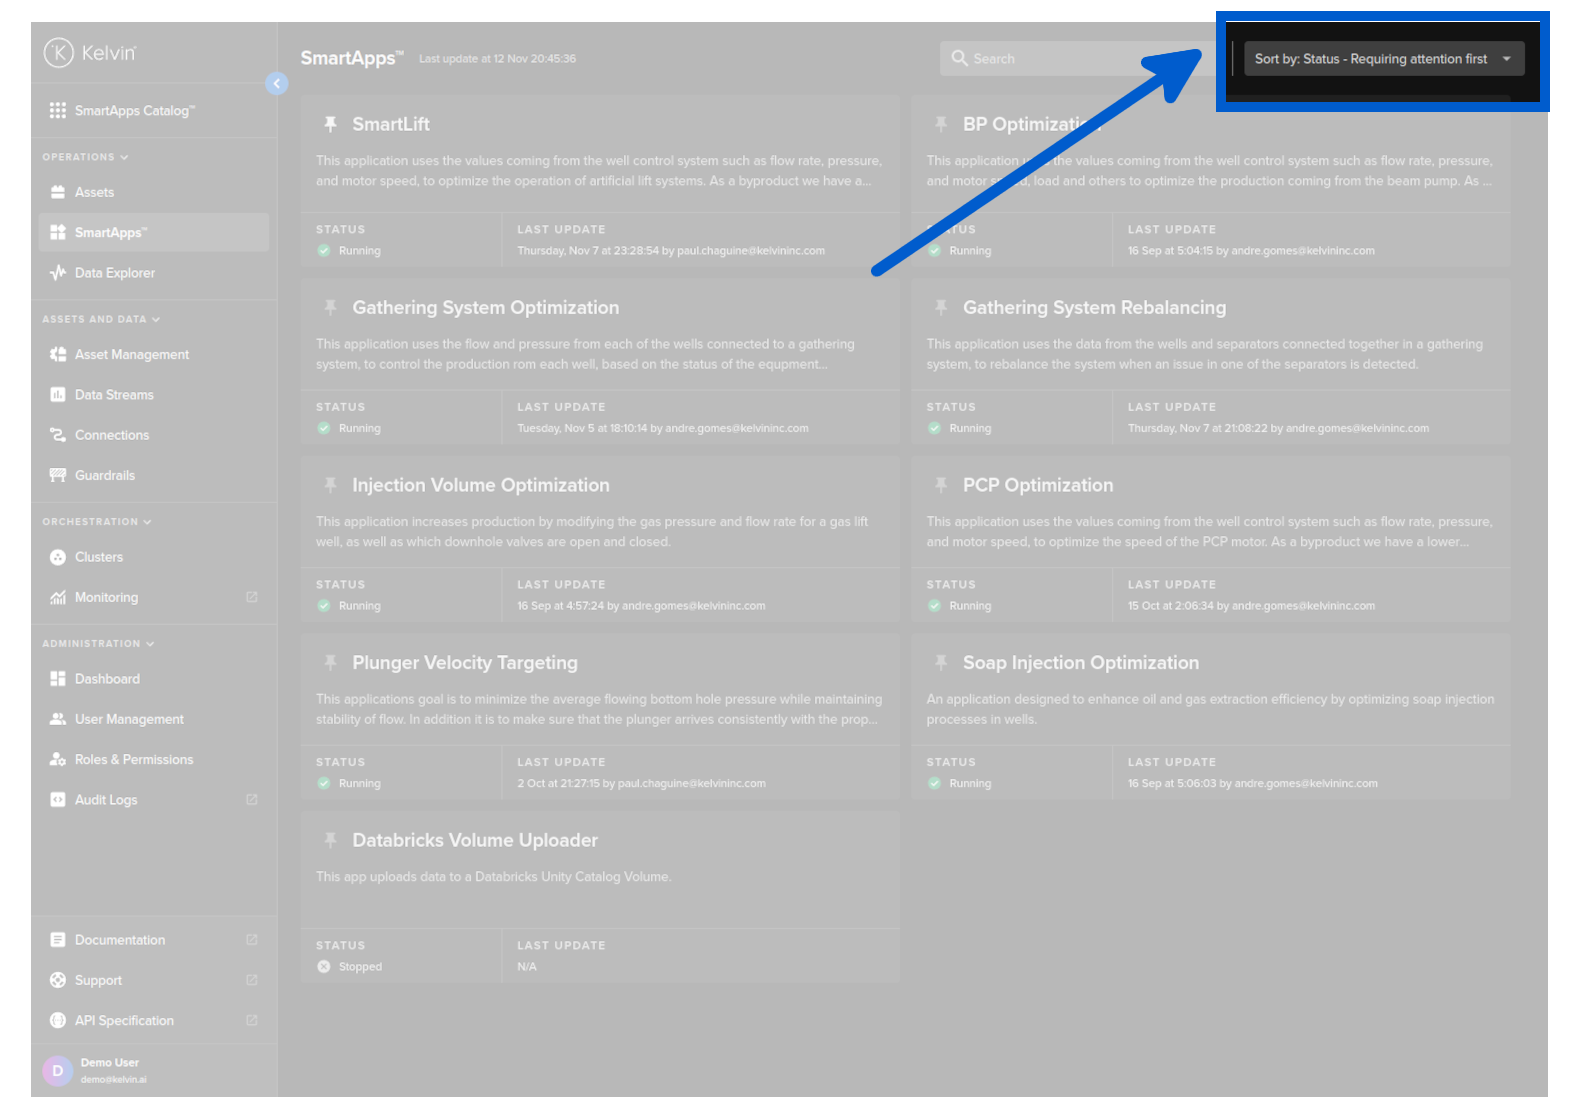
You can also sort Kelvin SmartApps™.
| Sort Option | Description |
|---|---|
| Status - Requiring attention first | This will put all Kelvin SmartApps™ that have any reported issues at the top. |
| Last updated first | This will put Kelvin SmartApps™ that have been created or updated in any way at the top. |
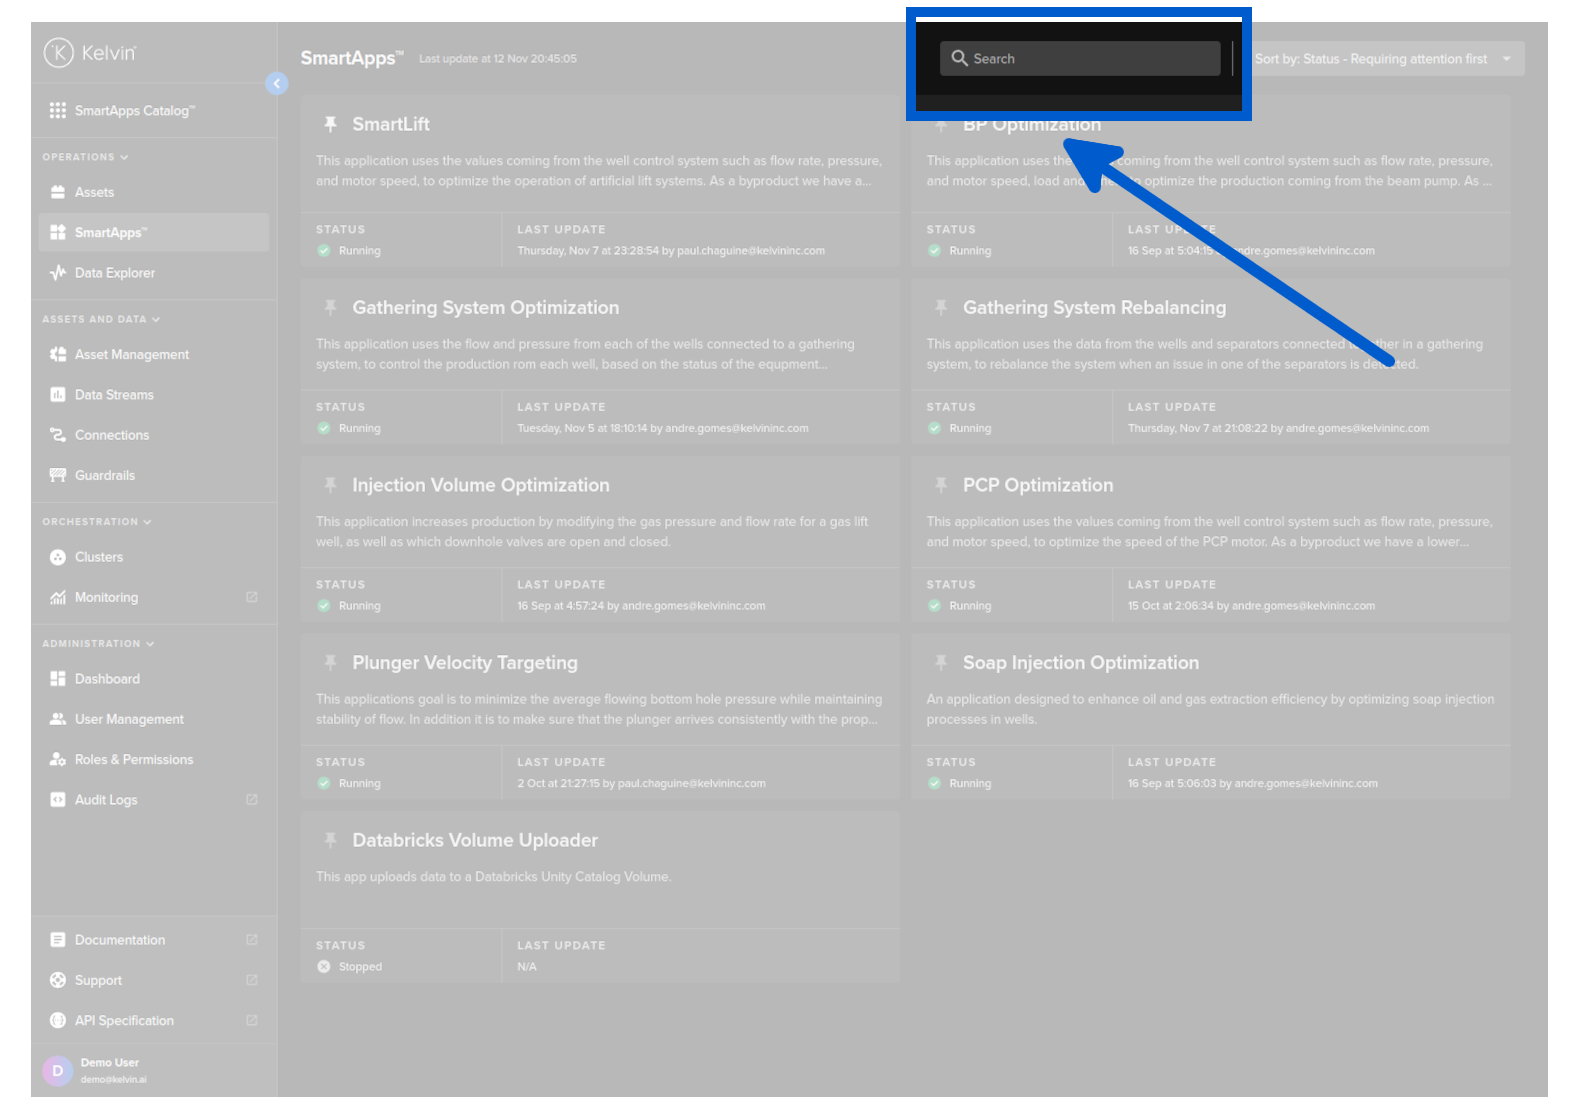
When dealing with large quantities of Kelvin SmartApps™, you can search for Kelvin SmartApps™ of interest.
This is dynamic and will update the list as you type.
The search feature is not case-sensitive and will search for any matches anywhere in Kelvin SmartApps™ name, i.e. it does not have to be at the beginning of the name.
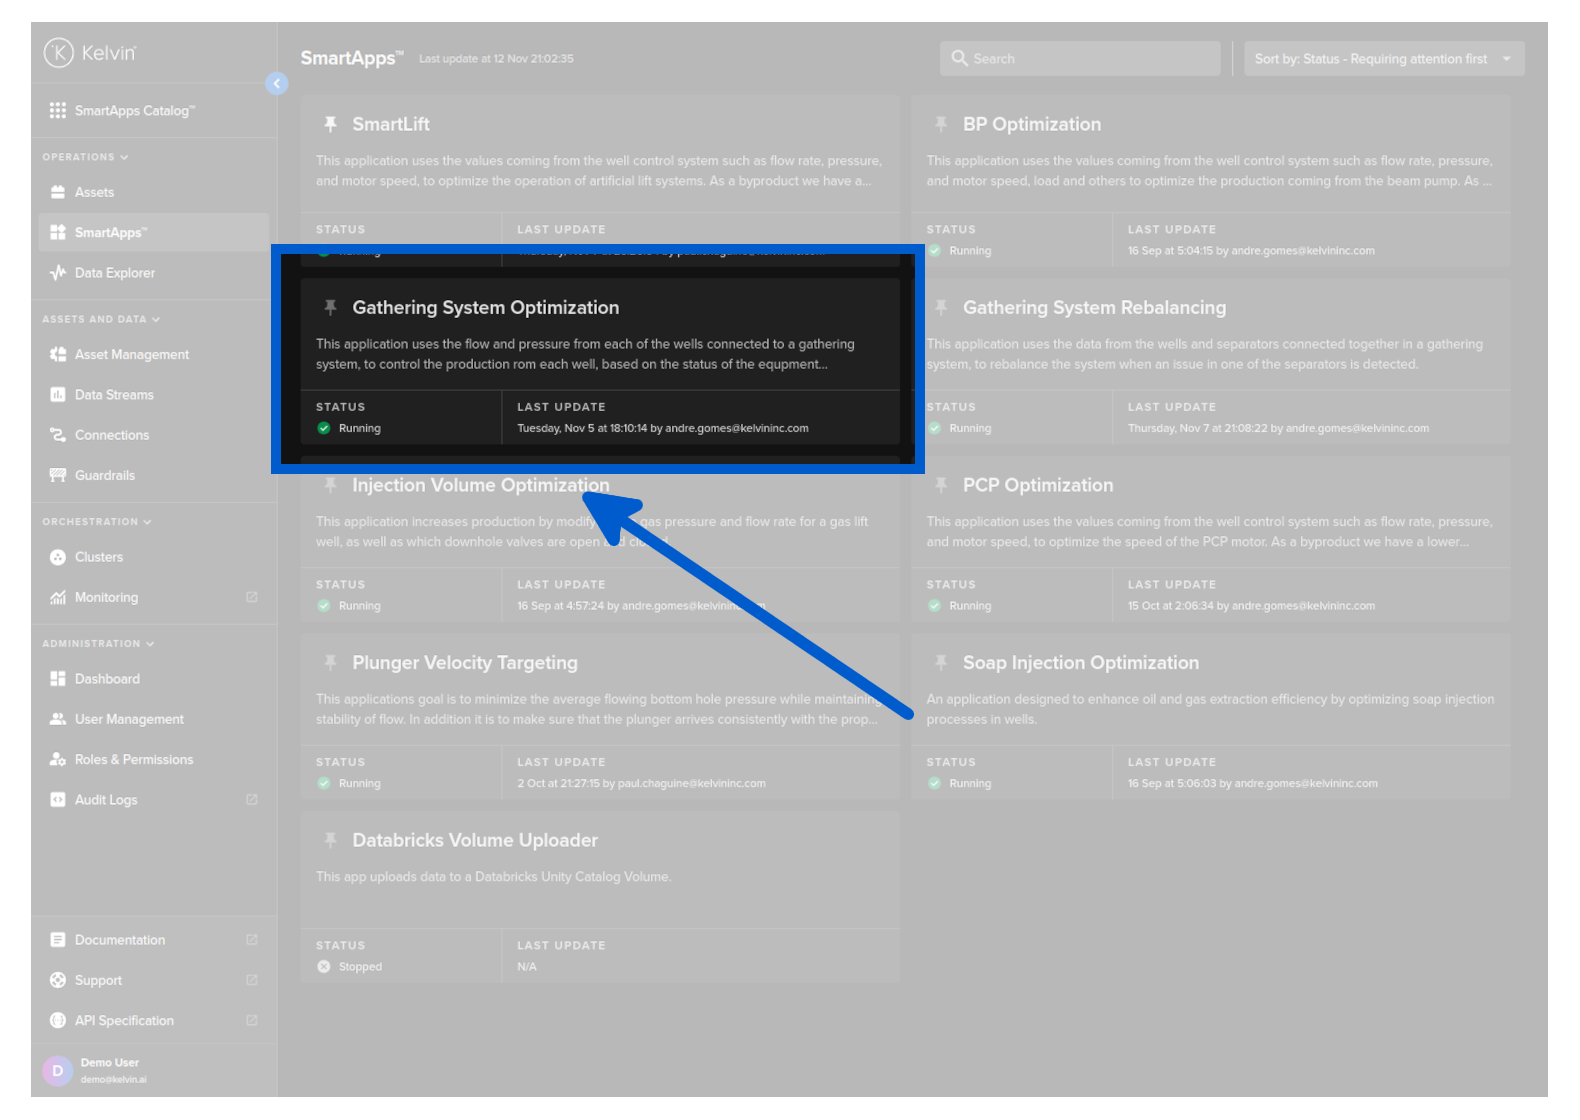
You can keep important Kelvin SmartApps™ pinned to the top of the page simply by clicking on the pin icon.
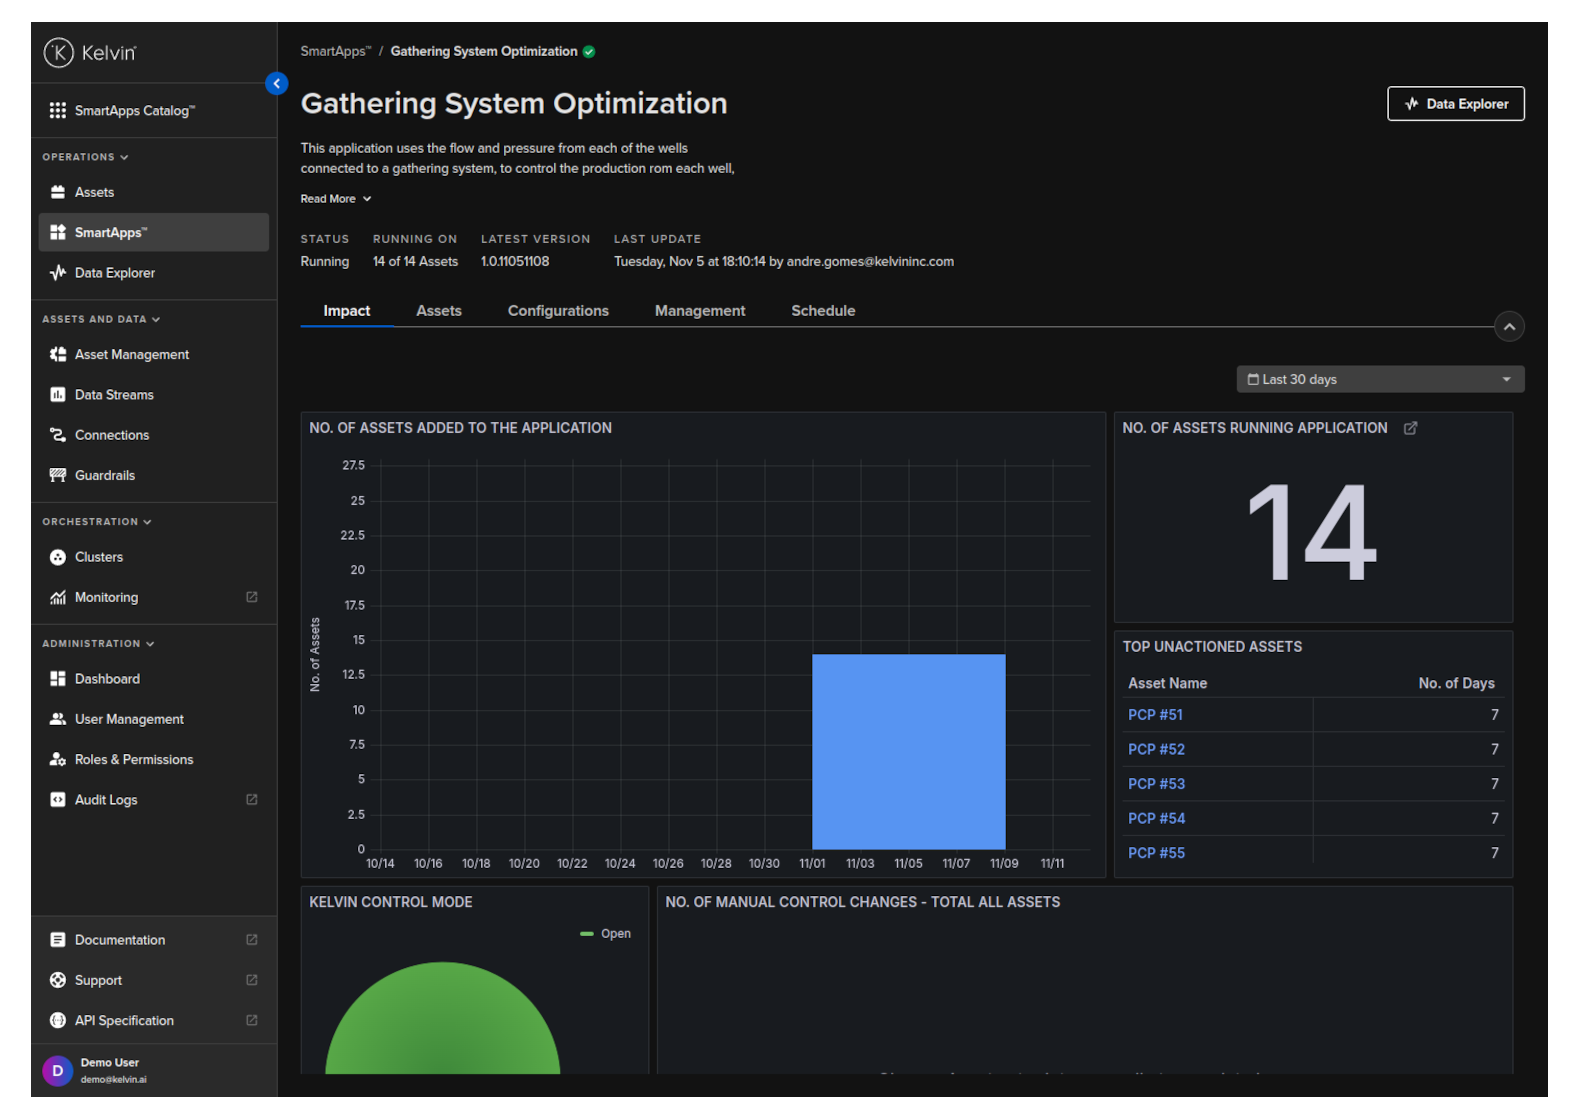
Kelvin SmartApps™ Details Page
When you click on a Kelvin SmartApp™ card you will see an overview of the Kelvin SmartApp™ impact metrics on all the Kelvin SmartApp™ Assets.
In this section you have the option to;
- See a full summary of the impact the Kelvin SmartApp™ has on the Assets
- See a full list of all Assets deployed with this Kelvin SmartApp™.
- Monitor and Change configurations for one or more Assets.
- Deploy, control and manage the Assets operations at the edge.
In this How To page we will focus on monitoring the Assets deployed with this Kelvin SmartApp™ in the first tab.
Kelvin SmartApps™ Status & Details
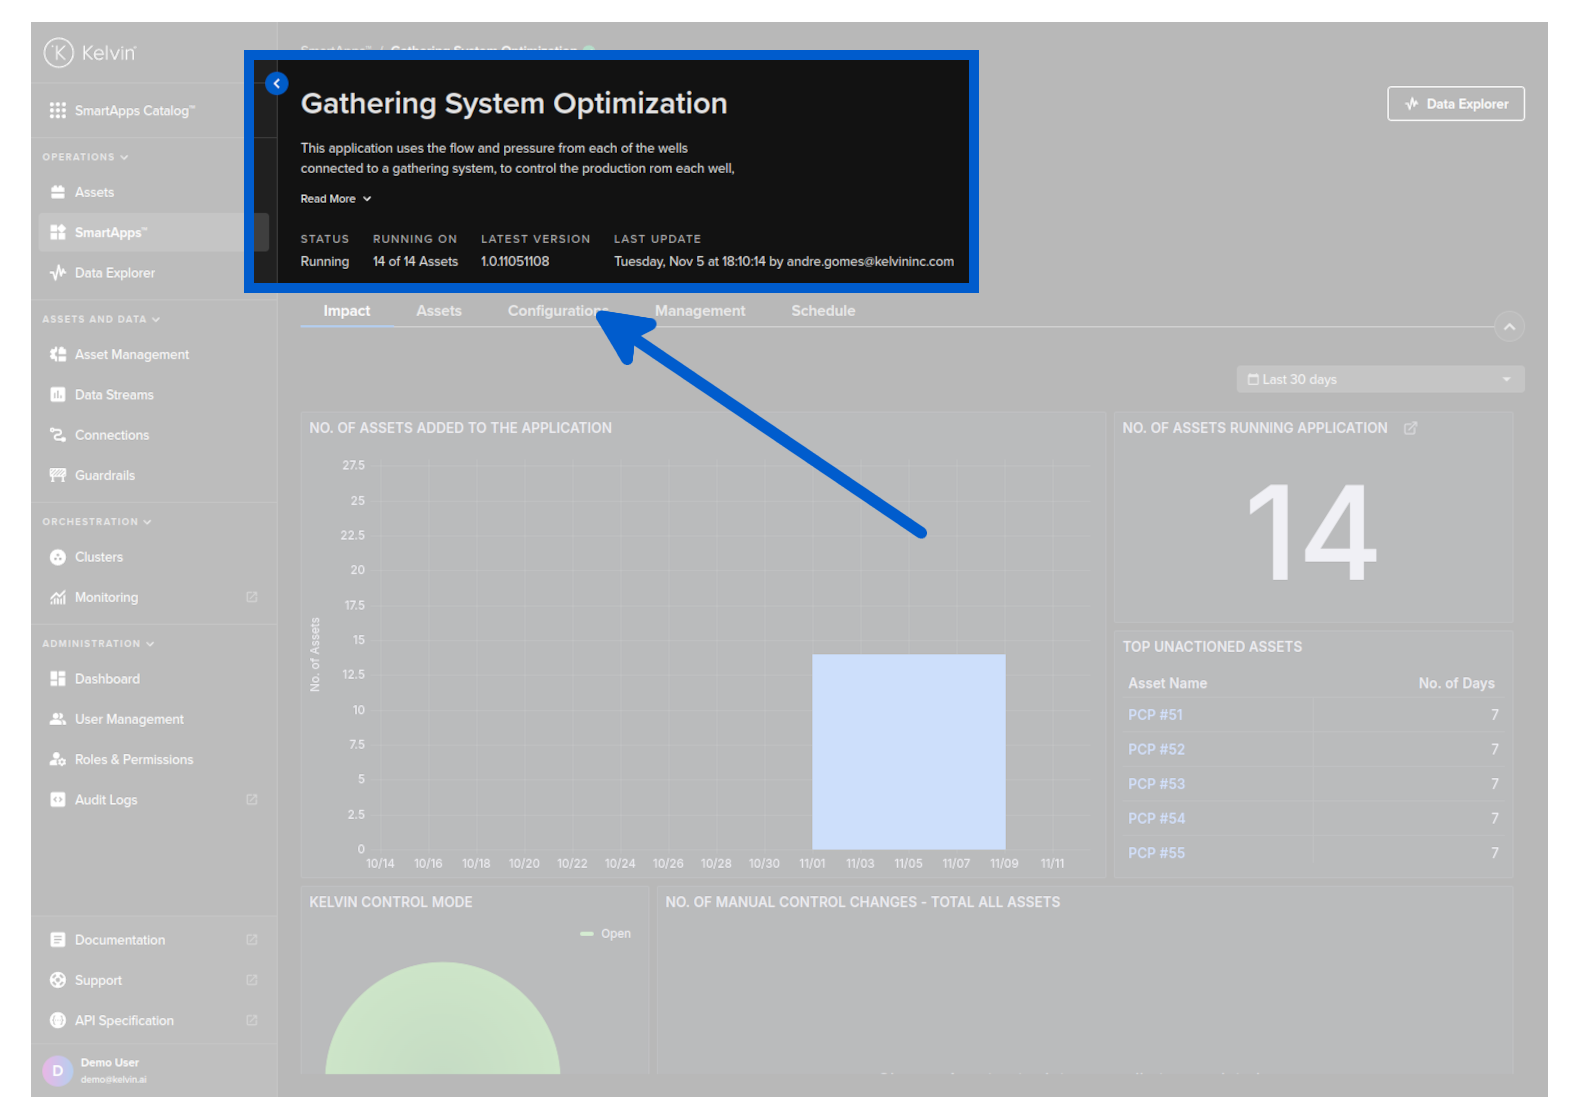
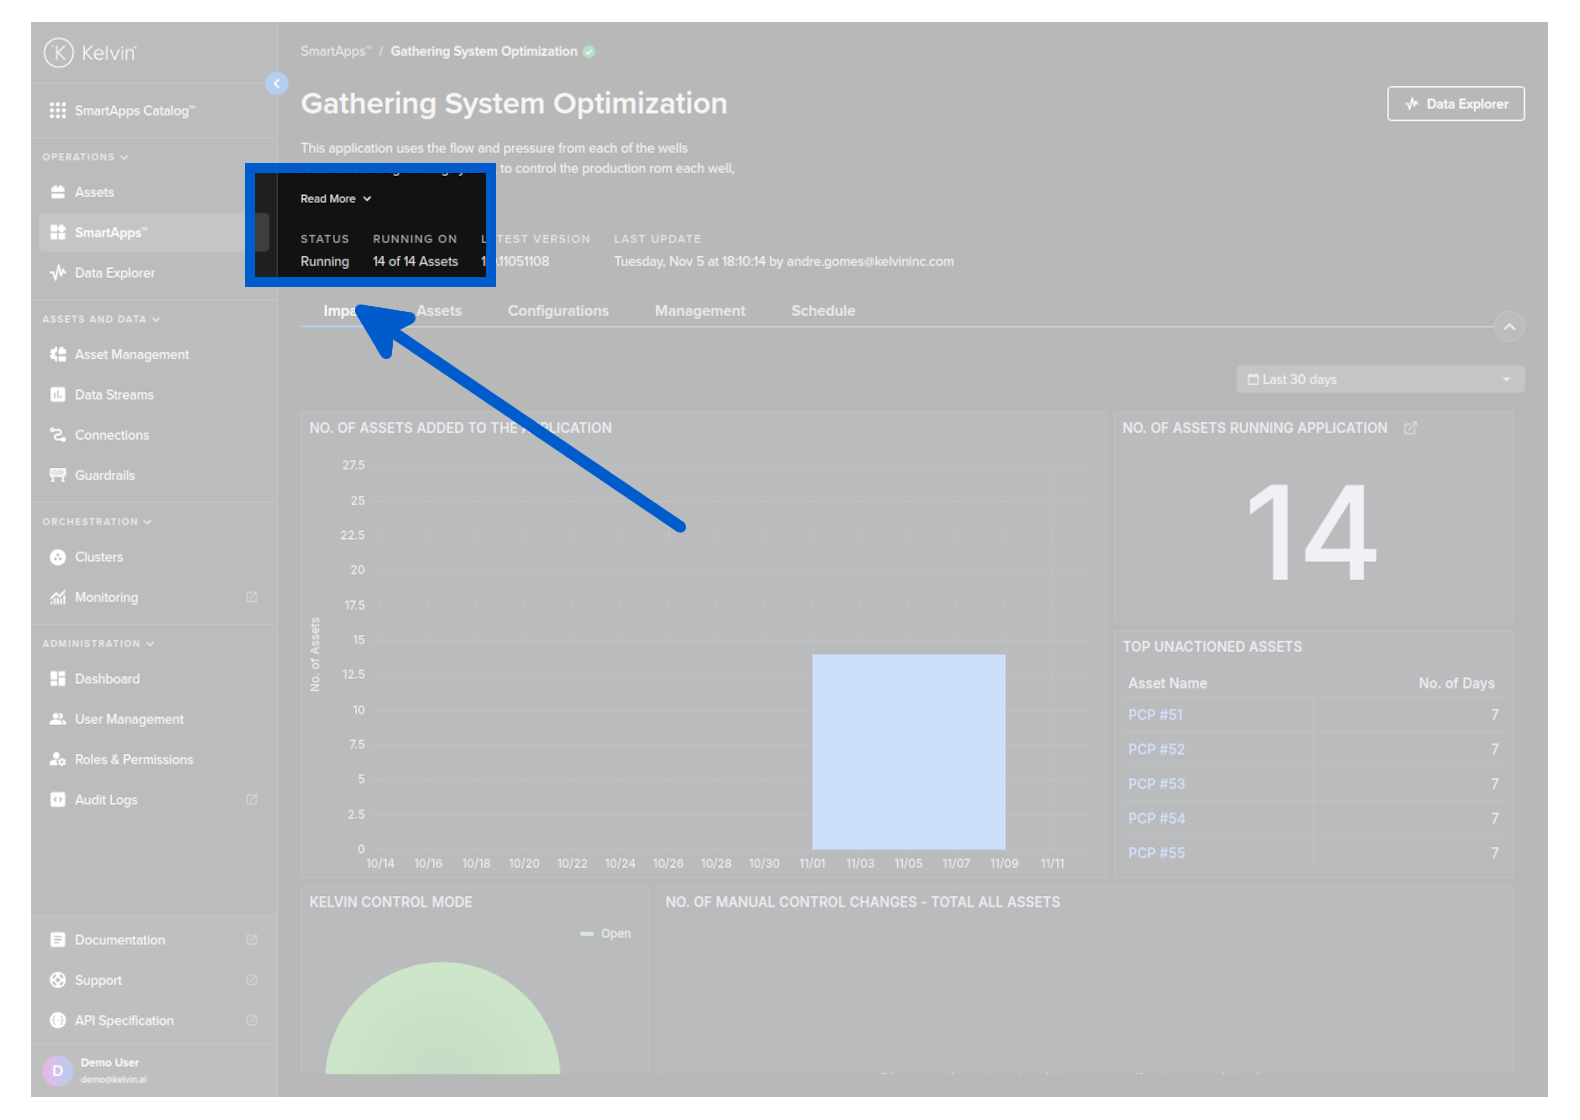
At the top you have an overview of the status and total running Asset's. It also gives you information about the Kelvin SmartApp™, like the latest Kelvin SmartApp™ version available for Kelvin SmartApp™ and when the last update occurred for the Kelvin SmartApp™.
You can hide the information on the top to give as much screen real estate space to the Asset table.
There are many options available for viewing and accessing key Kelvin features.
You can quickly see the status of all your Assets and whether any Assets are currently not being processed by the Kelvin SmartApp™.
See when each Assets had its last data update applied and a summary of the latest for all Assets.

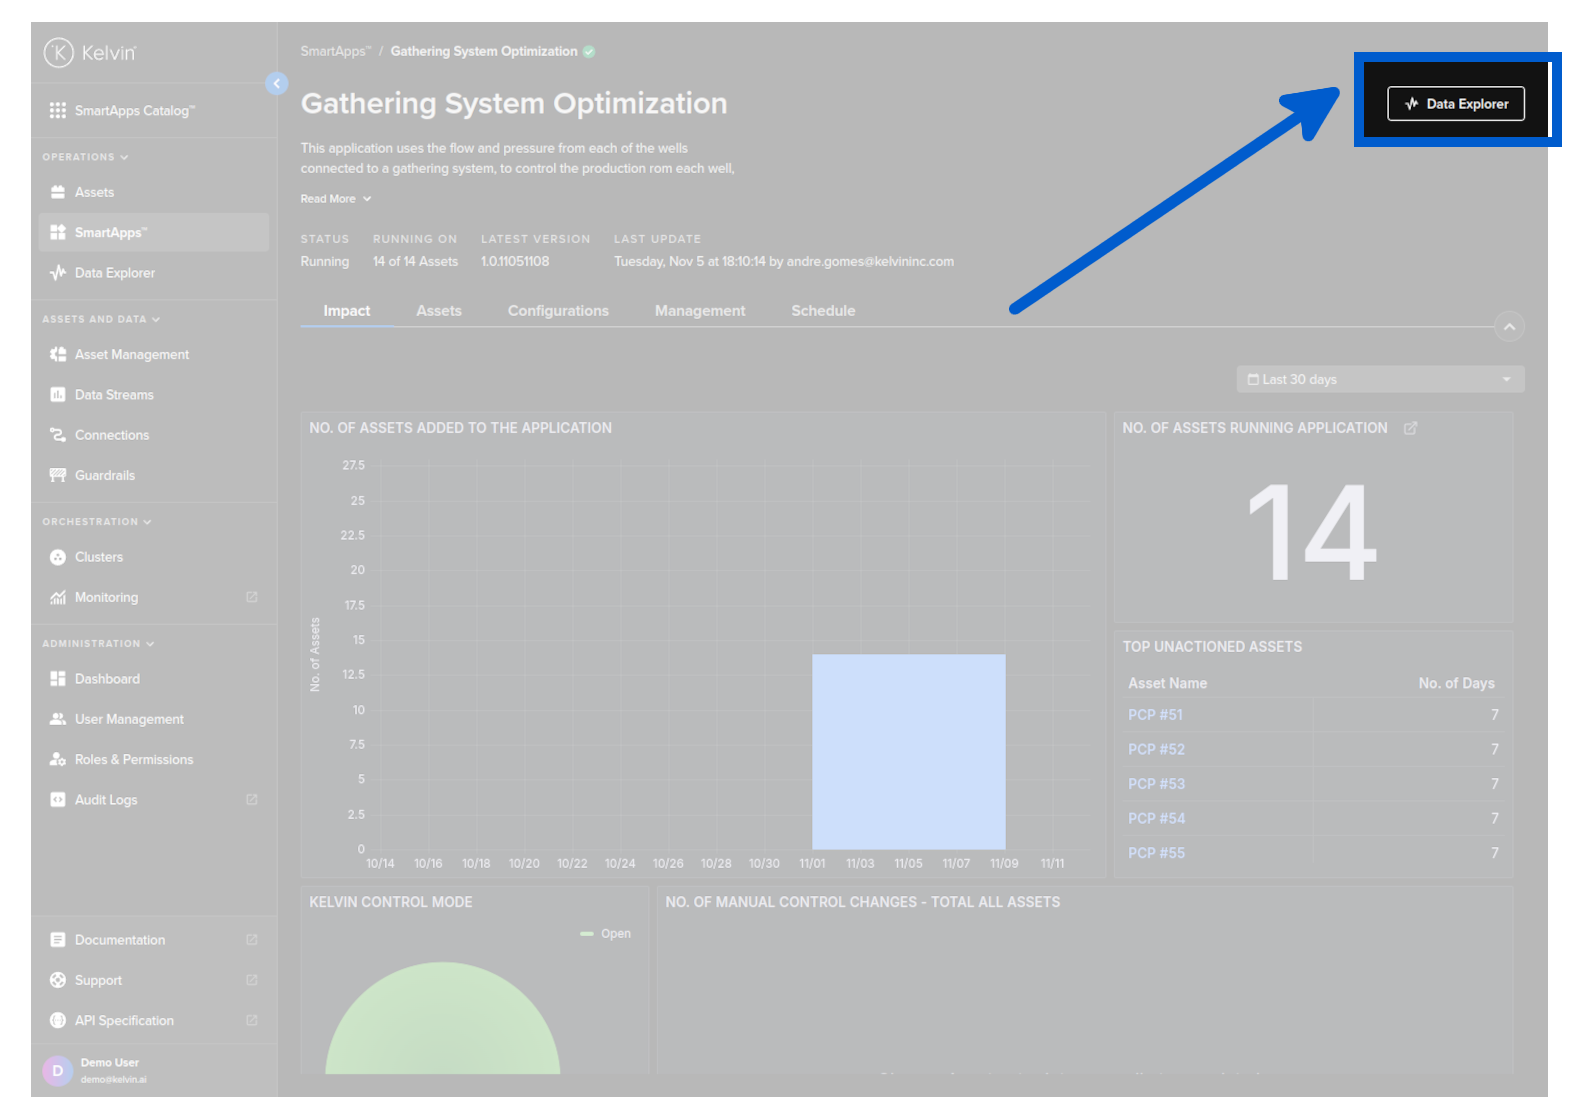
Data Explorer is setup so that you can see or quickly switch between all your Assets for the Kelvin SmartApp™.
To go to this specialized Data Explorer, either click on the asset name to immediately open that asset in Data Explorer or click on Data Explorer at the top right hand corner and then select the Assets you want to view.
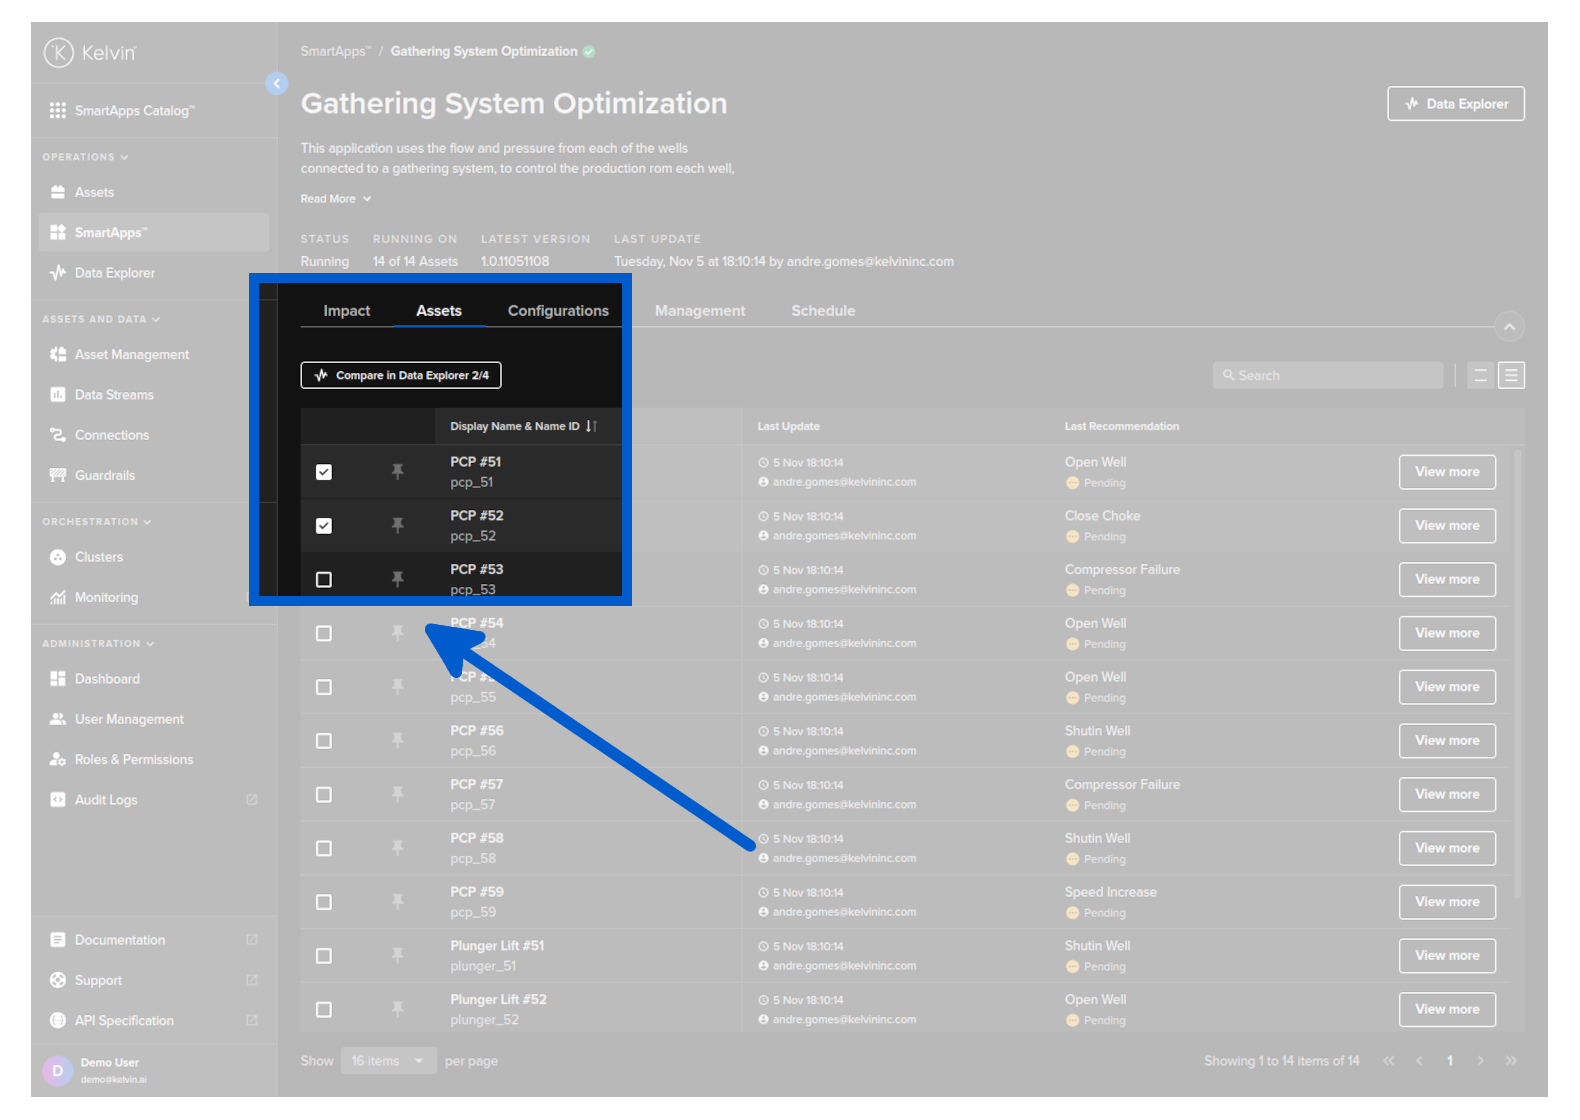
Or you can select the Assets tab, find the Asset in the list that you want to view, then click on the Asset name to open the Data Explorer page for that Asset.

Or to open a multi-Asset Data Explorer page, select the wanted Assets (maximum 4) and click on Compare in Data Explorer button.
You can also change to a multi-asset Explorer page when viewing a single Asset on the page through the Data Source options.
Asset Status & Details
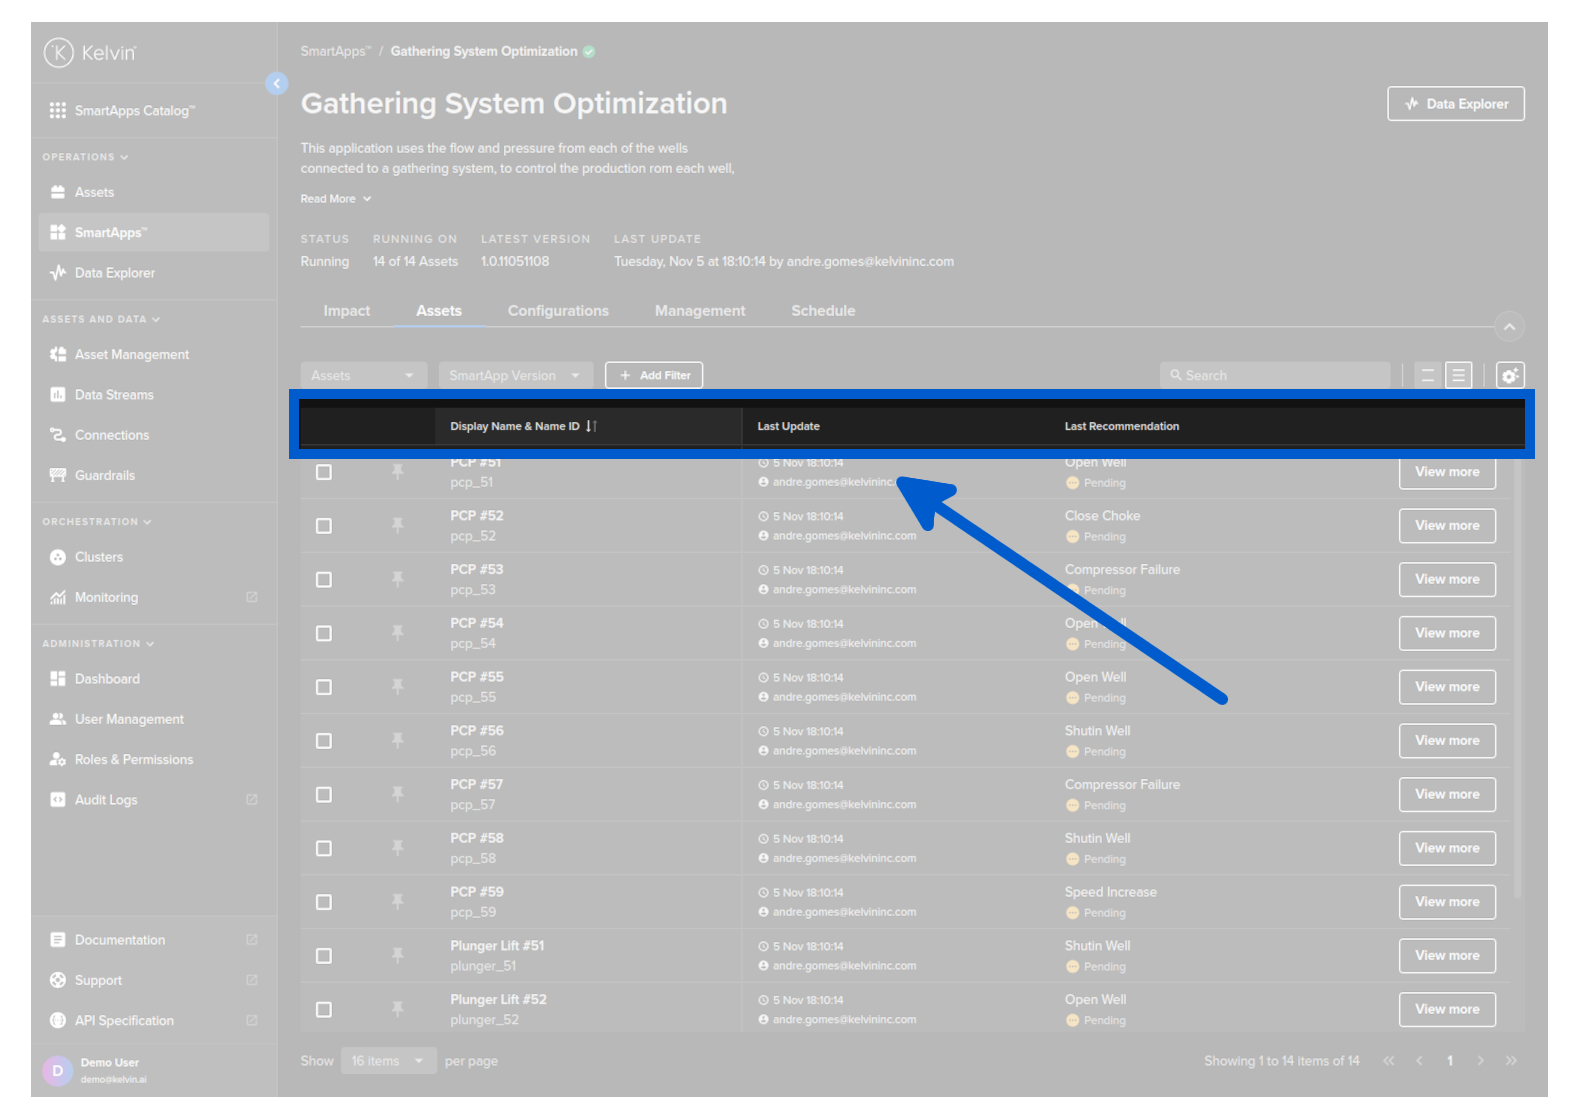
The Asset table itself uses Kelvin's asset-centric table which incorporates many Kelvin features such as Recommendations and Control Changes so that you can monitor and make decisions about your Assets directly from here.
You can sort the table rows simply by clicking on the header name. Clicking it will cancel the other sorts in other headers and each click will rotate between ascending, descending and no sorting.
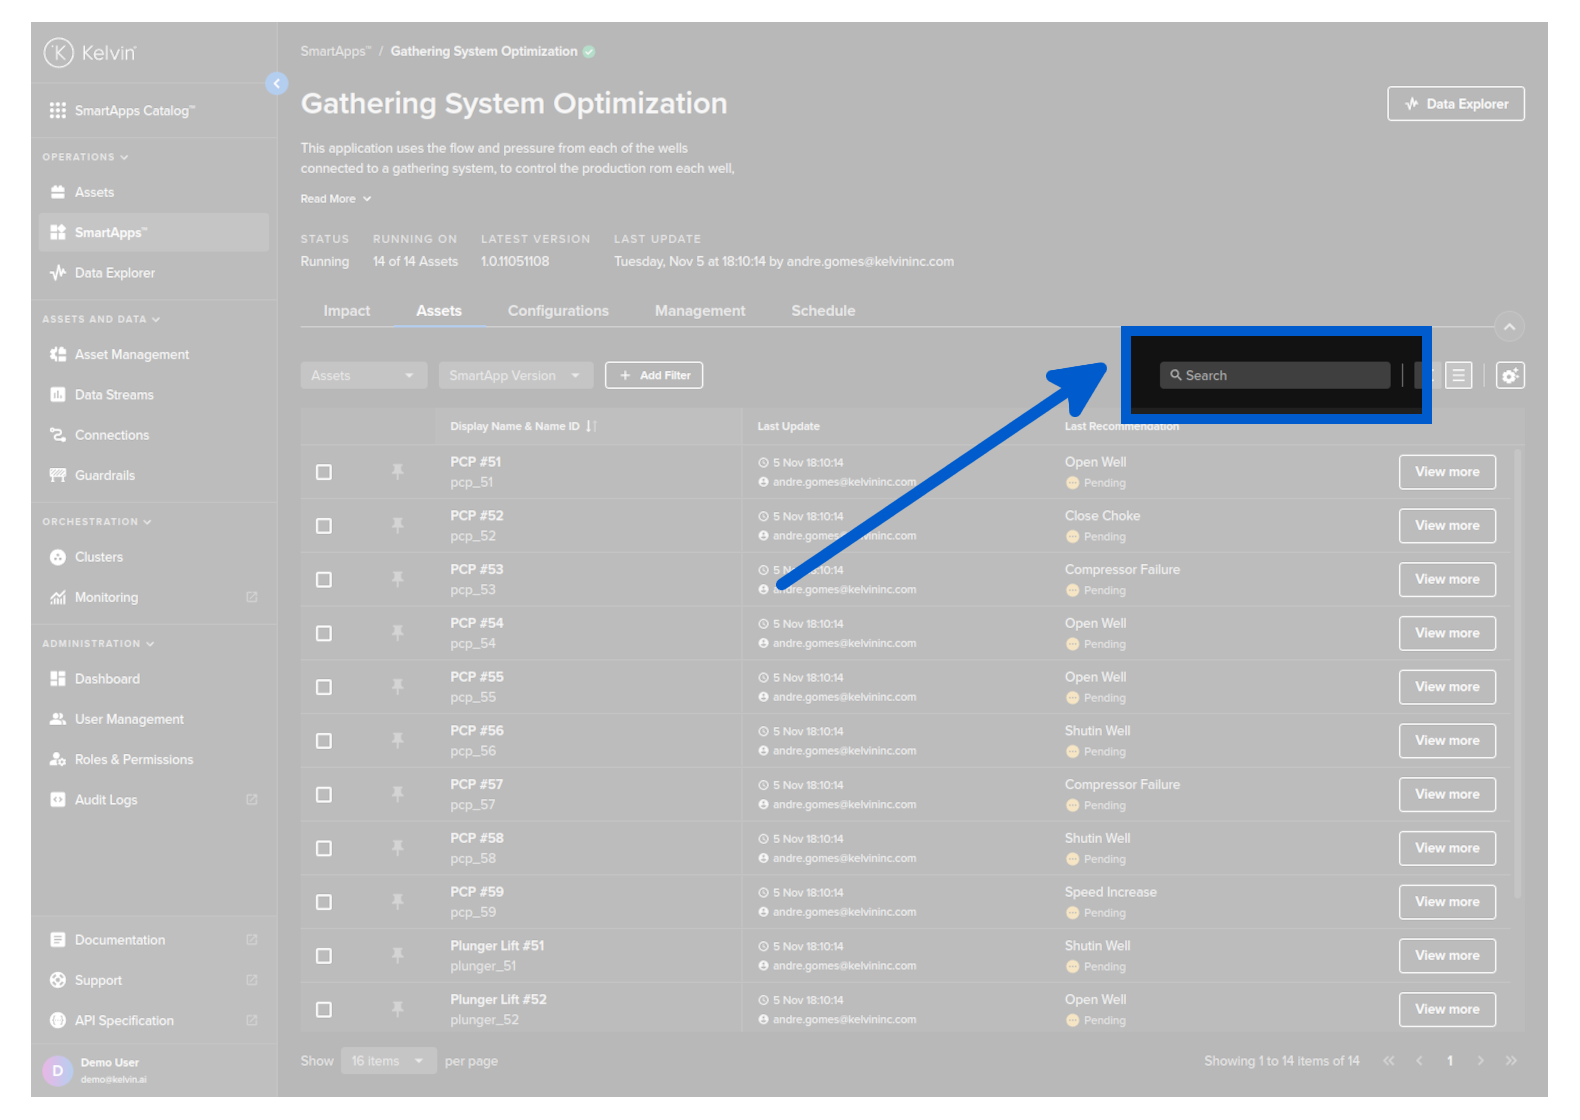
Quickly find the Assets you want to see with the dynamic search which filters the list as you type.
You can choose the height of the row to fit as many rows as possible on the screen, or space them out for easier readability.
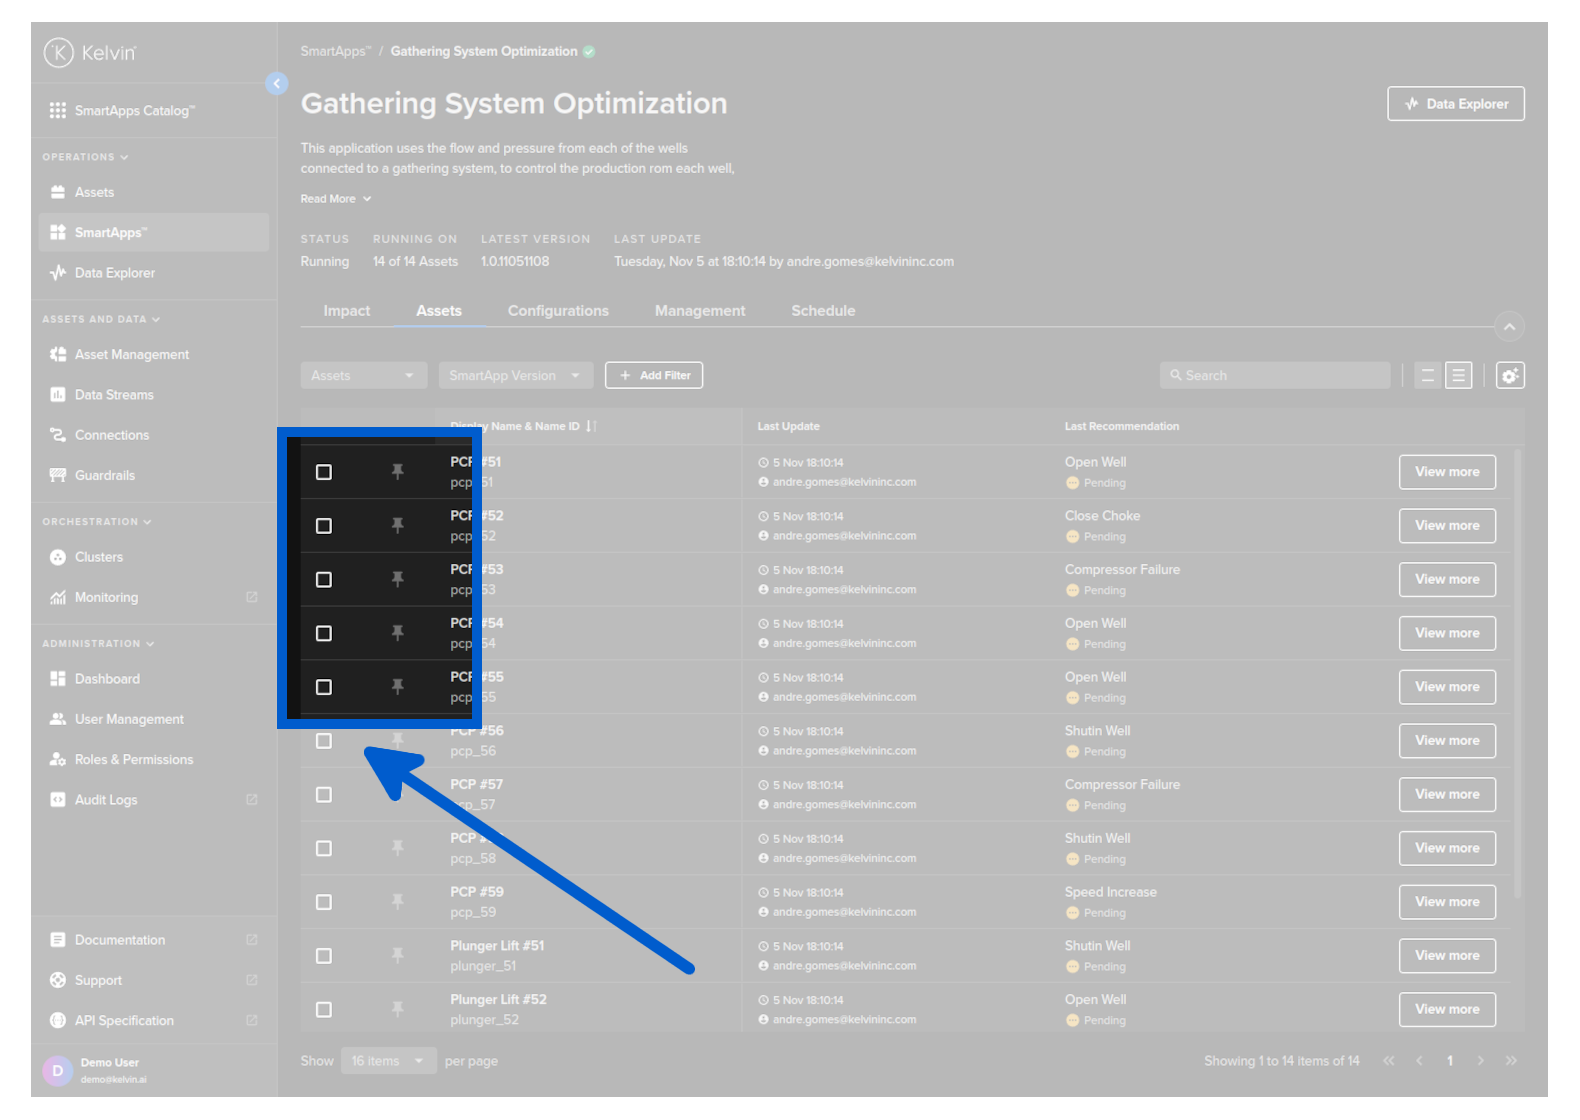
You can keep important Assets pinned to the top of the page simply by clicking on the pin icon.
The pinned Assets will show on the top of every page.
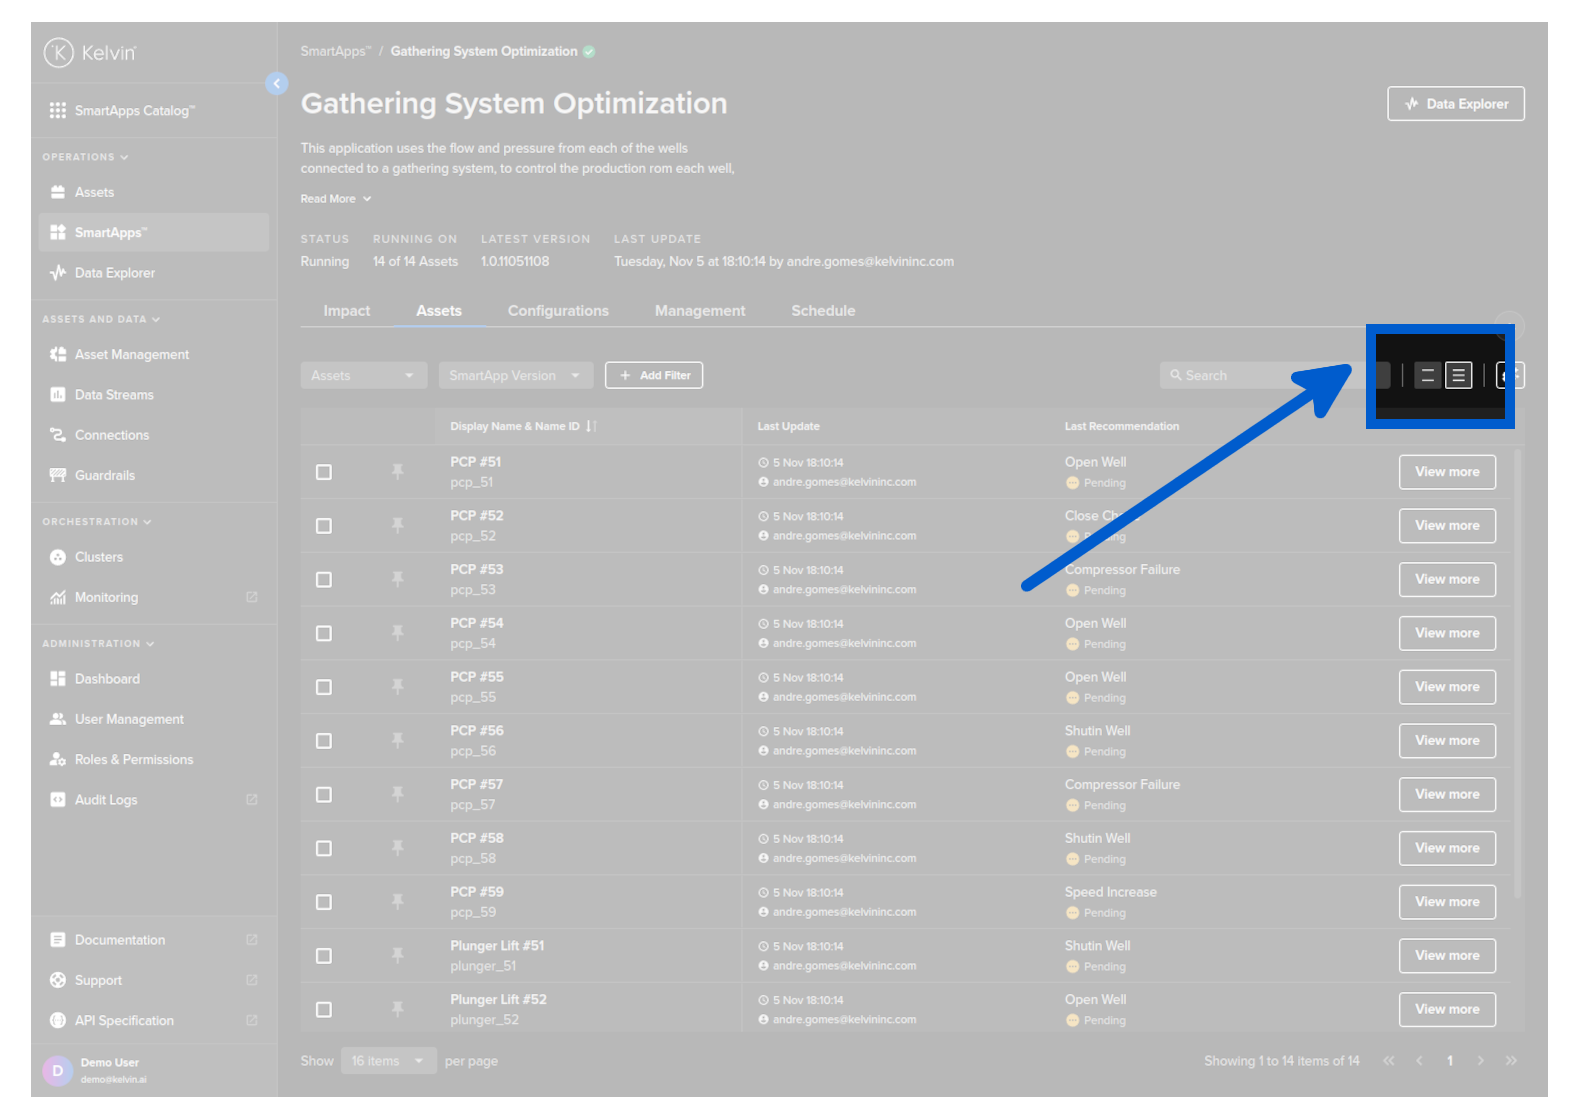
You can also control your page management to be able to maximize the number of Assets you see on the screen or zoom in with larger spacing for small screens.
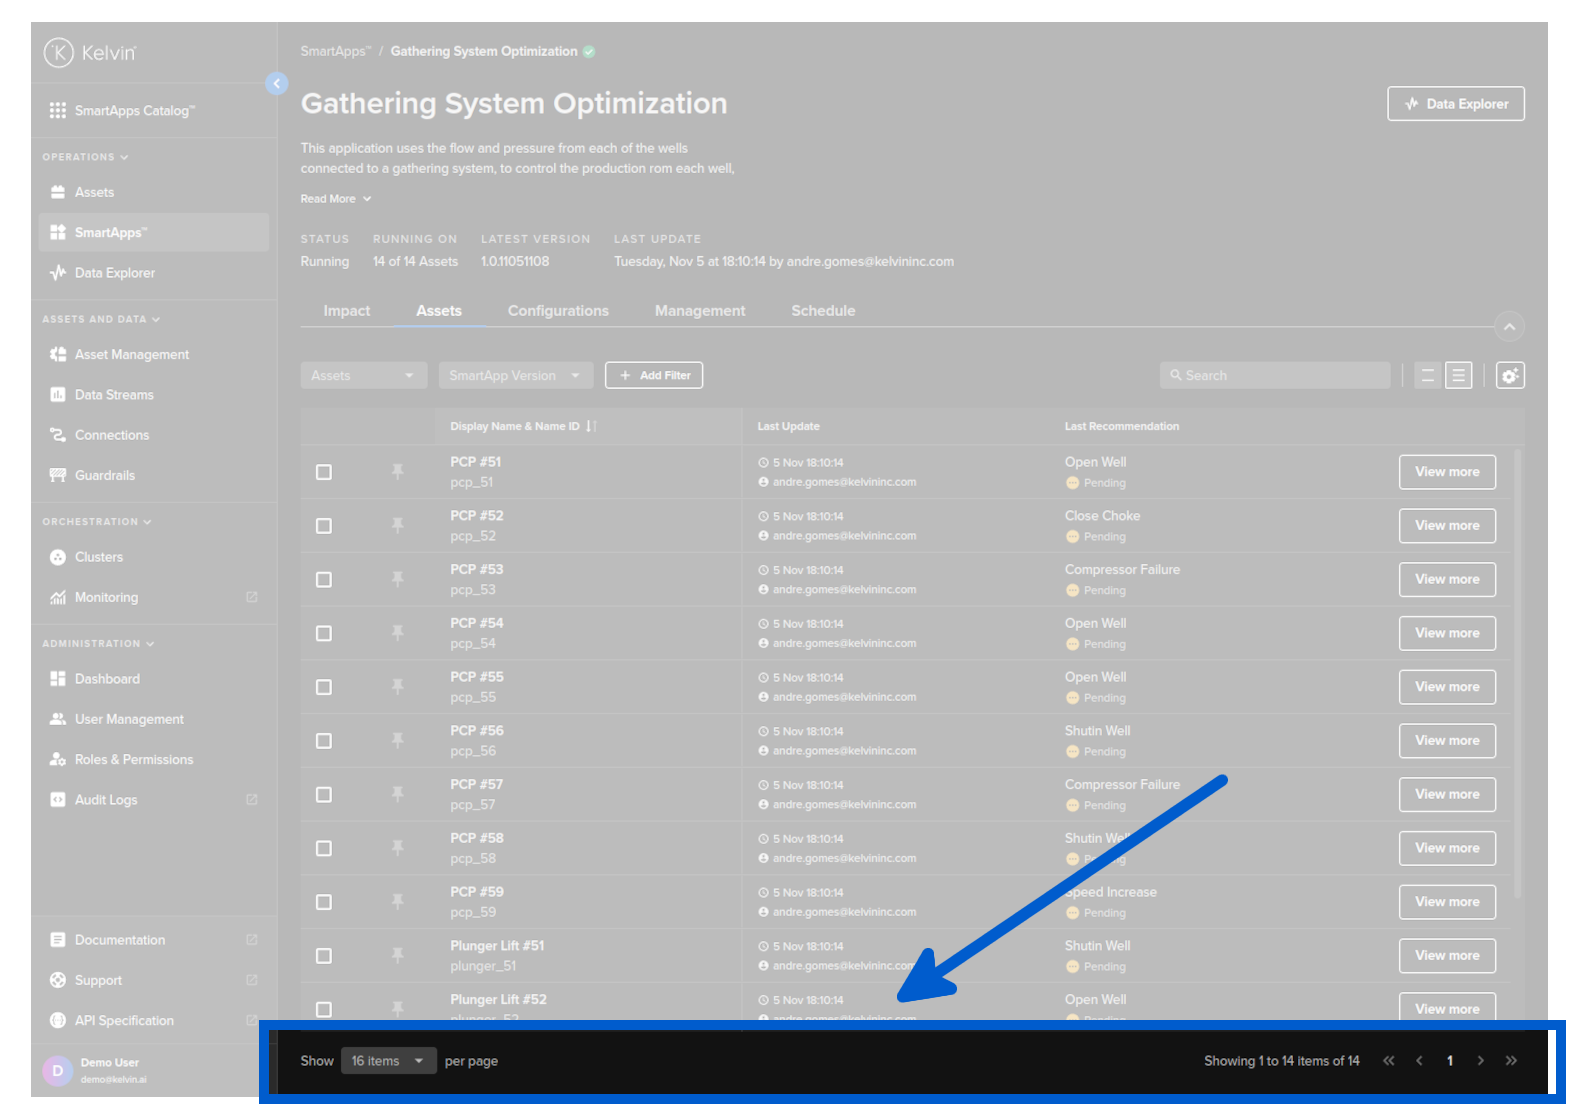
You can select how many Assets are shown per page or flip between pages through the page management bar;
You can also manage the table and column configurations;
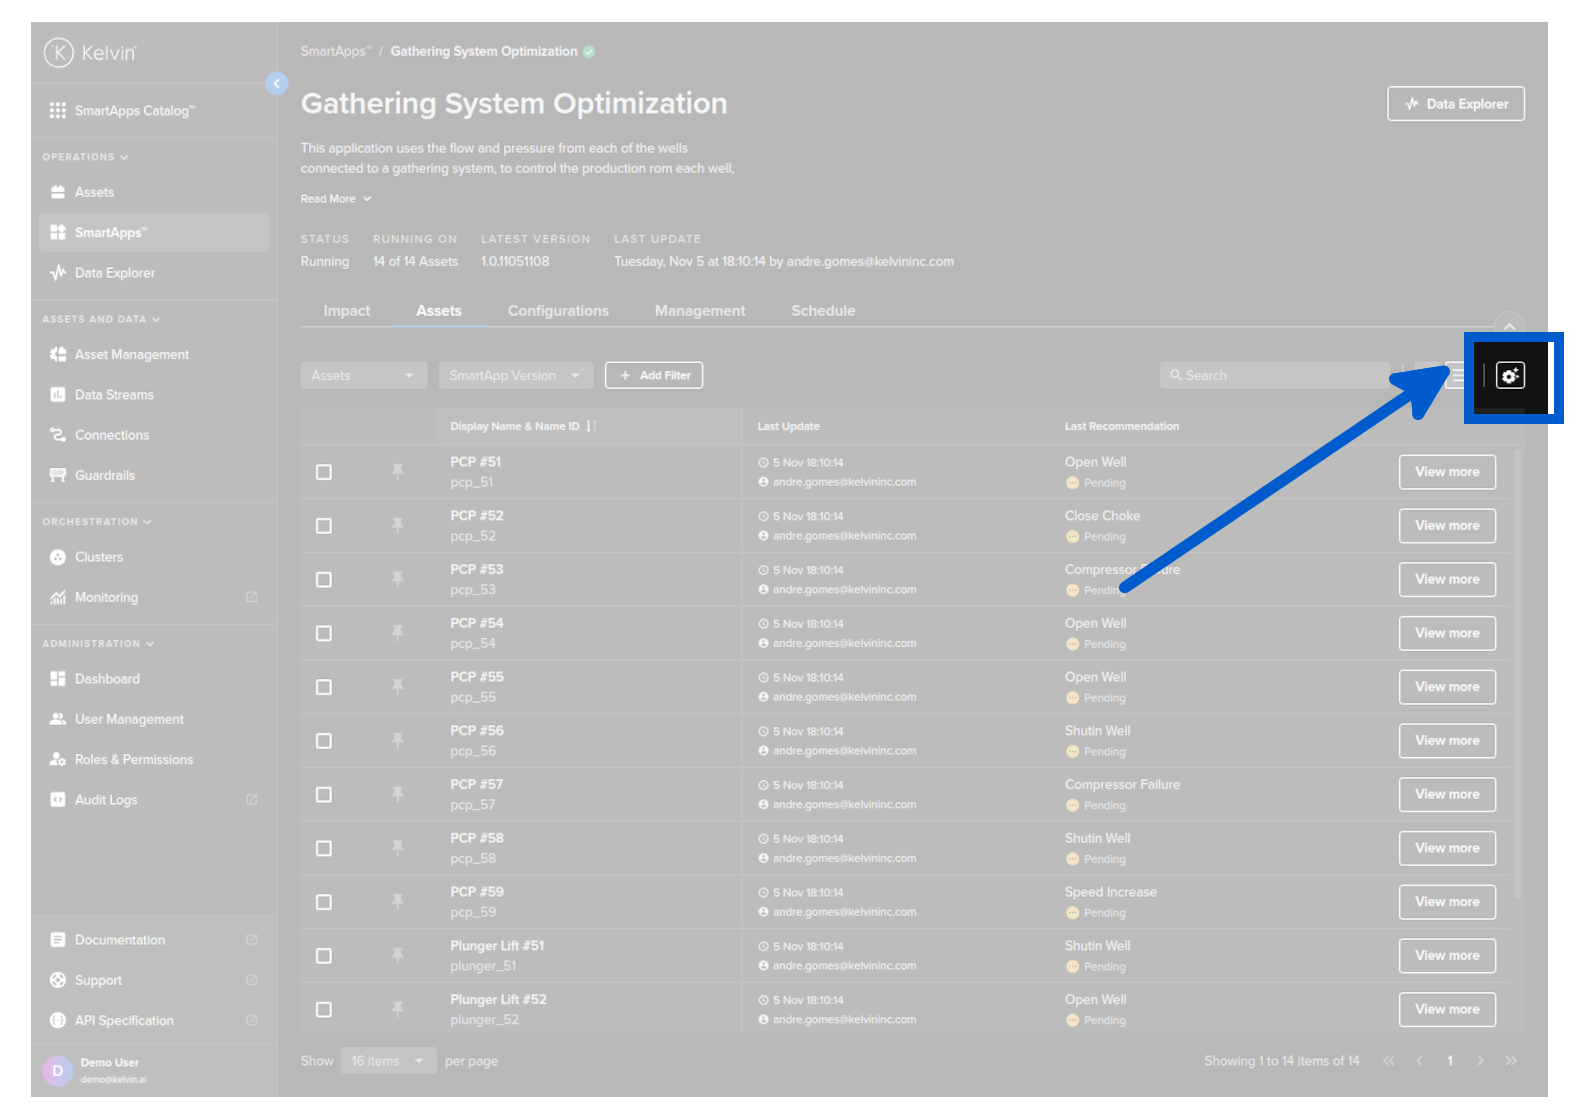
And you will see a full range of options to customize the table and columns to your requirements.
This is a powerful feature so we give a complete chapter below to explain all the options available.
Columns Management
Column Settings
Asset-centric tables developed by Kelvin bring many more advanced features to the lists to give you greater control in setting up the right overview experience to streamline your workflow. This includes being able to incorporate specific Recommendations and Control Changes into the lists with direct links to control the Assets.
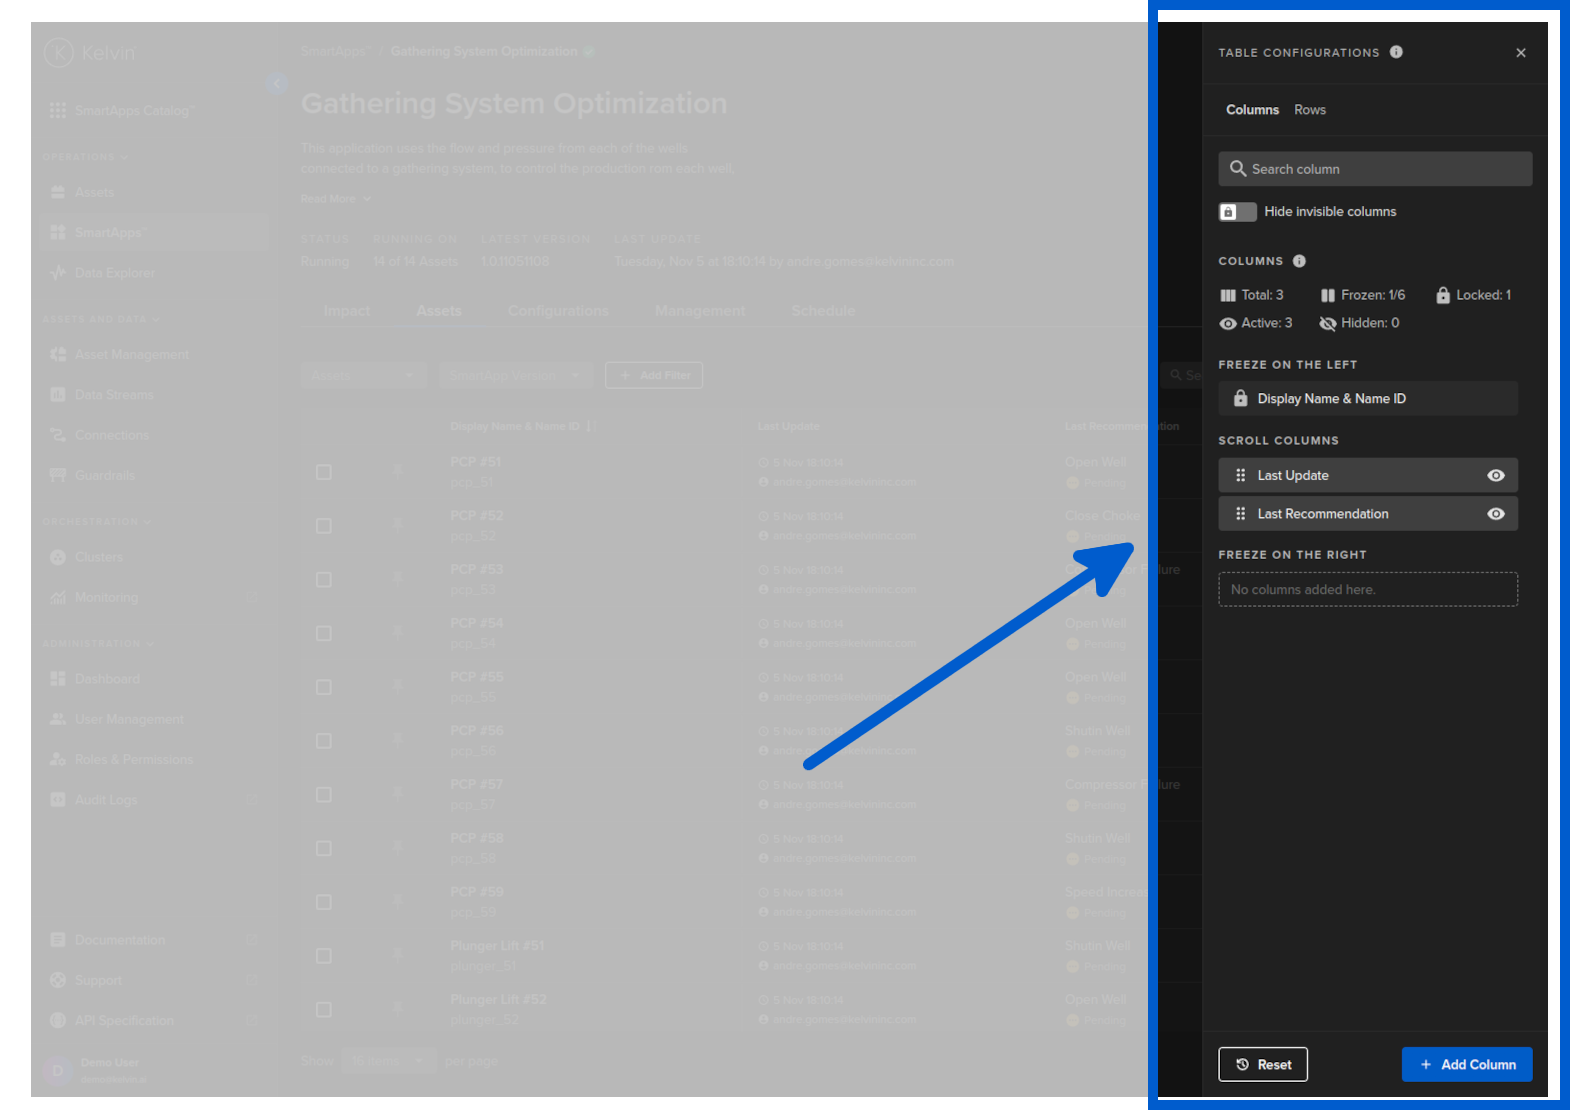
When you click on the button you will get the Configuration Table options come up;
You will then see a new option bar open up on the right hand side.
There are a number of options available to customize the asset-centric table.
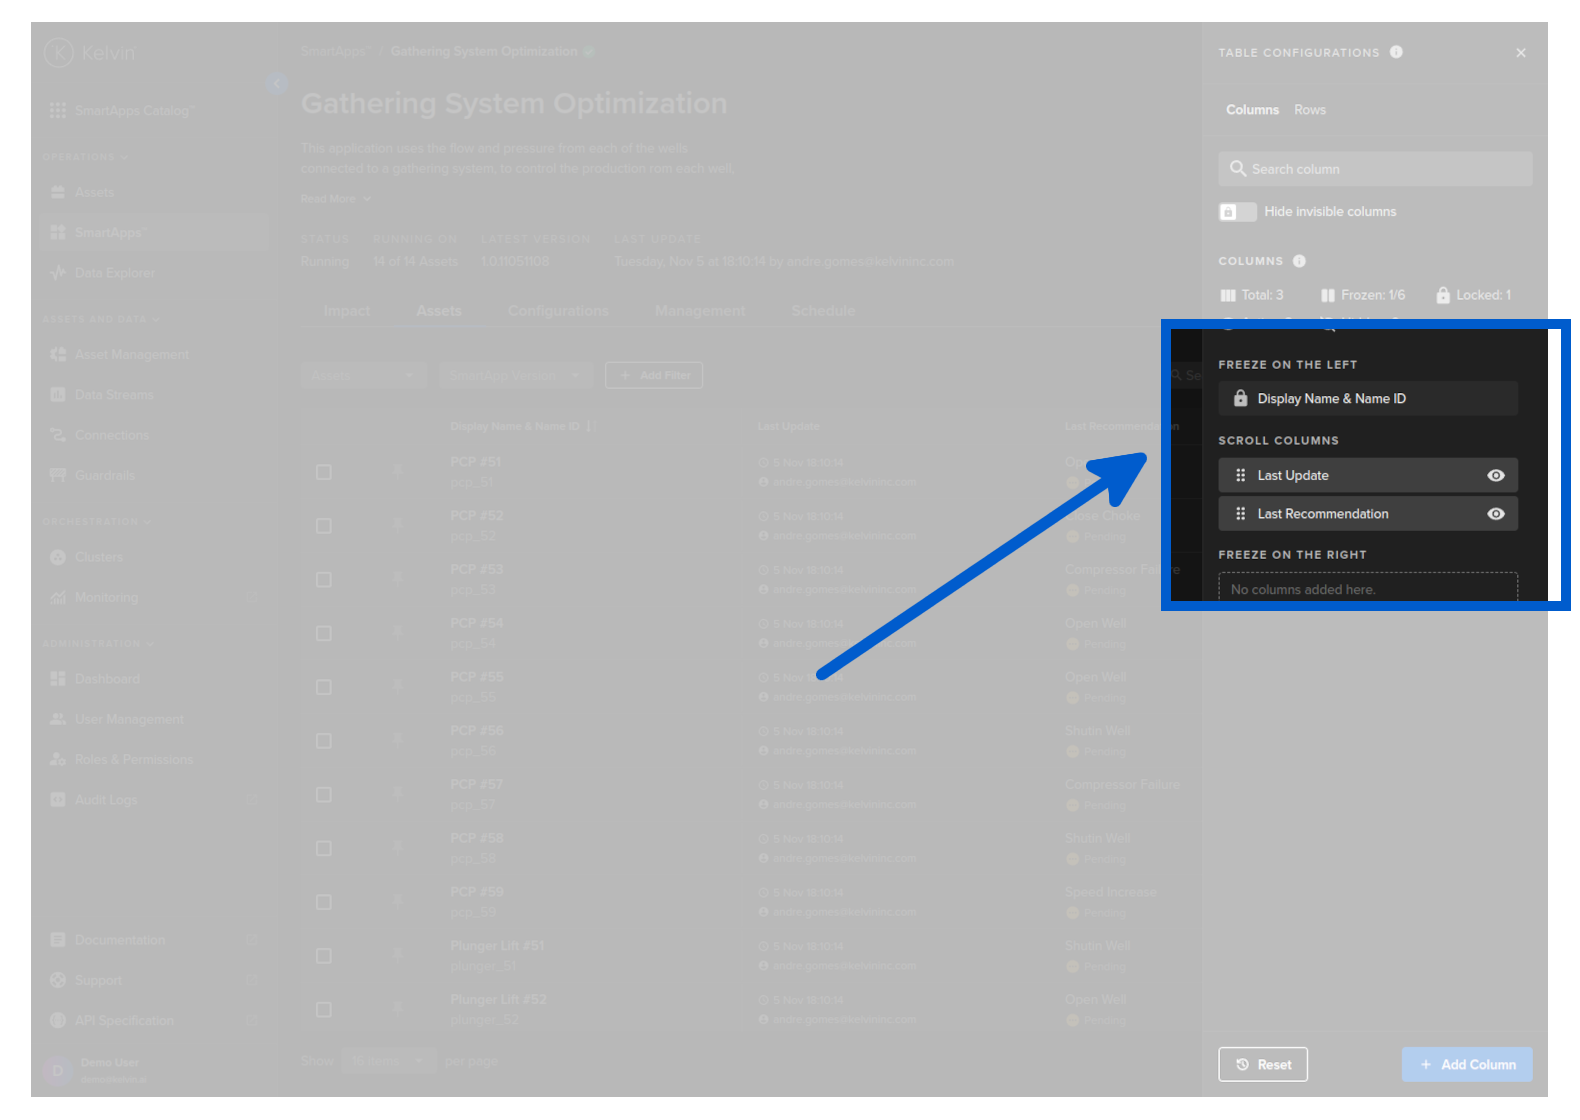
When you are inside the column settings you can freeze columns left and right. This ensures the columns will always show, even when you scroll left or right to see all the columns.
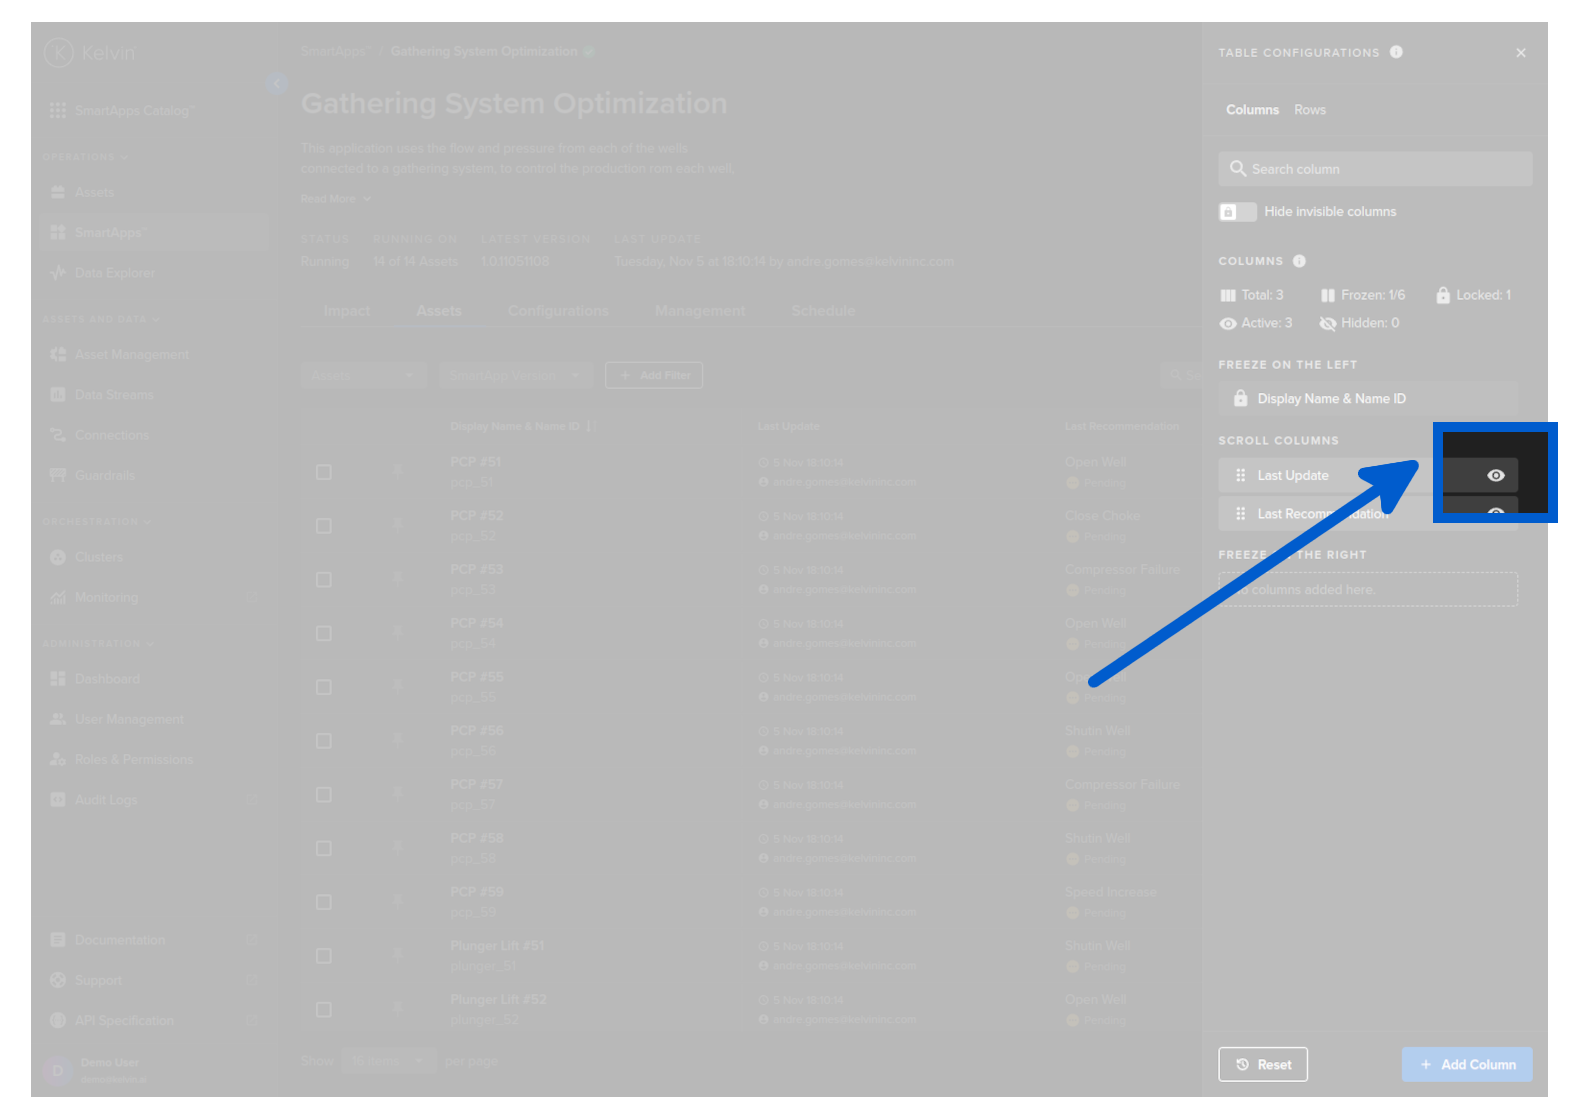
When you are inside the column settings you can show or hide columns to ensure you only see what you need to see.
When you are inside the column settings you can see an overview of the columns available and showing.
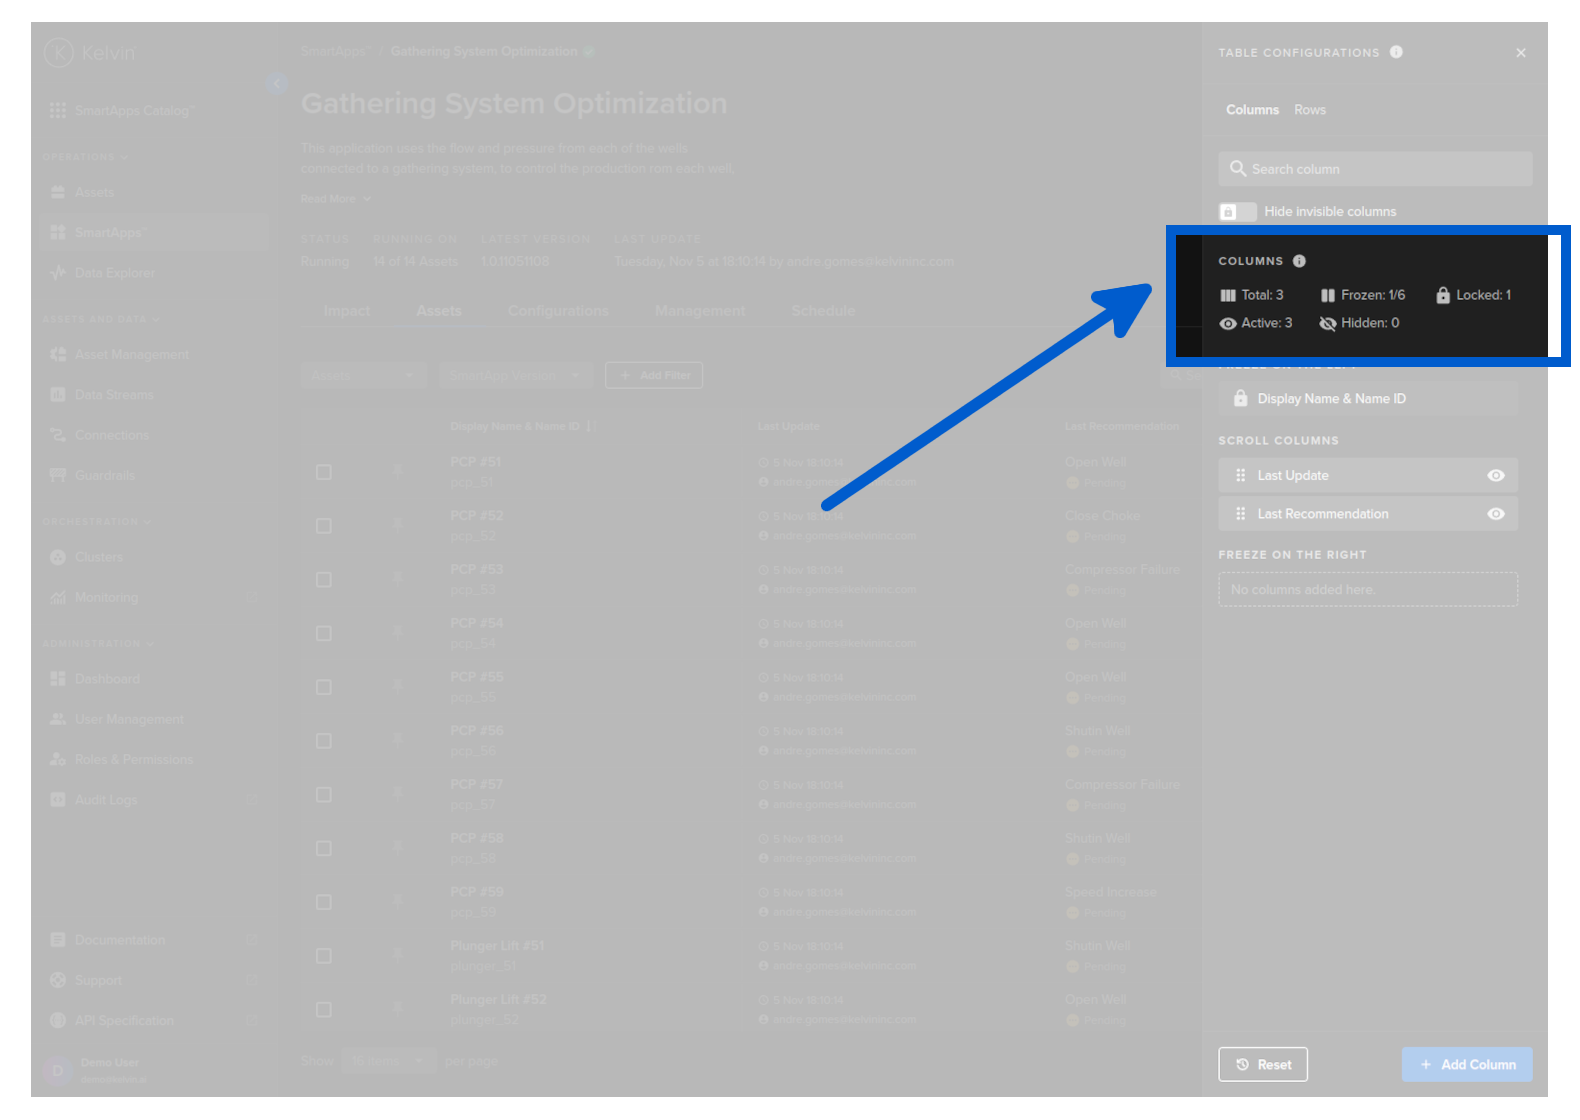
When you are inside the column settings with a large number of columns, this feature is useful to find columns and to hide the hidden columns from the list to make it easier to see what is relevant.

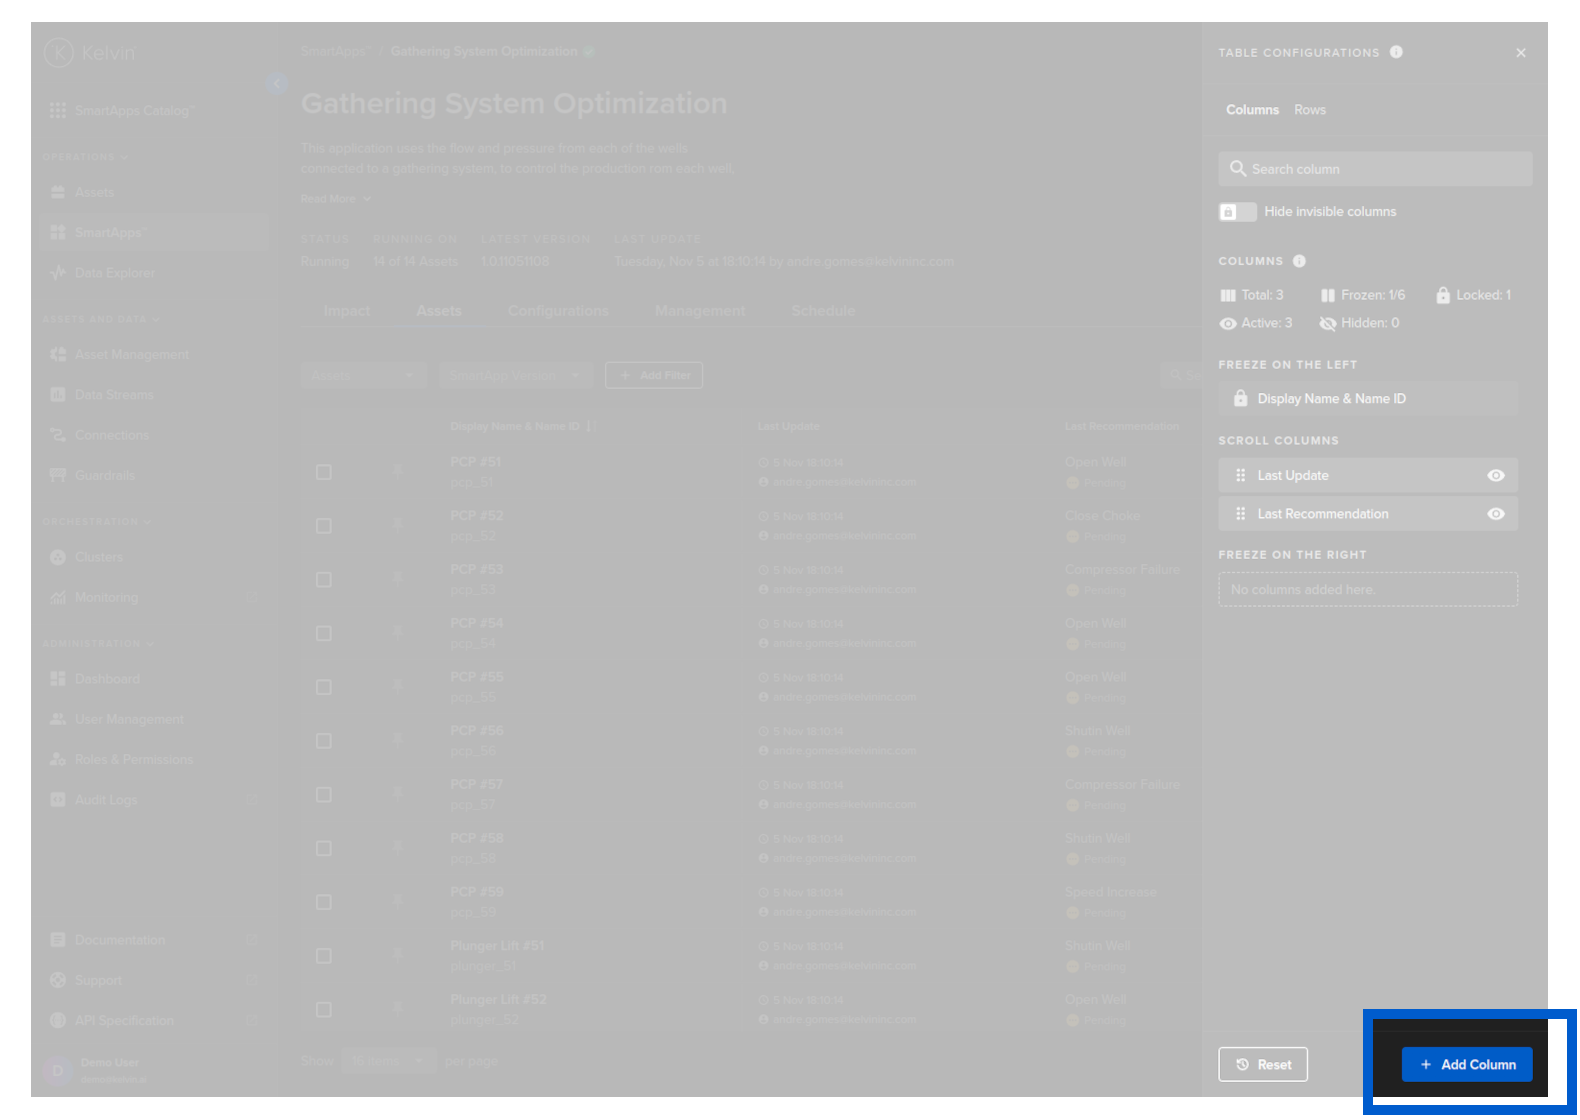
Add Custom Columns
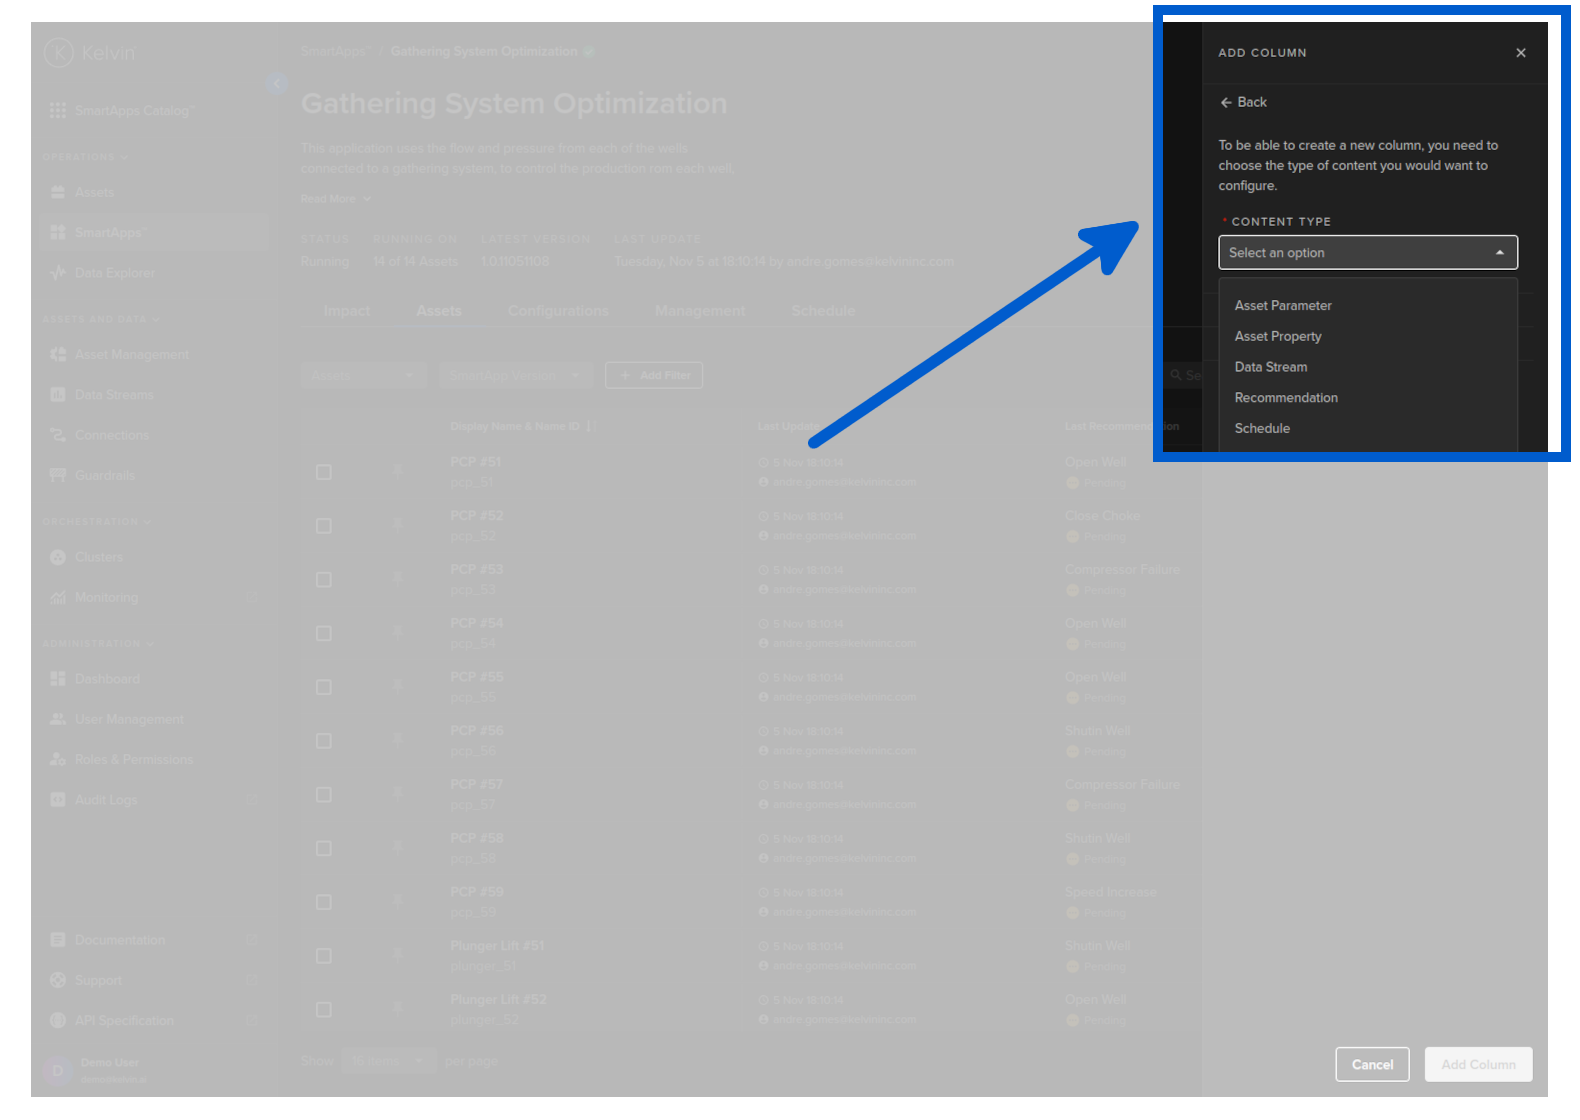
You can add a number of customizable columns to the Asset Table list by clicking on the Add Column button.
Each type you select can be customized to only the information that you required. This is especially useful if you want to have the same content type in multiple columns showing different types of information.
You can select which Asset Parameter in the Configuration is shown in the Column.
On the table the Parameters are read only. If you want to change a Kelvin SmartApp™ Configration Parameter for an Asset, you need to go to the Configurations Tab.

| Option | Description |
|---|---|
| Asset Parameter Name | Options available will depend on the Kelvin SmartApp™ itself. |
Assets have a special section called Asset Properties.
This is a client custom configuration that can hold any type of information useful for clients. It does not affect Kelvin in any way.
In this setting, you can select the properties to show in the column. This is a list of all property names available across all Assets.
| Option | Description |
|---|---|
| Asset Property Name | This is the name of the Asset Property Name to display it's value for each Asset in the column. If this property does not exist for an Asset, then it is left blank in the row. |
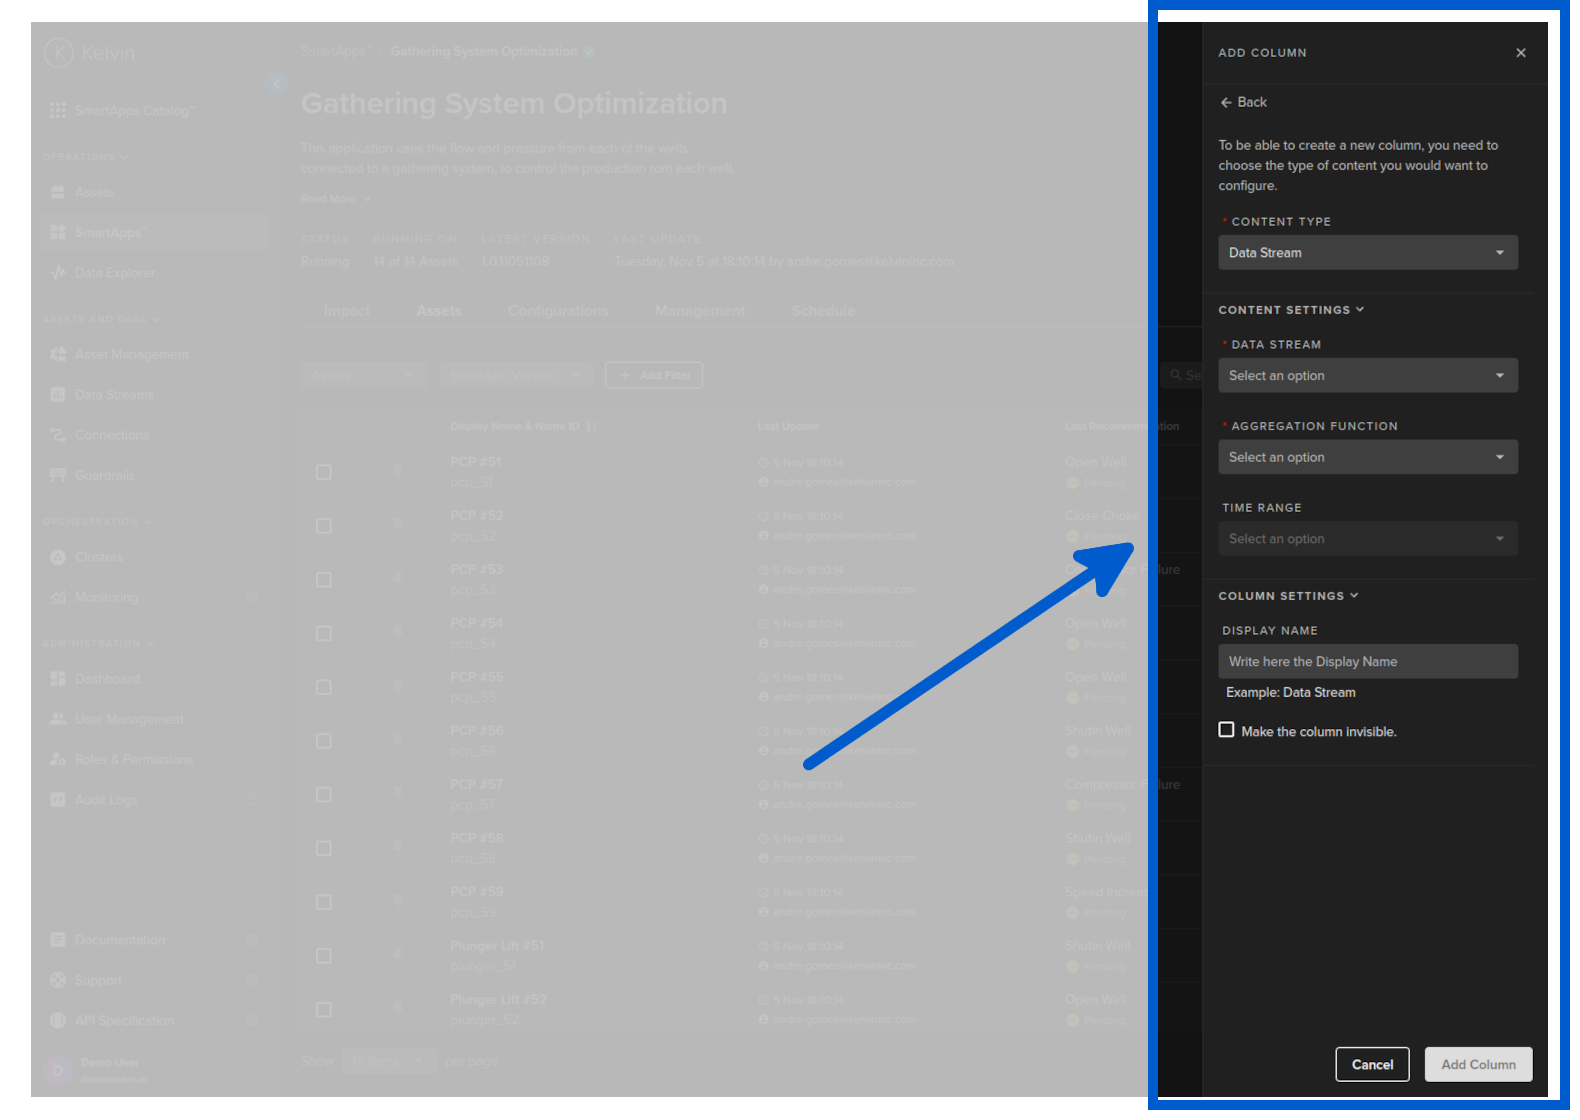
You can select a Data Stream to perform a number of different types of aggregation functions on the Asset / Data Stream pair.
| Option | Description |
|---|---|
| Data Stream Name | This is the name of the Data Stream to reference. You can only pick one Data Stream per column. When processing, this will pick relevant information that is associated with the Asset / Data Stream pair. |
| Aggregation Function | Options are; Count, Mean, Sum, Max, Min, Last This is what information will be displayed. Each one is self explanatory and will be associated with the Time Range option to produce the required information for the column. |
| Time Range | Options are from Last 5 minutes to Last 7 day. This is the time range that will be used to perform the aggregation function selected above. In cases where you select Last and there is no data available or the Asset has not pair with the Data Stream in the time range, then you will see N/A. |
You can select which Recommendations associated with a Kelvin SmartApp™ over a defined period of time to be shown in the column for each Asset.
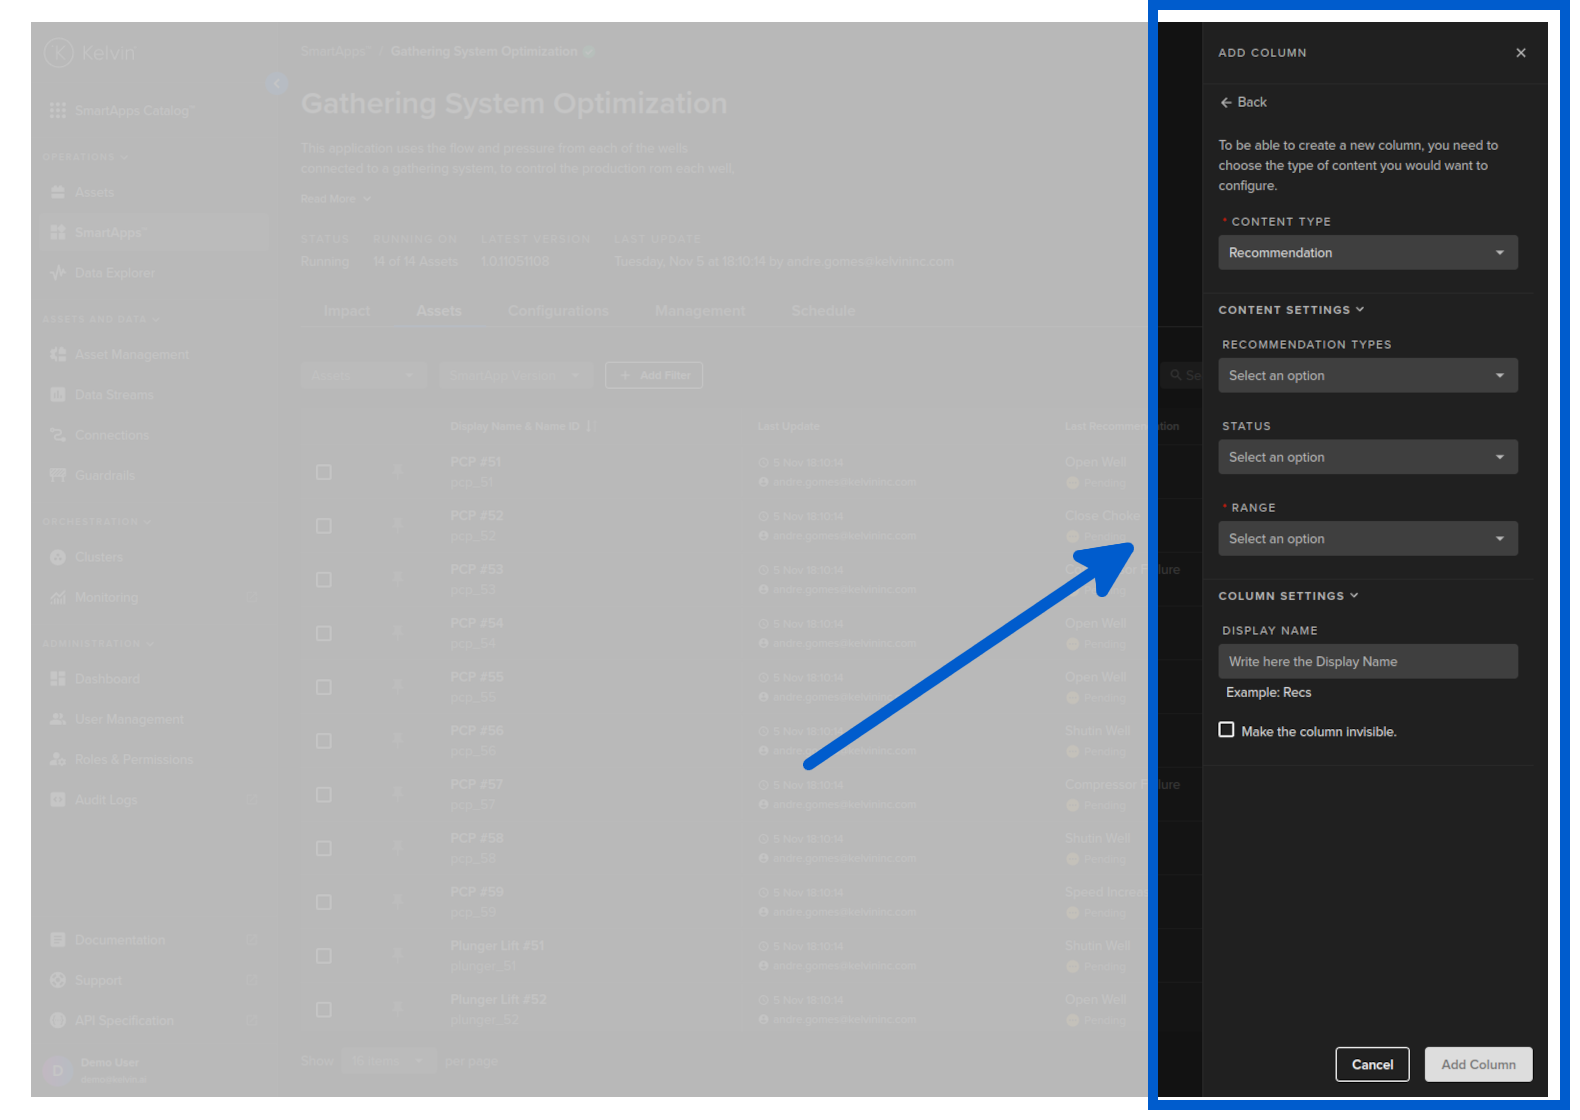
There are also a number of mandatory and optional filters you can select to focus the information shown in the column.
| Option | Description |
|---|---|
| Recommendation Types | Options are; The recommendation types list (it is customizable by the client, so will be different for each Kelvin Instance. This will filter the Recommendations shown to only those that are selected here. This option is optional and you can multi-select many types. |
| Status | Options are; Pending, Accepted, Rejected and Expired. This will filter the Recommendations shown to only those that have a certain status. This option is optional and you can multiselect many status. |
| Range | Options are; a Time range from 5 minutes to 7 days. This will only look for Recommendations meeting the options above within a defined time range. |
You can select which Schedule associated with a Kelvin SmartApp™ over a defined period of time to be shown in the column for each Asset.
You can not see schedules in the past. These have already been converted into Control Changes and can be viewed with Control Change filters and columns.
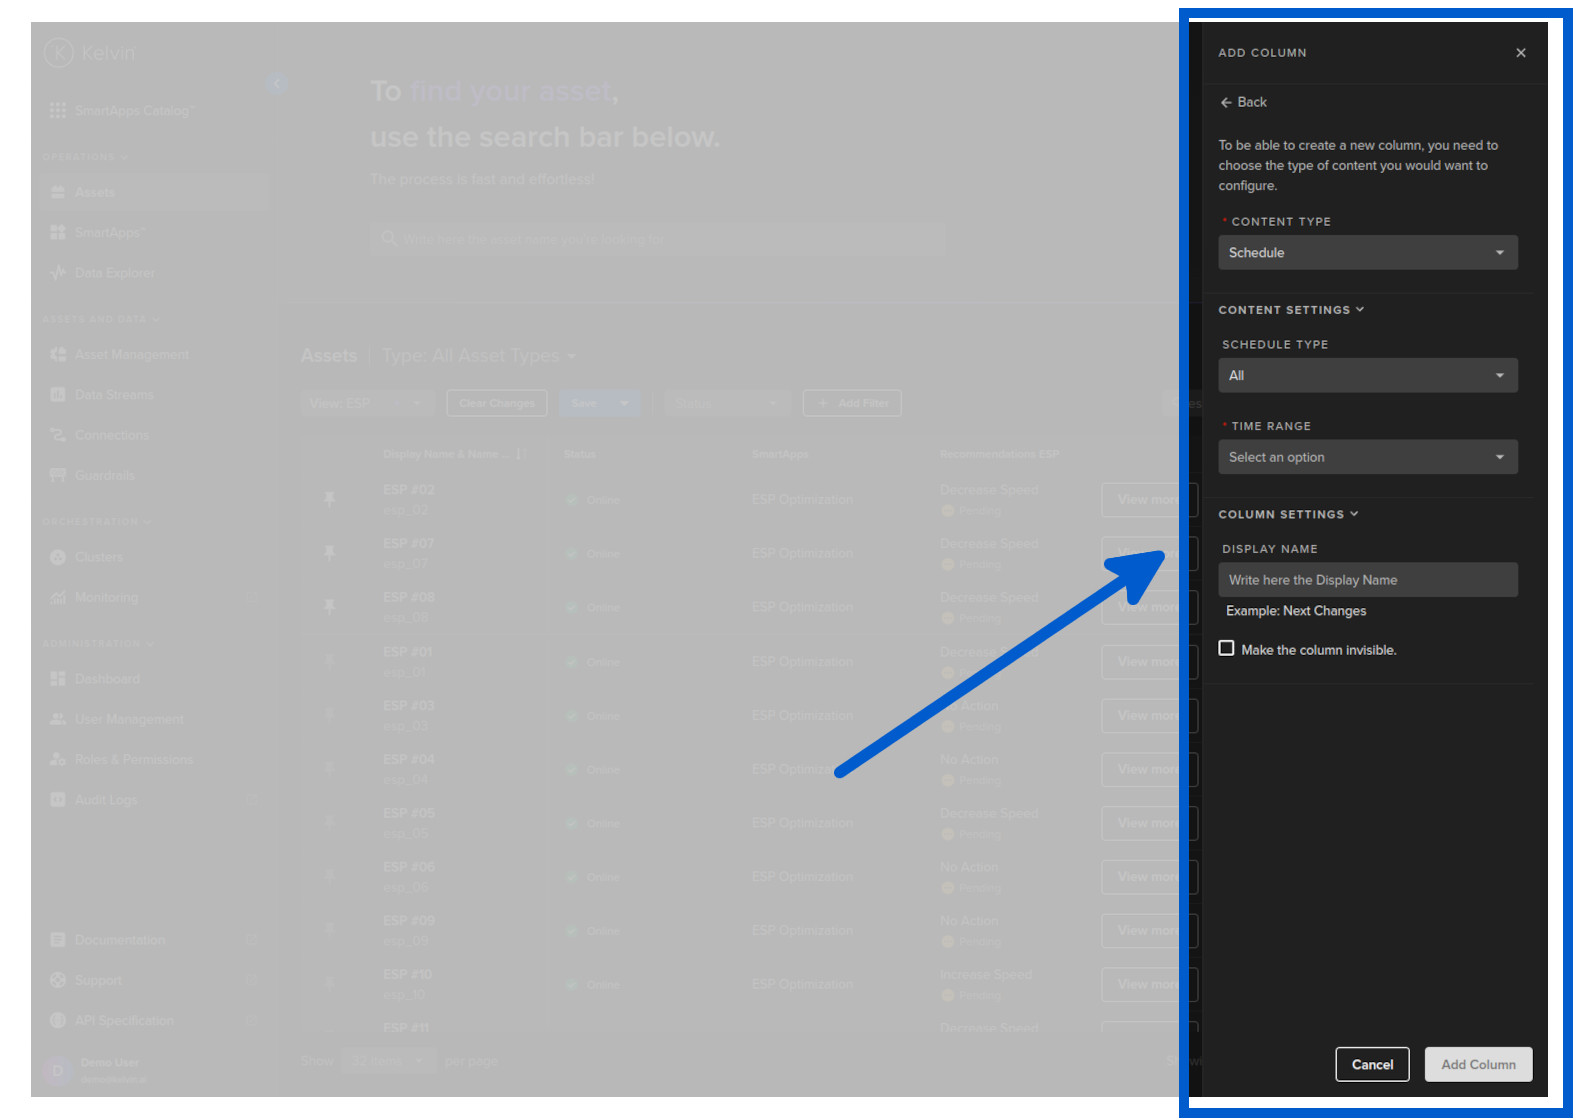
| Option | Description |
|---|---|
| Schedule Type | Options are; Change Once and Change and Revert. You can not view both in the same column. |
| Time Range | FIlter on time range from now to the future. Options are in hours and days. |