Custom Views in Data Explorer
On this page you will learn how to save, switch and manage your views in the Data Explorer.
You can watch this short demo video or read the full written guide below.
Overview
A view saves your Data Explorer setup so you can come back to it at any time and switch between different setups.
The aim of a view is that you only need to select the Asset you want to look at. When you change the Asset, all the other settings stay as they are saved in the view. This lets you;
- Easily switch between Assets while keeping the same view settings
- Switch between views to see different setups for different types of Assets, or different perspectives on one Asset
A view remembers;
- The Data Streams selected
- The aggregation of each Data Stream
- The Axis setting
- The Fill Data setting
- The time range and refresh rate
- Which lanes are shown and how they are filtered
Important
The Asset is NOT saved in a view. The Asset is always dynamic, and you need to select it manually each time you select a view.
Note
If you select an Asset that does not have all the Data Streams saved in the view, the Data Streams missing on that Asset are shown as disabled.
You can share a view with all users.
Select a View
Click the DE View dropdown at the top of Data Explorer to see all the views you can use.
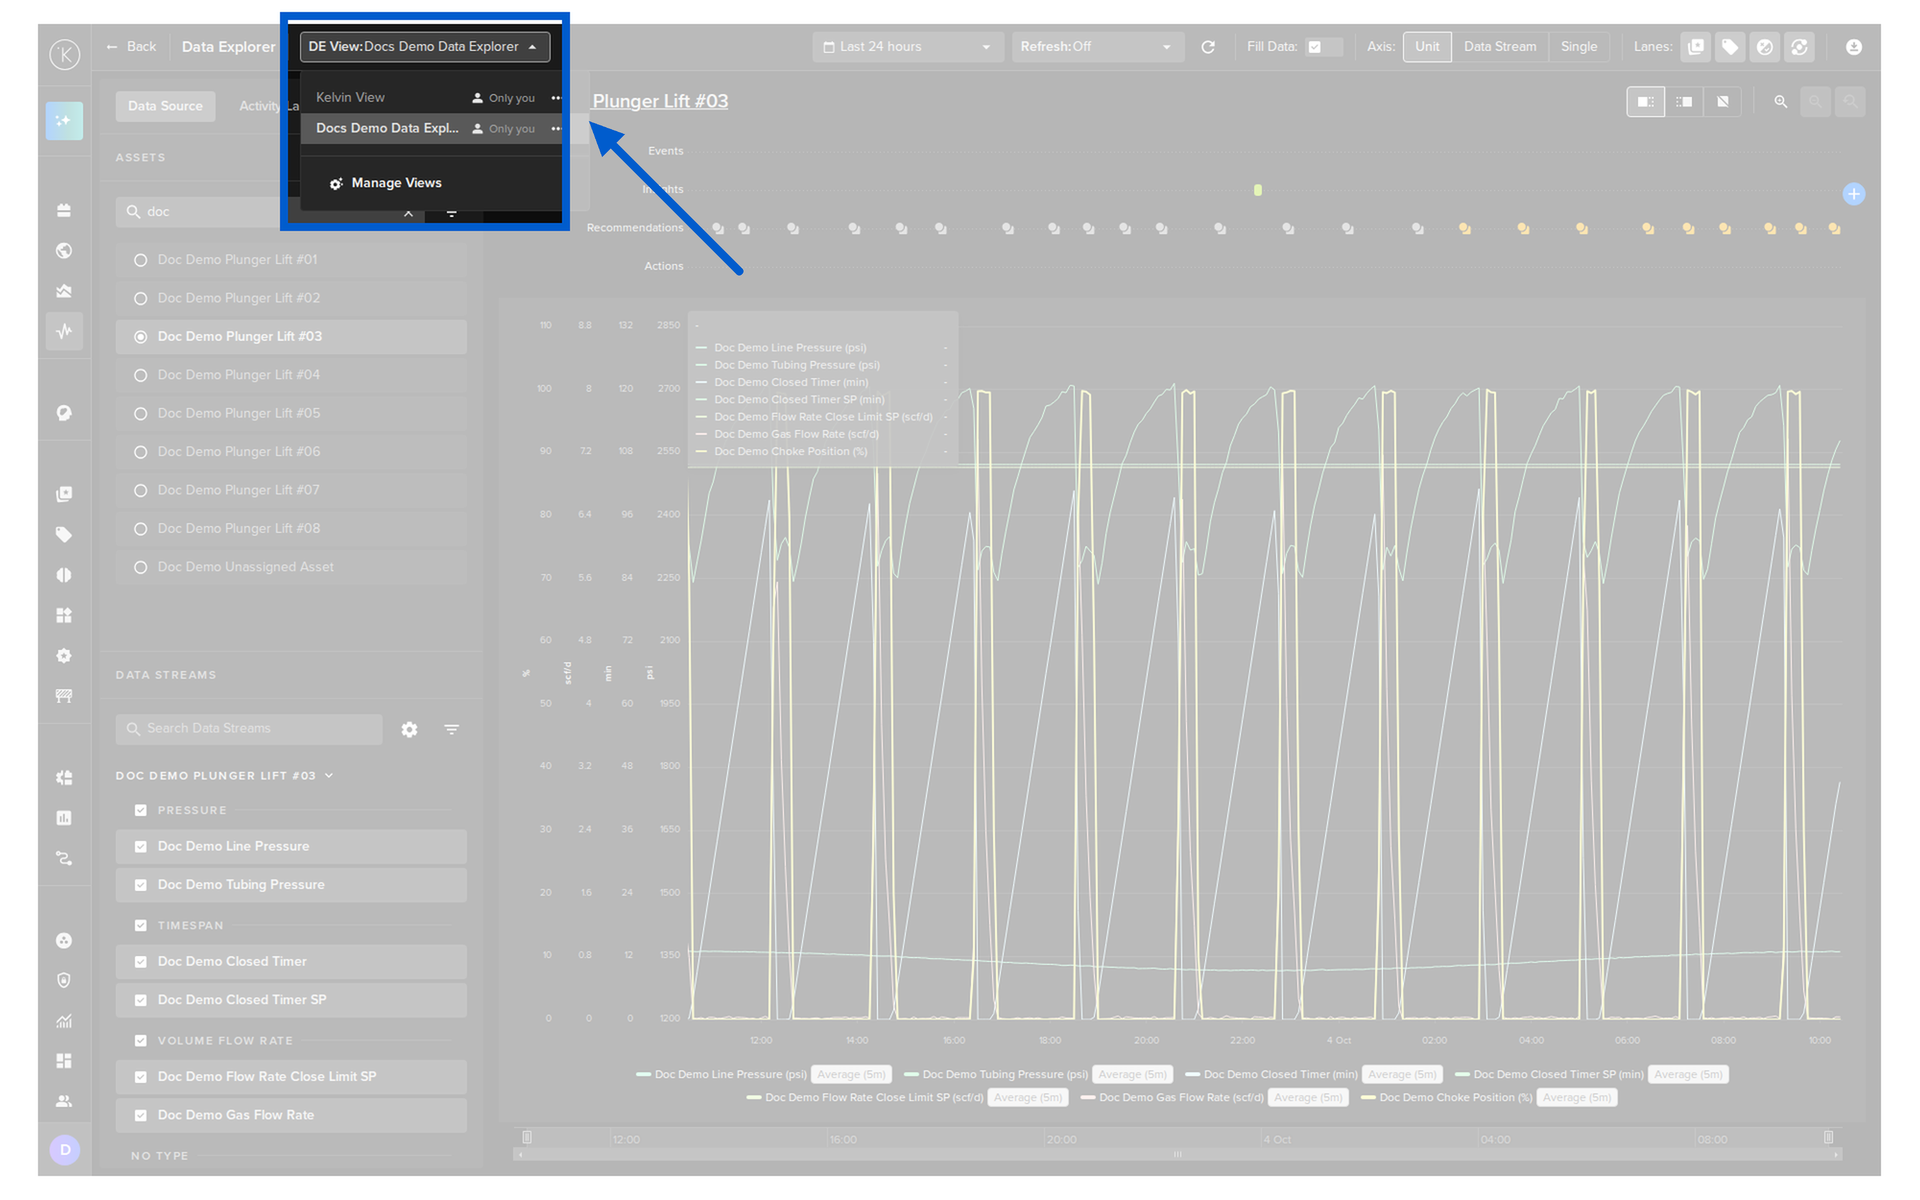
Click a view name in the dropdown list to switch to it.
Data Explorer remembers the last view you selected. The next time you open Data Explorer, it opens with that view selected, the same way the Assets list opens with your last selected view.
Edit a View
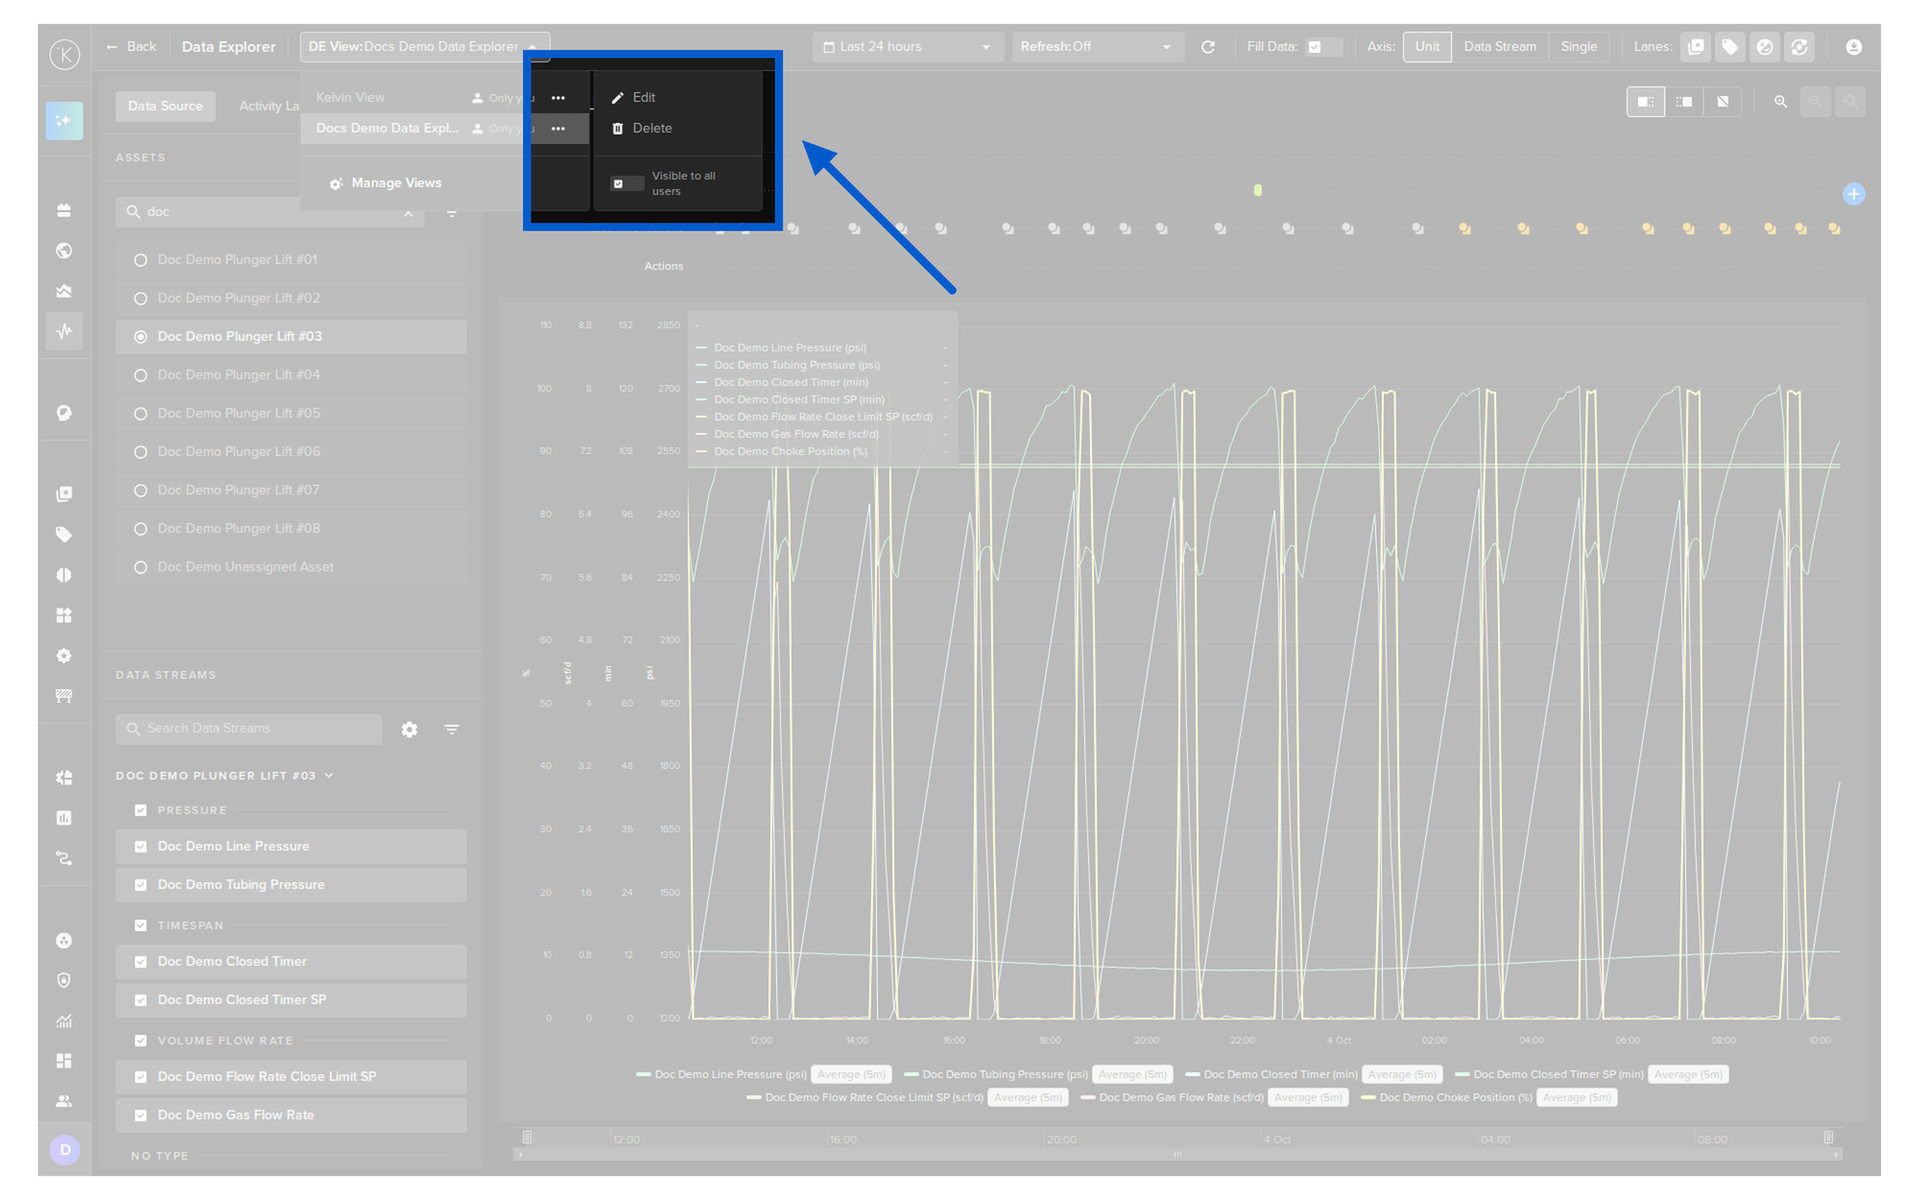
To change the name of a view, click the meatballs icon  next to the view in the list, then click the Edit option in the menu.
Share a View
To share a view with all users, click the meatballs icon next to the view in the list, then turn on the Visible to all users switch in the menu.
Turn the switch off to make the view private so only you can see it.
Delete a View
To delete a view, click the meatballs icon next to the view in the list, then click the Delete option in the menu.
Save a View
When you change the setup of Data Explorer, a bullet appears next to the name of the view to show you have unsaved changes.
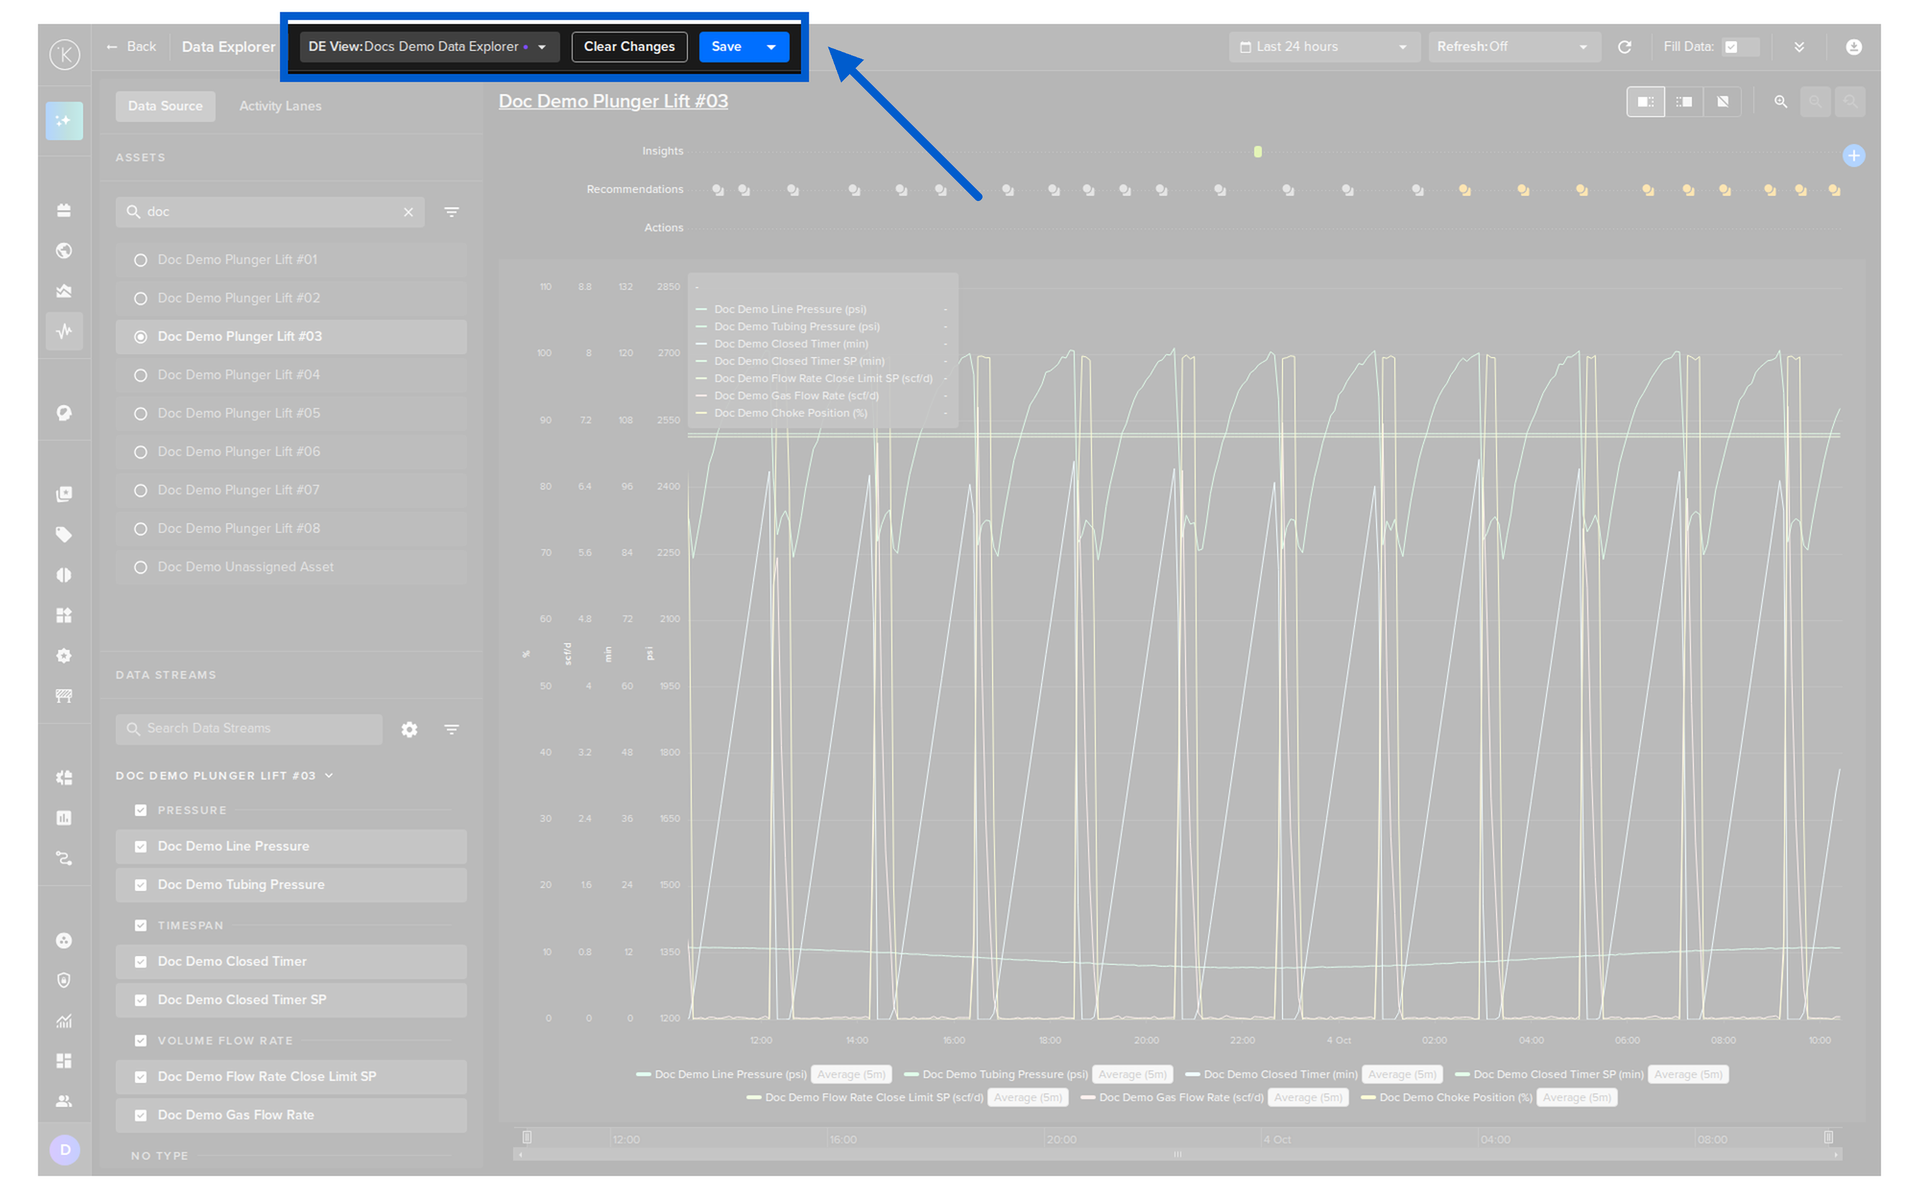
Your unsaved changes are kept as a draft of the view. If you leave Data Explorer and come back, the draft is still there until you save it or click Clear Changes.
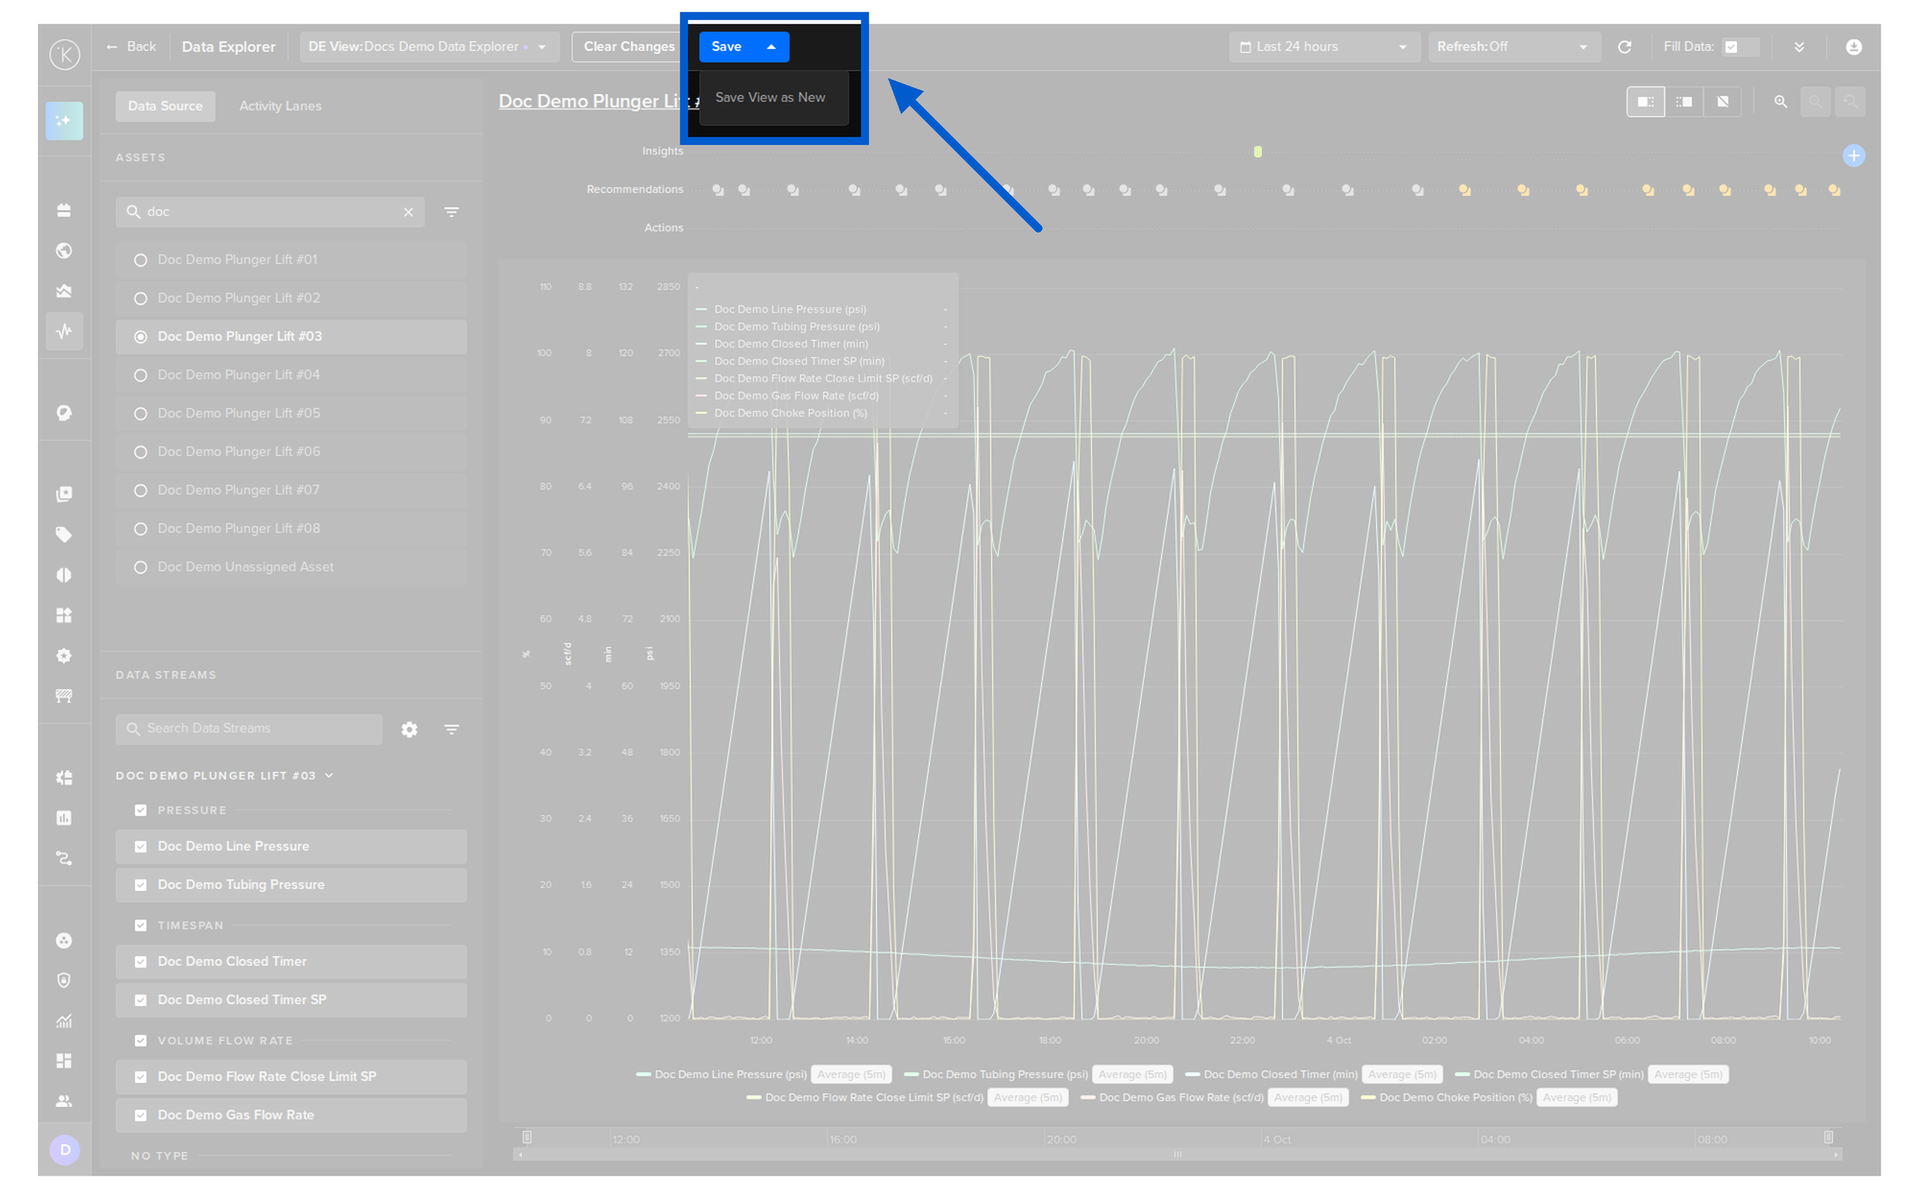
The Clear Changes button and the Save button appear next to the DE View dropdown. You can choose to;
- Click the Save button to overwrite the current view with your changes
- Click the arrow of the Save button, then click the Save View as New option to save your changes as a new view
- Click the Clear Changes button to go back to the saved view
Note
If you change a view that is shared with all users, you can save your changes as a new view.
Manage Views
You can manage all your views in one popup. Click the Manage Views option in the DE View dropdown list to open the Data Explorer Views Management popup.
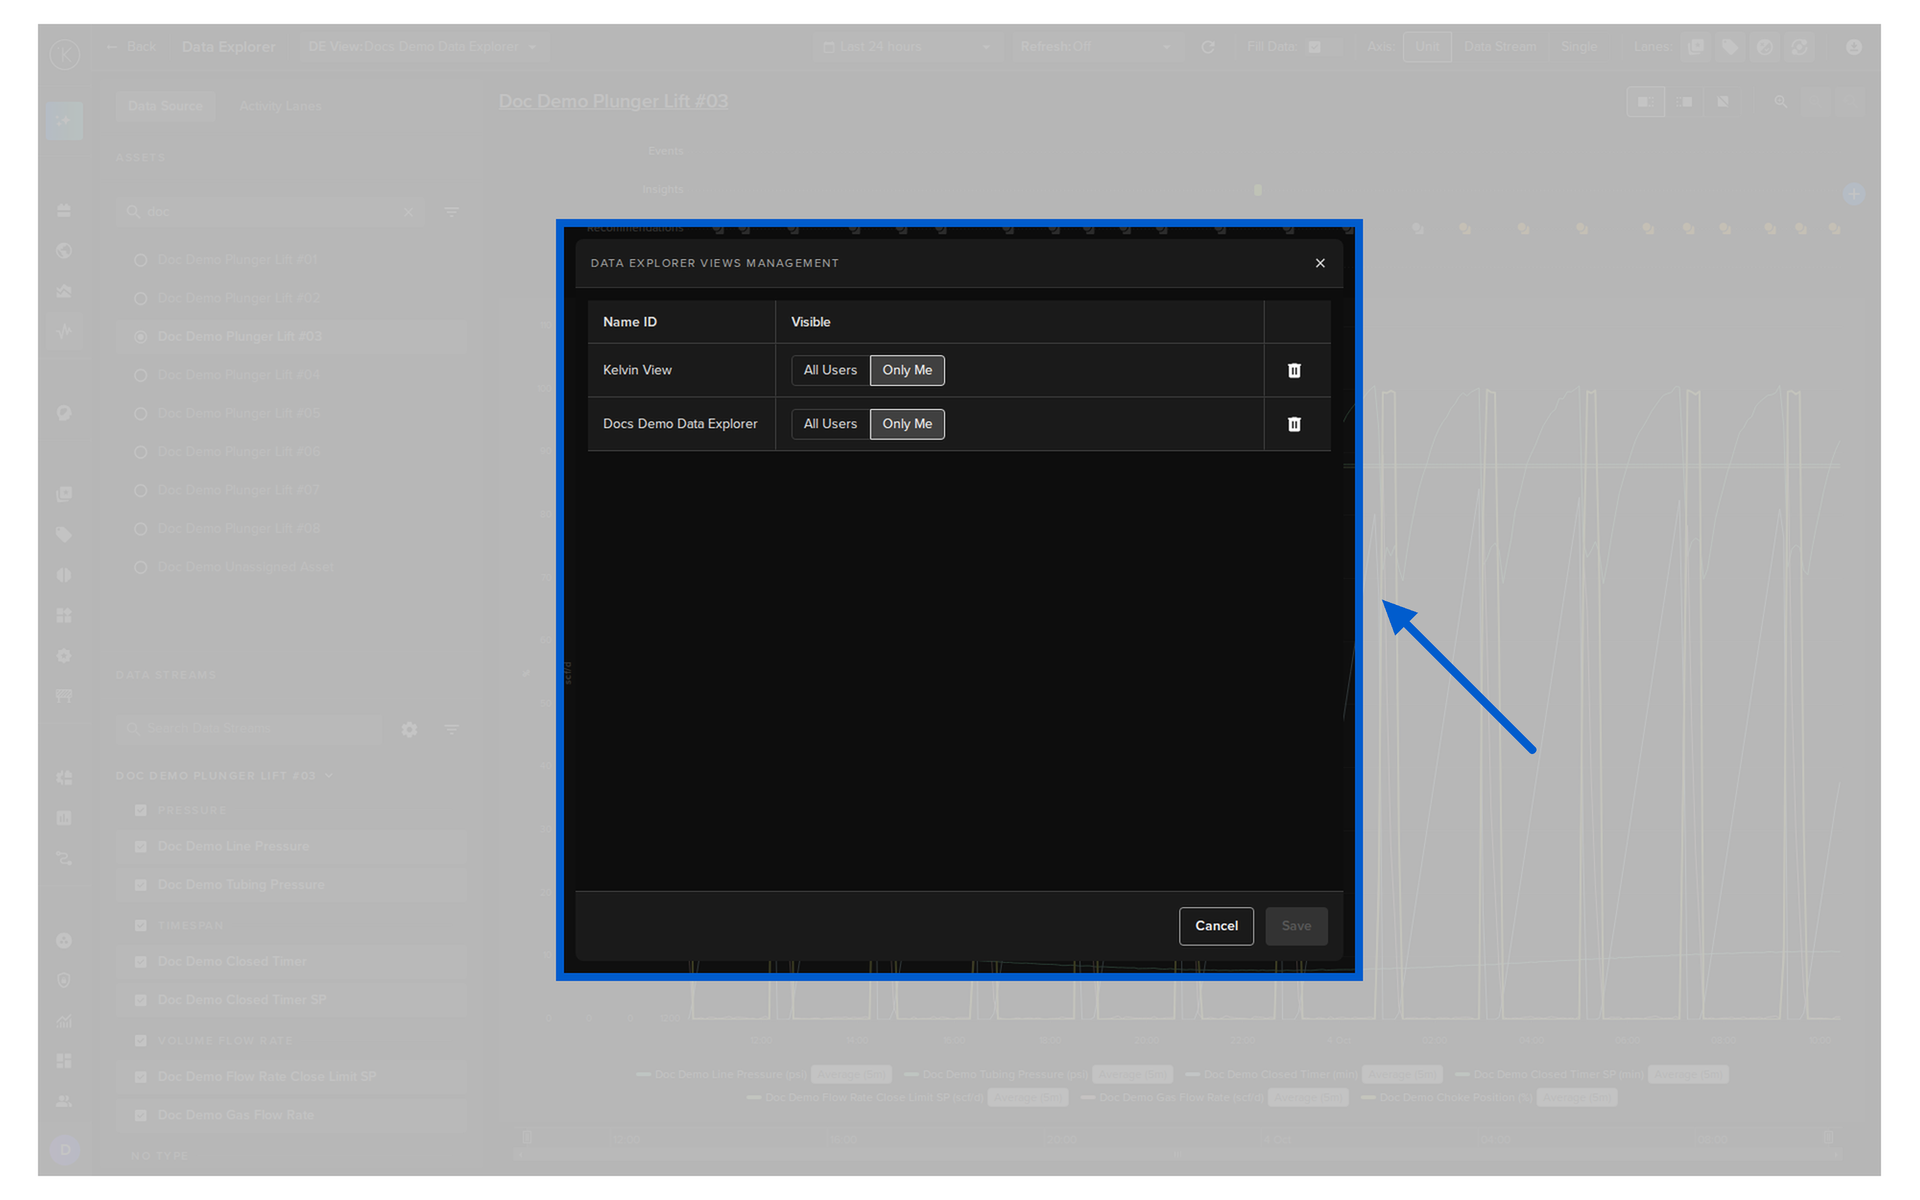
In the popup you can;
- See the Name and ID of each view
- Change who can see a view in the Visible column, choosing All Users or Only Me
- Delete a view with the delete icon
Click the Save button to keep your changes or the Cancel button to close the popup without changes.