Add CSV Publisher Connection - How To
When developing or testing new Kelvin SmartApps™ there may be times when you have a set of data you want to test on your Kelvin SmartApp™.
You can easily achieve this by using this CSV publisher which will use a set of data in a CSV file and simulate a live Connection.
Only available for x86_64 devices. arm64 version coming soon.
Connections was formerly called Bridges. You will find the Kelvin SDK and Kelvin API commands still refer to Connections as Bridges.
We first need to prepare the CSV file with data.
You can download a sample template in Step 3 of Creating a Connection in the Kelvin UI, or you can simply create your own CSV file as there are only three main rules for the CSV file;
- The first row is the header where each column name is a Data Stream name.
- Optionally the first column of the header can be named
timestampwhich is used to control when data is released to the Asset / Data Stream pairs. - Each following row is one set of data to be sent to the Asset / Data Stream pairs.
The headers are referencing the Data Stream name which must be lowercase alphanumeric without spaces. If you use a different name, you will still have opportunity to manually connect the header name with the correct Data Stream in kelvin UI during Step 4.
Once you have created this file, which for these examples we have called publisher-example.csv, then proceed to with one of these methods to deploy the Connection.
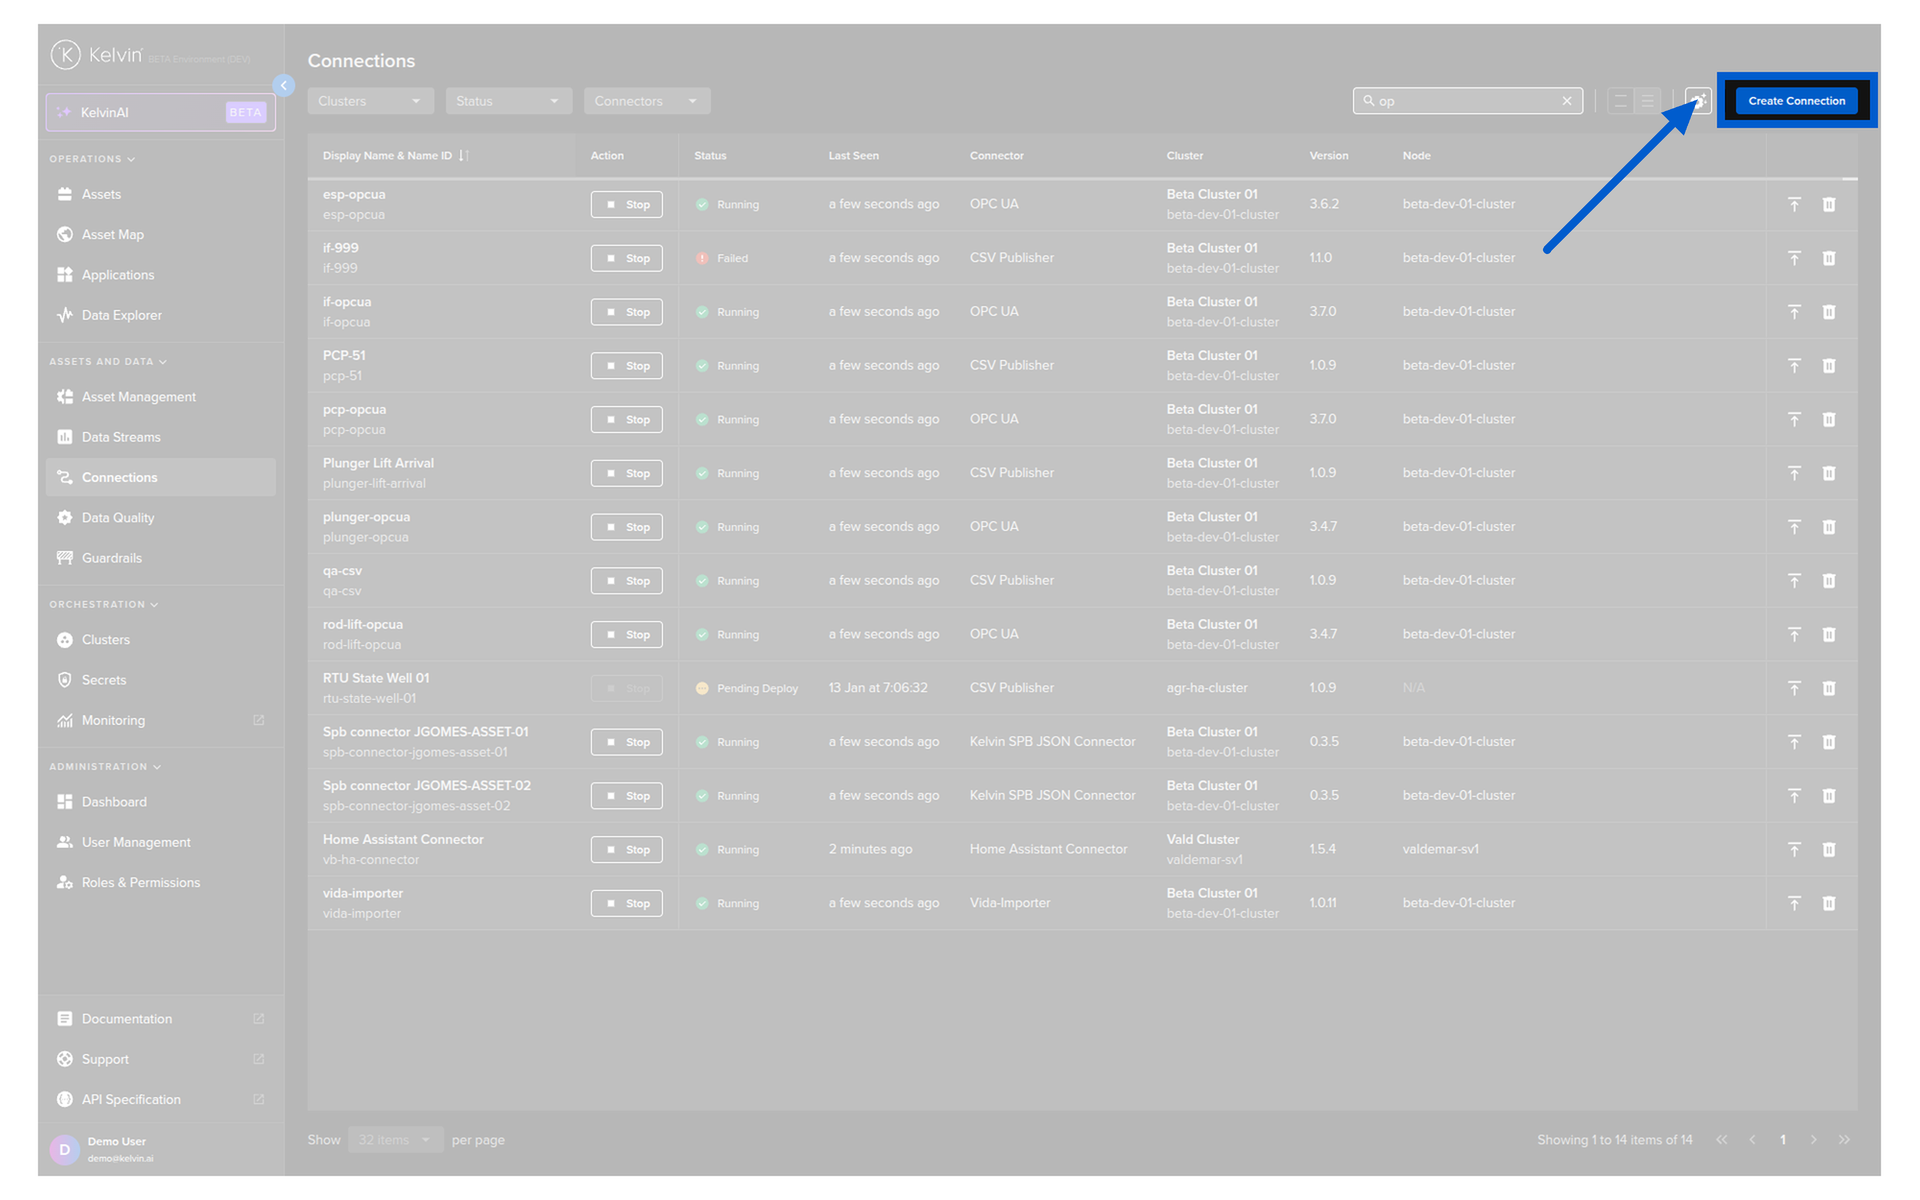
To start click on the Connections menu option from the left side bar menu.

click on the Create Connection button.
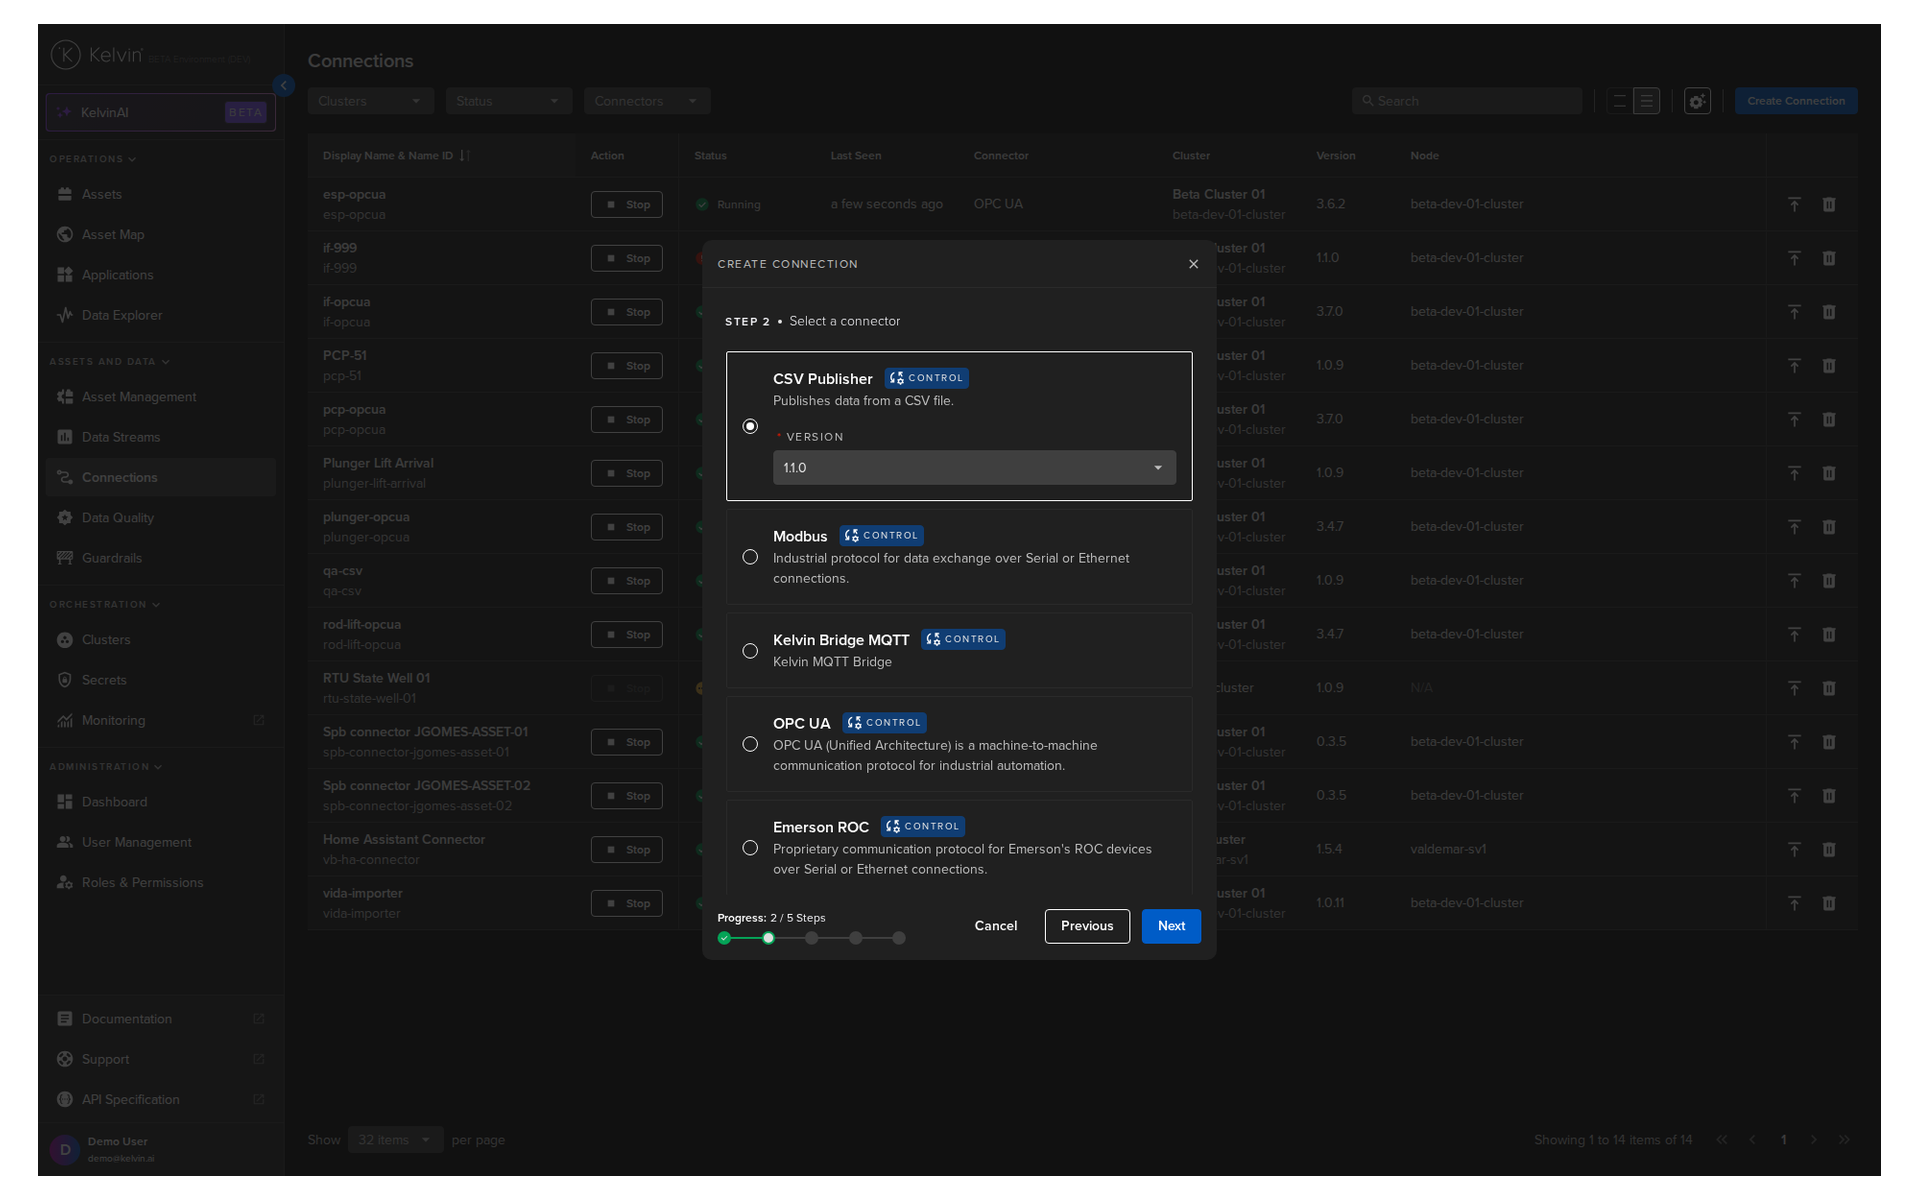
Step 1
Select the Kelvin CSV Publisher Connector option and click Next.
Step 2
Type in a memorable name in the Display Name text input. You can use any letters, numbers and special characters.
The Connection Name text input will be automatically converted and filled in as you type in the Connection Display Name section. The conversion ensures the Connection Name only contains lowercase alphanumeric characters and ., _ or - characters.
Then select which Cluster to deploy the new Connector to.
It is important that the asset is reachable from the selected Cluster.
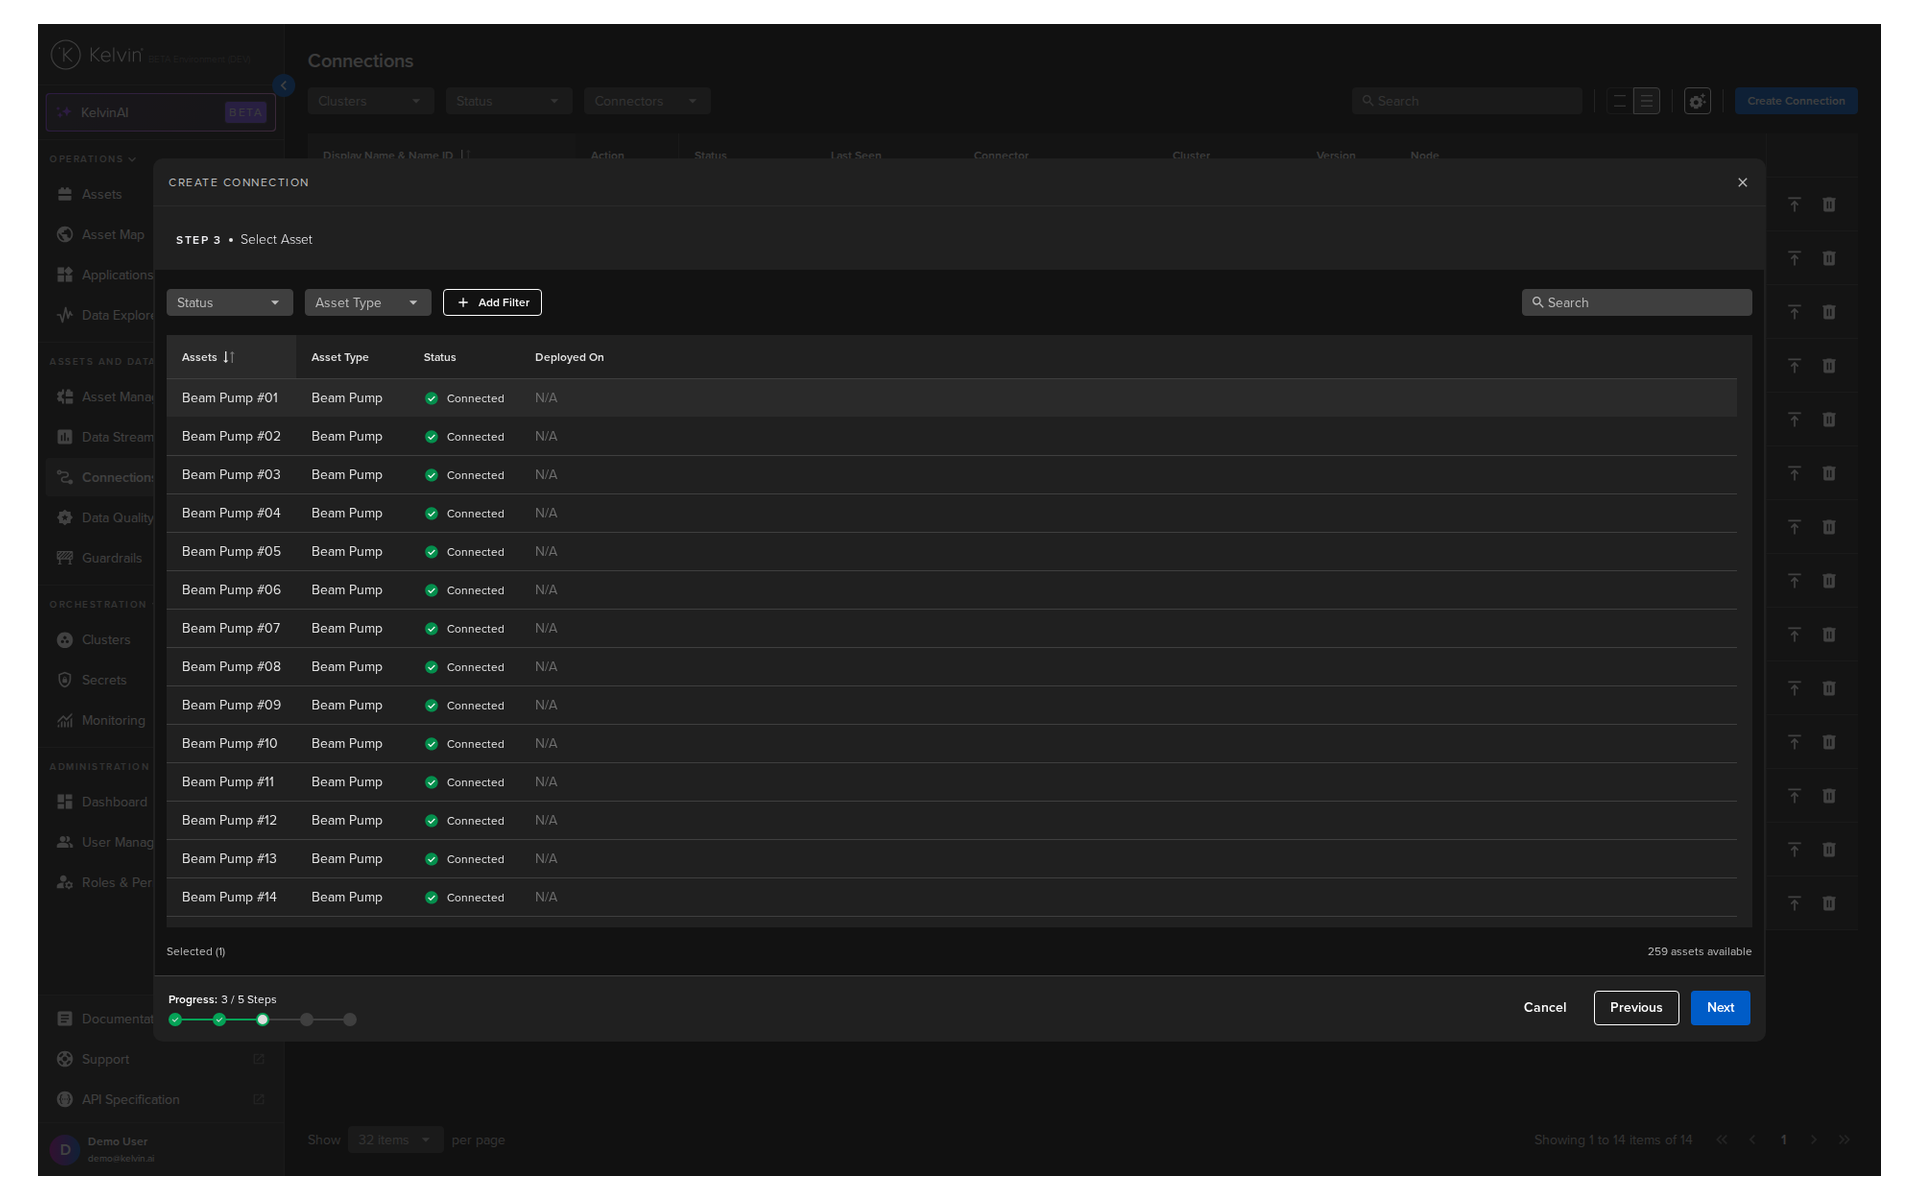
And finally select the Asset the data will be sent to.
You can only select one Asset per Connection to send the data to.
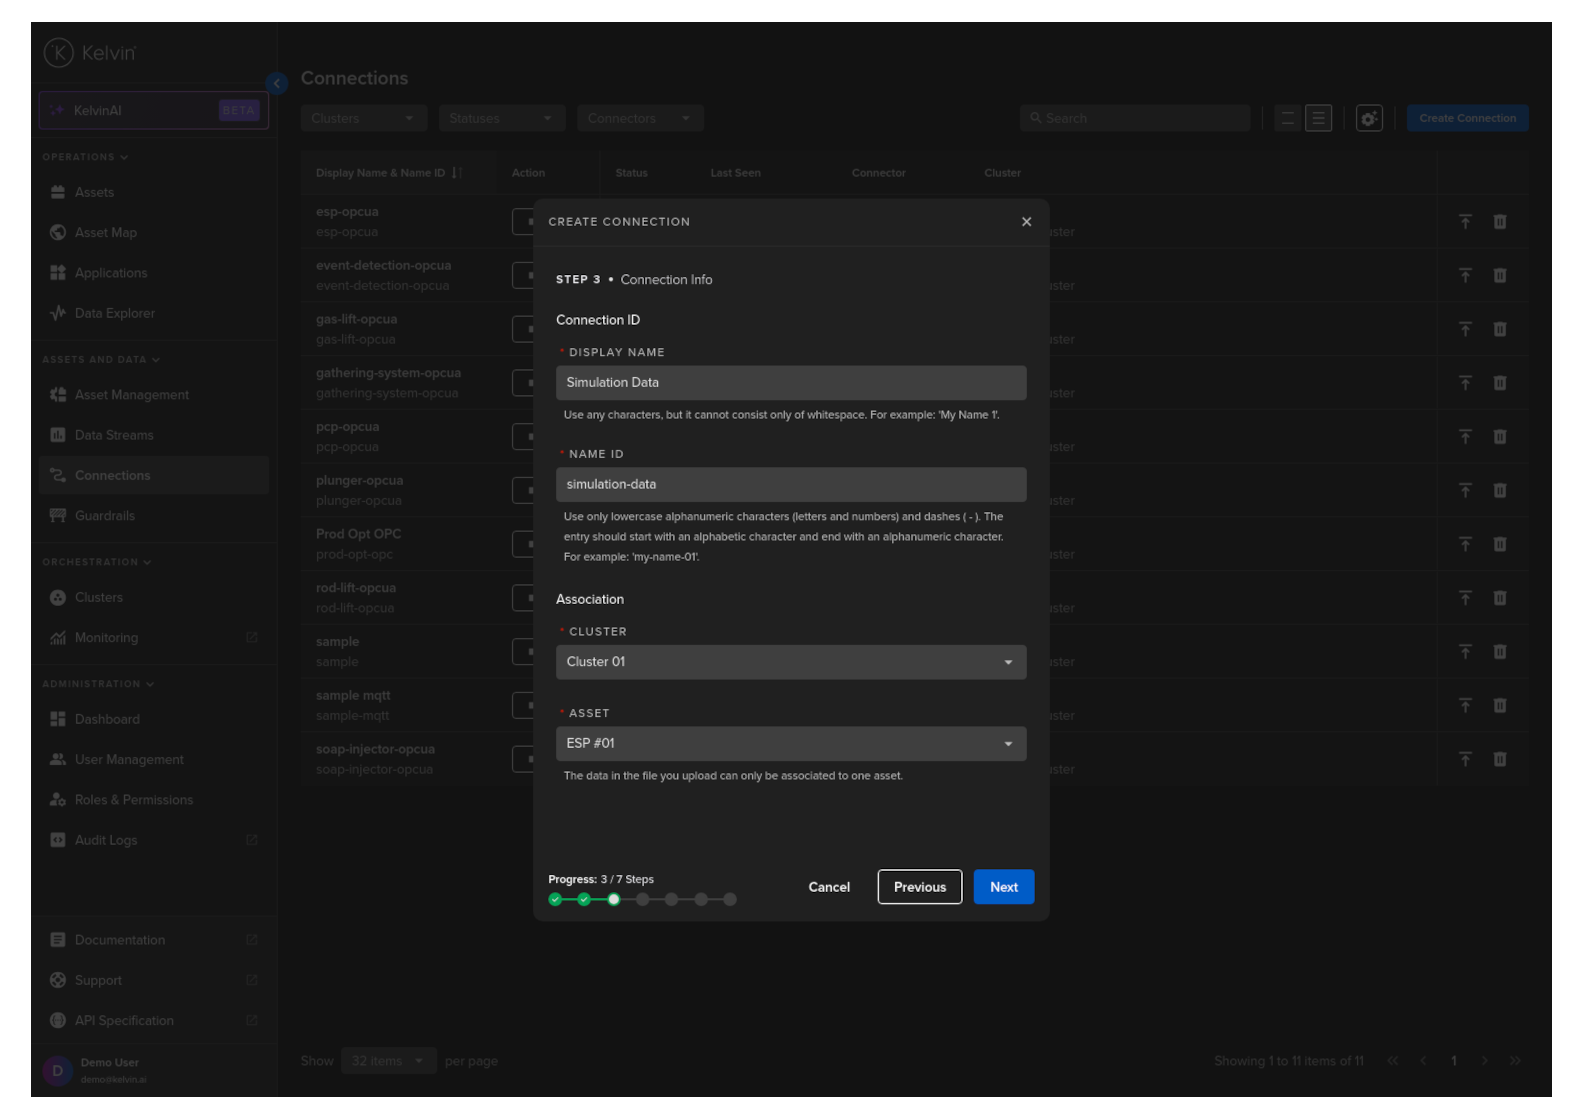
When ready click Next to move to Step 3.
Step 3
Drag and drop or select your file to upload.
At this stage you can also download a sample template for reference on how to create a valid publishing CSV file.
Once you have selected the right CSV file you can click Next to go to Step 4.
Step 4
The file is now validated.

Once done you can click Next to go to Step 5.
Step 5
In this step you can now connect the column name to the Data Stream name.
Kelvin UI will attempt to automatically select the right Data Stream based on the column name.
You do not have to accept this and can select any Data Stream name in the Instance.
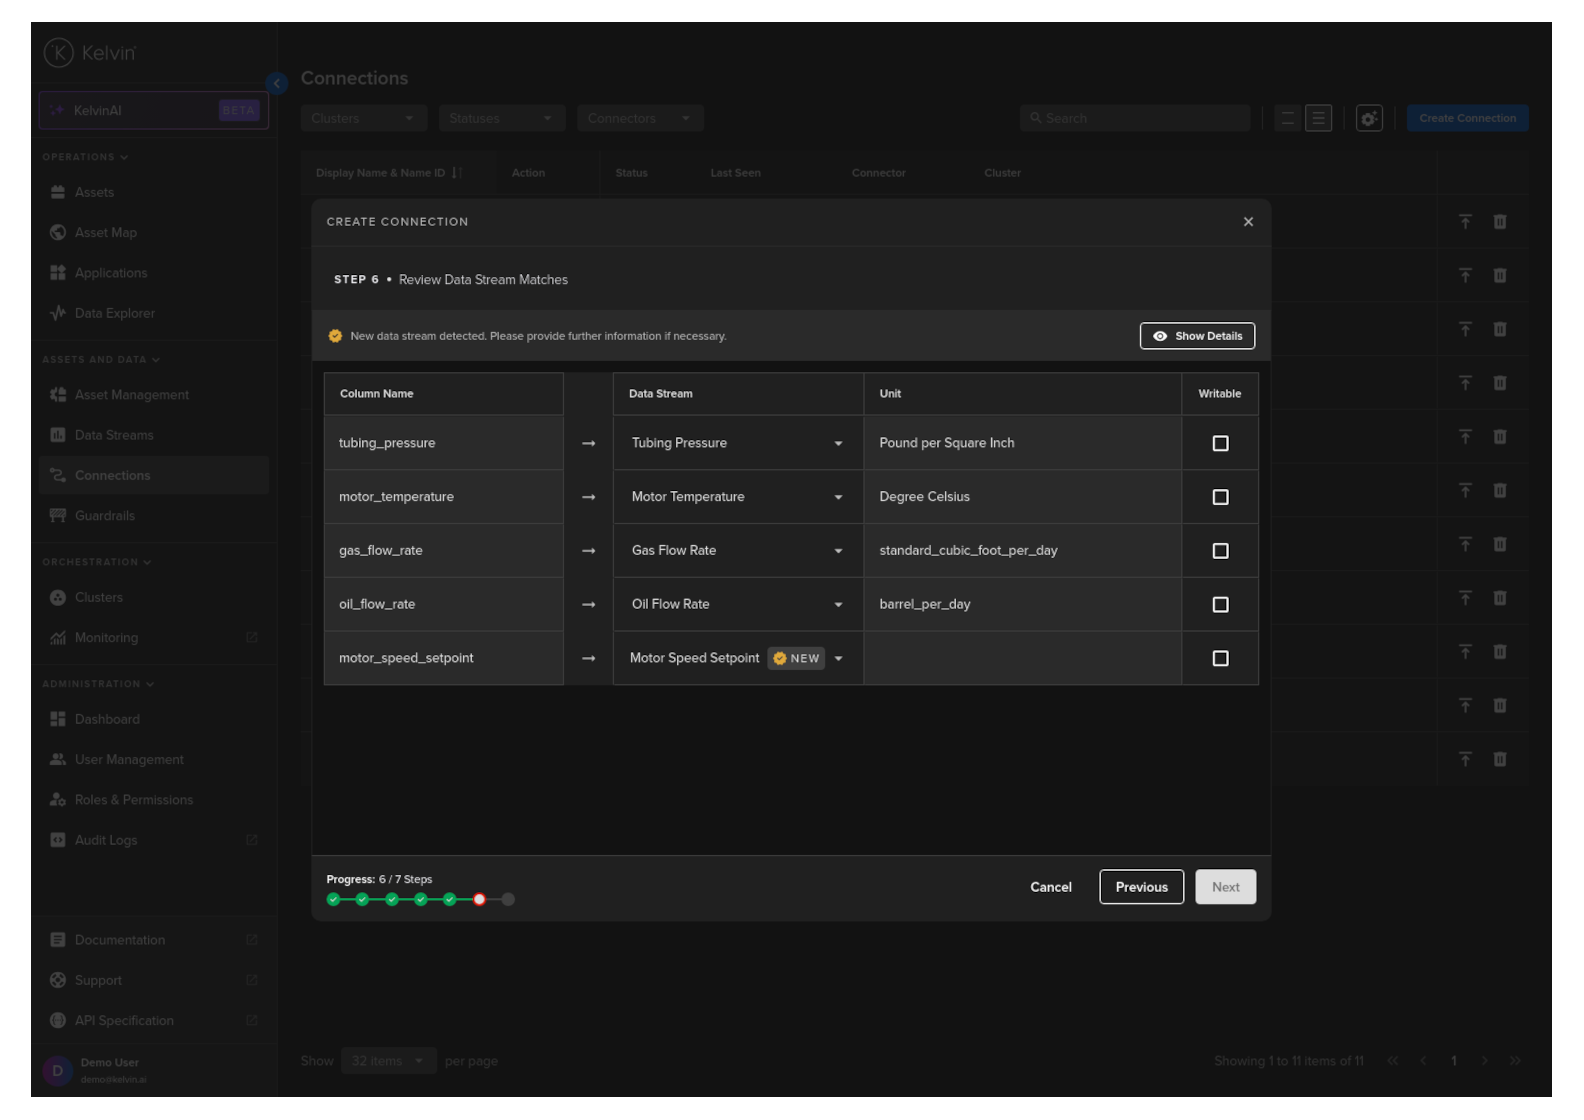
Once you are satisfied you can click Next to go to Step 5.
Step 6
Now you can select how the data will be replayed to the Asset / Data Stream pairs.
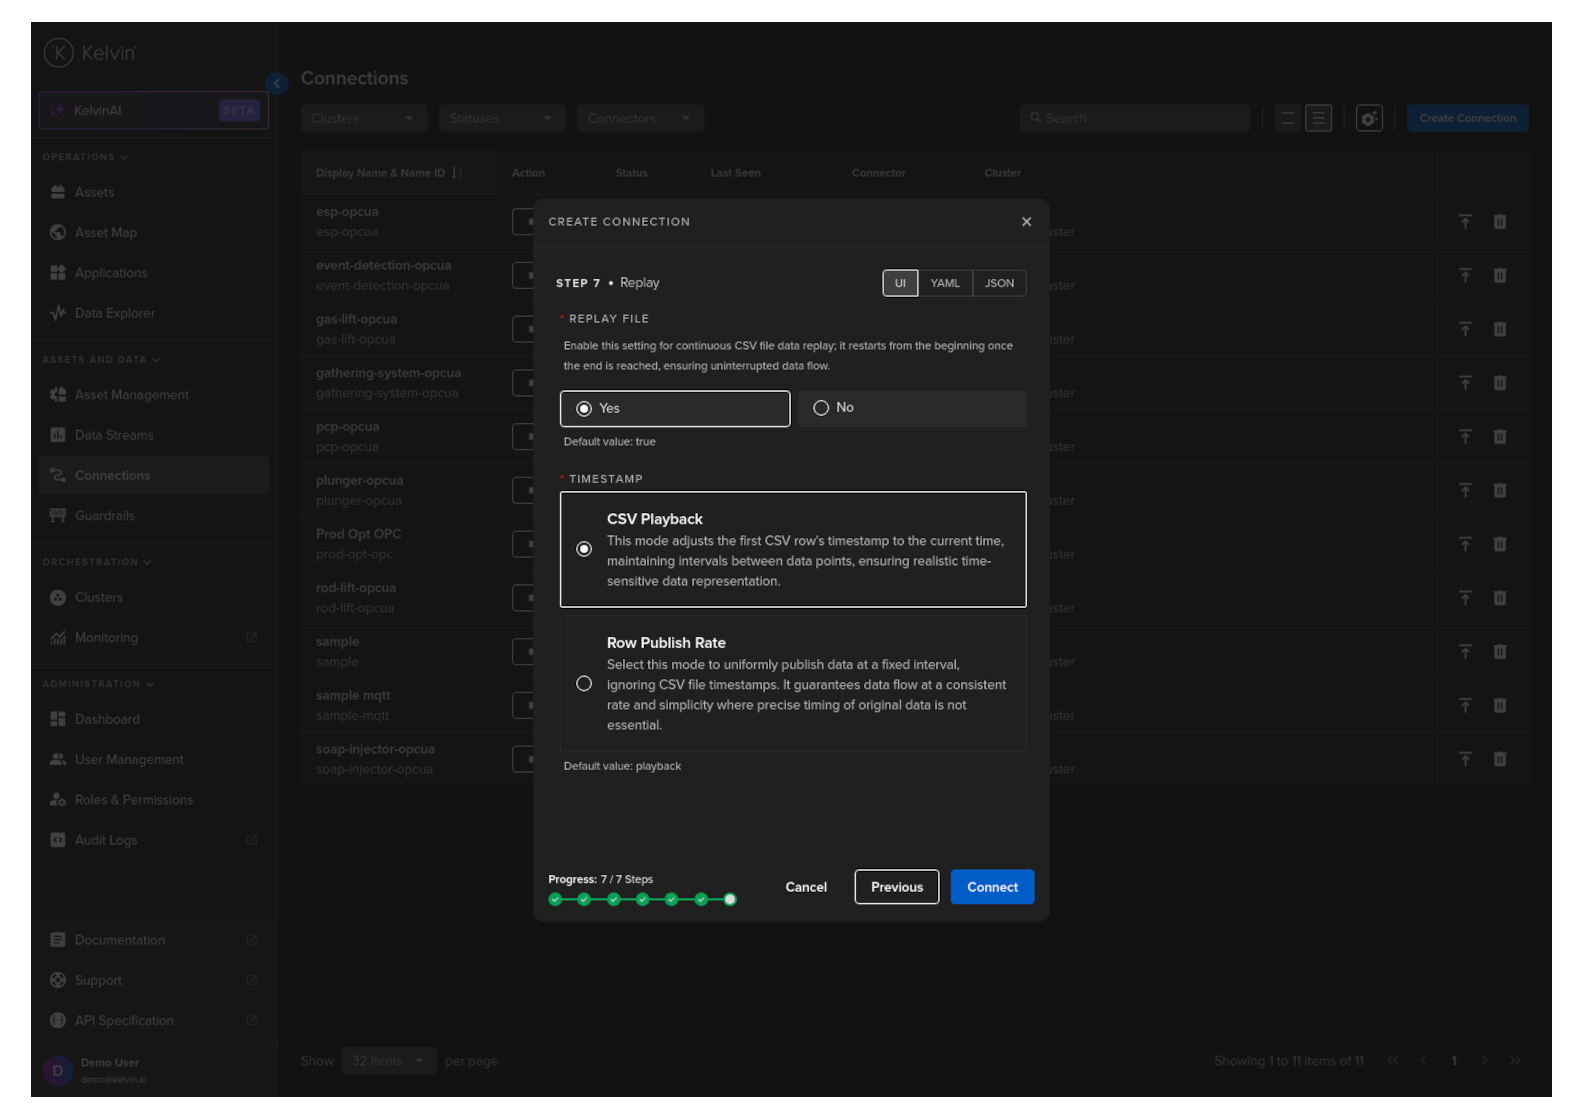
When you are ready, click Connect and the Connection will be deployed and automatically started.
The two main playback options are;
This option allows you to loop the data to produce an infinite amount of data or you can send the data once.
Very useful for both testing long term reliability of your Kelvin SmartApp™ with infinite loop
OR testing the accuracy of your Kelvin SmartApp™ with a known set of data through one iteration to monitor its response.
This option allows you to select what time intervals to use to send data to the Asset / Data Stream pairs.
CSV Playback
This option uses the timestamp information in the timestamp column of the CSV file on when to release the data.
The timestamp of the first data row is used as the starting point reference and each consecutive row will be sent based on the time different of the first row and next row to be sent.
Row Publish Rate
This option will send each row of data at a fixed interval and ignore any timestamp column in the CSV file.
Before deploying a CSV Publisher Connection using the Kelvin API you will need to upload the CSV file to File Storage first and get the reference ID.
| API cURL Example | |
|---|---|
1 2 3 4 5 6 7 | |
The response will look like this;
| API cURL Example Response | |
|---|---|
1 2 3 4 5 6 7 8 9 10 11 | |
You can now deploy the CSV Publisher connection
You will need to note the file_id which will be used as part of the csv_url in the Connection as reference to the data to be published.
The column header in the csv file and the data stream name in metrics_map does not need to be the same.
It is only important that the column name exists in the csv file and the data stream name exists in Kelvin.
| API cURL Example | |
|---|---|
1 2 3 4 5 6 7 8 9 10 11 12 13 14 15 16 17 18 19 20 21 22 23 24 25 26 27 28 29 30 31 32 33 34 35 36 37 | |
You will get a response similar to this;
| API cURL Example Response | |
|---|---|
1 2 3 4 5 6 7 8 9 10 11 12 13 14 15 16 17 18 19 20 21 22 23 24 25 26 27 28 29 30 31 32 33 34 35 36 37 38 39 40 41 42 43 | |
And after a while the state will change from pending_deploy to running.
You will need to first upload a file to the file storage on Kelvin. This file holds all the data used for serving as the simulation data.
You can learn more how to upload and manage files in the file storage on Kelvin here.
The column header in the csv file and the data stream name in metrics_map does not need to be the same.
It is only important that the column name exists in the csv file and the data stream name exists in Kelvin.
| API Client (Python) Example | |
|---|---|
1 2 3 4 5 6 7 8 9 10 11 12 13 14 15 16 17 18 19 20 21 22 23 24 25 26 27 28 29 30 31 32 33 34 35 36 37 38 39 40 41 42 43 44 45 46 47 48 | |
You will get a response similar to this;
| API Client (Python) Example Response | |
|---|---|
1 | |