5. Configure

In this section, you will learn how to configure your Kelvin Cloud instance. We will configure the environment to simulate a real-world scenario. Here is a high-level overview of the steps involved:
-
Importing Assets: An Asset in Kelvin denotes a digital representation of a physical or virtual equipment. Each asset is characterized by a set of properties that detail its attributes and by datastreams, which are channels of continuous or time-stamped data related to the asset's operation or state
-
Importing Data Streams: Data streams are the primary source of data for Kelvin SmartApps™. They represent the real-time data generated by assets and are used as inputs to the SmartApp to generate actionable recommendations and control system adjustments.
-
CSV Connection: A connection in Kelvin is a data source that provides a data stream feed to the SmartApps. In this guide, we will create a CSV connection that will continously replay a CSV timeseries file.
This demonstration video was done in v5.9.
There may be slight differences with the latest version.
Check the latest documentation for the specific tasks should any feature not quite work as expected.
Video Guide
Watch this quick start guide performed in real time in less than 6 minutes.
Written Guide
Import Assets
Open your browser and navigate to https://<instance>.kelvin.ai. Login with your credentials and you will be presented with the Kelvin UI.
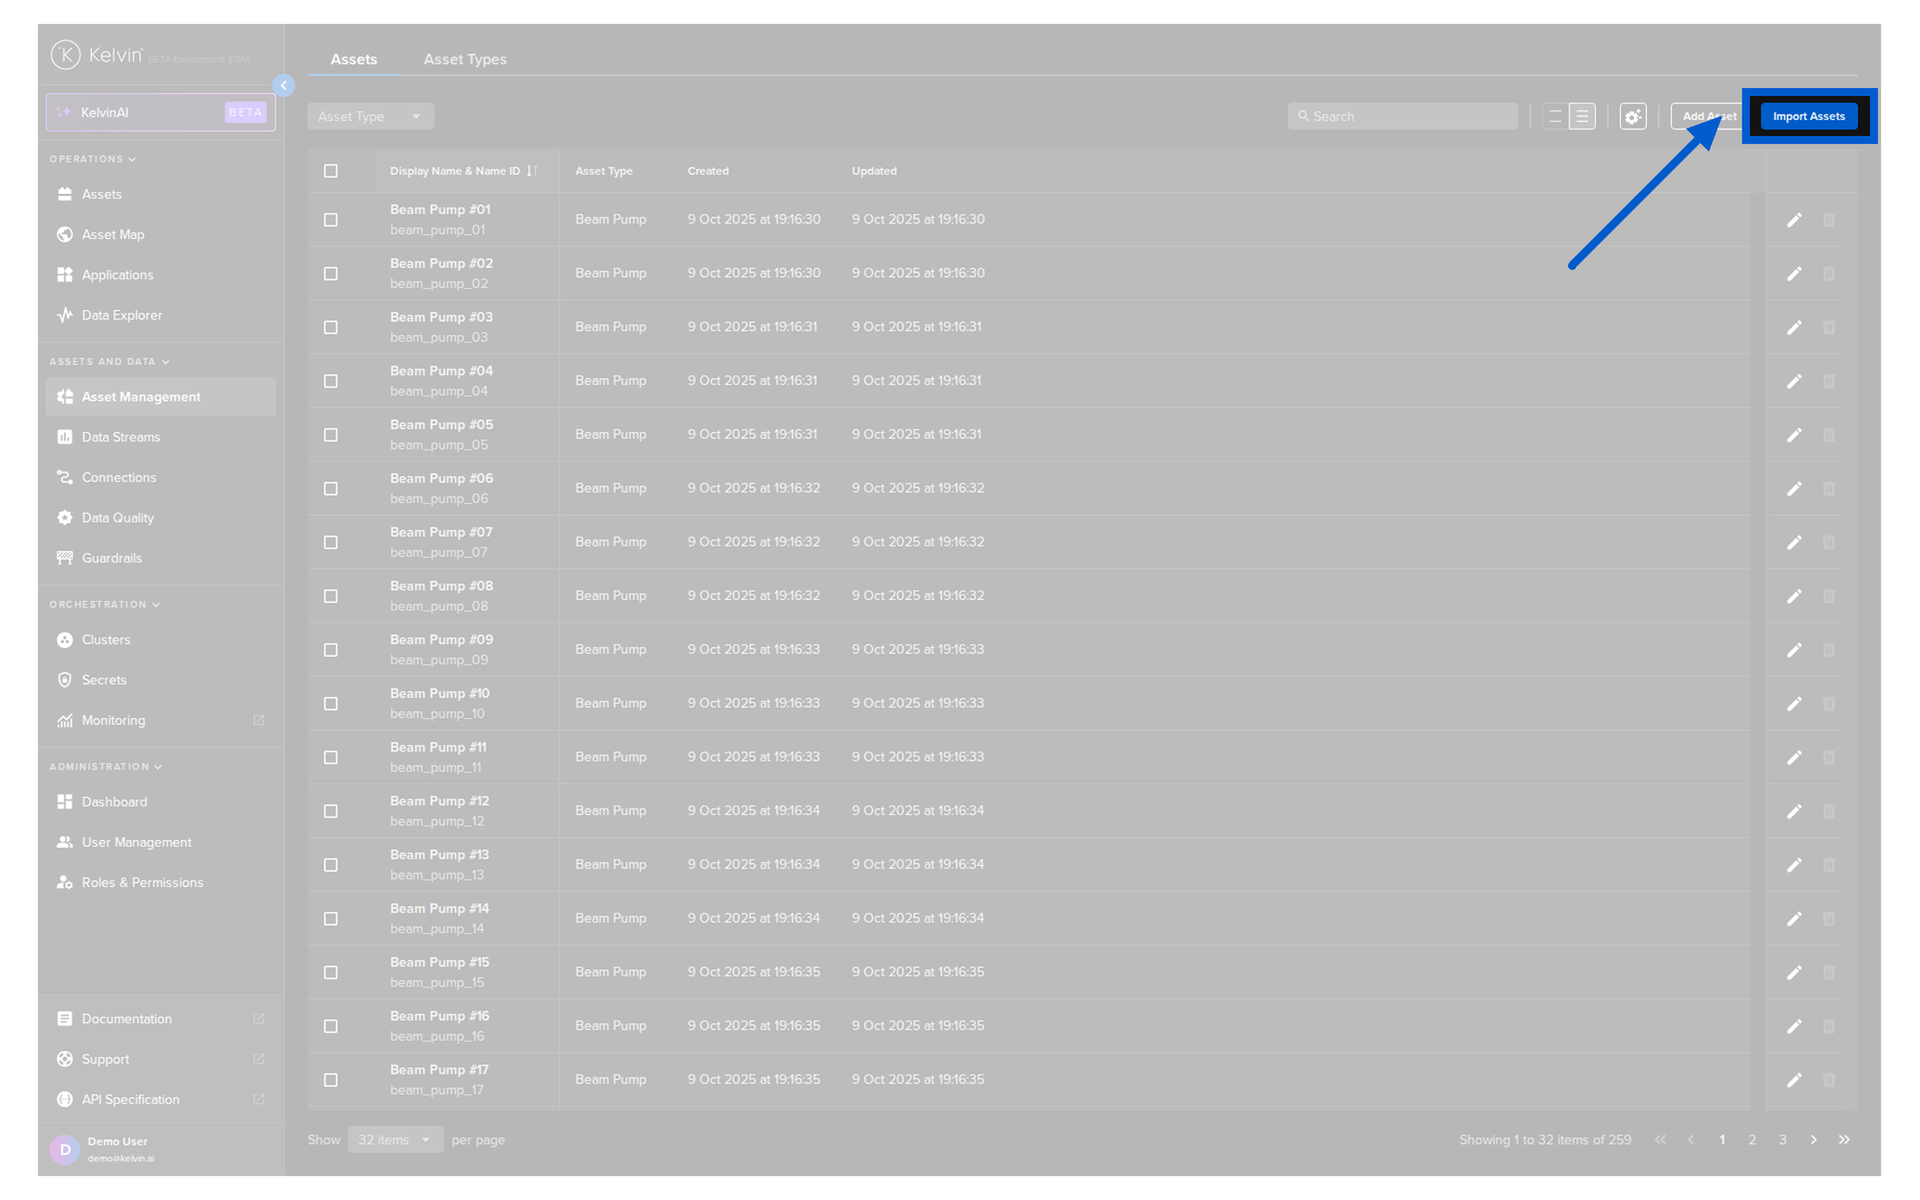
Click on the Asset Management section on the left navigation menu

And then click on the Import Assets button on the top right of the page.
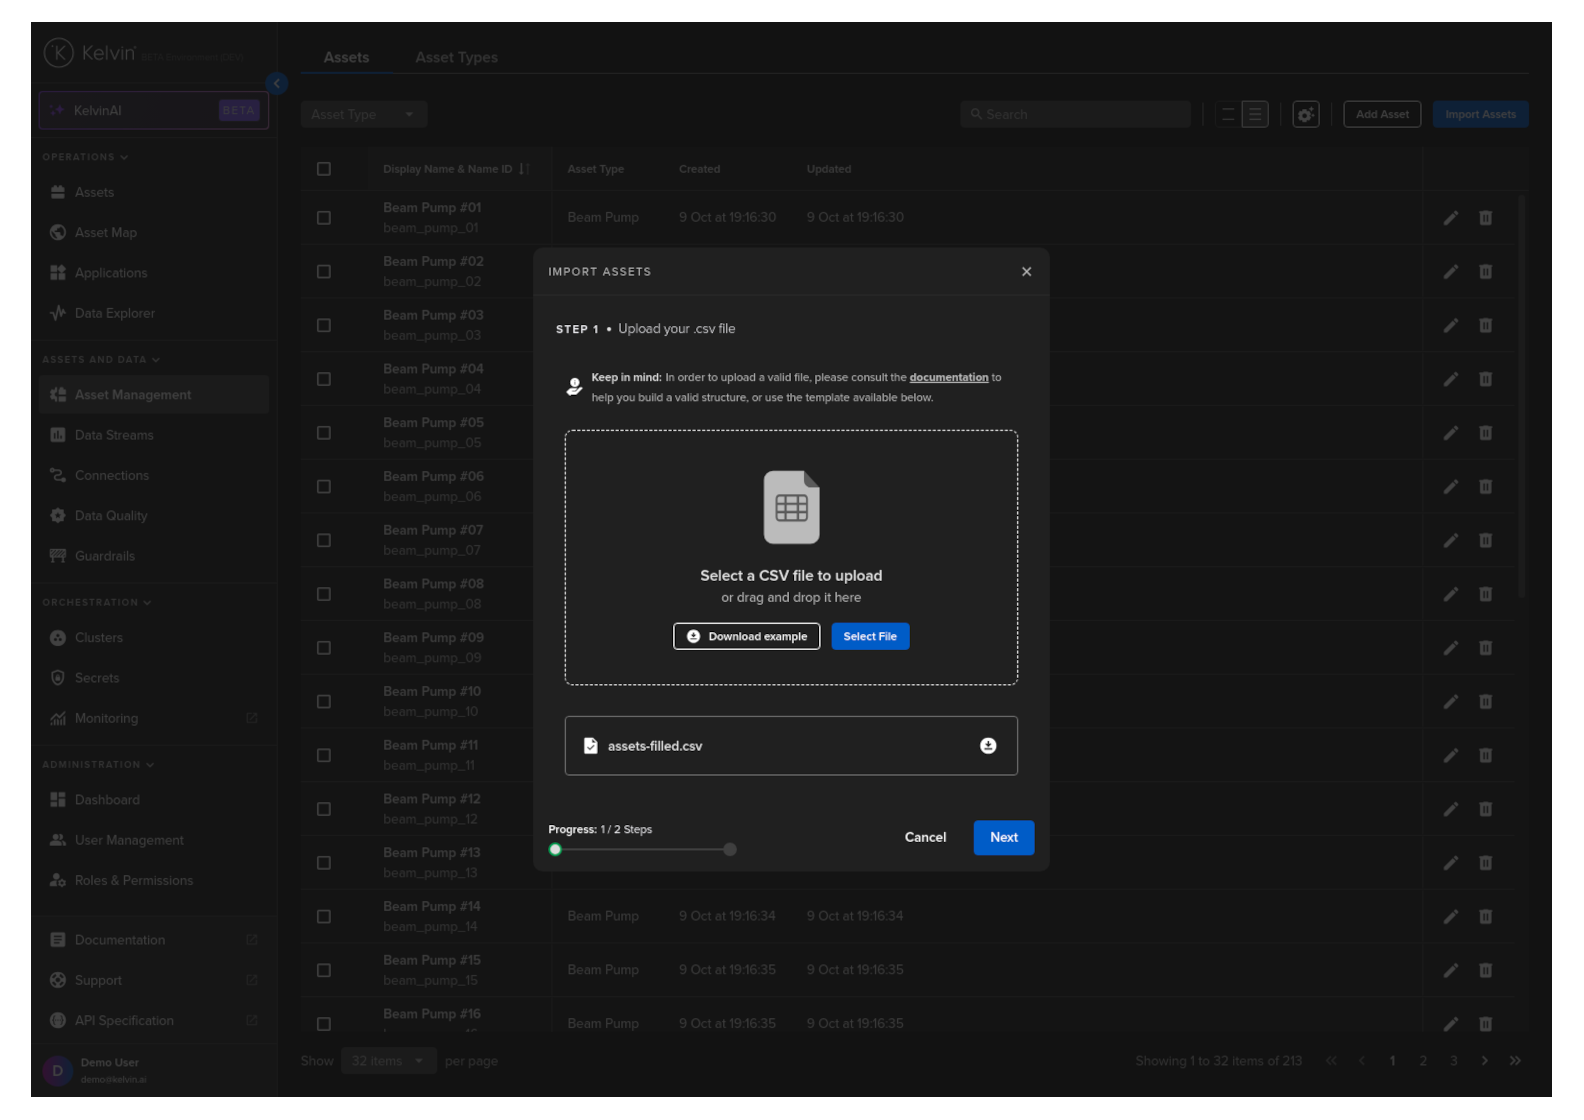
In the popup, you will have the option to download the sample template that gives you the structure you need to follow. Go ahead and click on the Download Template button and save the file.
Info
We have prepared an assets.csv file for you to test. You can download it from the link below and save it to your local machine:
Modify the template with the following data (or just download our ready made CSV file):
| Import Assets CSV File | |
|---|---|
1 2 3 4 5 6 7 8 9 10 | |
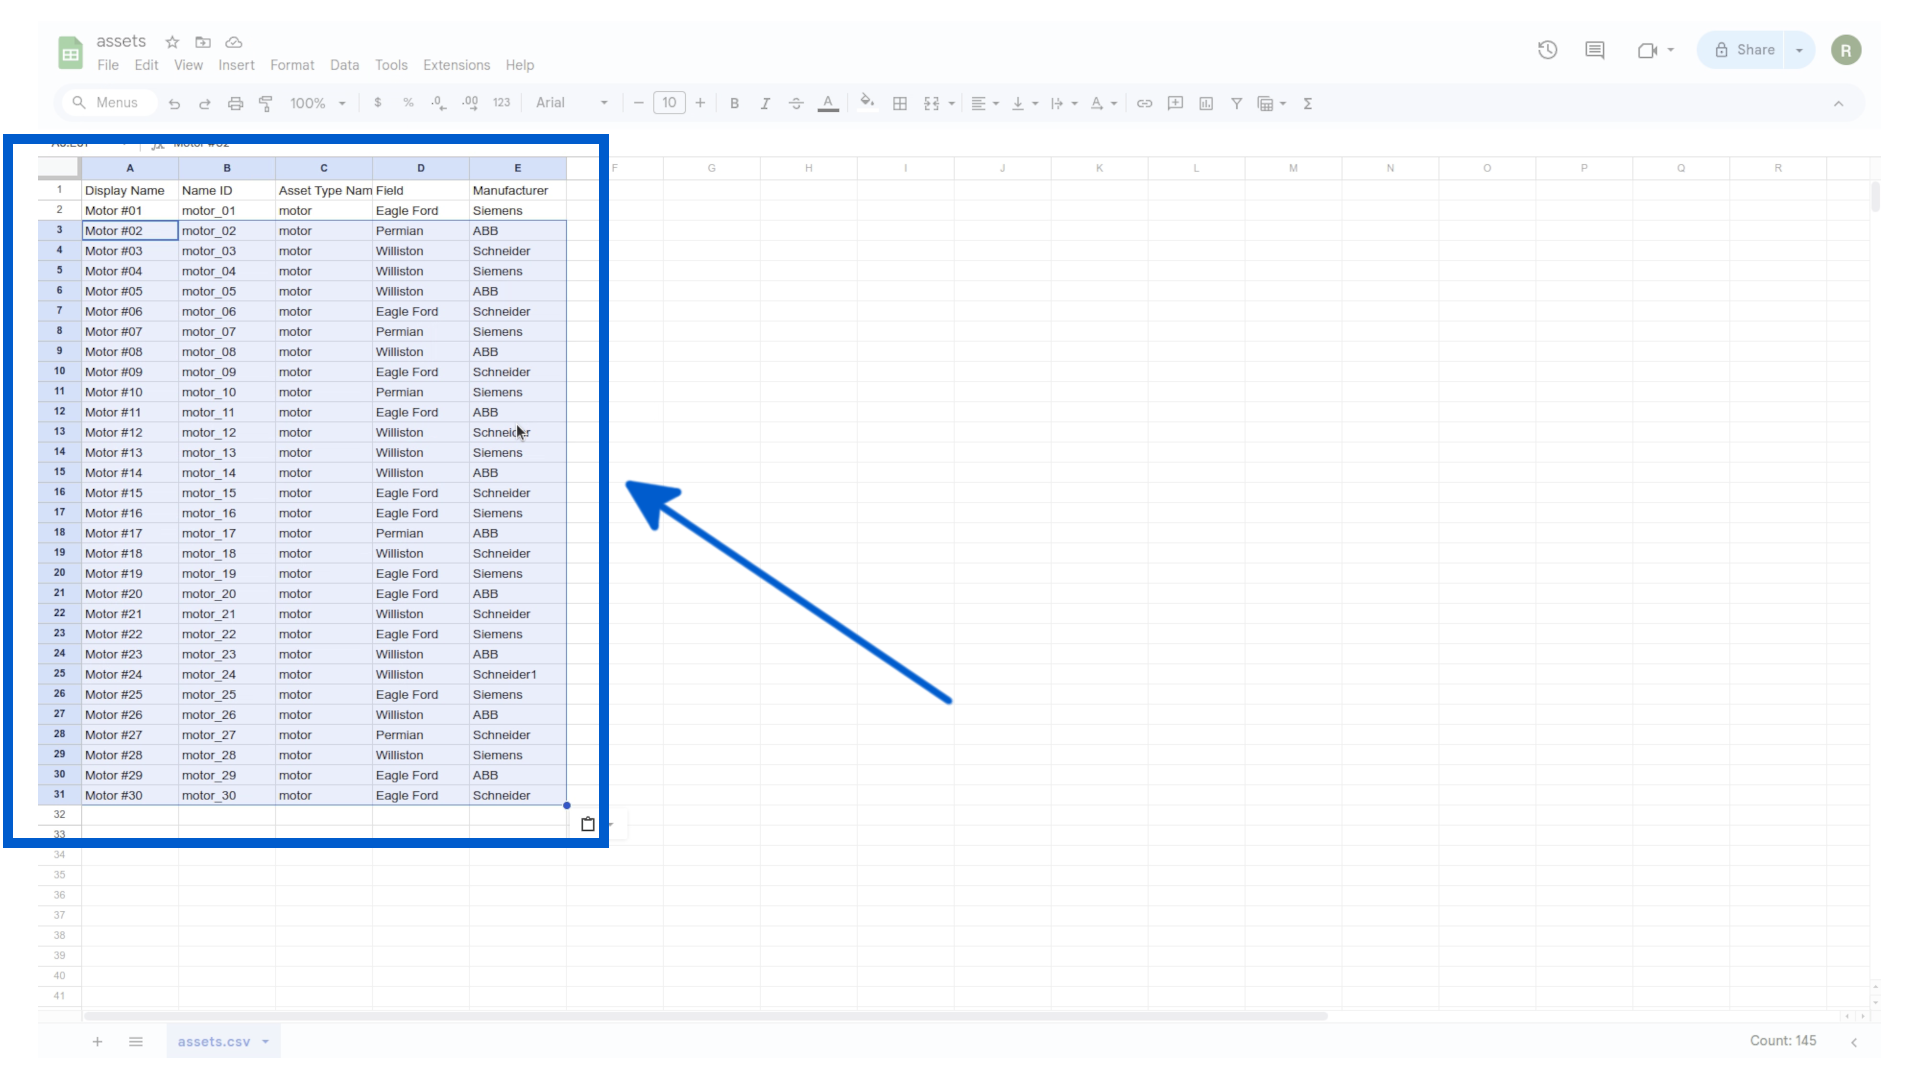
A brief explanation of the columns in the CSV file:
- Display Name: The name of the asset as it will appear in the Kelvin UI.
- Name ID: A unique identifier for the asset.
- Asset Type Name ID: The type of asset (e.g., motor, pump, compressor).
- Field: This is an optional Asset Property with metadata where the asset is located.
- Manufacturer: This is an optional Asset Property with metadata about the manufacturer of the asset.
You can add as many additional Asset Properties as needed, like Location, PLC Type, Well Depth, Motor Configuration, etc.
Next, let's import the assets into your Kelvin Cloud instance.
Upload the previously downloaded assets.csv file and click Next.
Note
In the screenshot you will see the file named assets-filled.csv. when uploading your file, you will see the name of your csv file here instead.
The contents of the file will be validated to make sure there are no errors. If there are any errors, you will be prompted to correct them before proceeding. Next, click on the Import button.
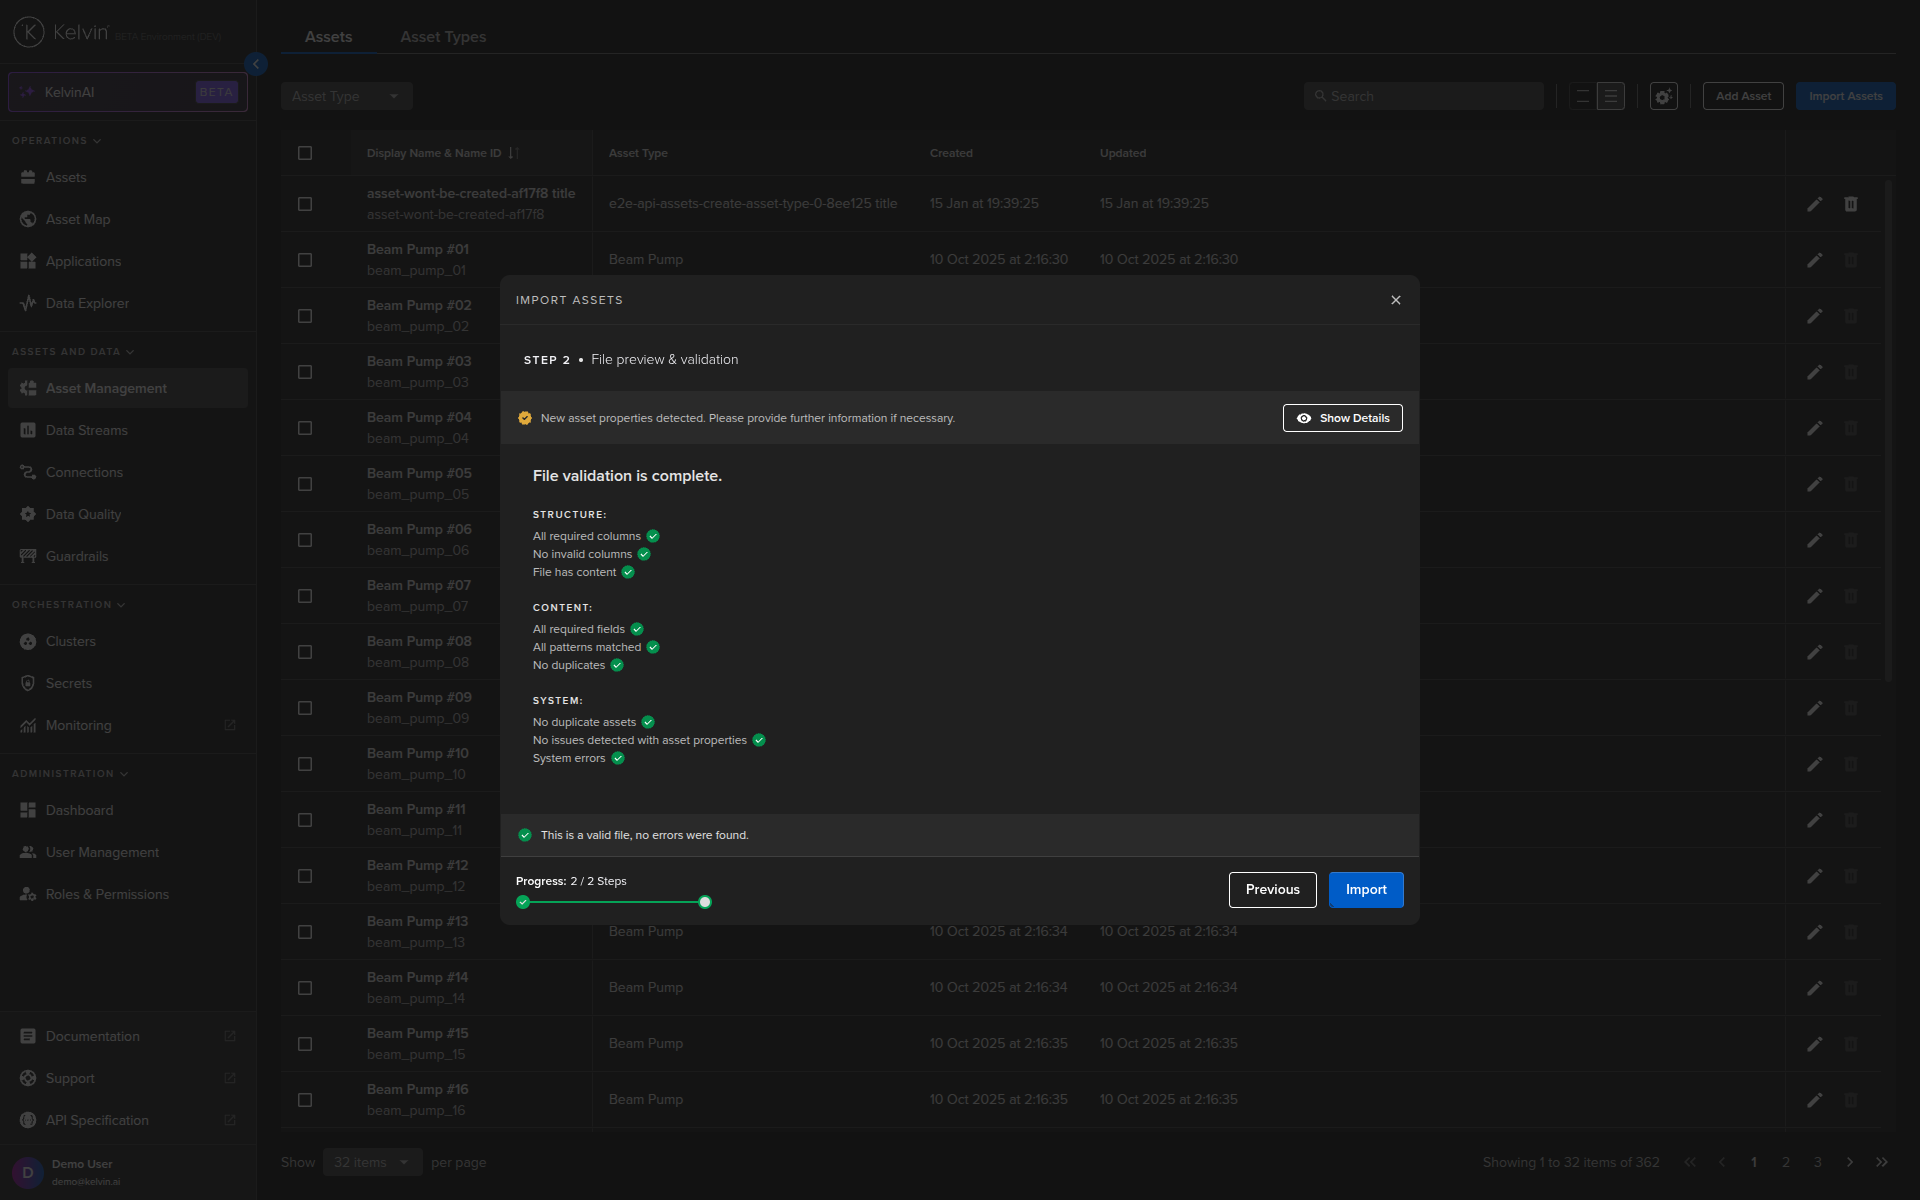
You will then see the assets you imported in the Asset Management section.
Success
Congratulations! You have successfully configured your assets.
Import Data Streams
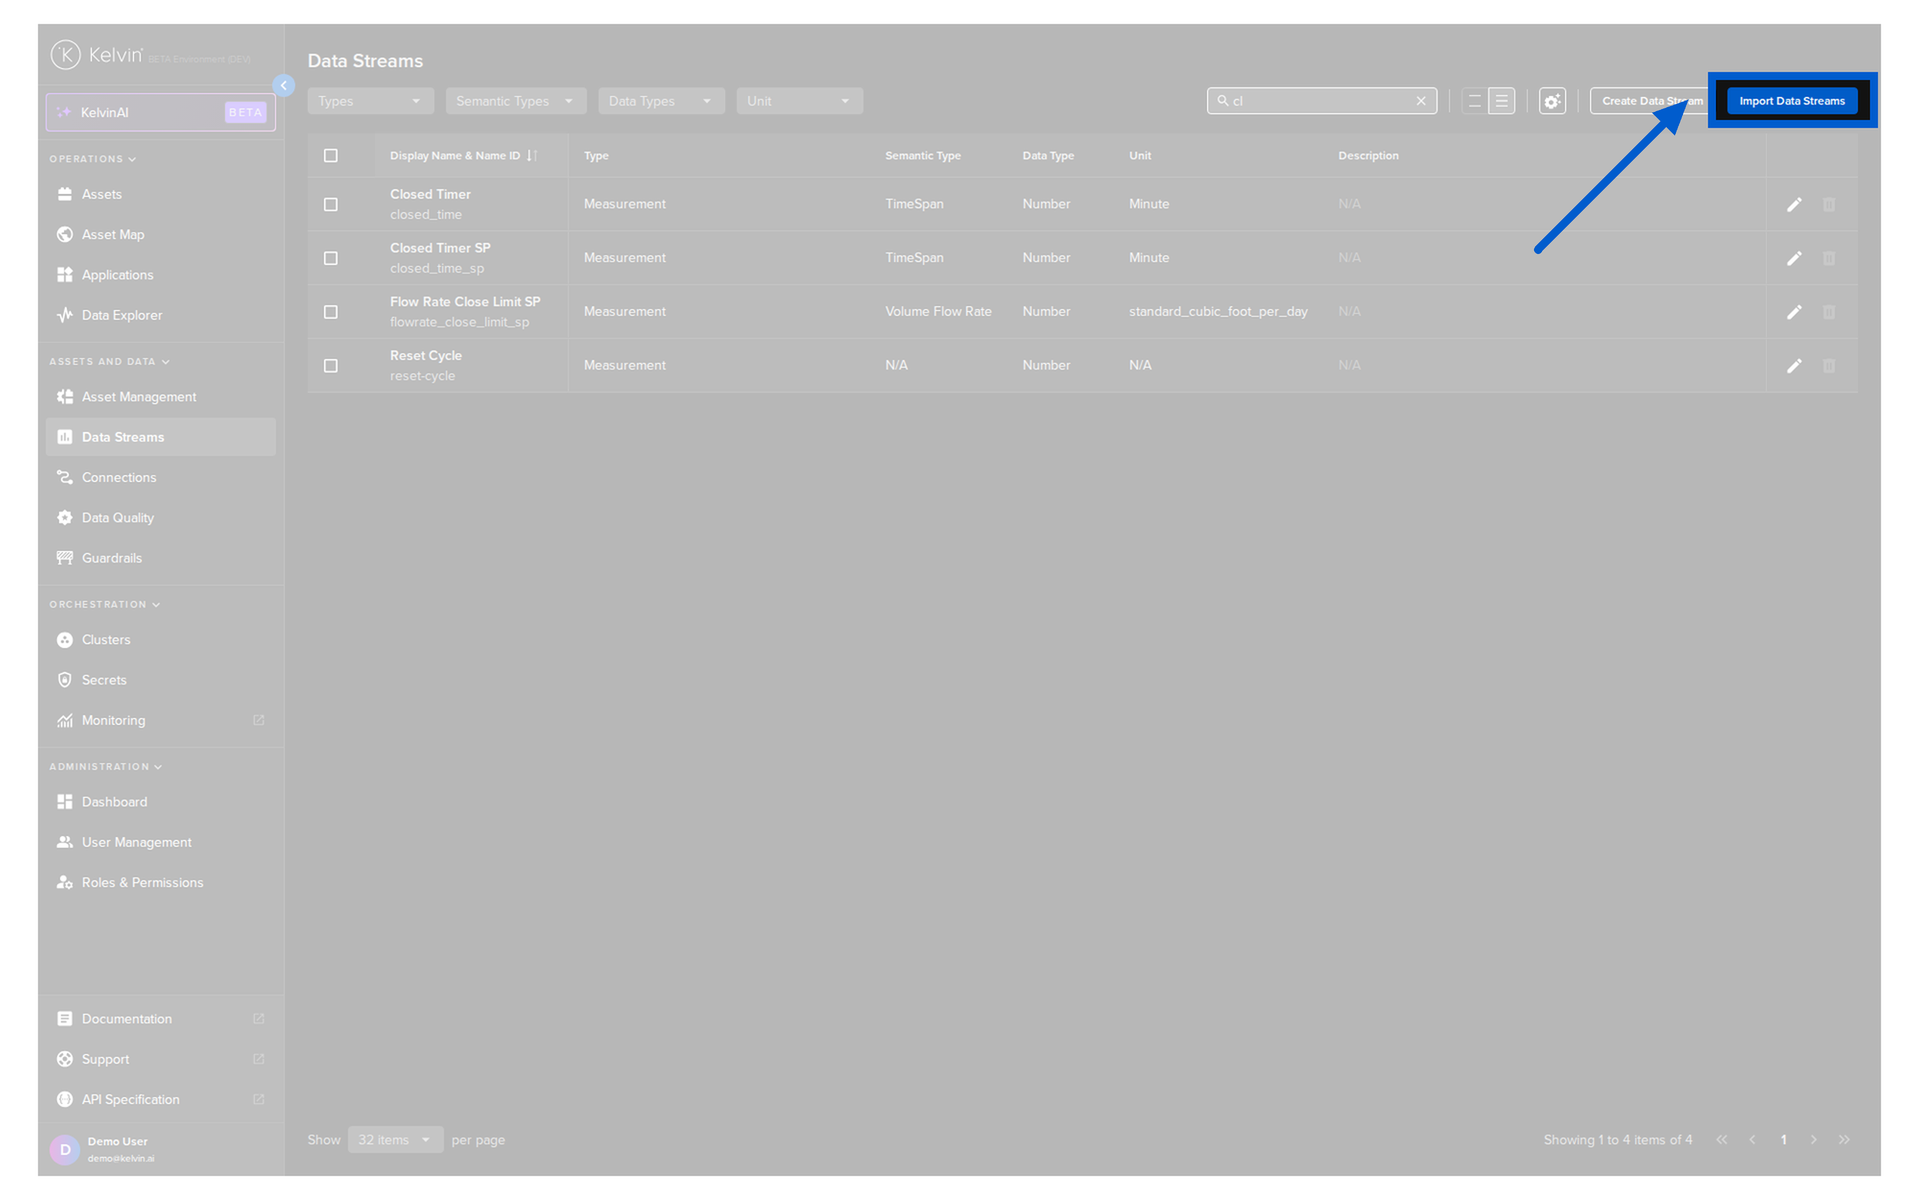
Go to the Kelvin UI. Click on the Data Streams section on the left navigation menu and then click on the Import Data Streams button on the top right of the page.
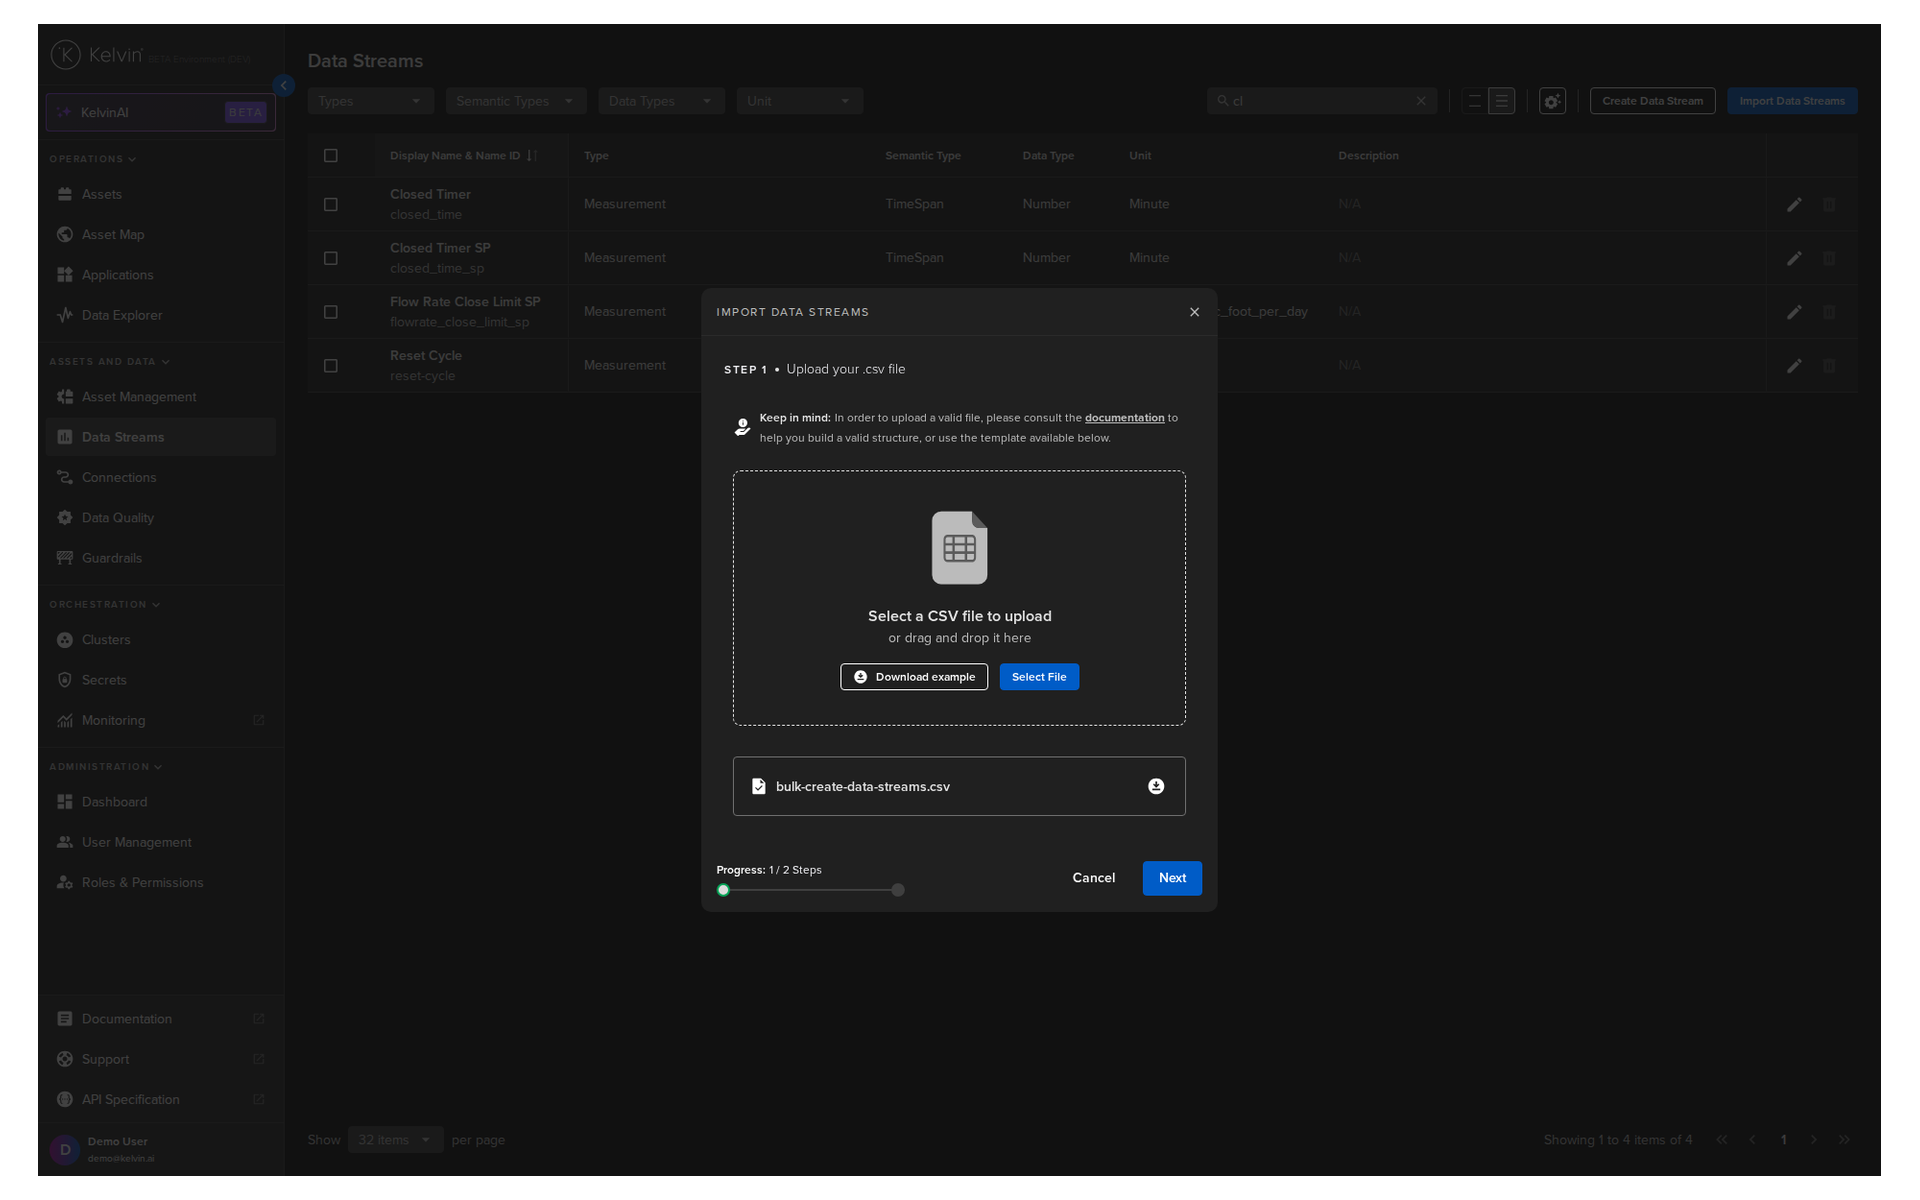
In the popup, you will have the option to download the sample template that gives you the structure you need to follow. Go ahead and click on the Download Template button and save the file.
Info
We have prepared a datastreams.csv file for you to test. You can download it from the link below and save it to your local machine:
Modify the template with the following data (or just download our ready made CSV file):
| Import Data Streams CSV File | |
|---|---|
1 2 3 | |
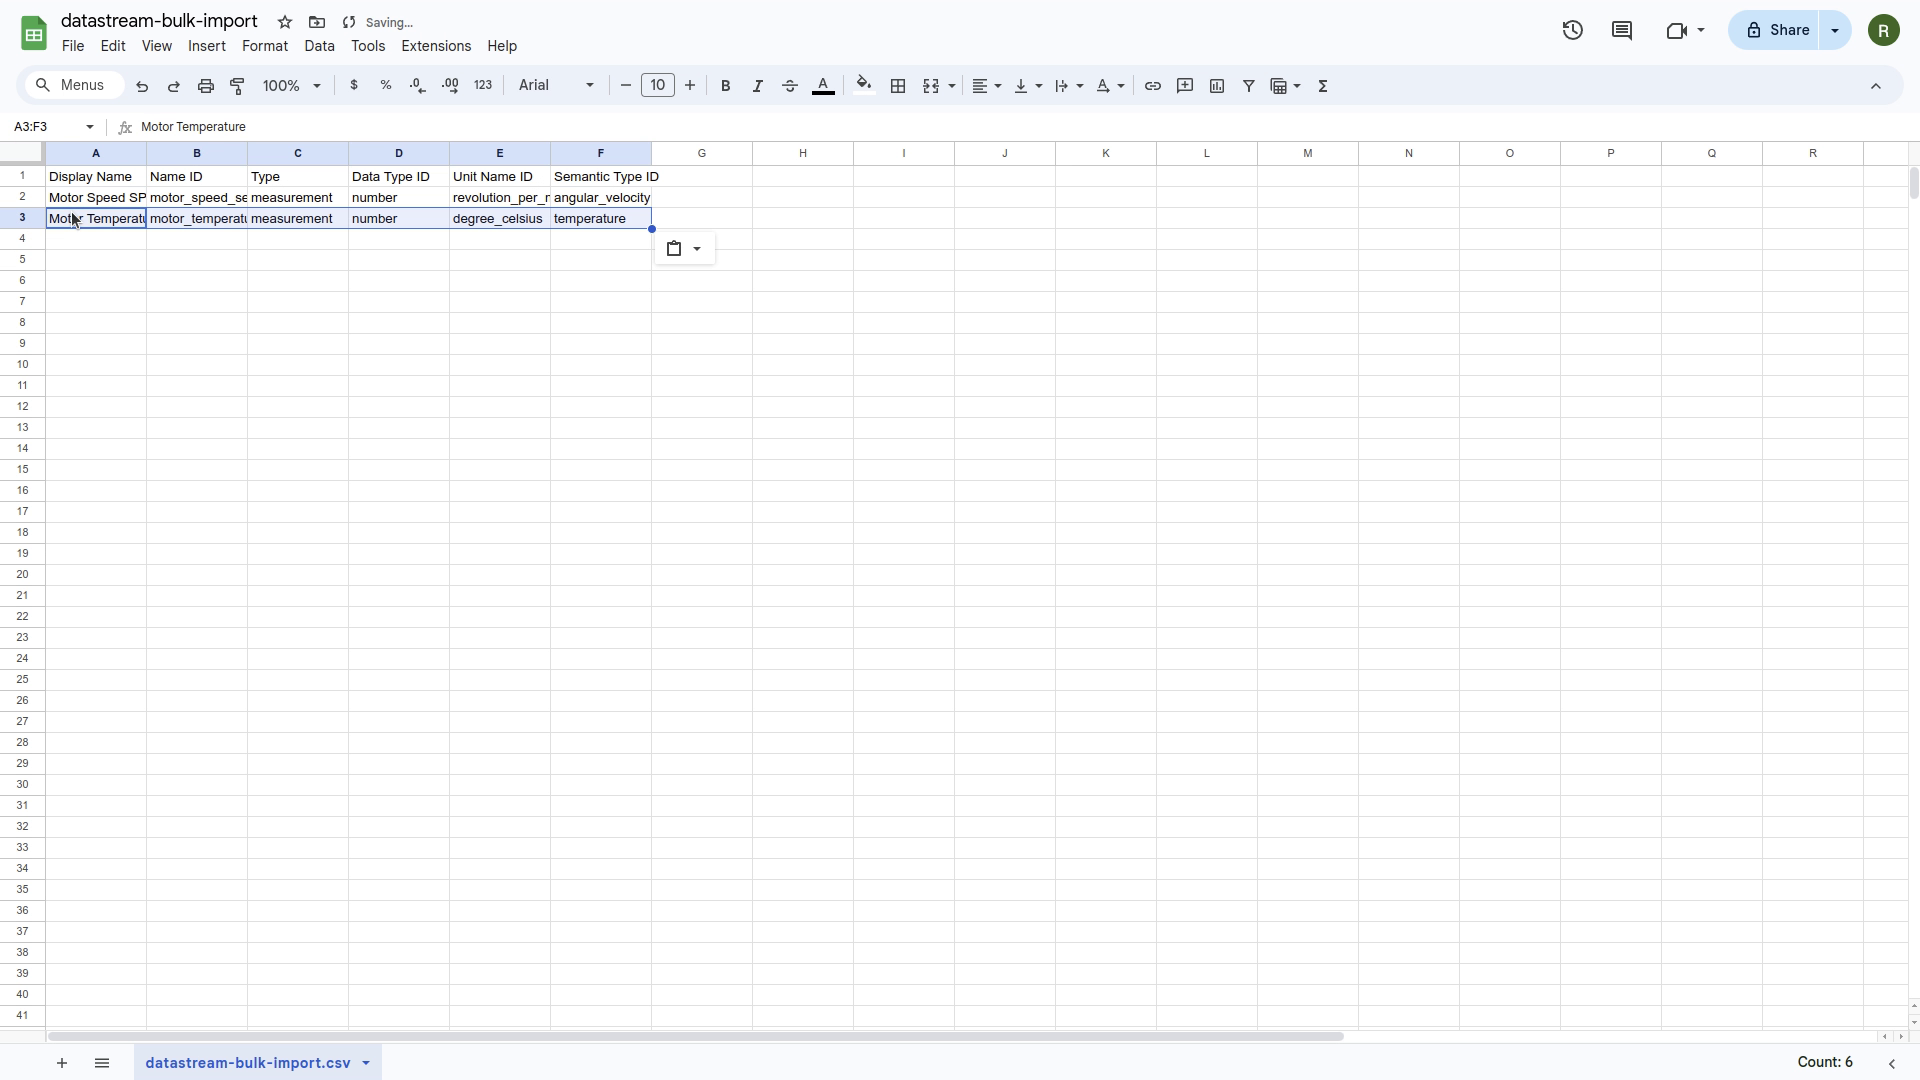
A brief explanation of the columns in the CSV file:
- Display Name: The name of the data stream as it will appear in the Kelvin UI.
- Name ID: A unique identifier for the data stream.
- Type: The type of data stream (e.g., measurement or computed).
- Data Type ID: The data type of the data stream (e.g., number, string, boolean).
- Unit Name ID: The unit of measurement for the data stream (e.g., revolution_per_minute, degree_celsius, pound_per_square_inch). More information on the available units can be found on the API documentation.
- Semantic Type ID: The semantic type of the data stream (e.g., temperature, pressure, volume_flow_rate). More information on the available semantic types can be found on the API documentation.
Next, let's import the data streams into your Kelvin Cloud instance.
Upload the previously downloaded datastreams.csv file and click Next.
Note
In the screenshot you will see the file named datastreams-bulk-import.csv. when uploading your file, you will see the name of your csv file here instead.
The contents of the file will be validated to make sure there are no errors. If there are any errors, you will be prompted to correct them before proceeding. Next, click on the Import button.
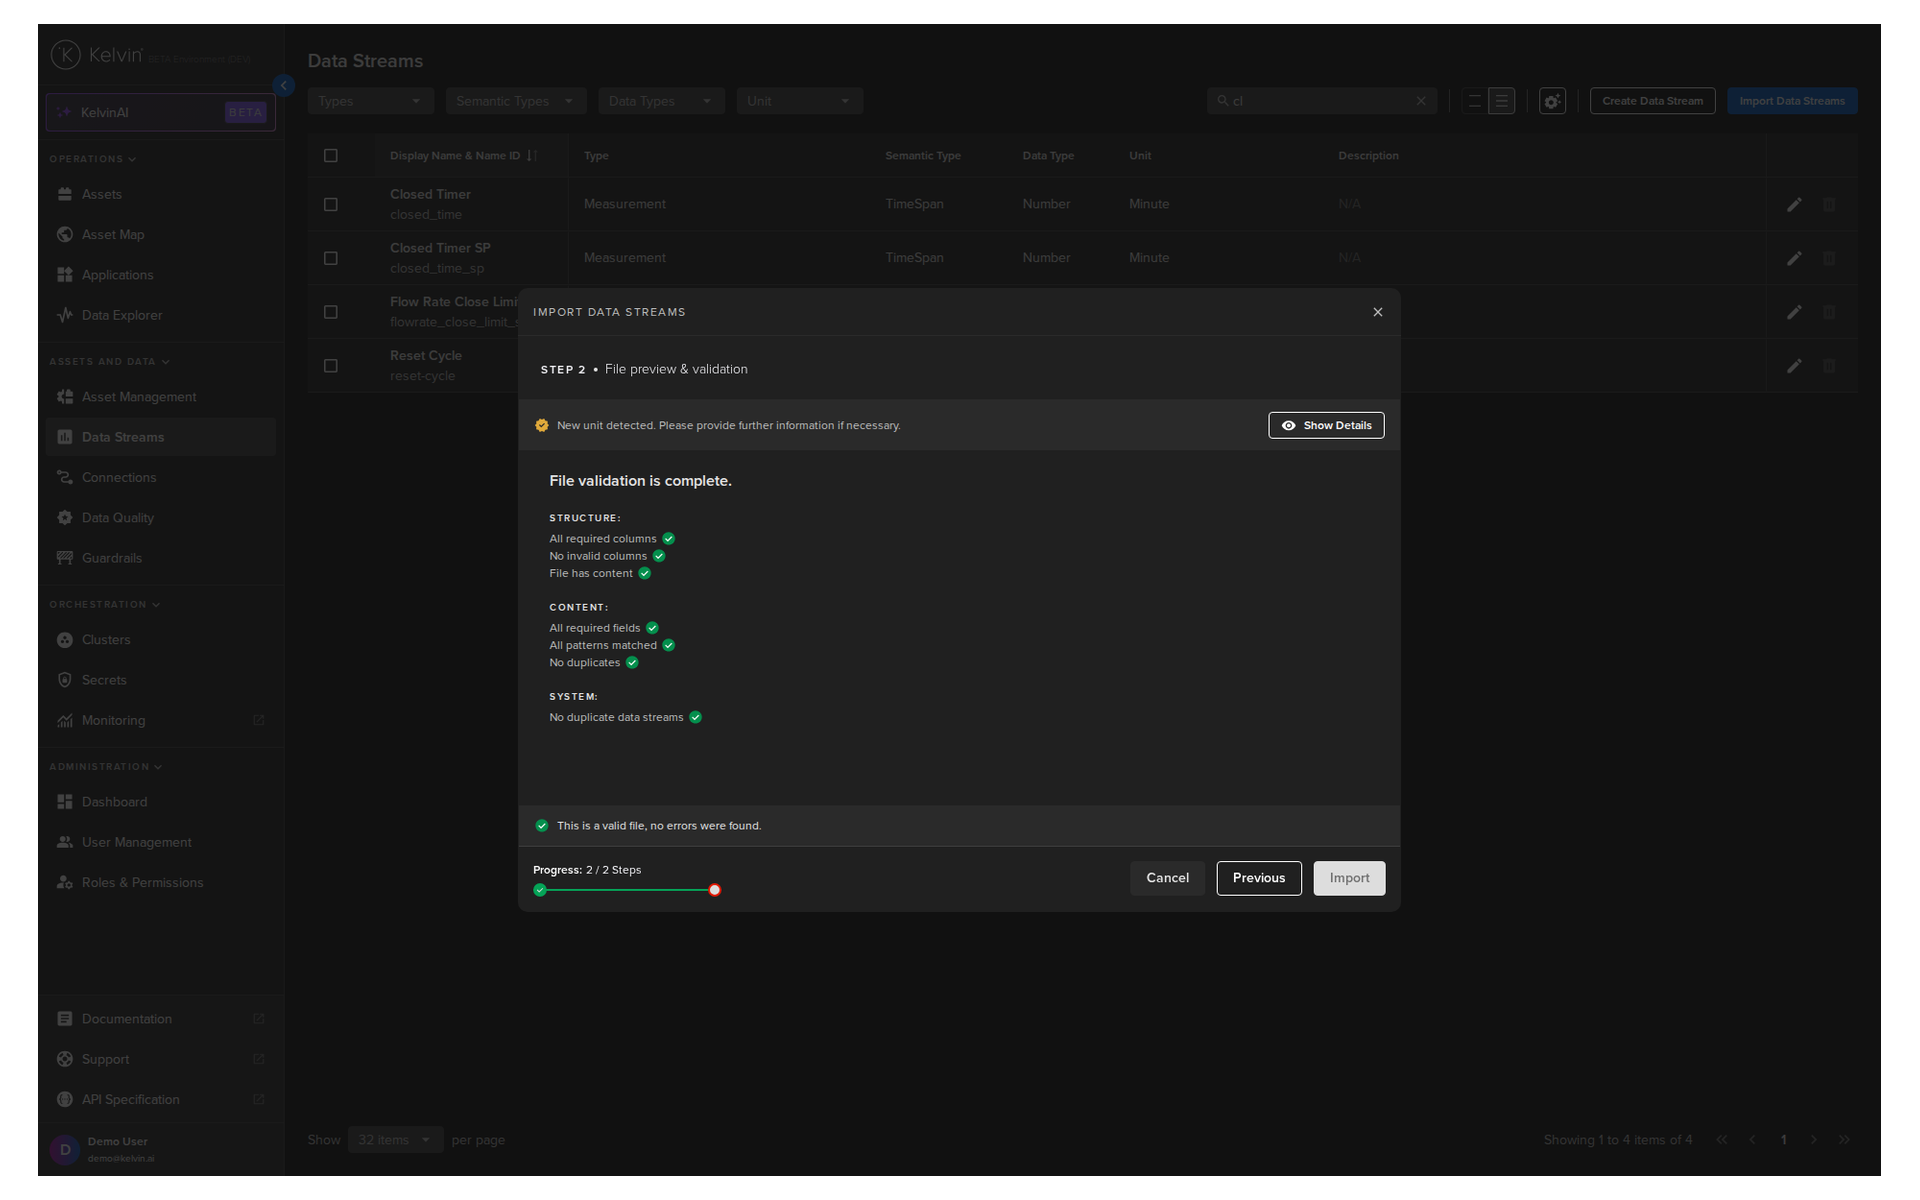
You should see the data streams you imported in the Data Streams section.
Success
Congratulations! You have successfully configured your data streams.
Create a CSV Connection
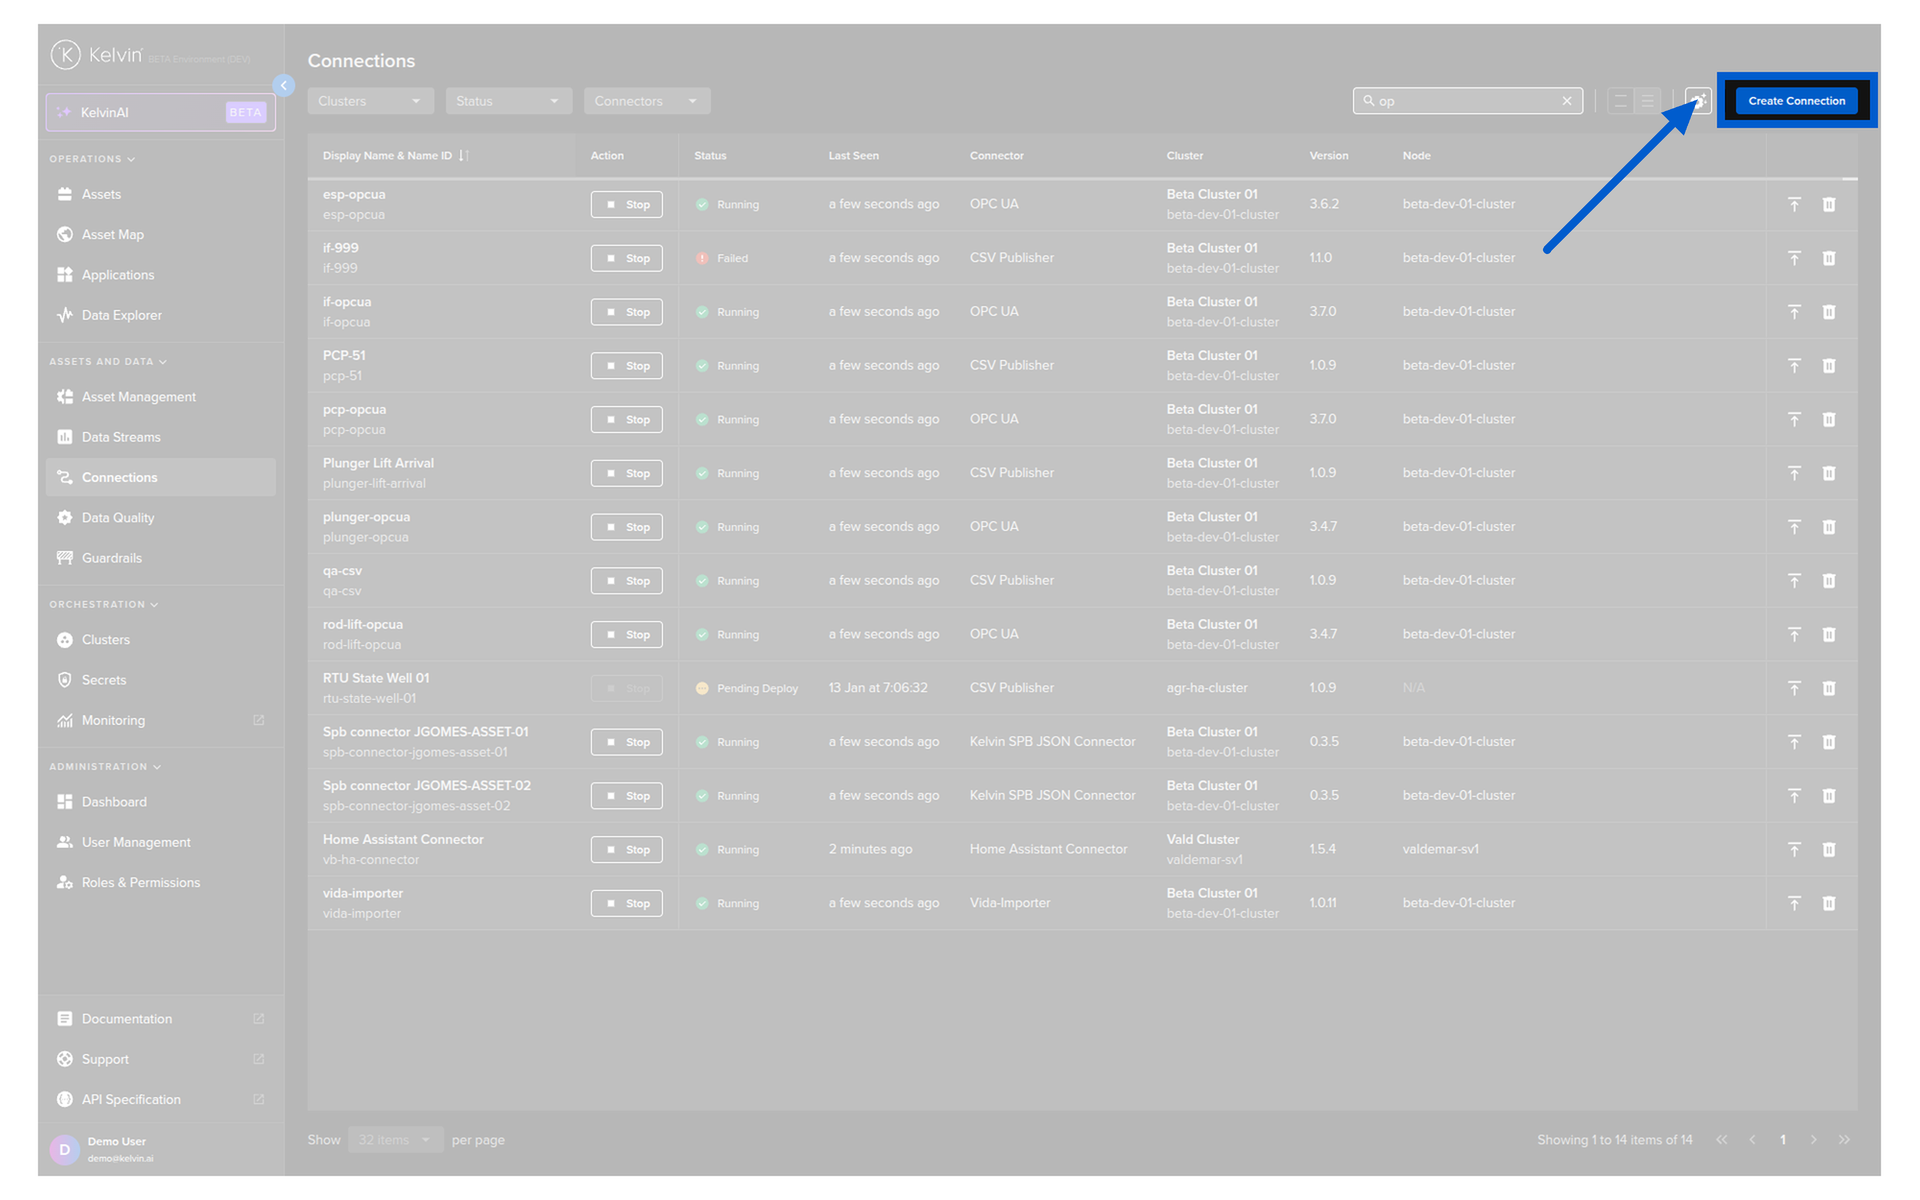
Go to the Kelvin UI. Click on the Connections section on the left navigation menu

And then click on the Create Connection button on the top right of the page.
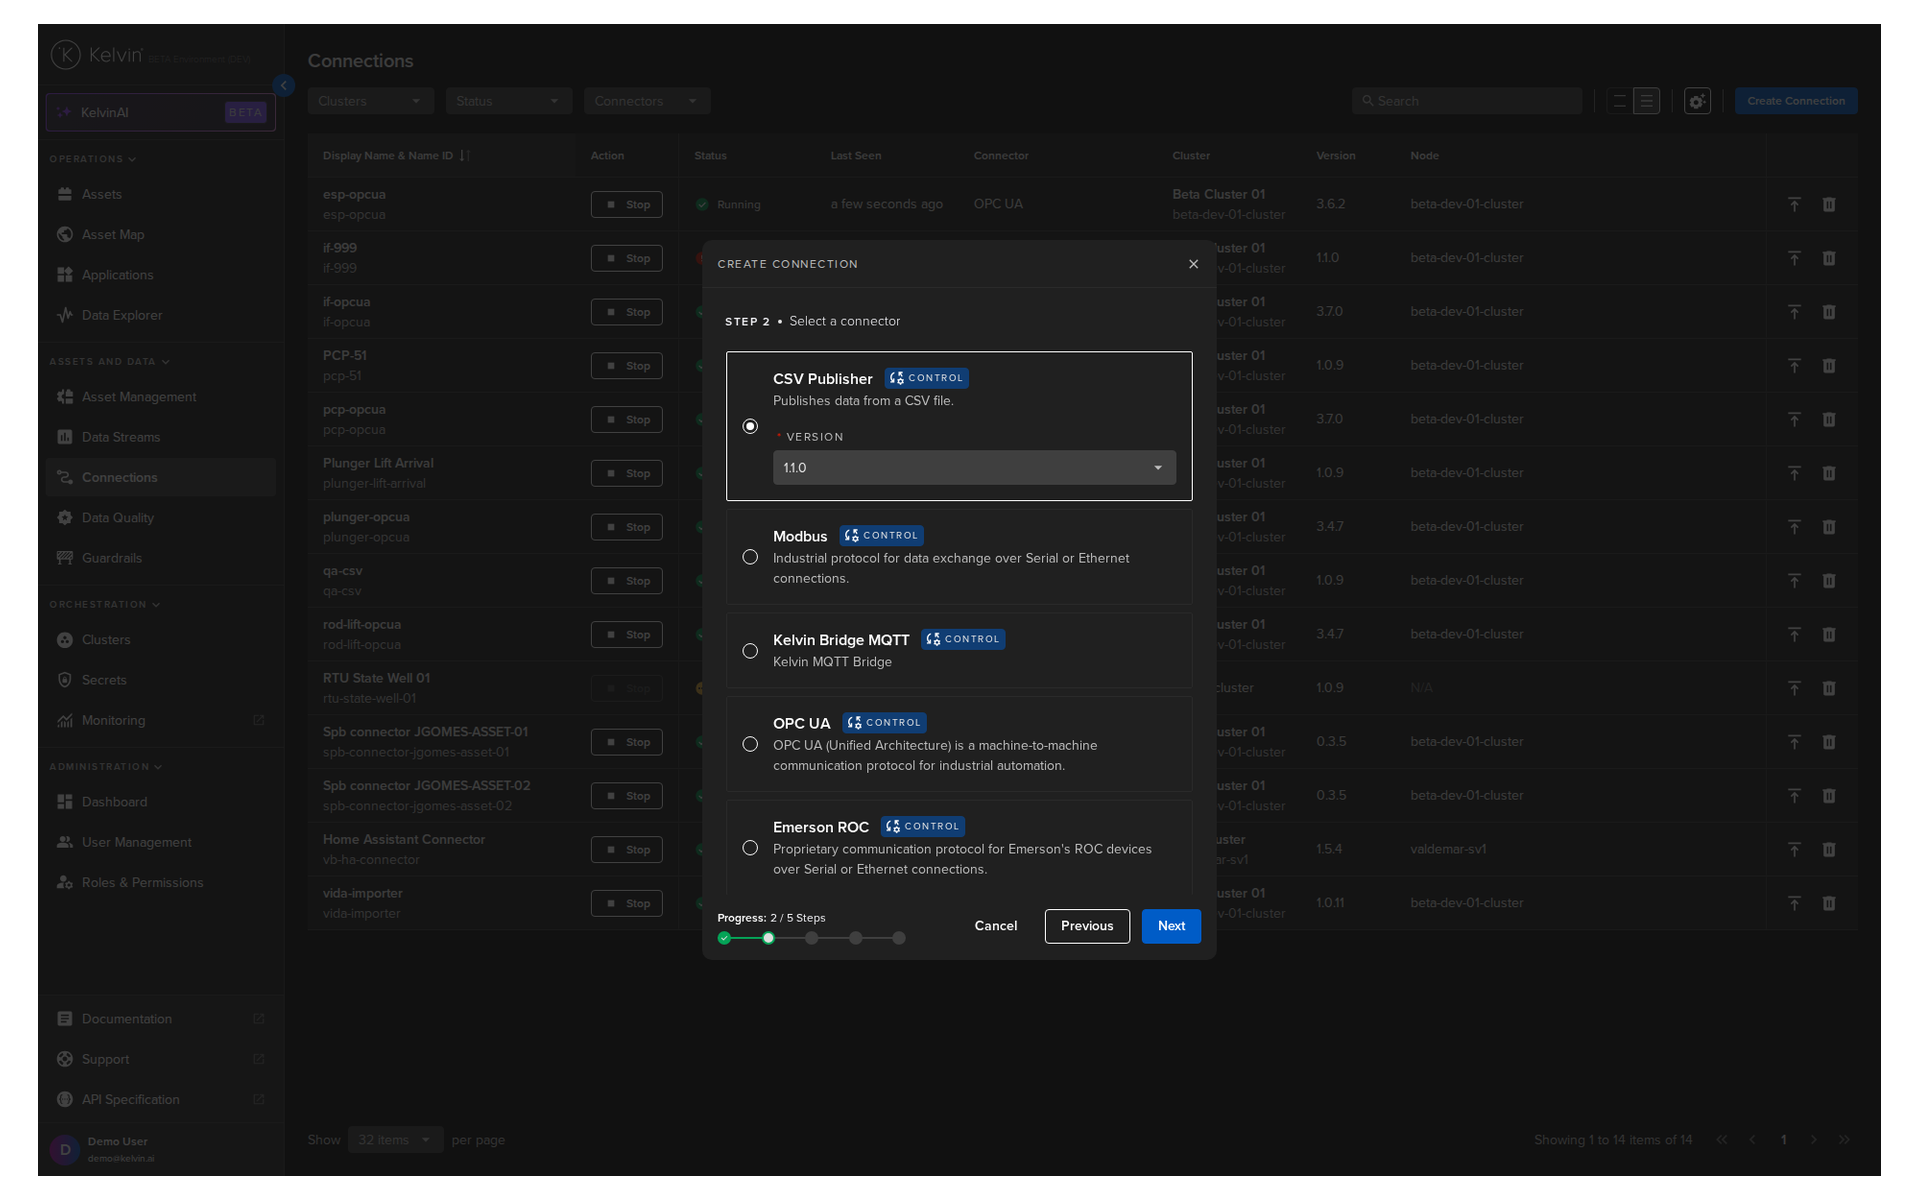
Select the CSV Publisher connection type and click Next.
Fill in the connection details as shown below:
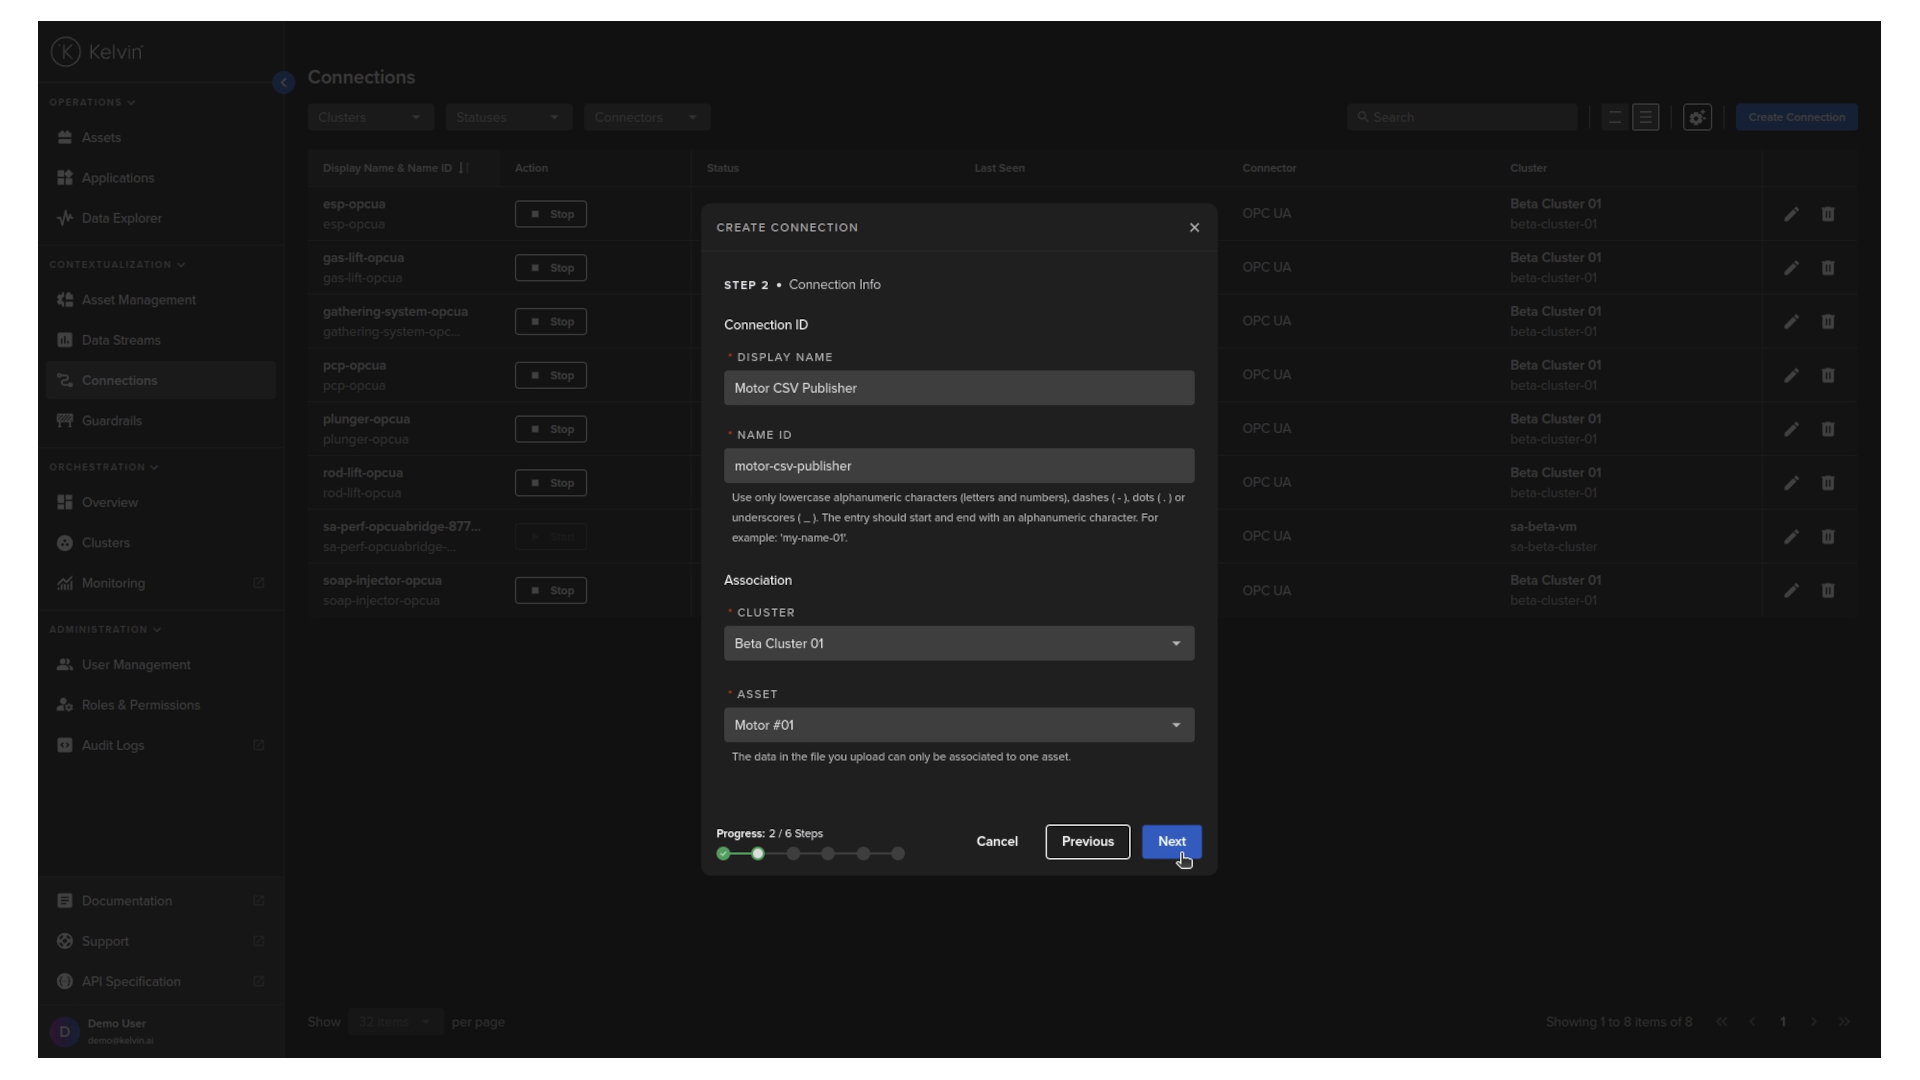
And a brief explanation of the fields:
- Display Name: This will be used to identify the connection in the Kelvin UI.
- Name ID: This is a unique identifier for the connection.
- Cluster: The cluster where the connection will be deployed.
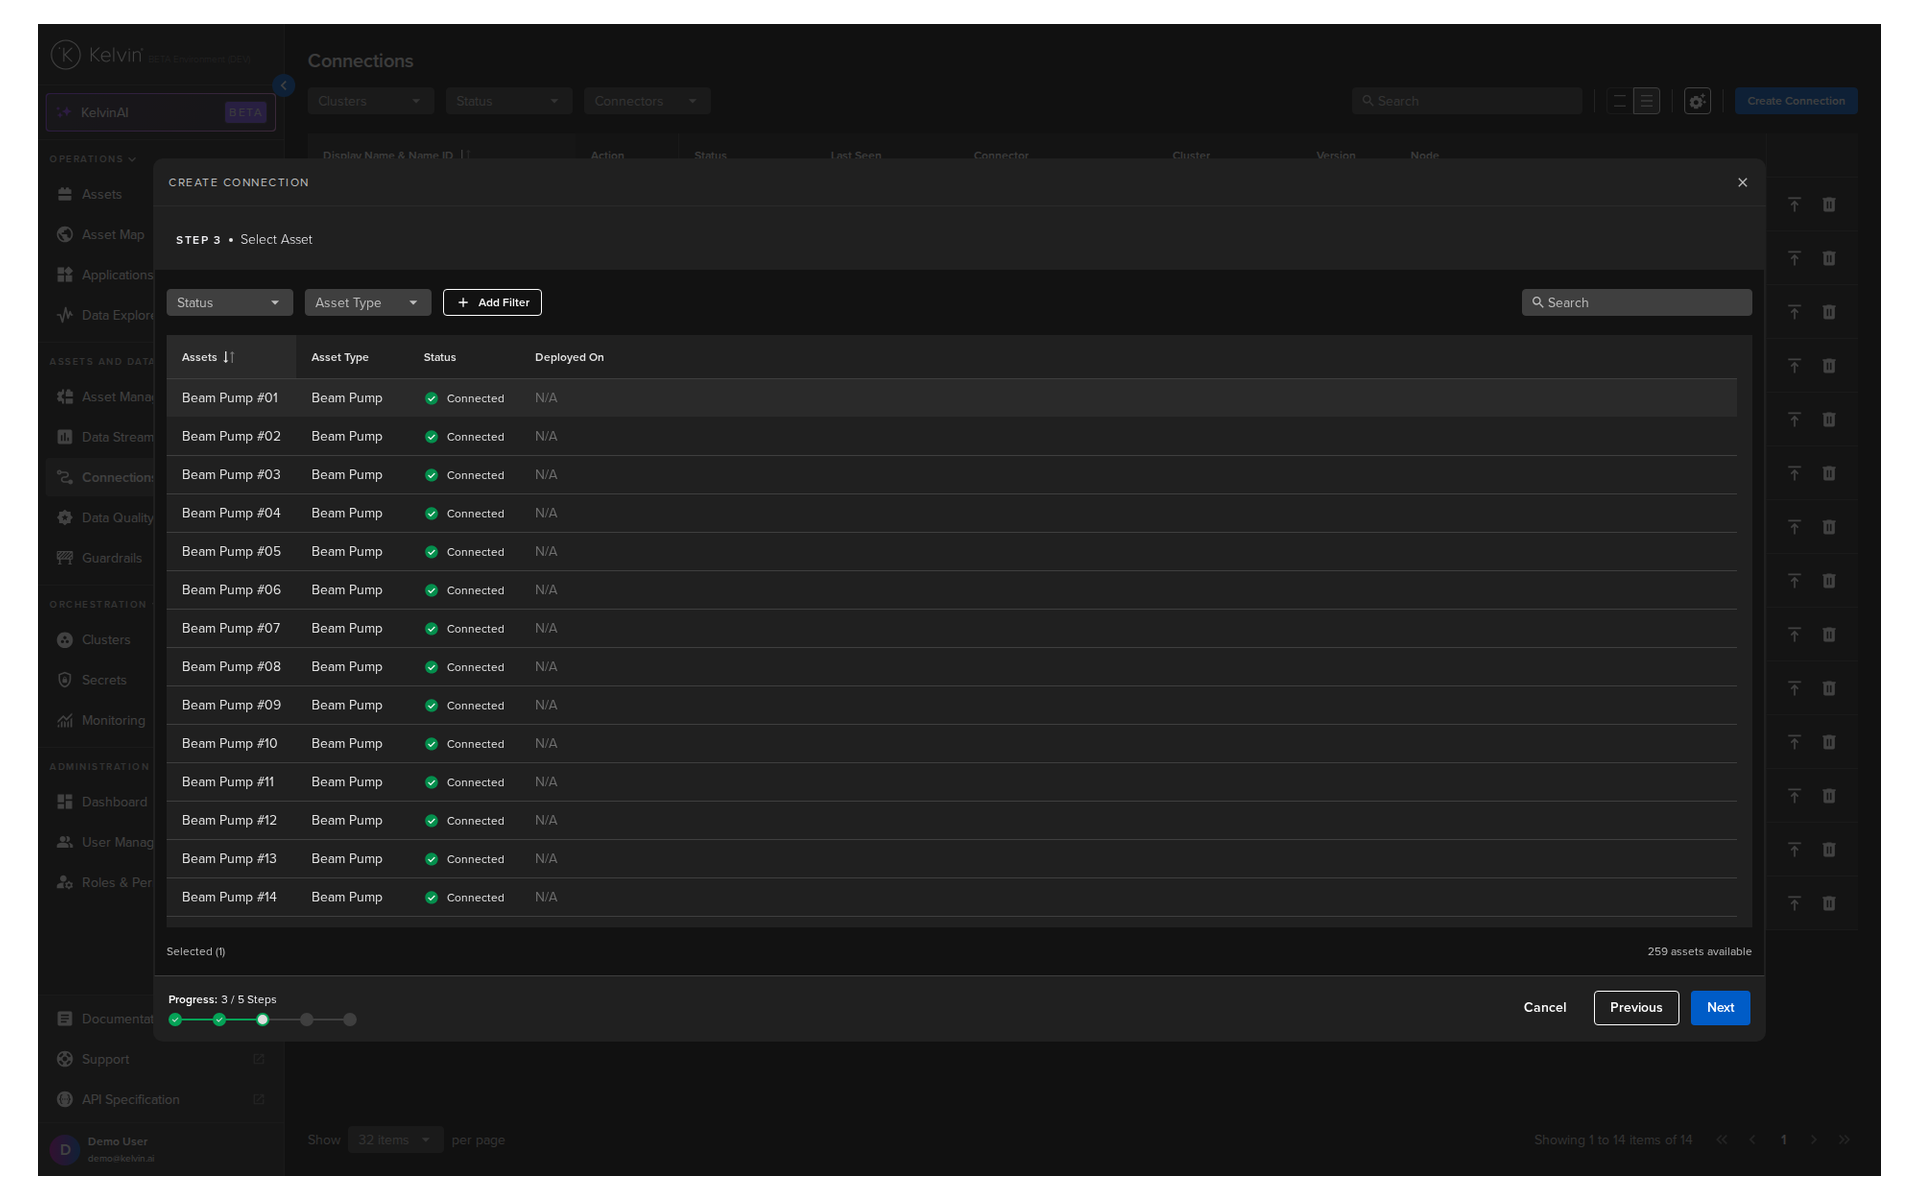
- Asset: The asset to which the connection will be associated. This means that the CSV Publisher will feed data to this asset's data streams.
Now you can now download the time series template.
Info
We have prepared a connection.csv file for you to test. You can download it from the link below and save it to your local machine:
Modify the template with the following data (or just download our ready made CSV file):
| Simulation Data CSV File | |
|---|---|
1 2 3 4 5 6 7 8 9 10 11 12 | |
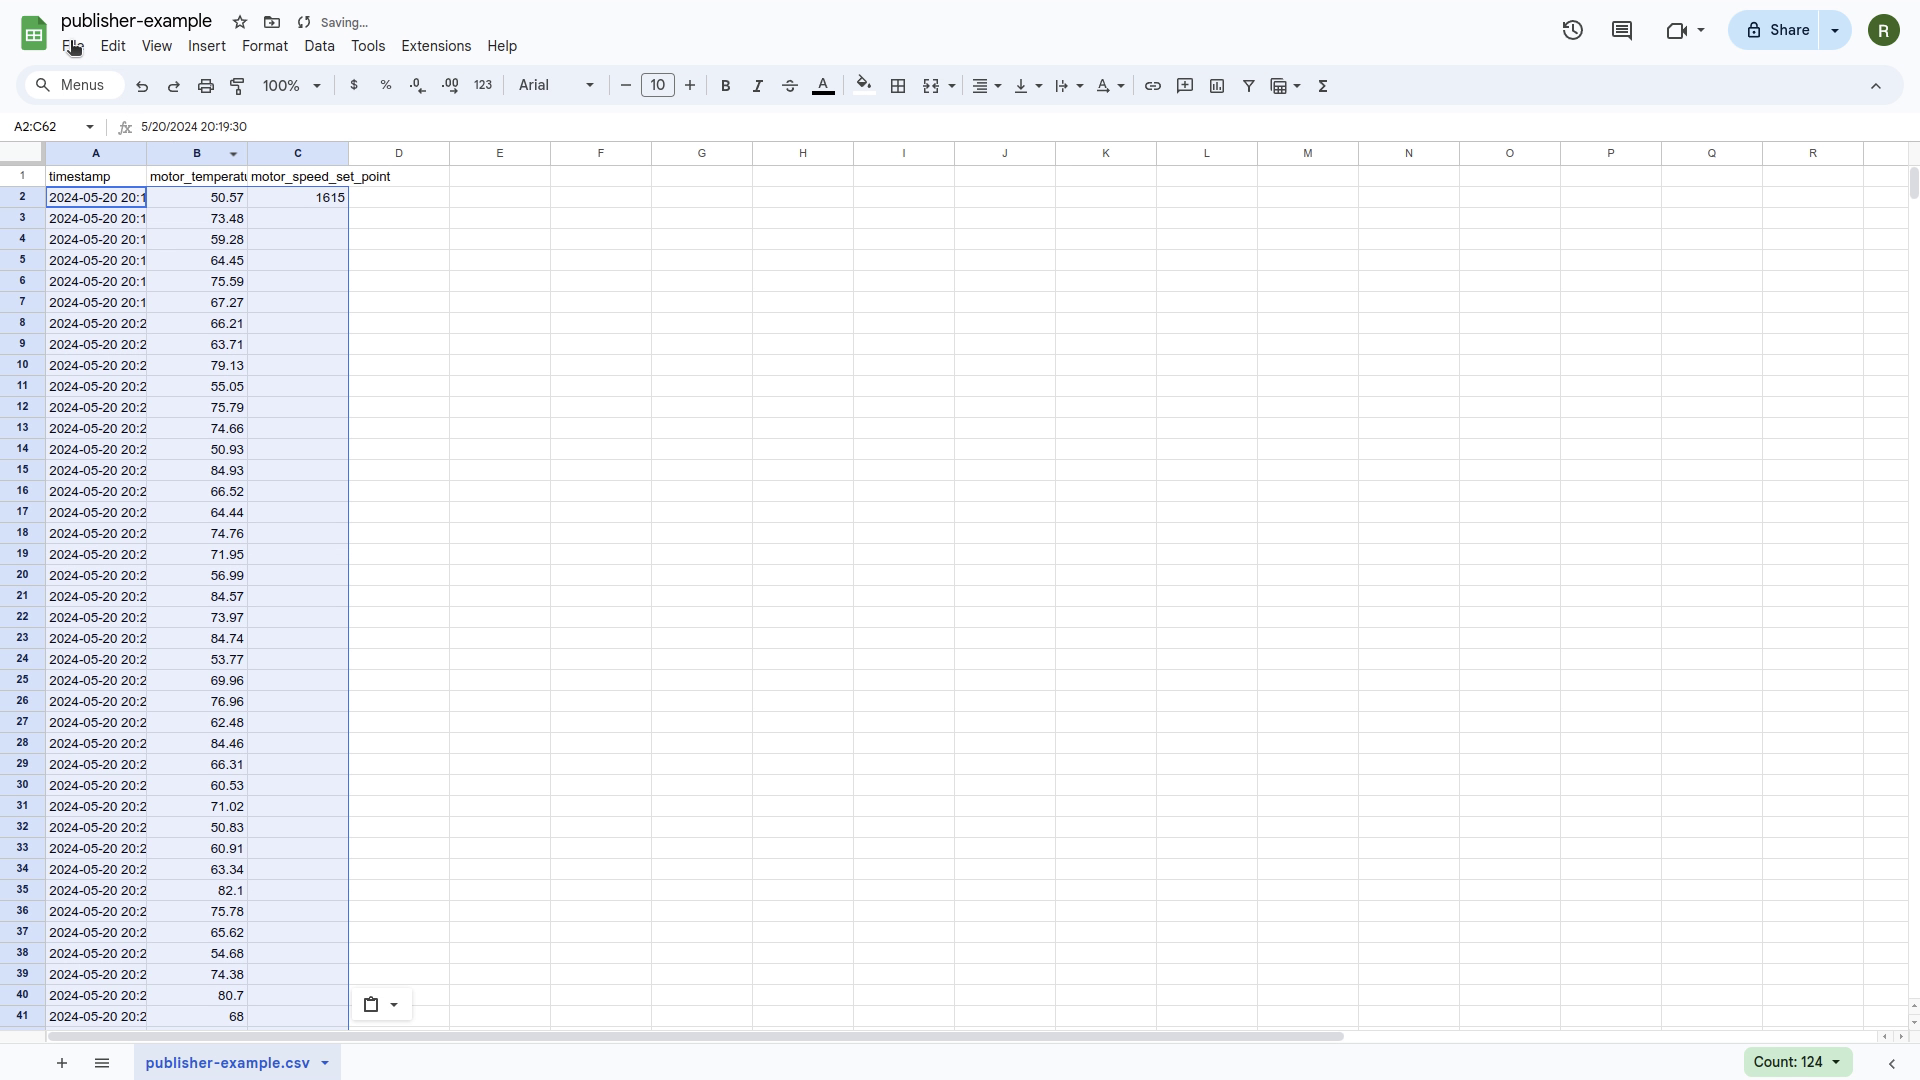
A brief explanation of the columns in the CSV file:
- timestamp: The timestamp of the data point. There are a number of different formats that are accepted.
Accepted Timestamp formats
| Accepted Timestamp Formats | |
|---|---|
1 2 3 4 5 6 7 8 9 10 11 12 13 14 15 16 | |
- motor_temperature: The motor temperature data stream.
- motor_speed_set_point: The motor speed set point data stream. We start with an initial value and leave the rest of the values empty, which means the set point will remain constant. This set point will be changed by our Event Detection SmartApp.
Next step, upload the file and click Next.
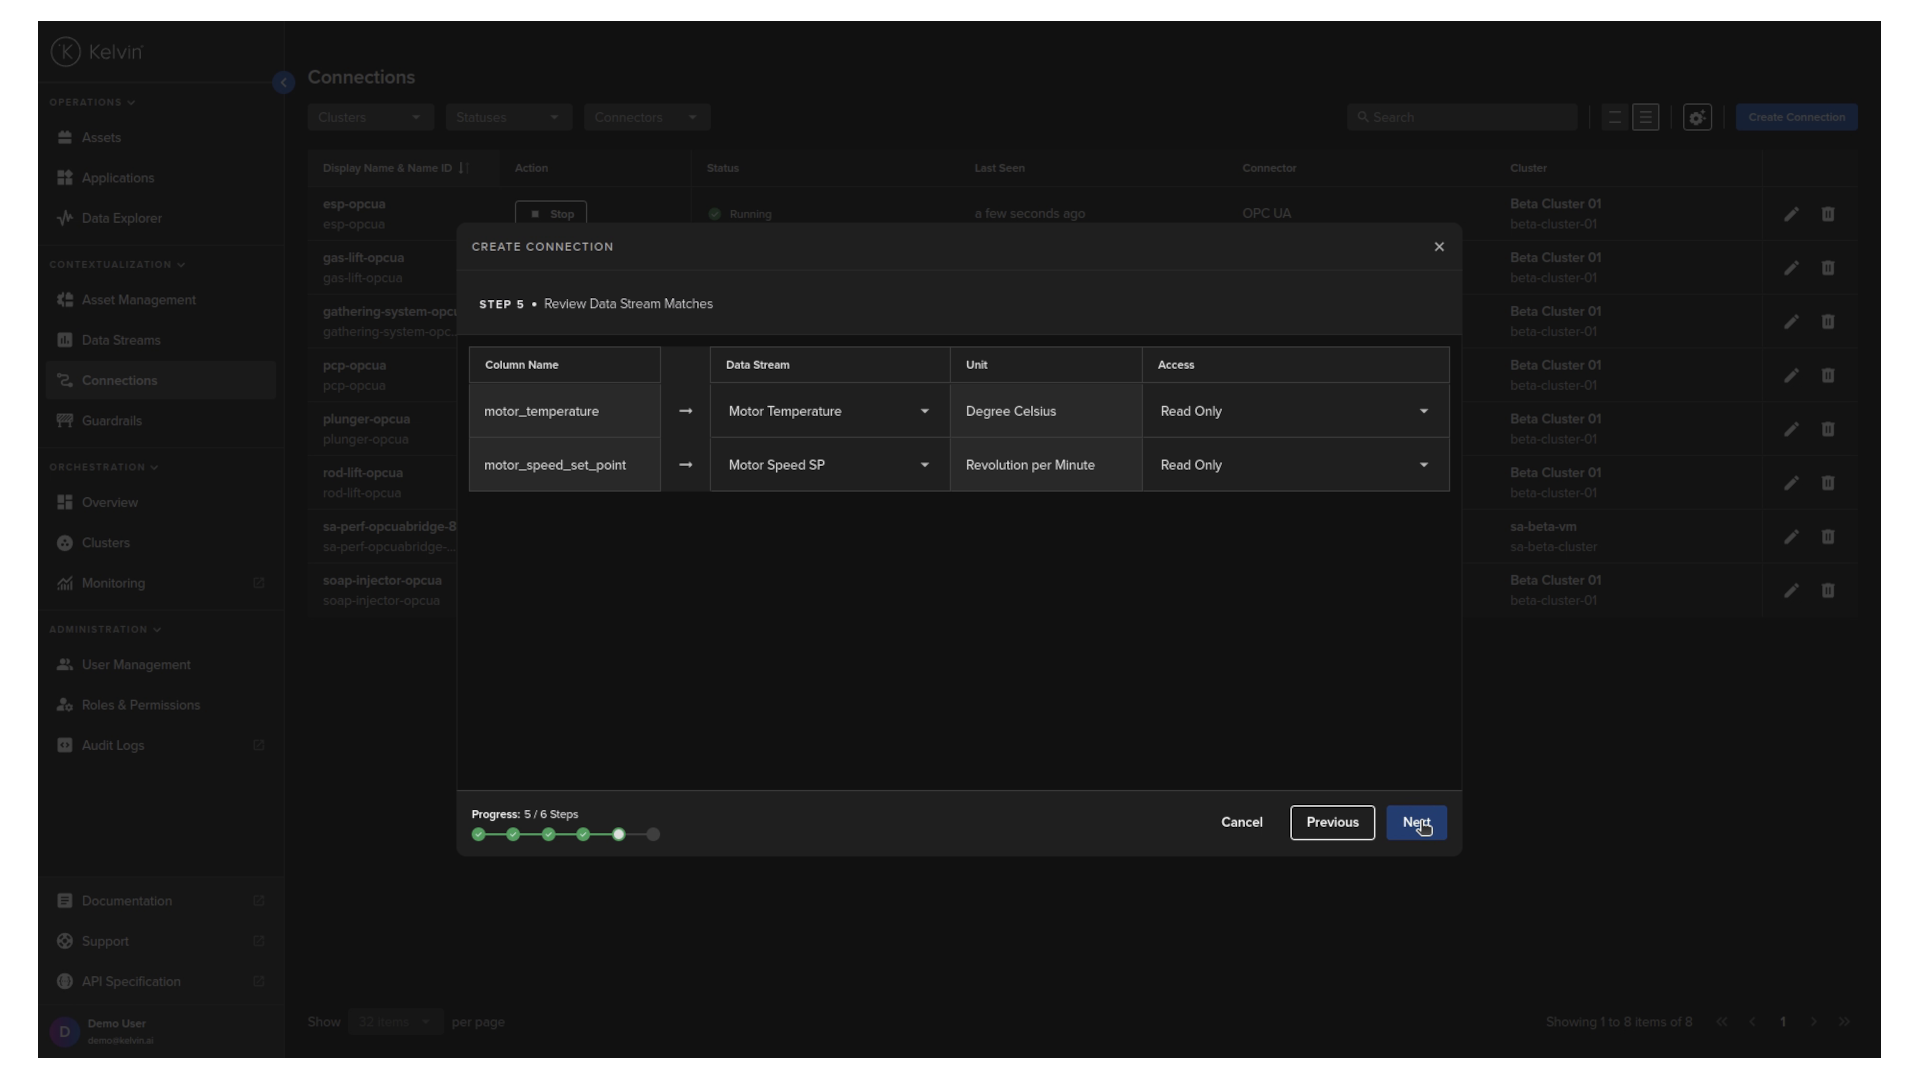
The contents of the file will be validated to make sure there are no errors. If there are any errors, you will be prompted to correct them before proceeding. Next, click on the Next button.

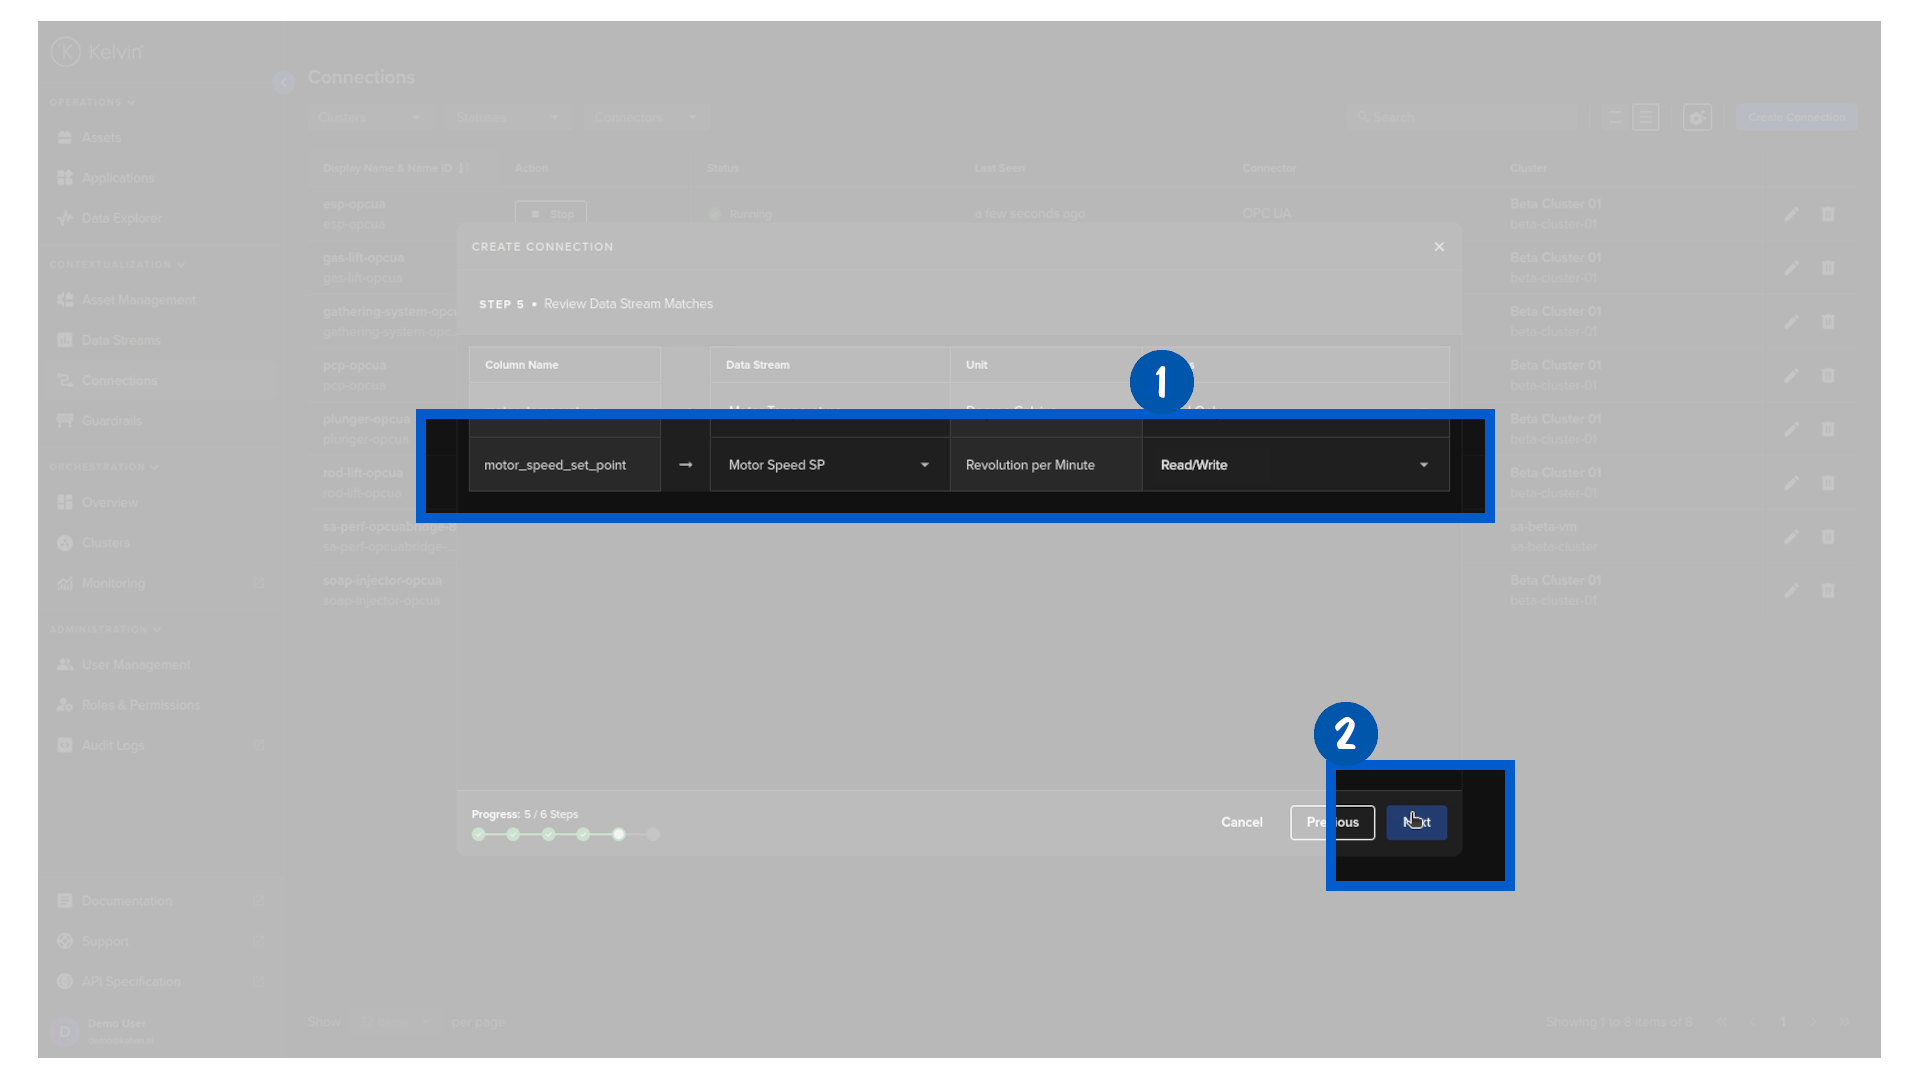
Change the motor_speed_set_point data stream to Read/Write, which means that the SmartApp will be able to write to this data stream, simulating a real world PLC system.
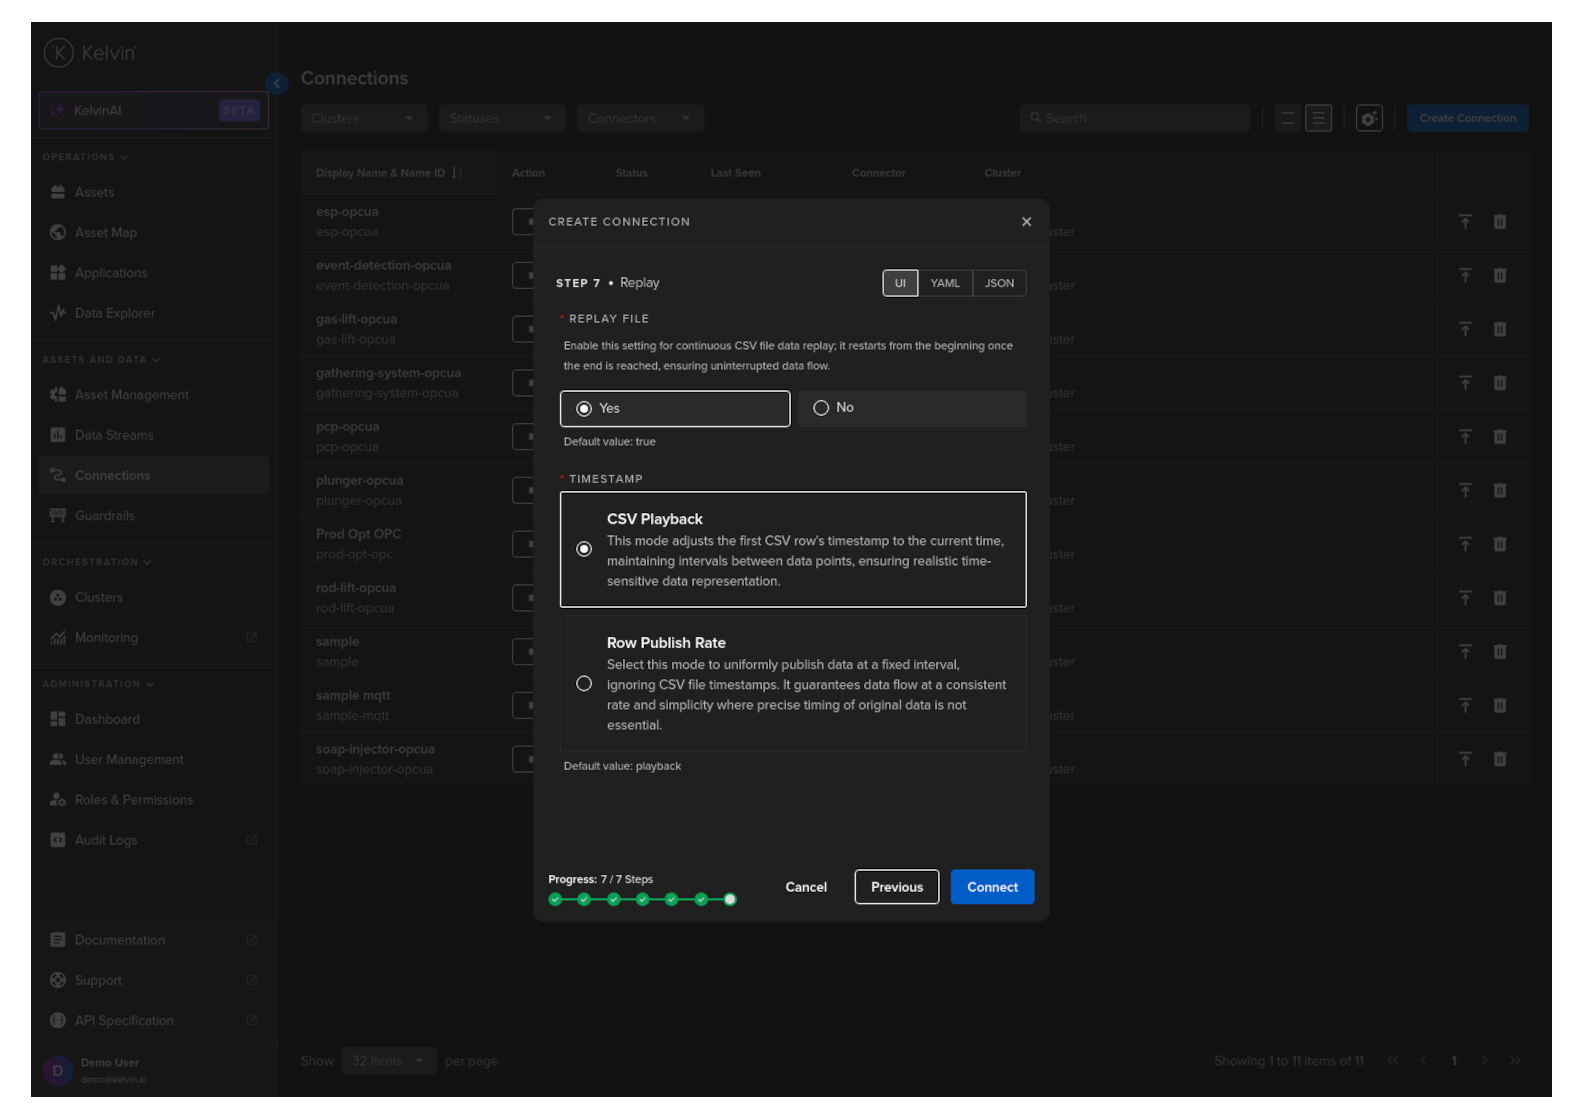
Configure the Replay logic of the CSV Publisher to replay the file and with the CSV Playback mode. This means that the connection will continuously replay the file based on the rate of the timestamps present in the CSV, simulating a real-time data stream feed.
Click on the Connect button to deploy the connection.
Wait a few seconds for the connection to be deployed and you should see the connection status change to Running.
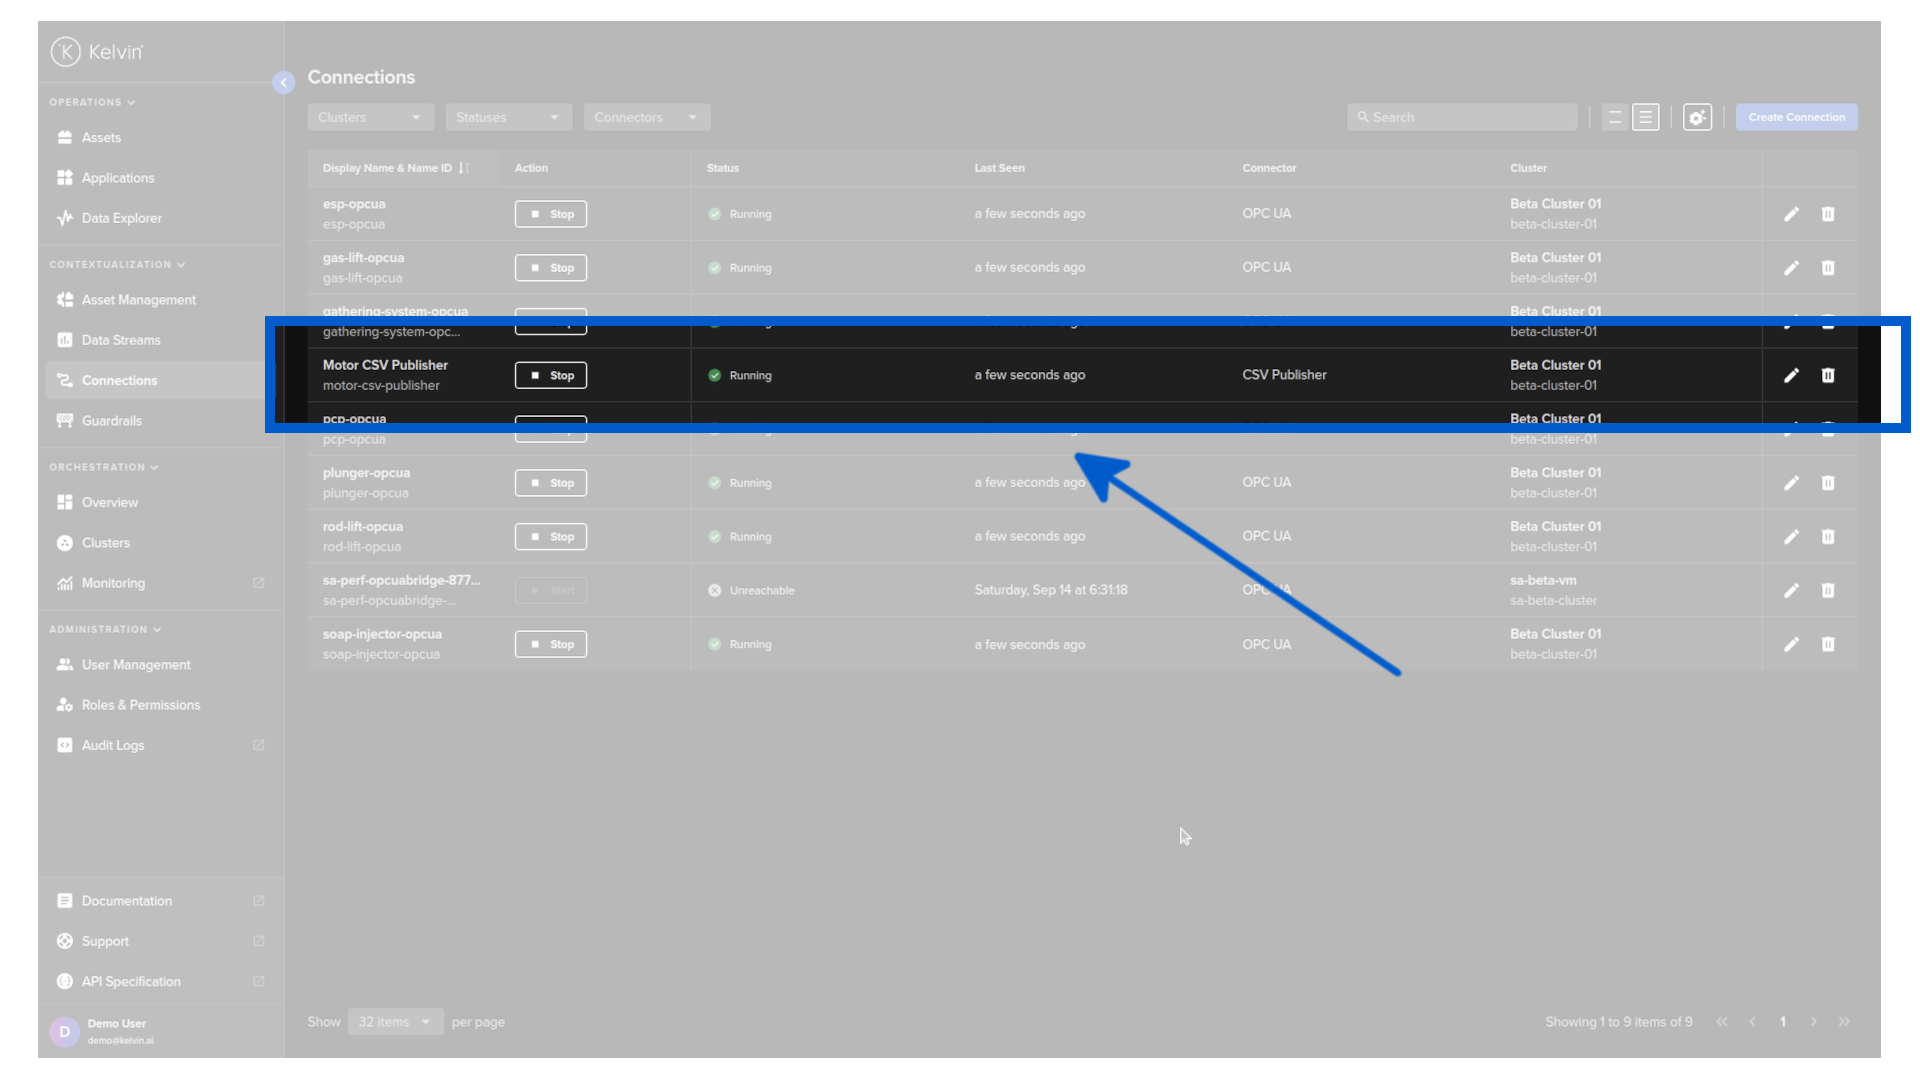
Proceed to click on the connection name to see the connection details. This will show you the data stream feed and when the data stream values were last updated.

Important Reminder
This connection will only publish data for one single asset. If you need additional data for the other assets you need to create a new connection for each asset. This allows you to test different scenarios and configurations for each asset.
Success
Congratulations! You have successfully configured your CSV Publisher connection.
Next Step
The next step is to deploy your Kelvin SmartApp™ to the assets.