Create SmartApps with ChatGPT
Just want to skip the guide and go directly to test our custom GPT ?
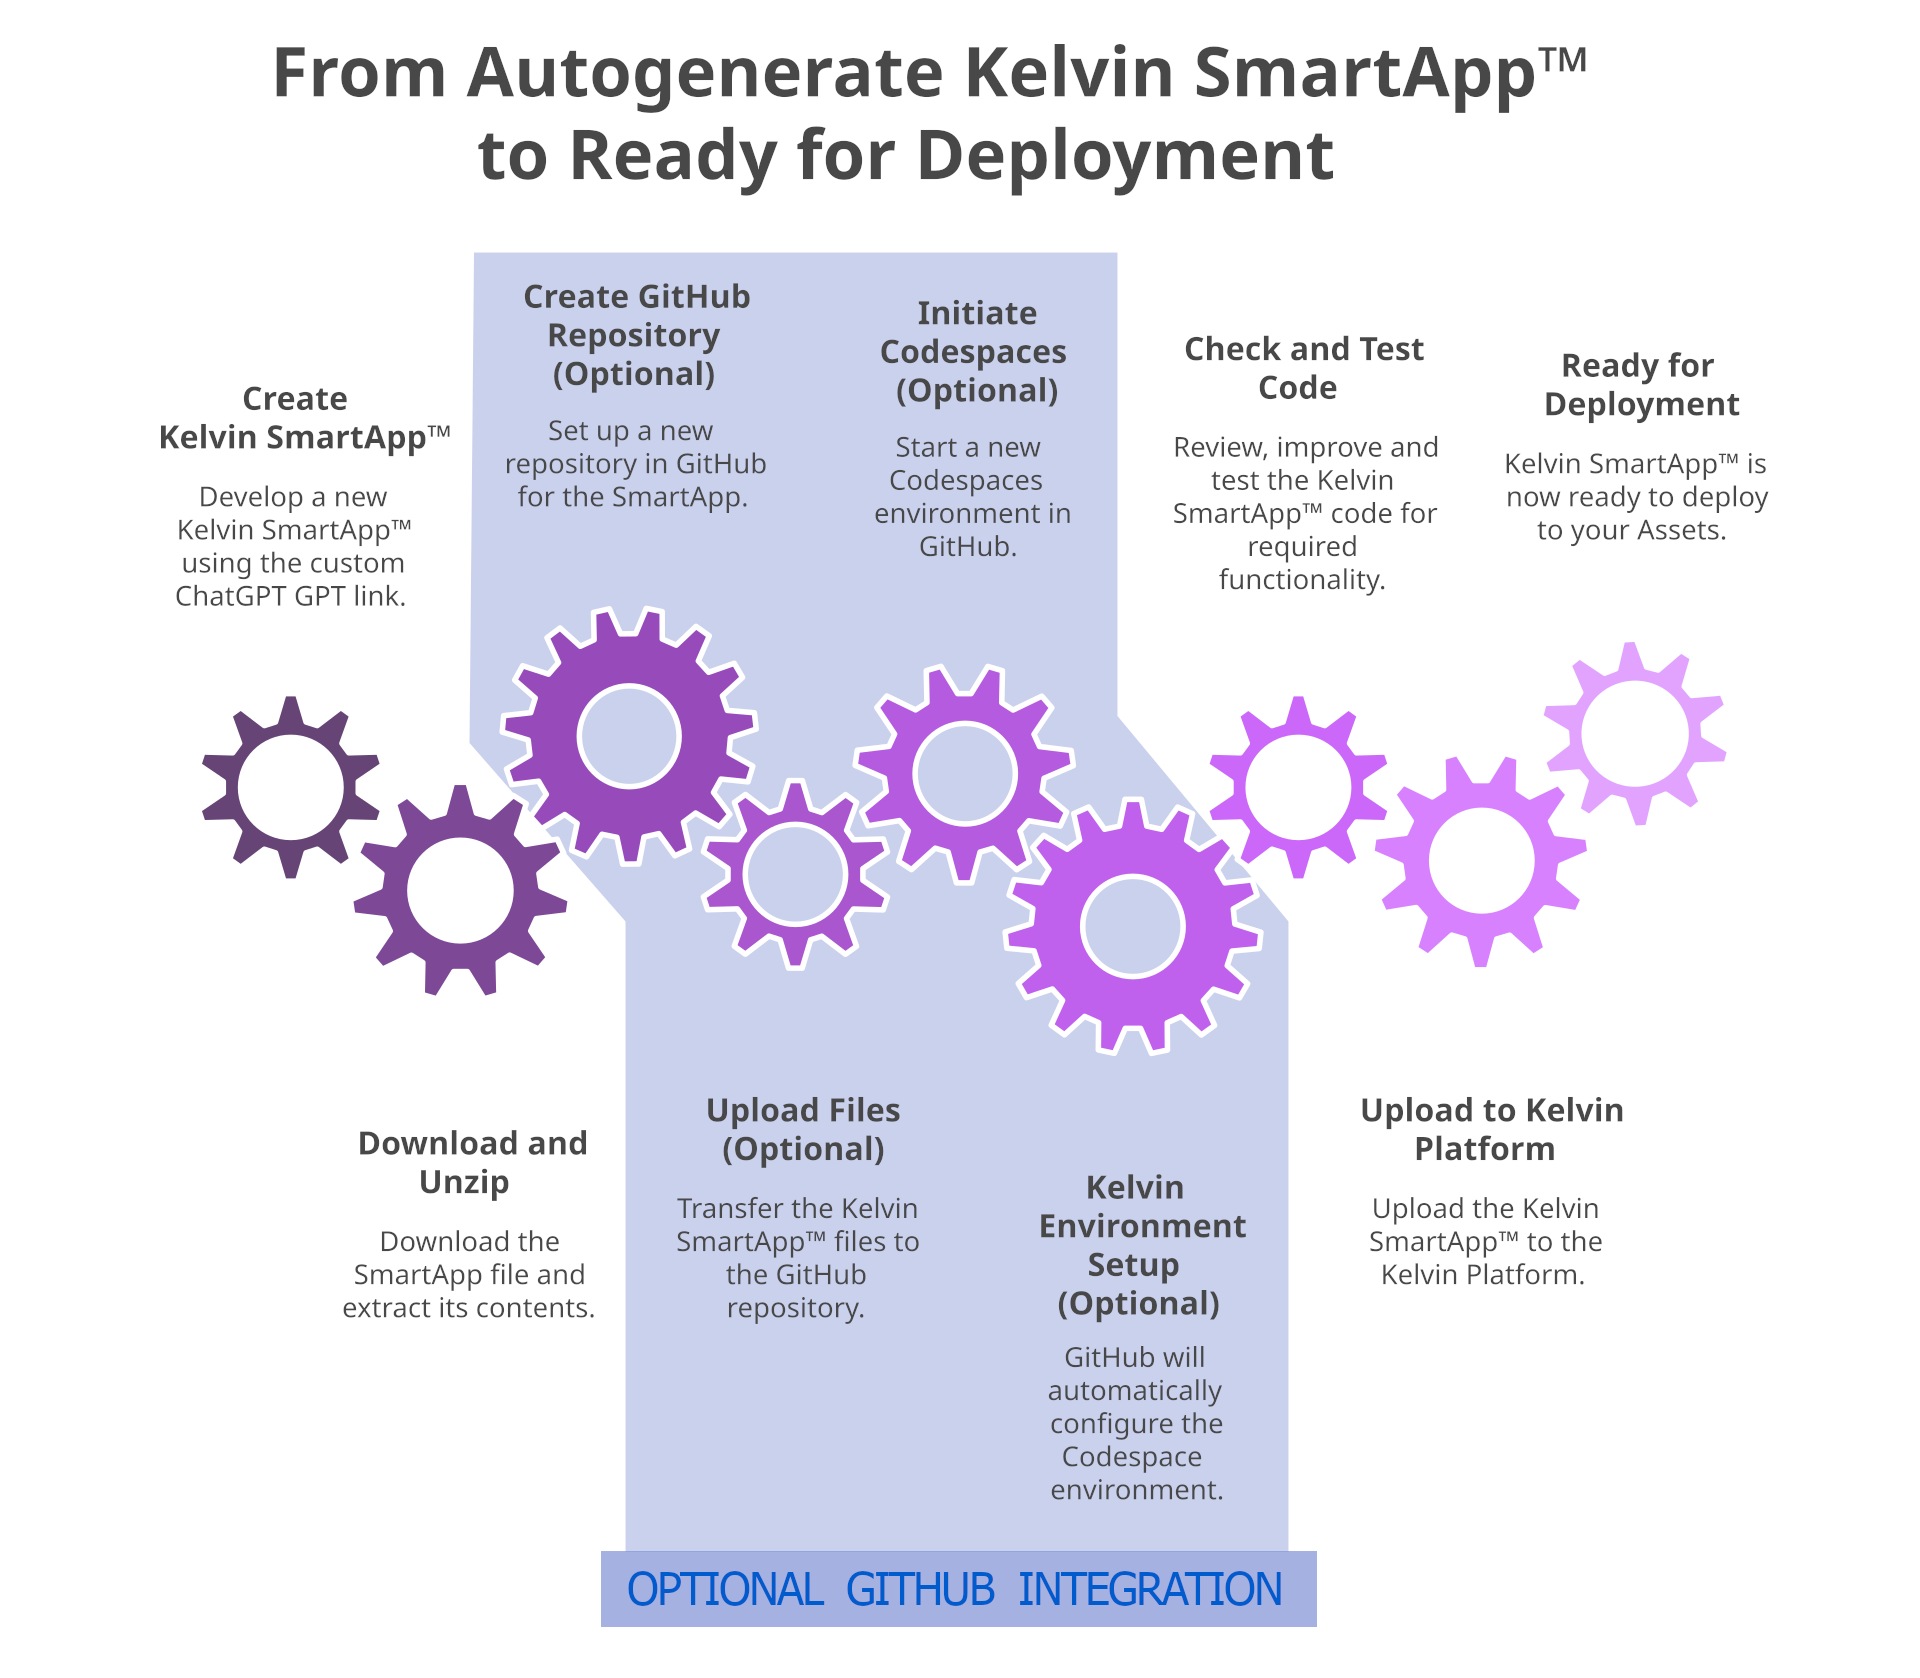
You can create a complete Kelvin SmartApp™ application with ChatGPT using our custom GPT.
This will ask you a few questions then create all the files required ready for upload to the Kelvin Platform.
Creating a SmartApp with GPT
Follow this link to start the GPT in ChatGPT.
Note
You will need to be logged in to ChatGPT use this. A ChatGPT requirement.
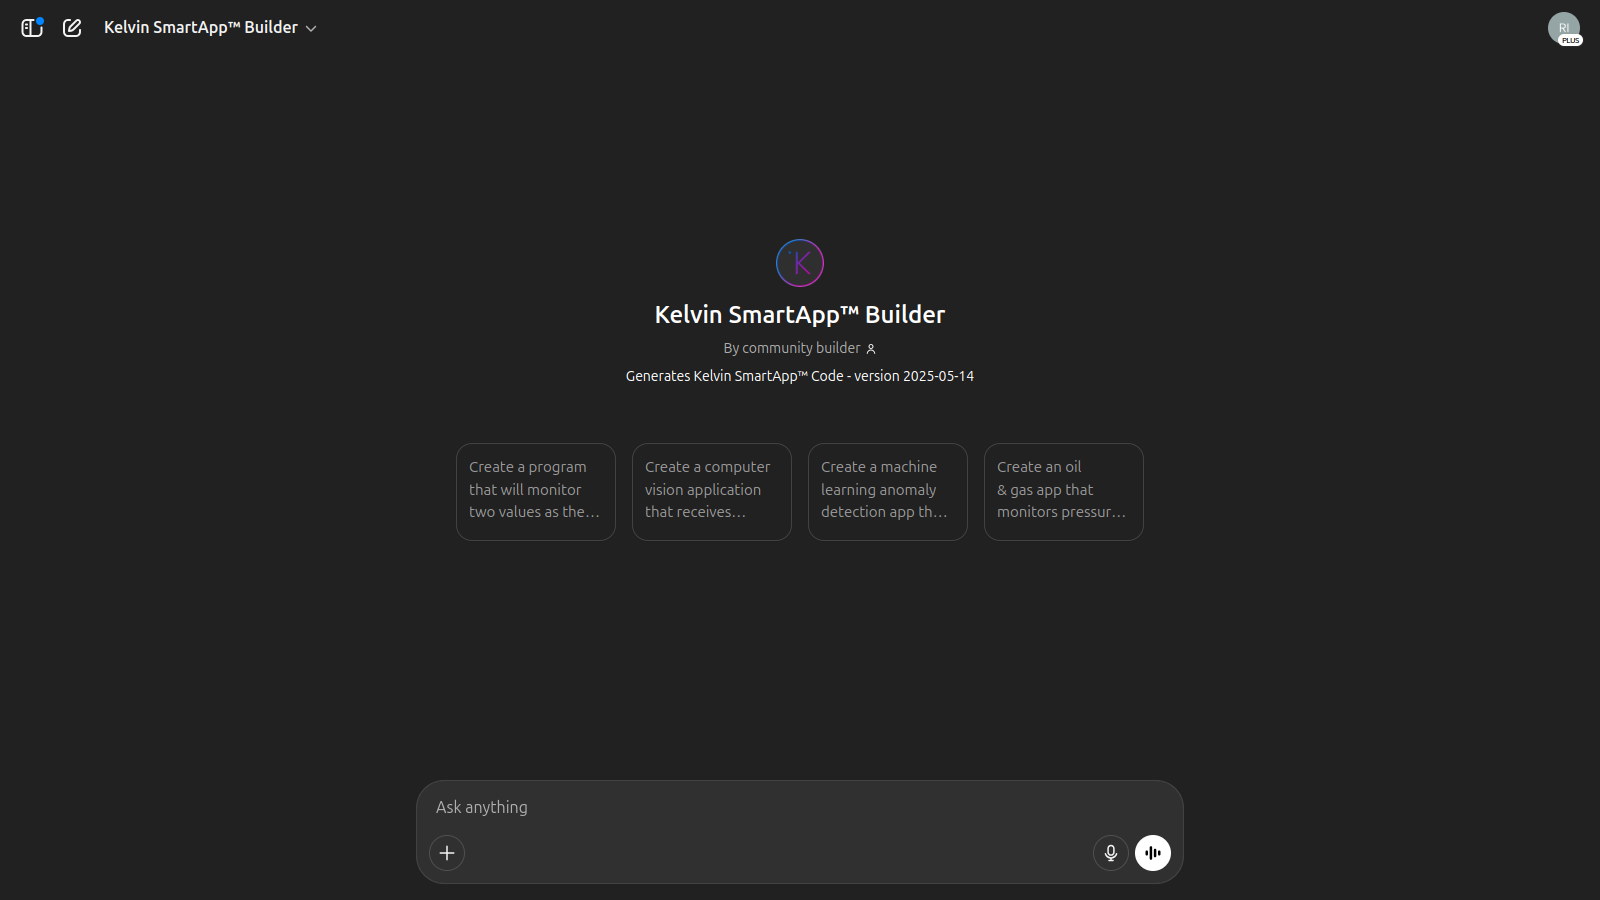
First, outline what you want to program in the SmartApp. For example type;
Create a program that will monitor two values as they come in. It will add these two values together and if the result is more than a maximum defined value, then turn off the conveyor belt. If it is less than a minimum defined value, then turn it back on.
GPT will review your requirements and summarize the steps.
And it will also ask any outstanding questions.
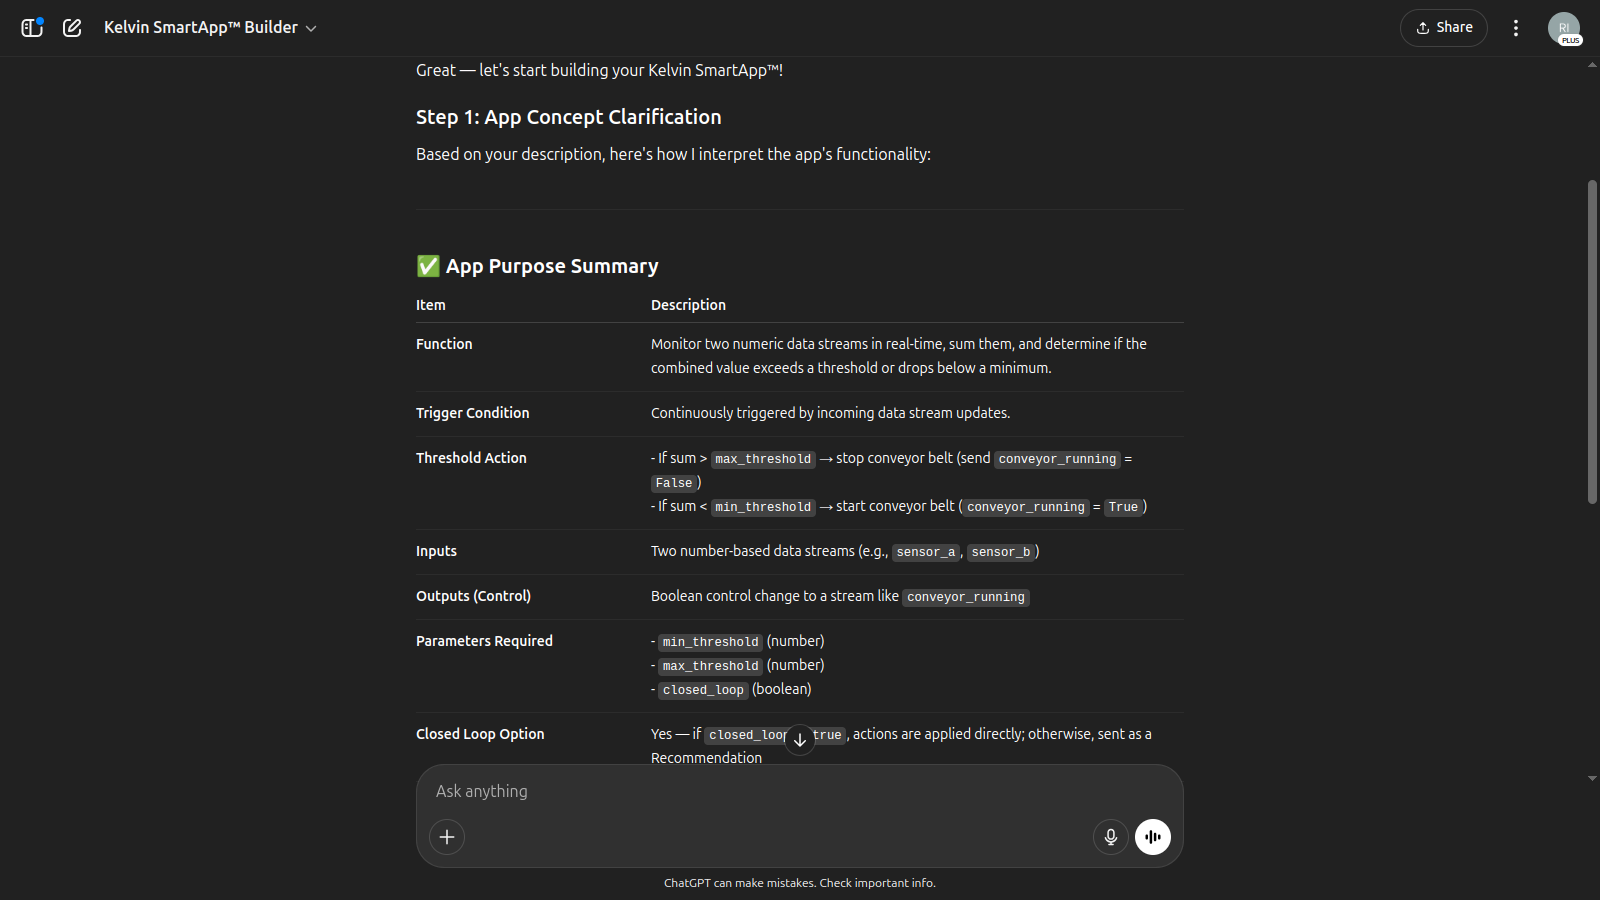
You can answer, review, or modify the program logic.
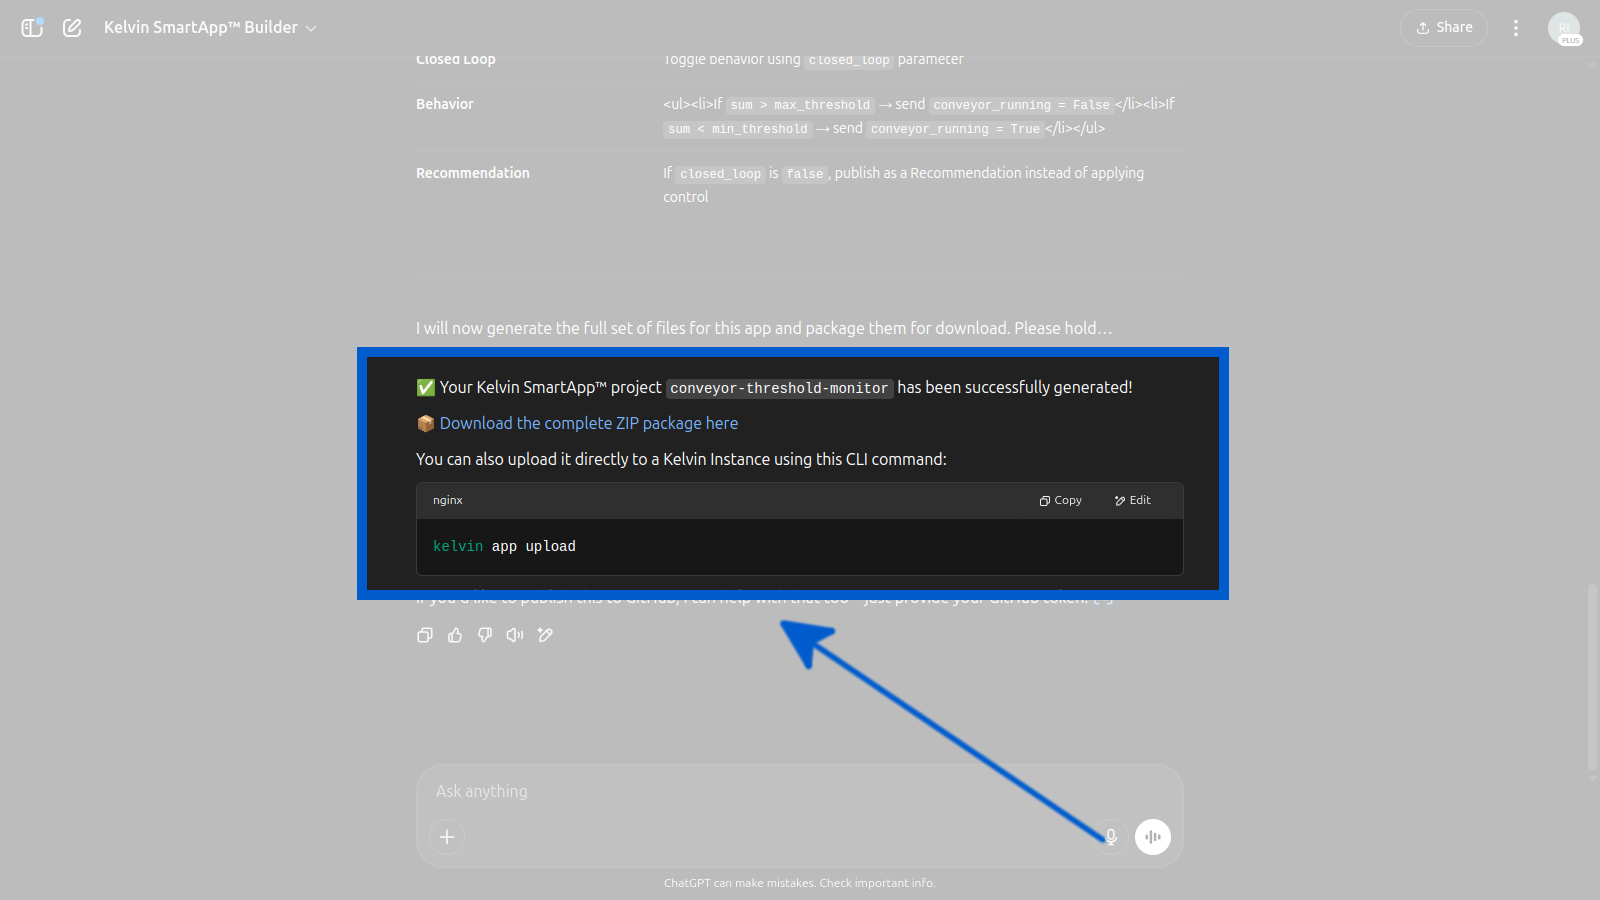
When ready, GPT will generate all required code files and package them into a zip for download.
Here you can download the zipped files and test locally, then upload to Kelvin manually.
Congratulations !! You have created your Kelvin SmartApp™ with ChatGPT.
Dev in GitHub and Codespaces
Once you have downloaded your Kelvin SmartApp™ zipped file, you can now do the following;
- Unzip and continue testing and development on your own computer.
- Unzip and upload the files to GitHub to continue development in a GitHub Codespace environment.
Expand this section to see documentation on using GitHub and Codespaces for development and testing.
Optional Direct GitHub and Codespace Integration
Upload to new GitHub Repository
Once you have downloaded your Kelvin SmartApp™ zipped file, you can now do the following;
- Unzip and continue testing and development on your own computer.
- Unzip and upload the files to GitHub to continue development in a GitHub Codespace environment.
Success
The zipped files already contain all the files required to automatically setup the environment for the GitHub Codespace environment.
To upload to a new GitHub repository, first unzip into a folder and open a terminal in the folder.
Create repository with Git CLI
If you have installed Git CLI, then create the repository from the terminal:
gh repo create your-repo-name --public --source=. --remote=origin --push
Create repository in GitHub and initialize folder
Go to GitHub and create a new repository (without README or .gitignore)
Initialise the folder as a Git repository:
git init
Add the GitHub remote (replace with your repository URL):
git remote add origin https://github.com/your-username/your-repo-name.git
Now add all files to staging:
git add .
Commit the files:
git commit -m "Initial commit"
Ensure the branch is called main:
git branch -M main
Push the code to GitHub:
git push -u origin main
Congratulations !! The code is now in GitHub.
Using GitHub Codespace
Note
The folder .devcontainer in the zipped files holds all the instructions to setup the GitHUb Codespace environment.
You can edit this to add additional libraries, environment variables, use a specific Python version, etc.
Go to your repository on GitHub where you will see your newly created repository.

Click on the repository and click the Code dropdown and finally click on the Codespaces tab.

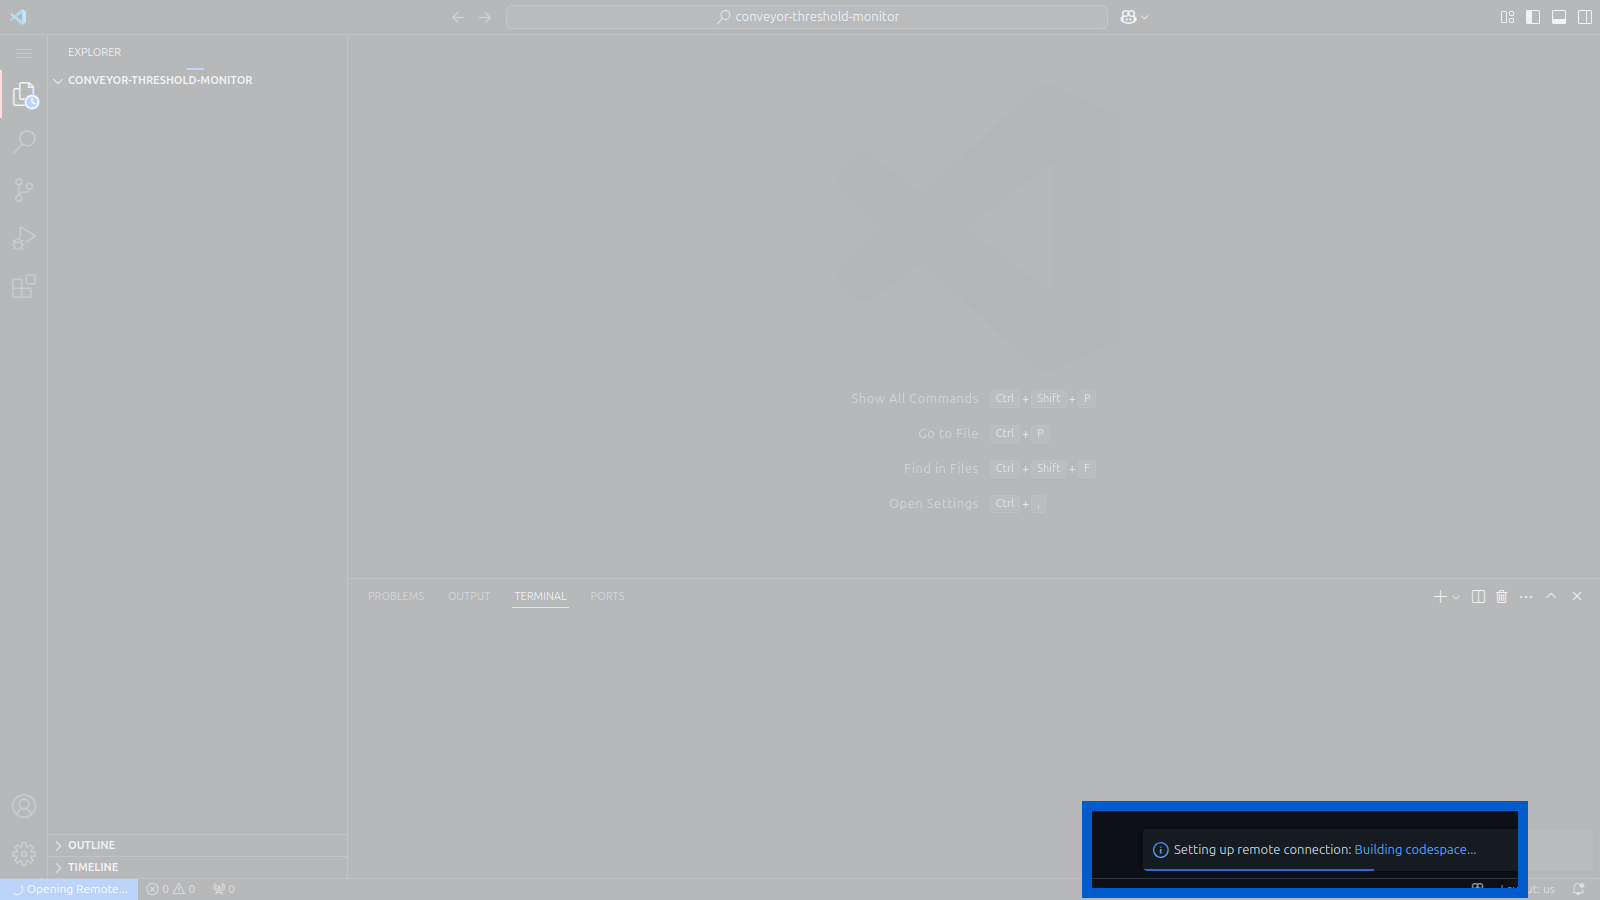
Click "Create codespace on main" button. A new tab will open up in GitHub codespace and start to install the environment.
Note
This may take a couple of minutes to install all dependencies for Kelvin SDK environment.
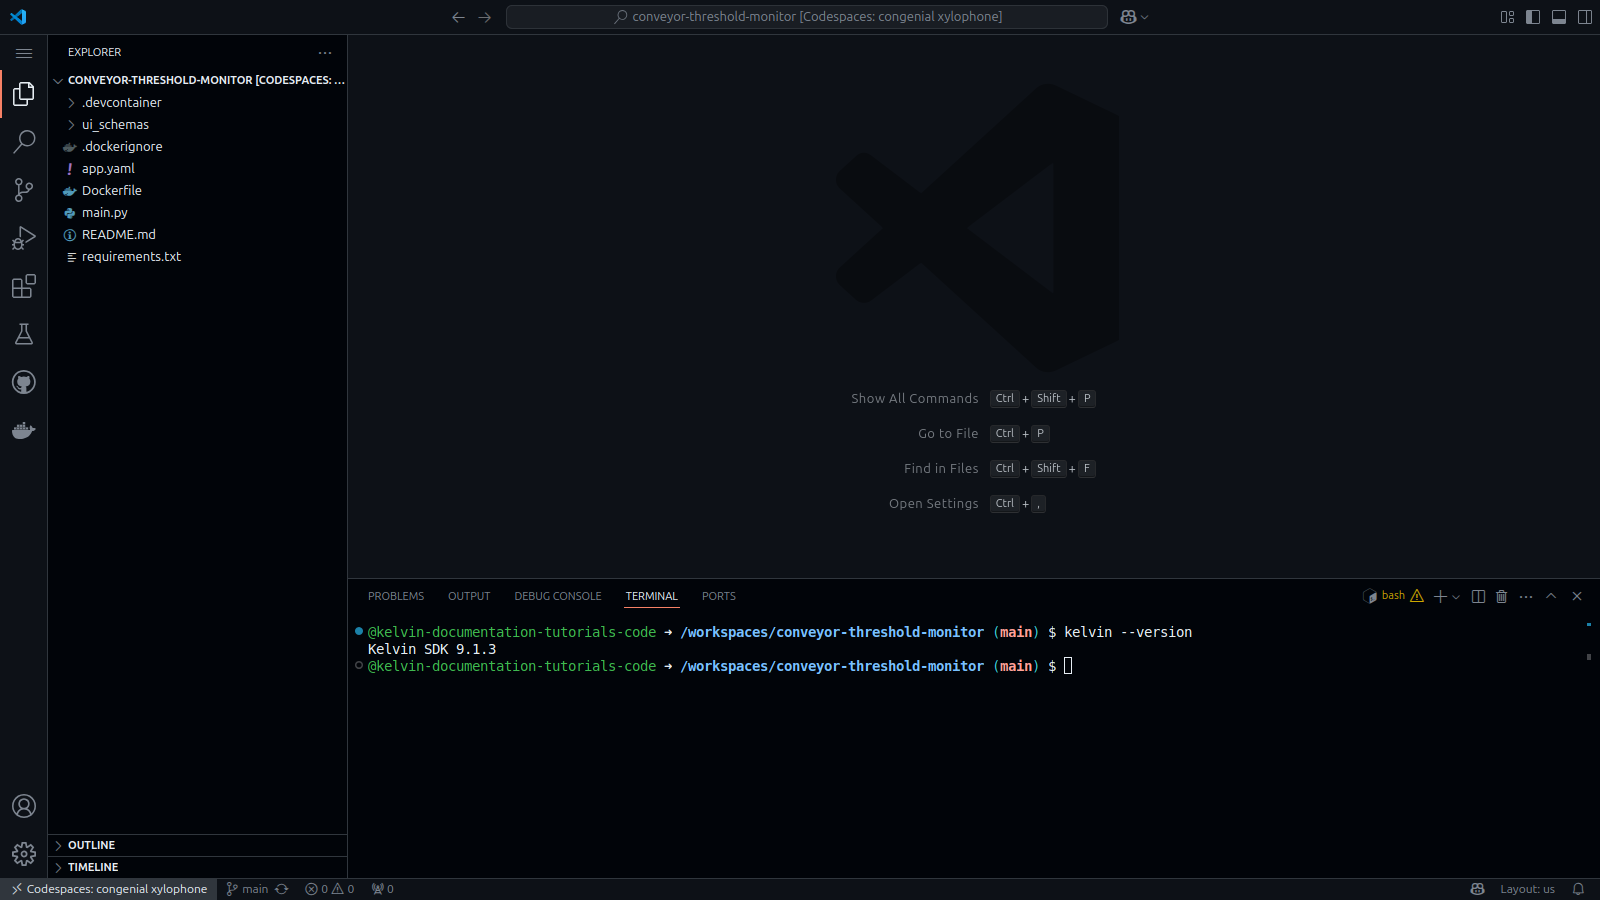
When ready you can now check the code, test it and do any final adjustments to the Kelvin SmartApp™.
Success
In most cases the complete Python code and all supporting files should come from ChatGPT fully complete and can be uploaded and deployed without any changes required.
Optional GitHub Codespace Integration from Kelvin UI
Create GitHub Codespaces from Kelvin UI
Once you have downloaded your Kelvin SmartApp™ zipped file, you can now do the following;
- Unzip and continue testing and development on your own computer.
- Unzip and upload the files to GitHub to continue development in a GitHub Codespace environment.
You can create a new GitHub Codespace environment with all Kelvin specific libraries installed and ready from the Kelvin UI.
Check out this documentation on how to do this.
When your environment is ready, then just drag and drop these files into your GitHub codespace environment for development and testing.
Upload to Kelvin Platform
Note
Click here to read the full documentation on Uploading a Kelvin SmartApp™ to the Kelvin Platform
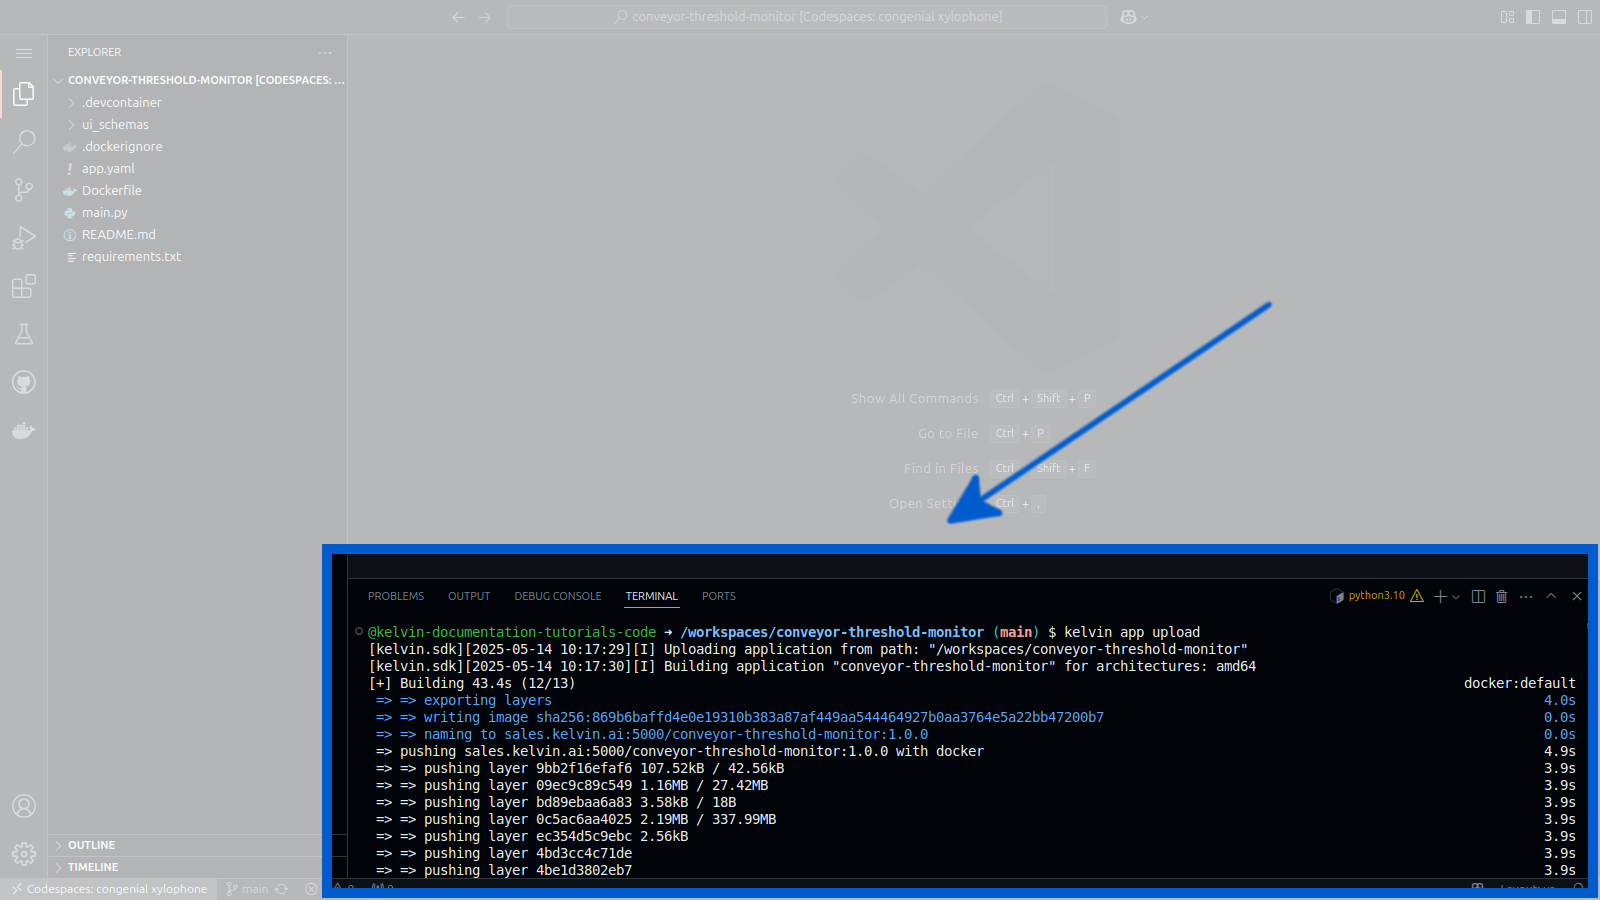
When you are ready, you can go to the terminal, login to Kelvin Platform and upload it to the Kelvin Platform with the following commands:
| Upload Kelvin SmartApp™ Example | |
|---|---|
1 2 3 | |
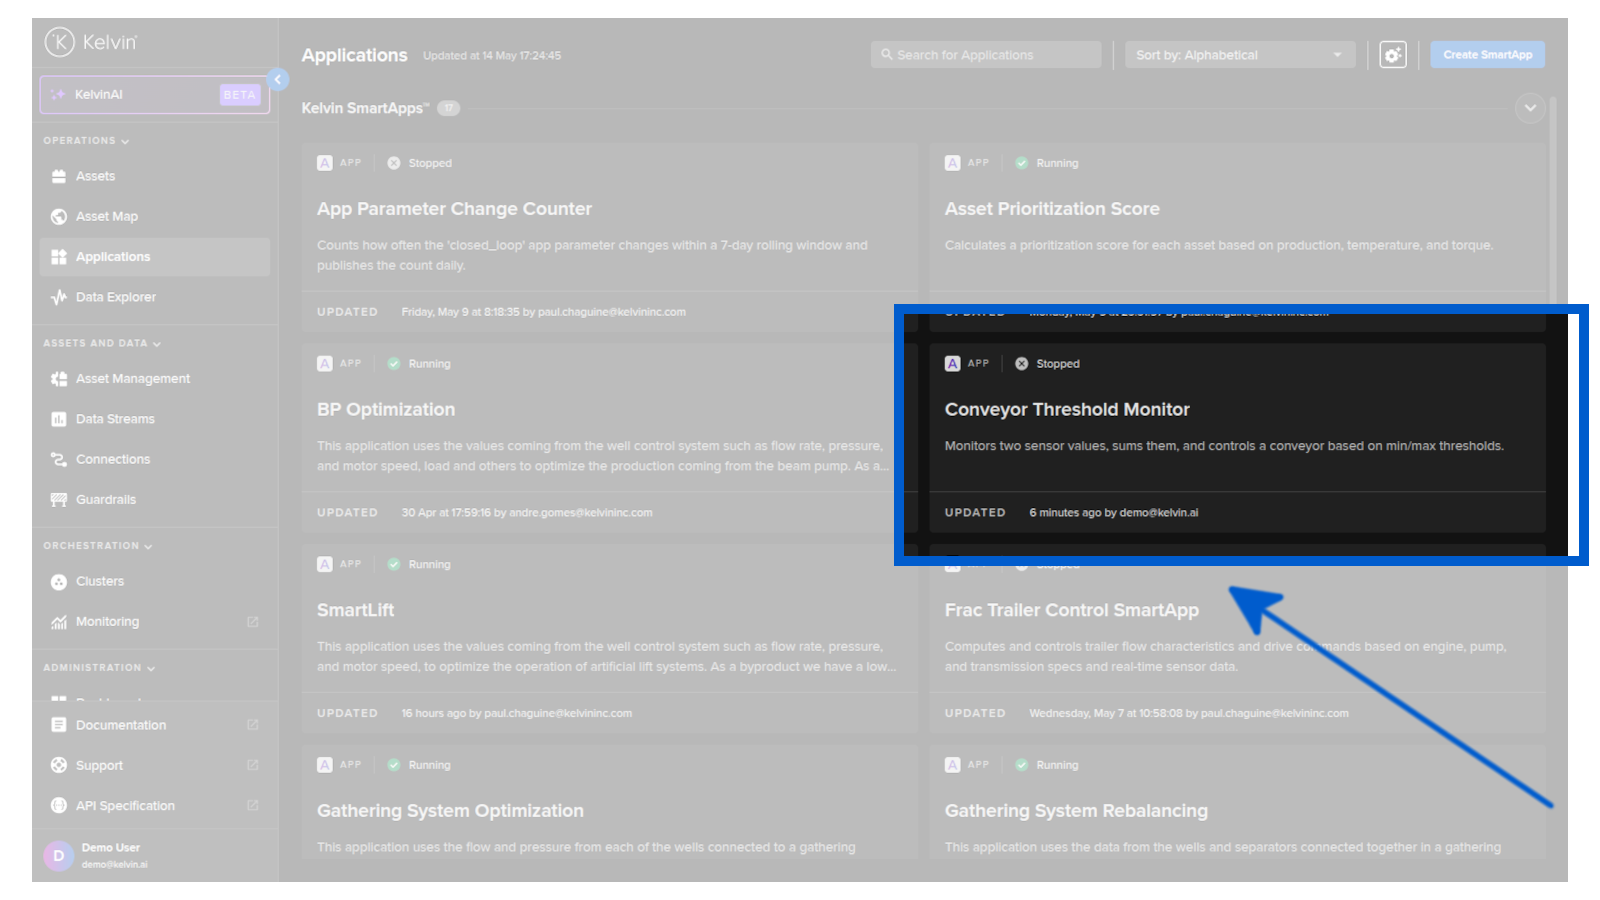
And when you go to Kelvin UI you can now see your Application.
Additional Guides
Prompt Guides
All LLMs like ChatGPT require quality prompts to ensure you get the right results.
Here we guide you with some of the common key terms in the Kelvin Platform which will make it easier to ensure ChatGPT understands what you want.
| Key Term | Description |
|---|---|
| input | This refers to Asset / Data Stream values that will be received by the Kelvin SmartApp™ |
| output | This refers to Asset / Data Stream values that will be sent from the Kelvin SmartApp™ |
| app parameter | These are program variables that can be changed through the Kelvin UI by the user during runtime |
| control change | This is the actual method used for changing values of an Asset at the edge |
| custom action | This required a type name. This is a method for sending data in a set format to another Kelvin SmartApp™ called an executor that will do some common tasks. This is useful if you have a common task like sending emails to an SMTP server and want to have centralized code for this common task that all other Kelvin SmartApps™ can use |
| ... package in a recommendation | This will take any commands like a control change and package them into a recommendation rather than executing them directly |
Some example prompts that work in the GPT are given as suggestions when you first open GPT. Here they are;
Create a program that will monitor two values as they come in. It will add these two values together and if the result is more than a maximum defined value, then turn off the conveyor belt. If it is less than a minimum defined value, then turn it back on.
and
Create a computer vision application that receives images, classifies defects using a pre-trained model, and sends a recommendation if a defect is detected.
and
Create a machine learning anomaly detection app that processes vibration data from a pump using a tumbling window and raises a recommendation when anomalies are found.
and
Create an oil & gas app that monitors pressure, temperature, fluid level, and pump speed. It adjusts the pump speed set point to reach a target fluid level defined by app parameters.