Install Kelvin SDK in Windows
Requirements
To get started is also very easy. Just ensure you have Docker, Python 3 and Pip 3 installed. Specific installation information on each of these for Windows, Mac and Linux can be found here;
- Docker: Always use the latest version or at least version ≥ 24.0.7 - https://docs.docker.com/engine/install/.
- Python 3: Supported versions from 3.8 to 3.12. https://www.python.org/downloads/windows/.
- Pip 3: Included by default with all Python versions starting from 3.4.
Other Windows requirements to check, especially when you are running the older Windows 10 operating system;
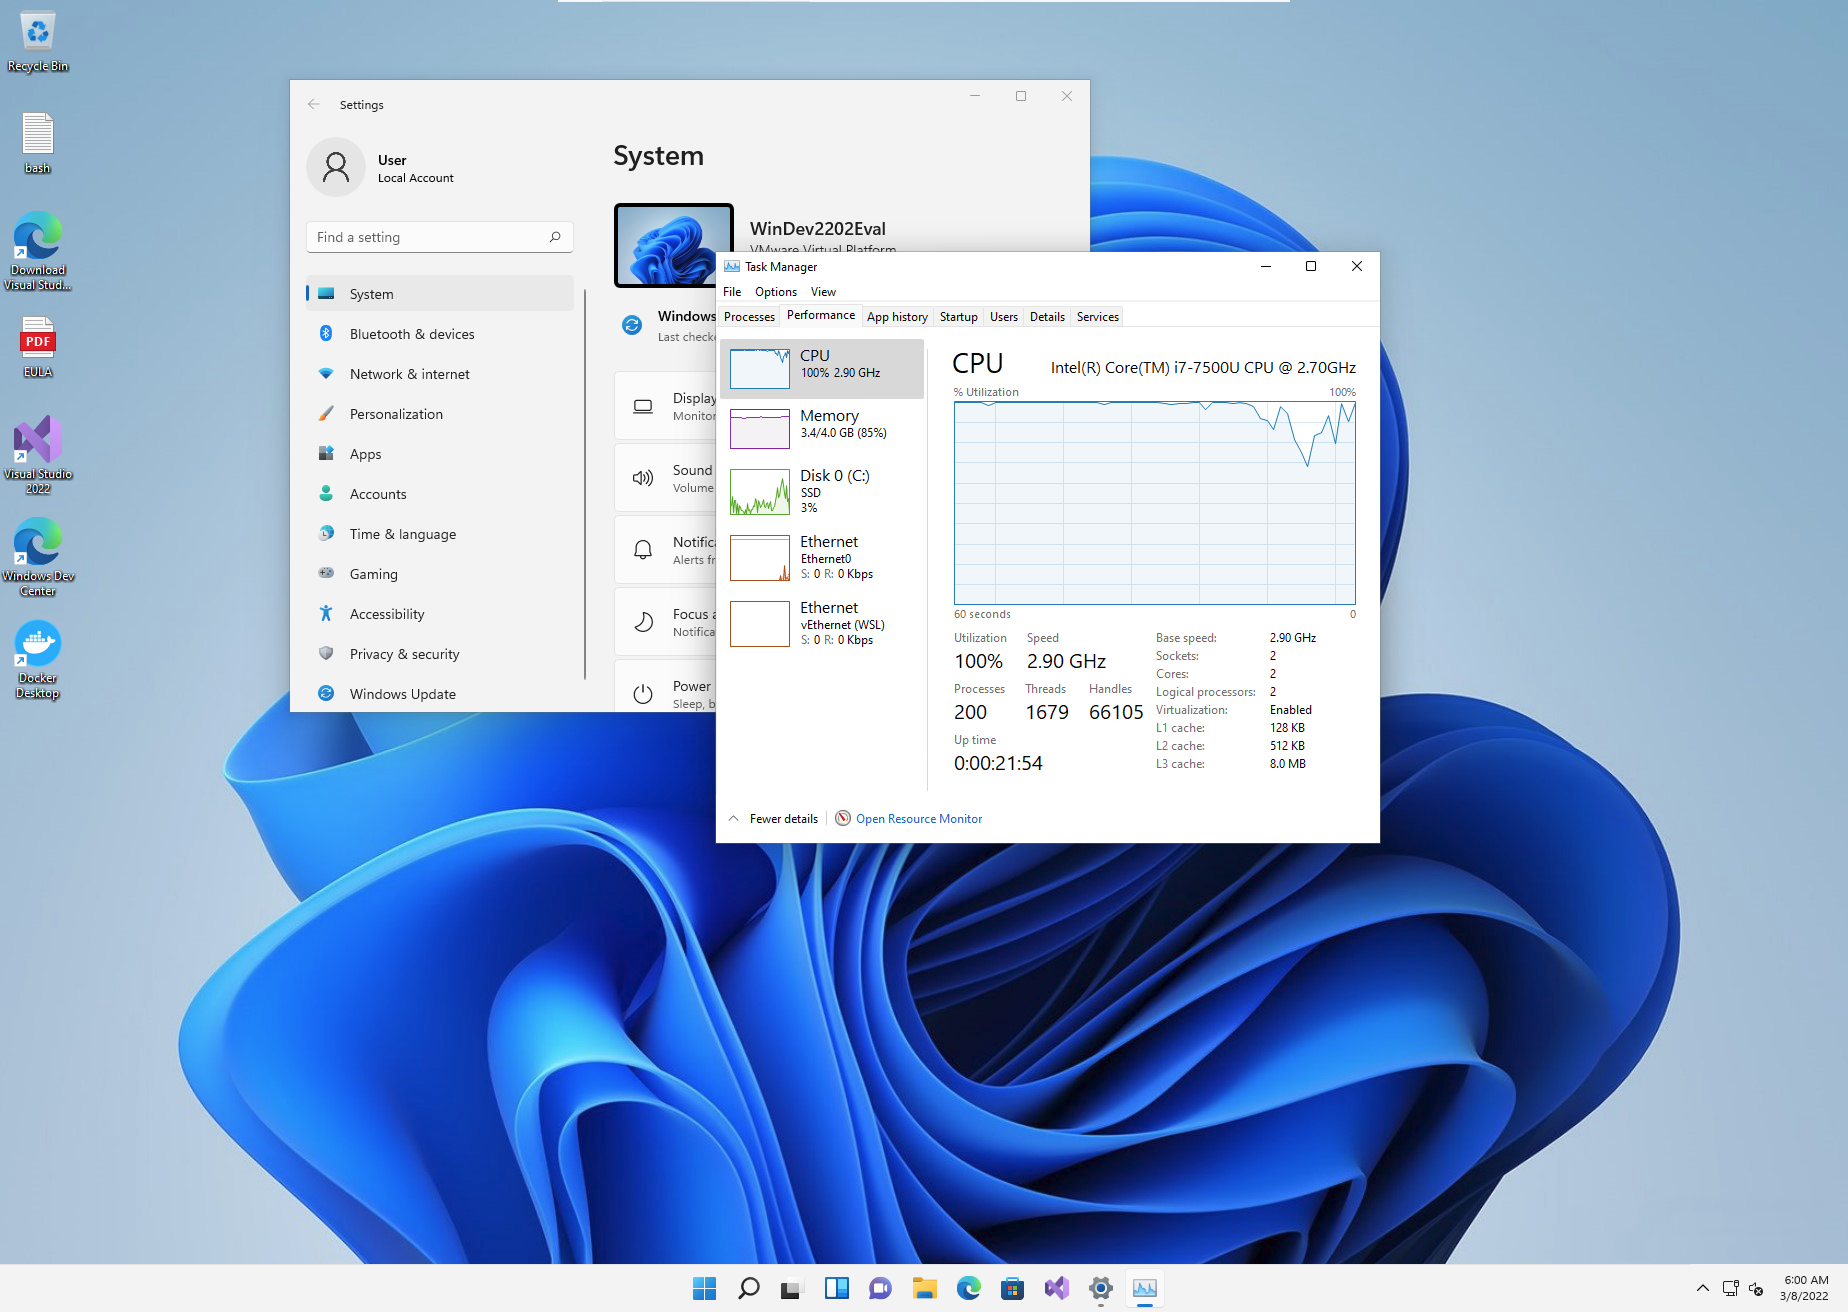
- Hardware Virtualization supported by CPU and enabled in BIOS/UEFI. To see if it is running go to Settings, search for Task Manager and click on the Performance tab. In the bottom right corner you should see "Virtualization: Enabled".
Be careful if you try to install Docker in a VirtualBox VM because of problems with hypervision. Docker will work inside a VMWare Workstation VM. See this discussion https://askubuntu.com/questions/1286352/wsl2-not-working-within-windows-10-vm-in-virtualbox-on-ubuntu-18-04-5-lts
- Windows Subsystem for Linux 2 (WSL2).
From these instructions - https://docs.microsoft.com/en-us/windows/wsl/install - you can install WSL2 with the following commands from the command prompt (windows-key R and type cmd enter)
| Install WSL2 | |
|---|---|
1 | |
After rebooting Windows then to change to version 2 type;
| Change WSL to Version 2 | |
|---|---|
1 | |
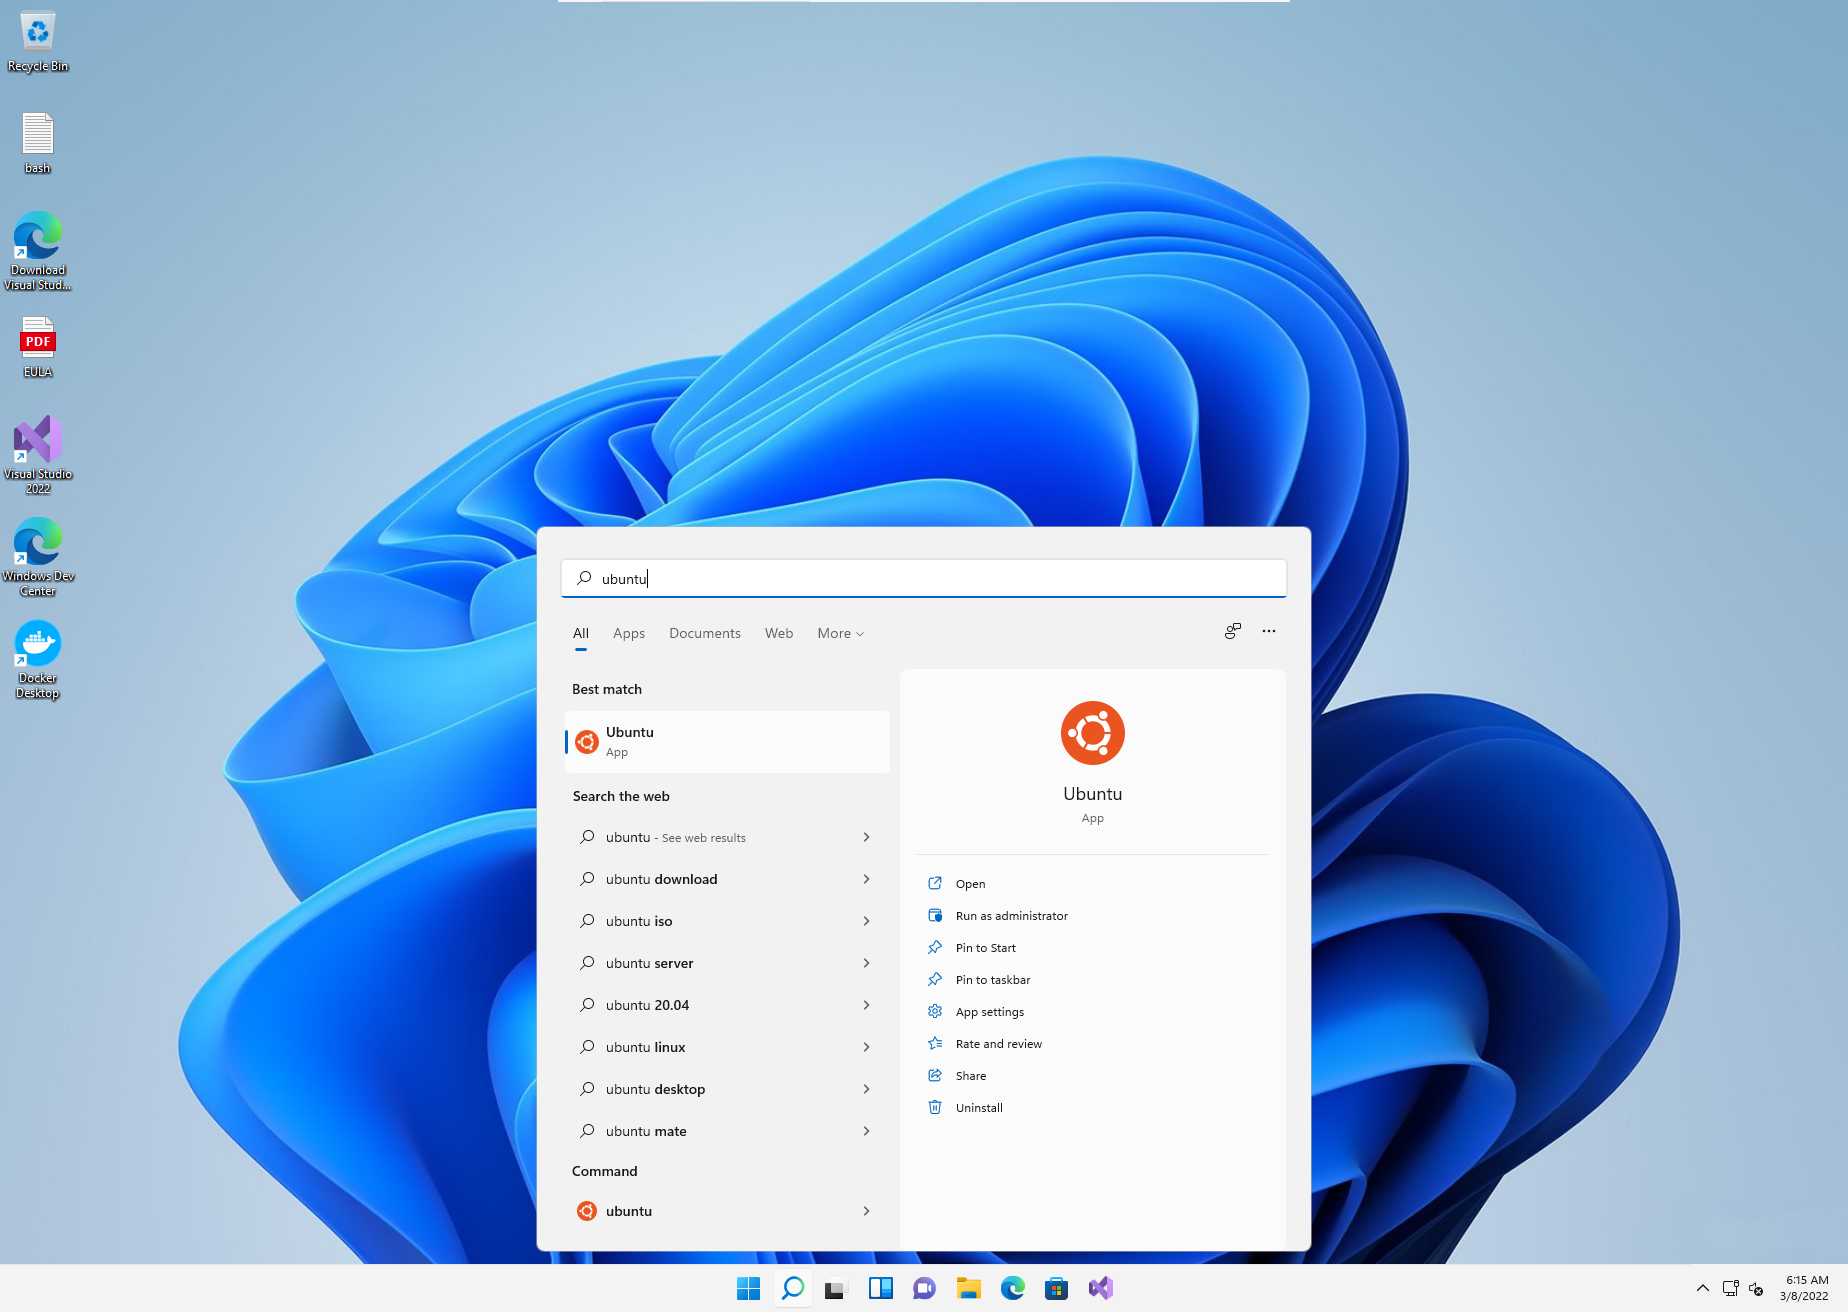
WSL2 is install by default with Ubuntu. Start Ubuntu by running it from the Start Menu
And you will see the command prompt appear.
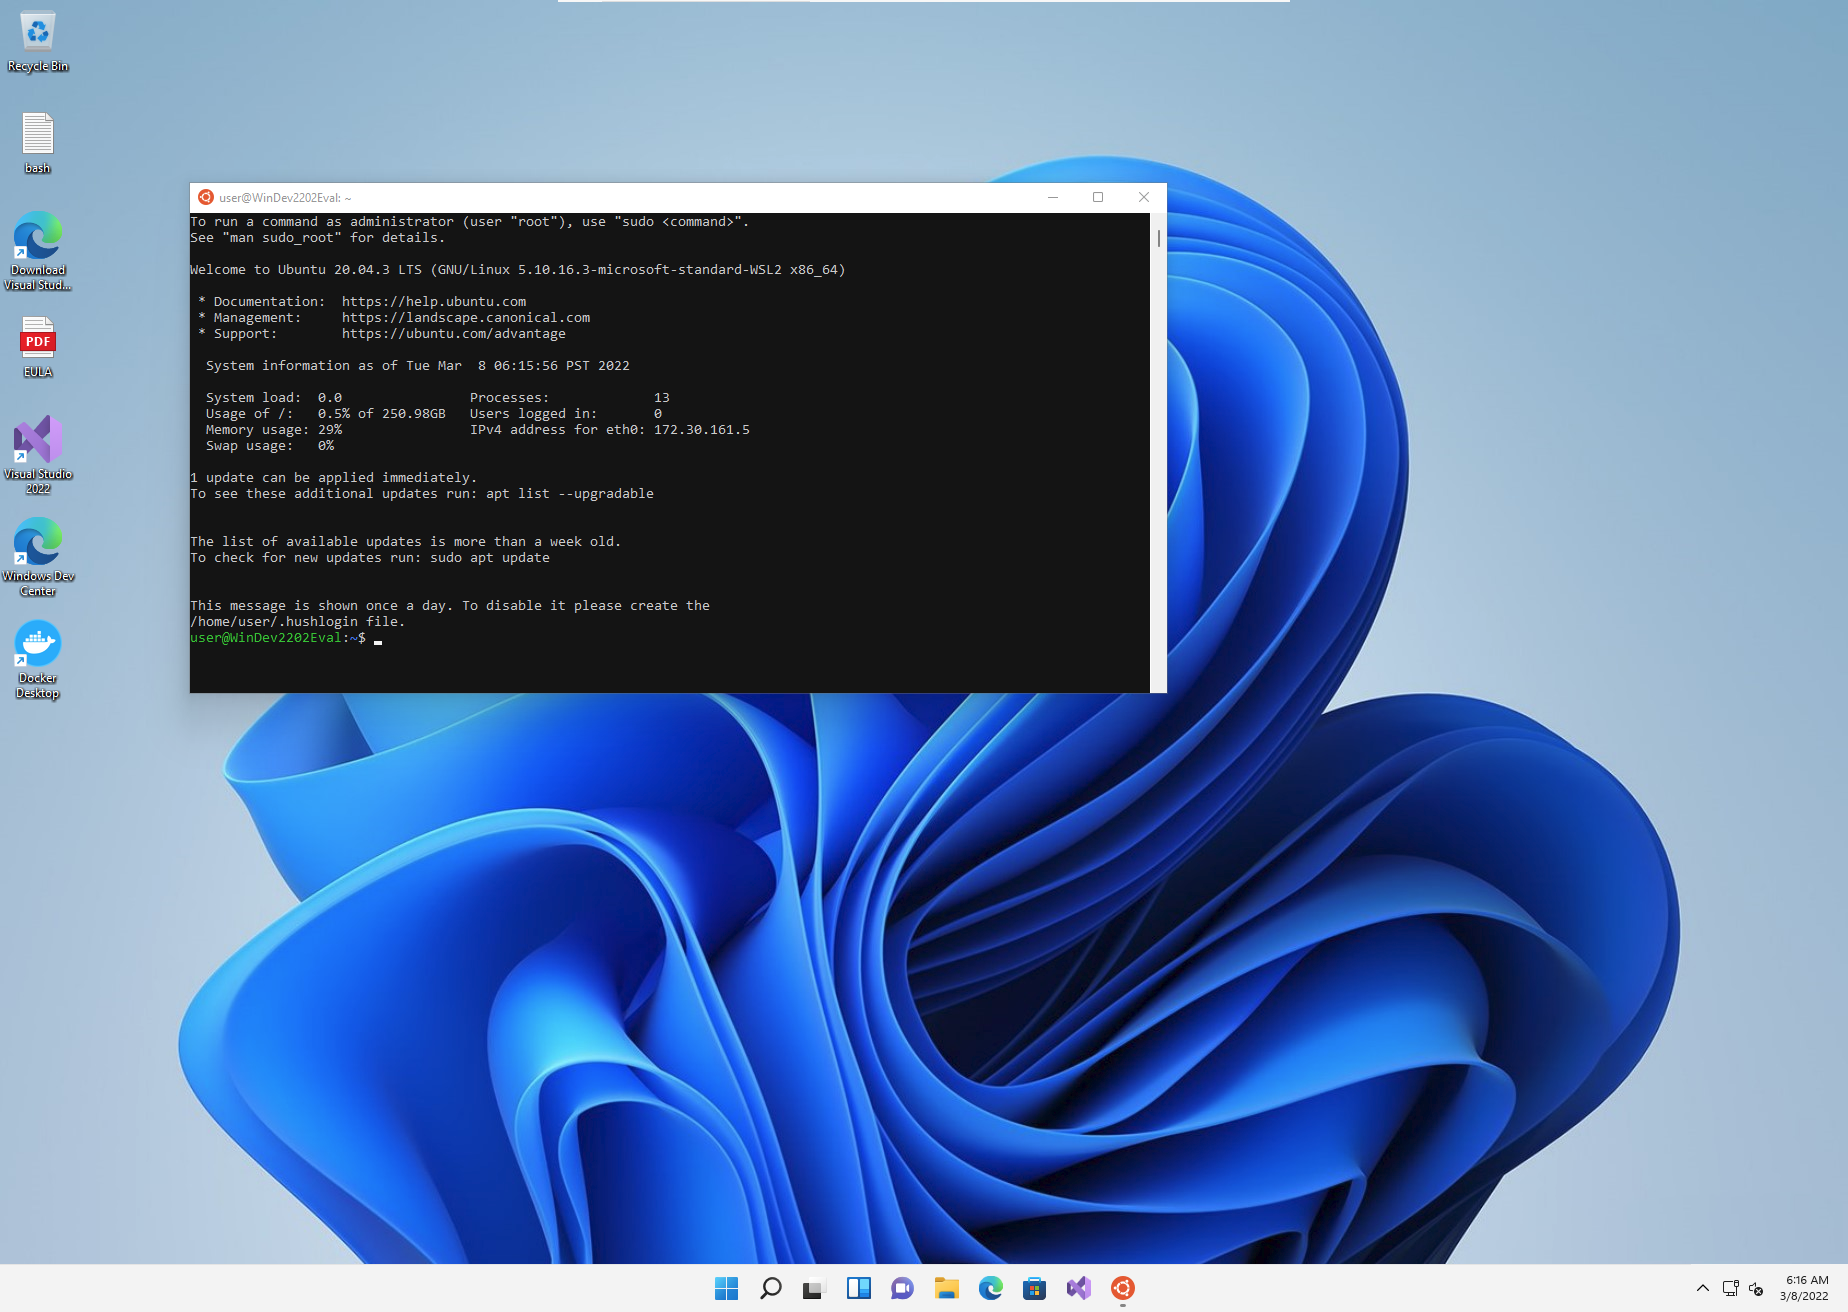
Update Ubuntu with the latest security patches (You will asked for your password. This is not the password of Windows but the username and password you created for the WSL2 Ubuntu). When finished you can close Ubuntu.
| Update Ubuntu with Latest Security Patches | |
|---|---|
1 2 3 | |
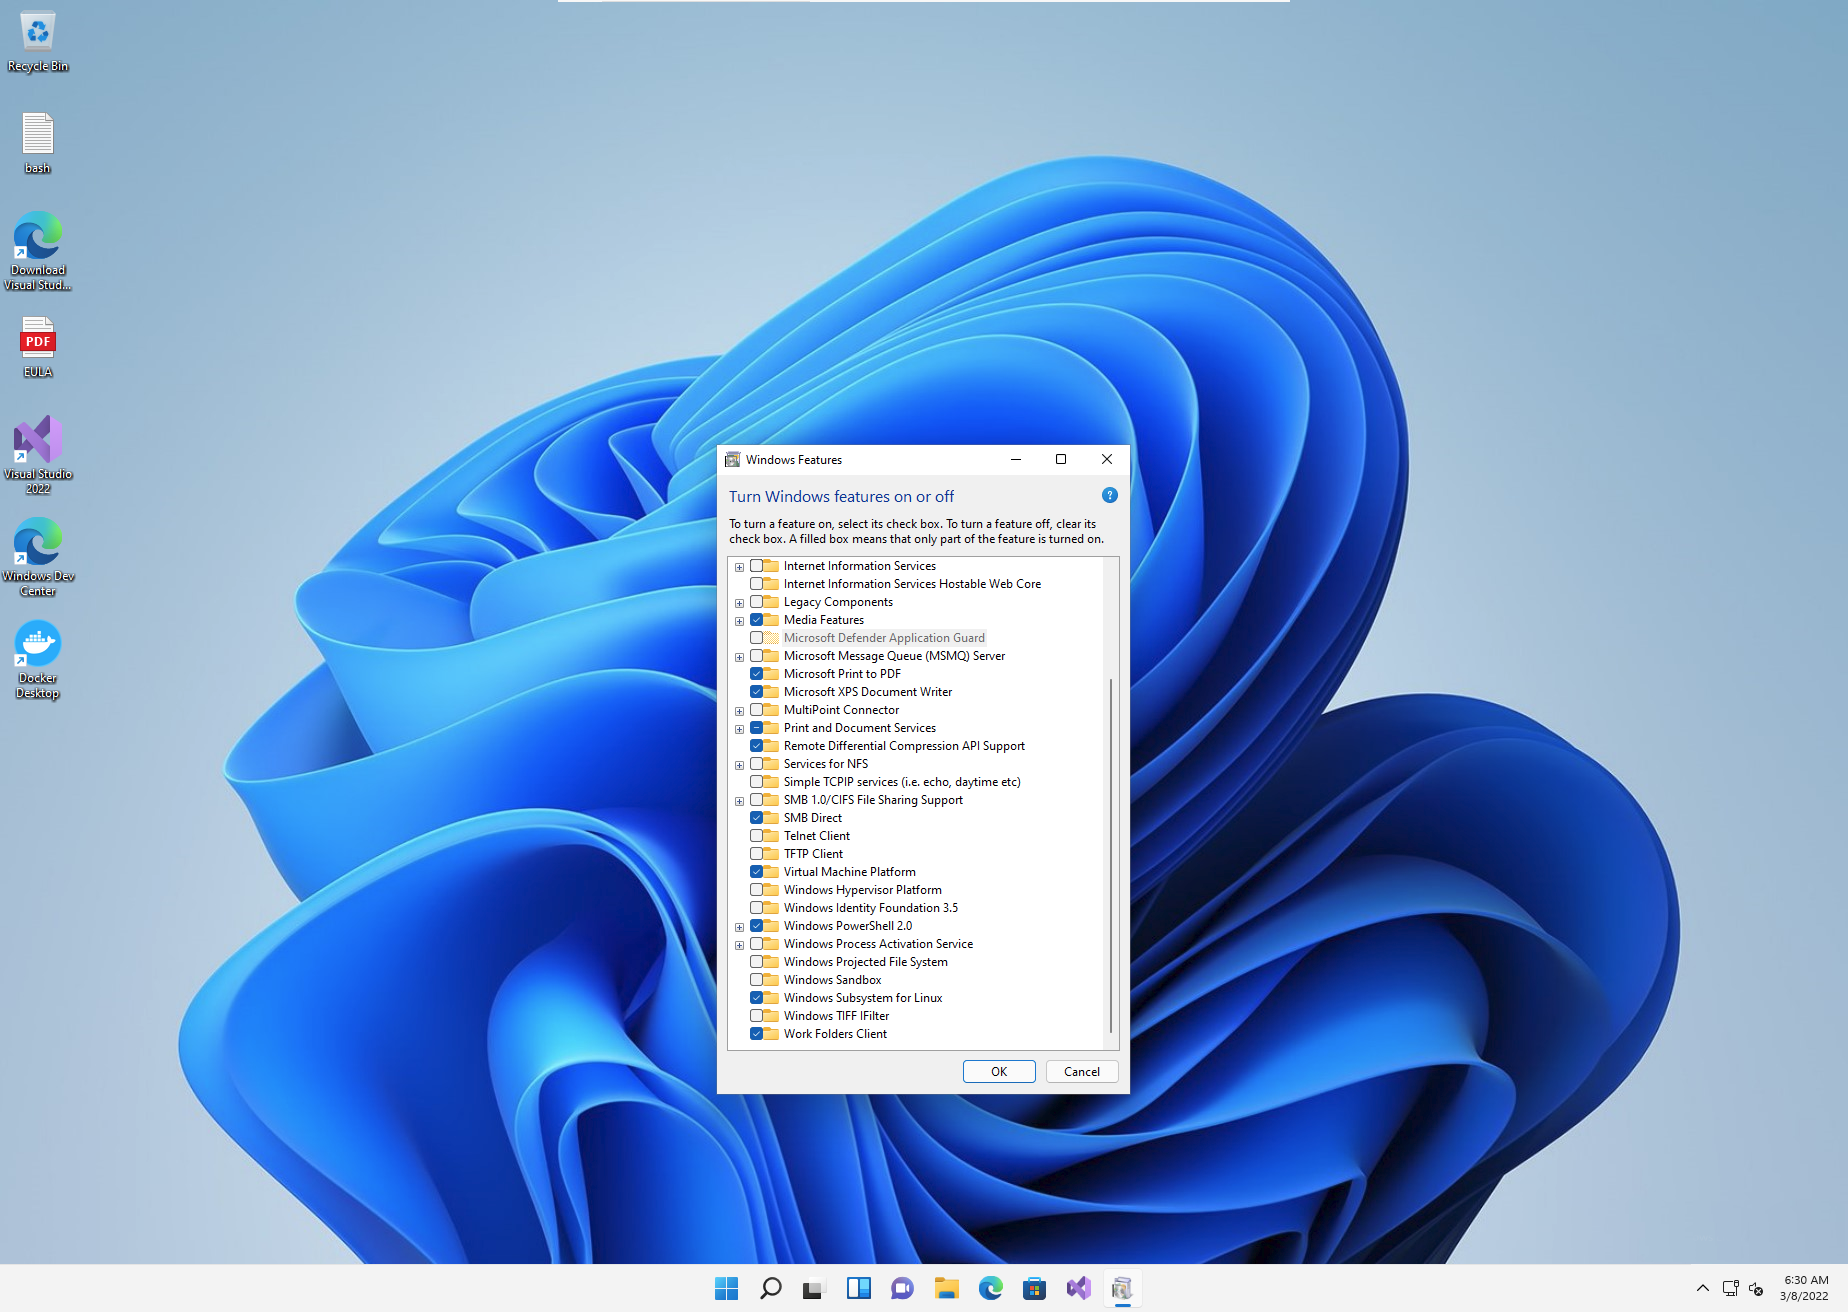
- The following Windows features must be enabled.
- Hyper-v
- Virtual Machine Platform
- Windows Subsystem for Linux
To do this, go to the start menu and search for "Turn Windows features on or off".
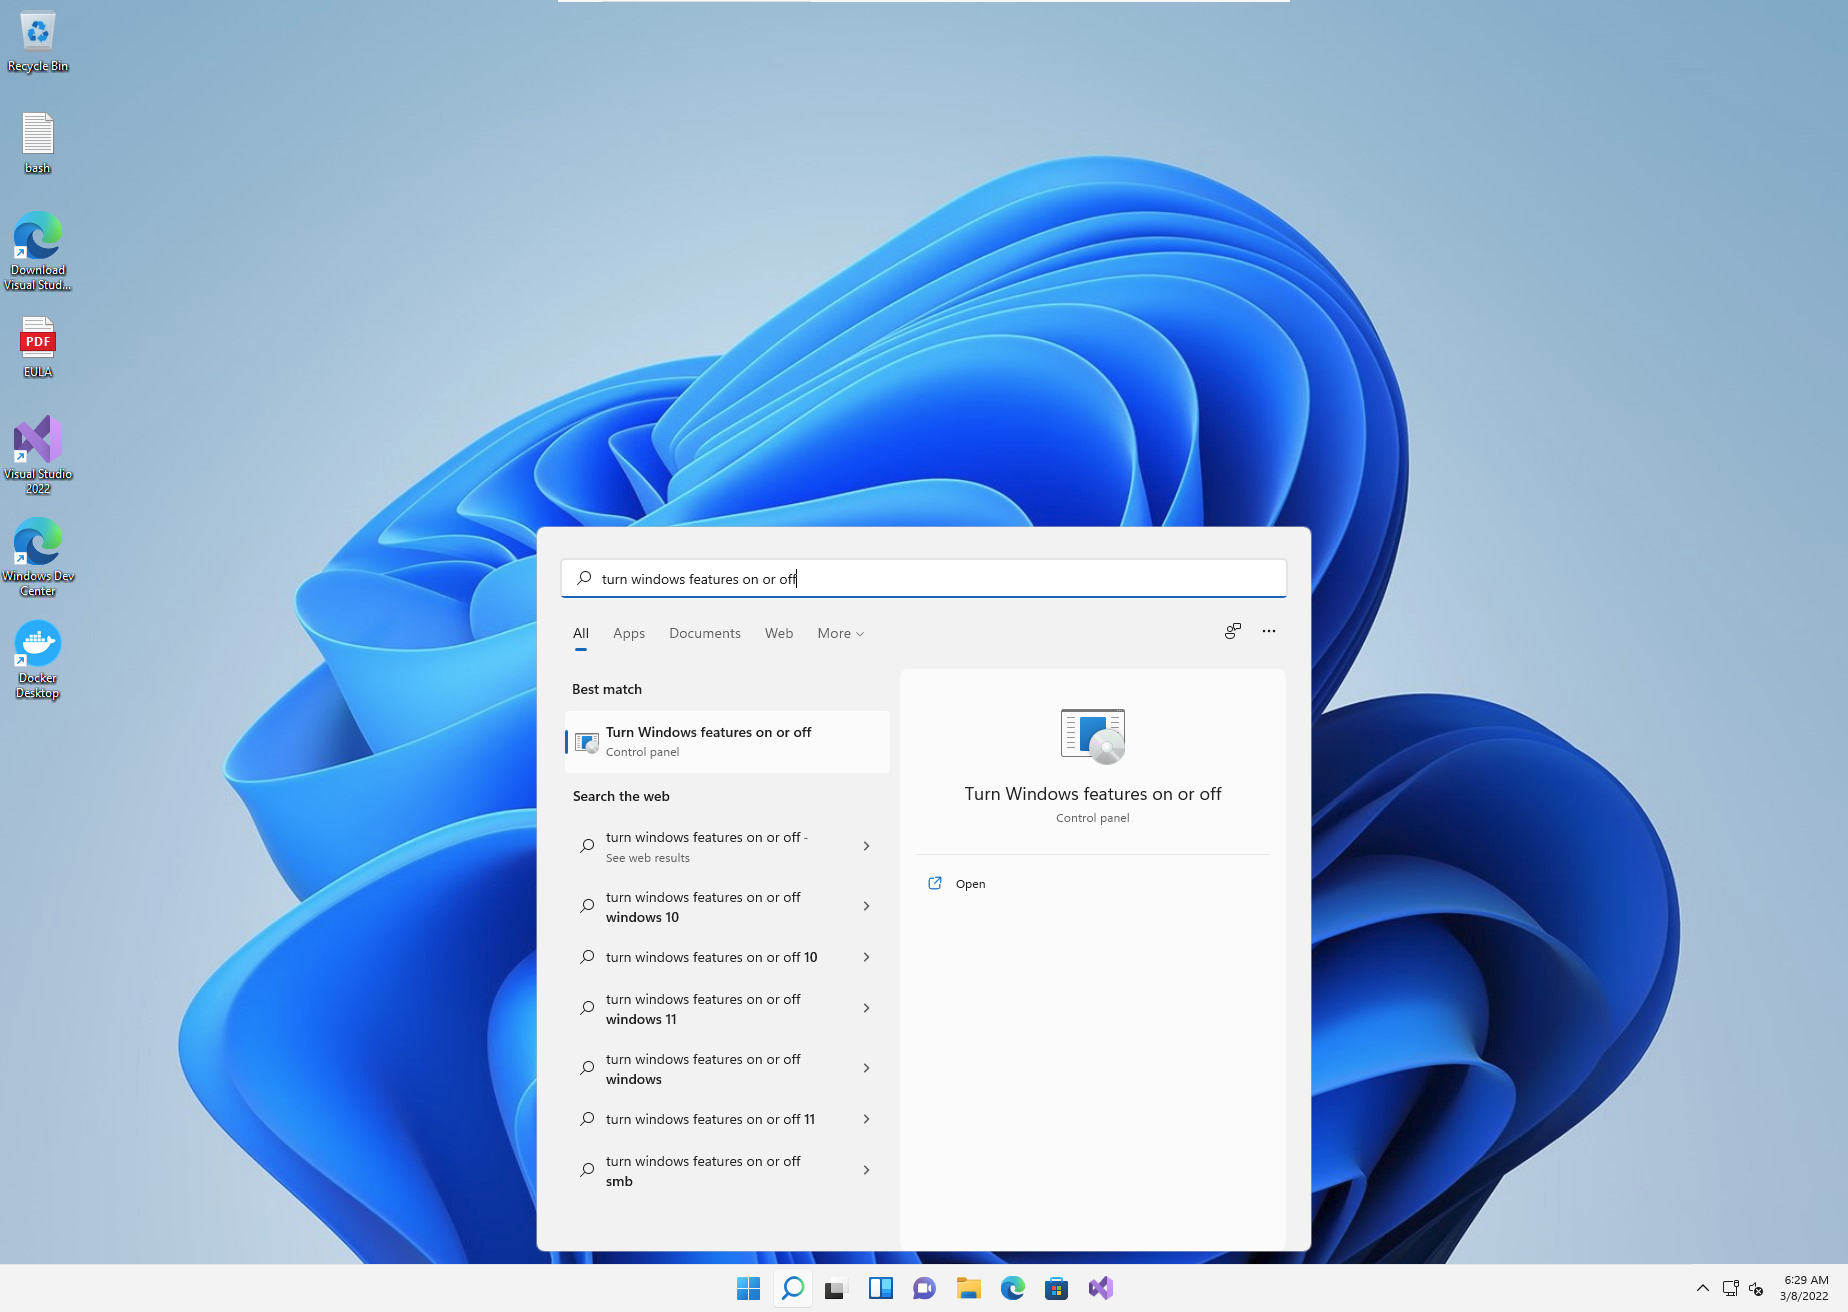
The three features mentioned above are all checked.
You are now ready to install all the software.
Installing
Docker
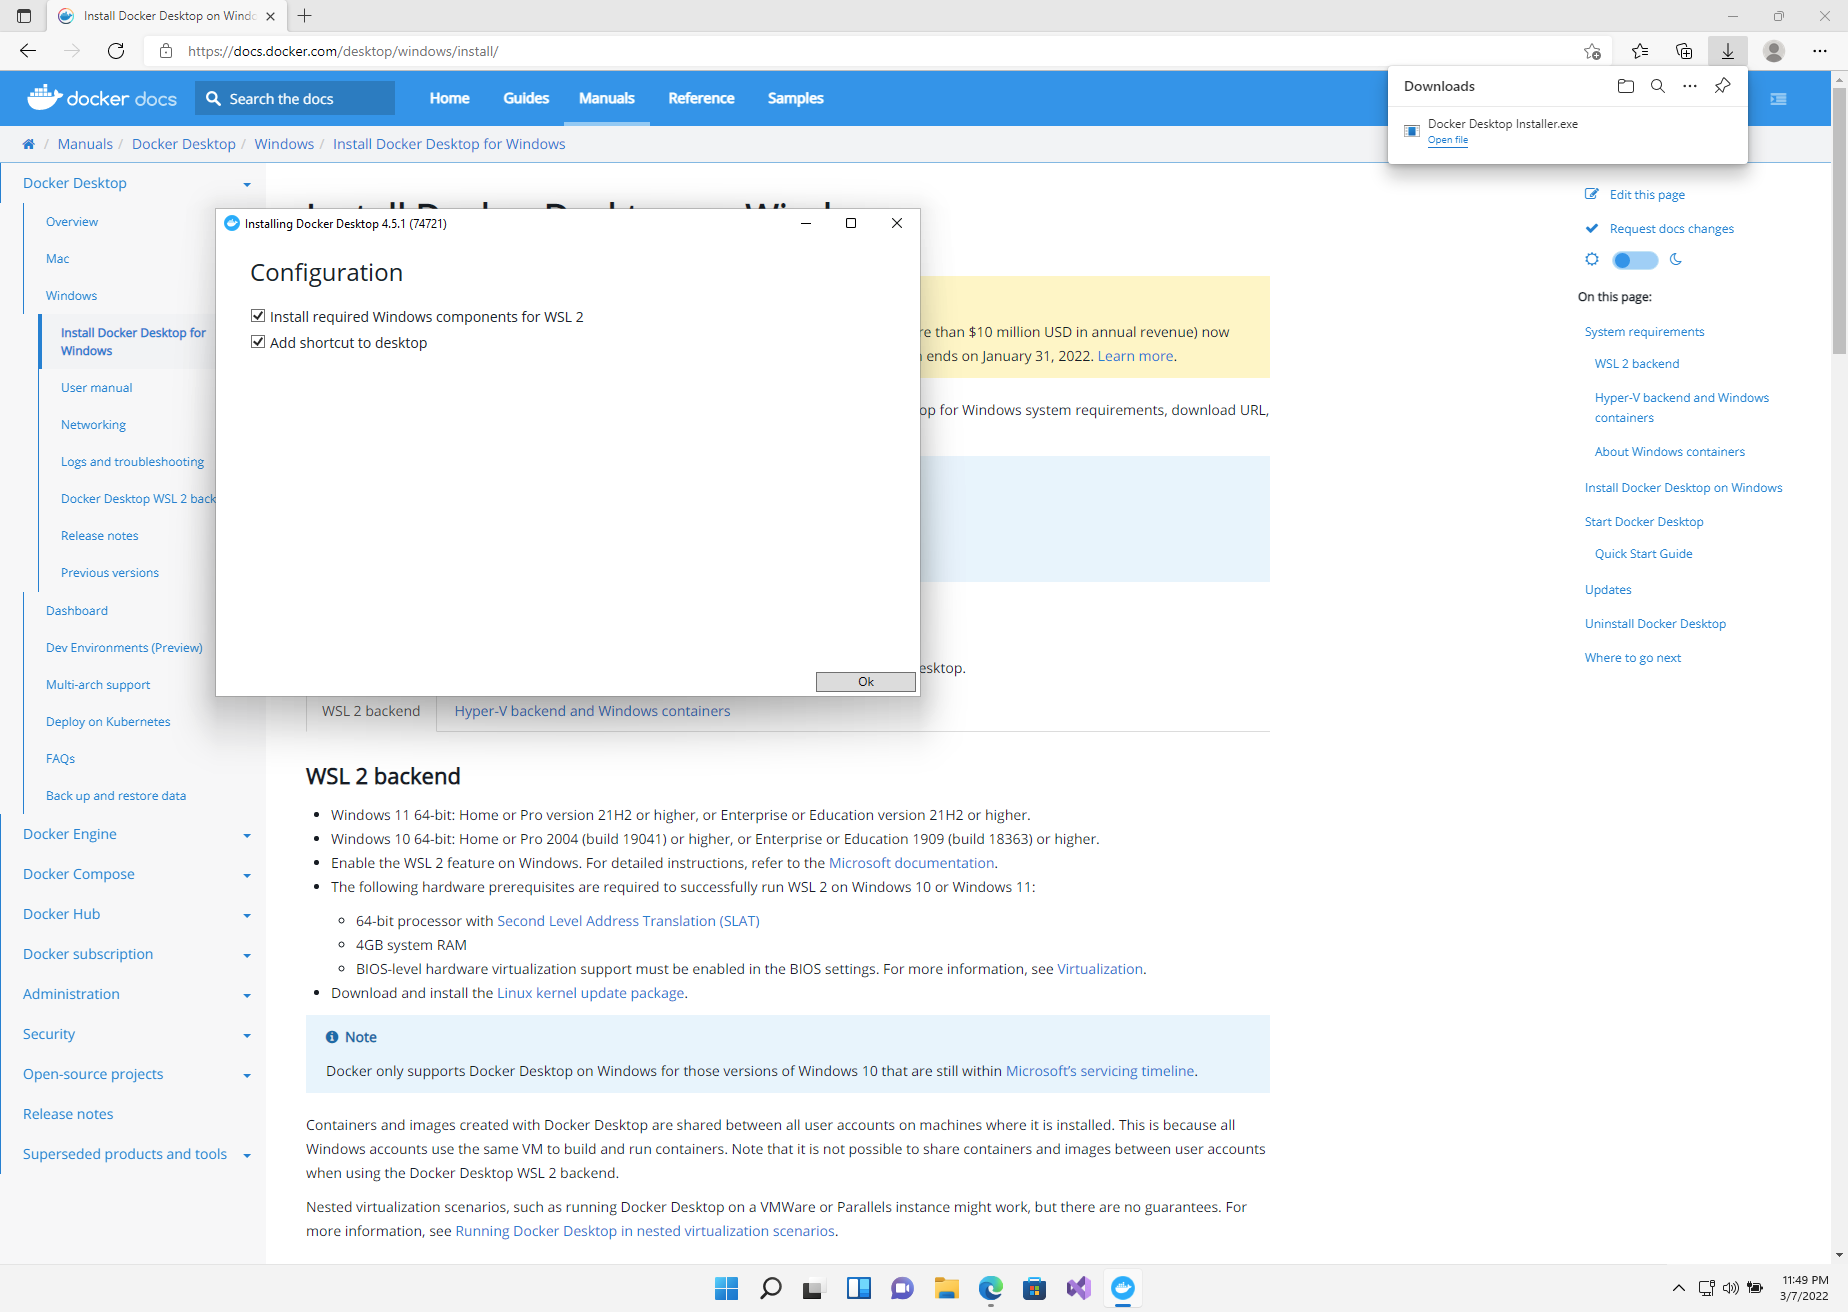
First of all go to the link and download the latest Docker Desktop installation file and run it.

Click on Yes when you get the User Account Control warning "Do you want to allow this app to make changes to your device".
When you get to the configuration page of the Docker Desktop installation, ensure that you check the option "Install required Windows components for WSL 2"
If all has gone well you should receive an Installation succeeded message.
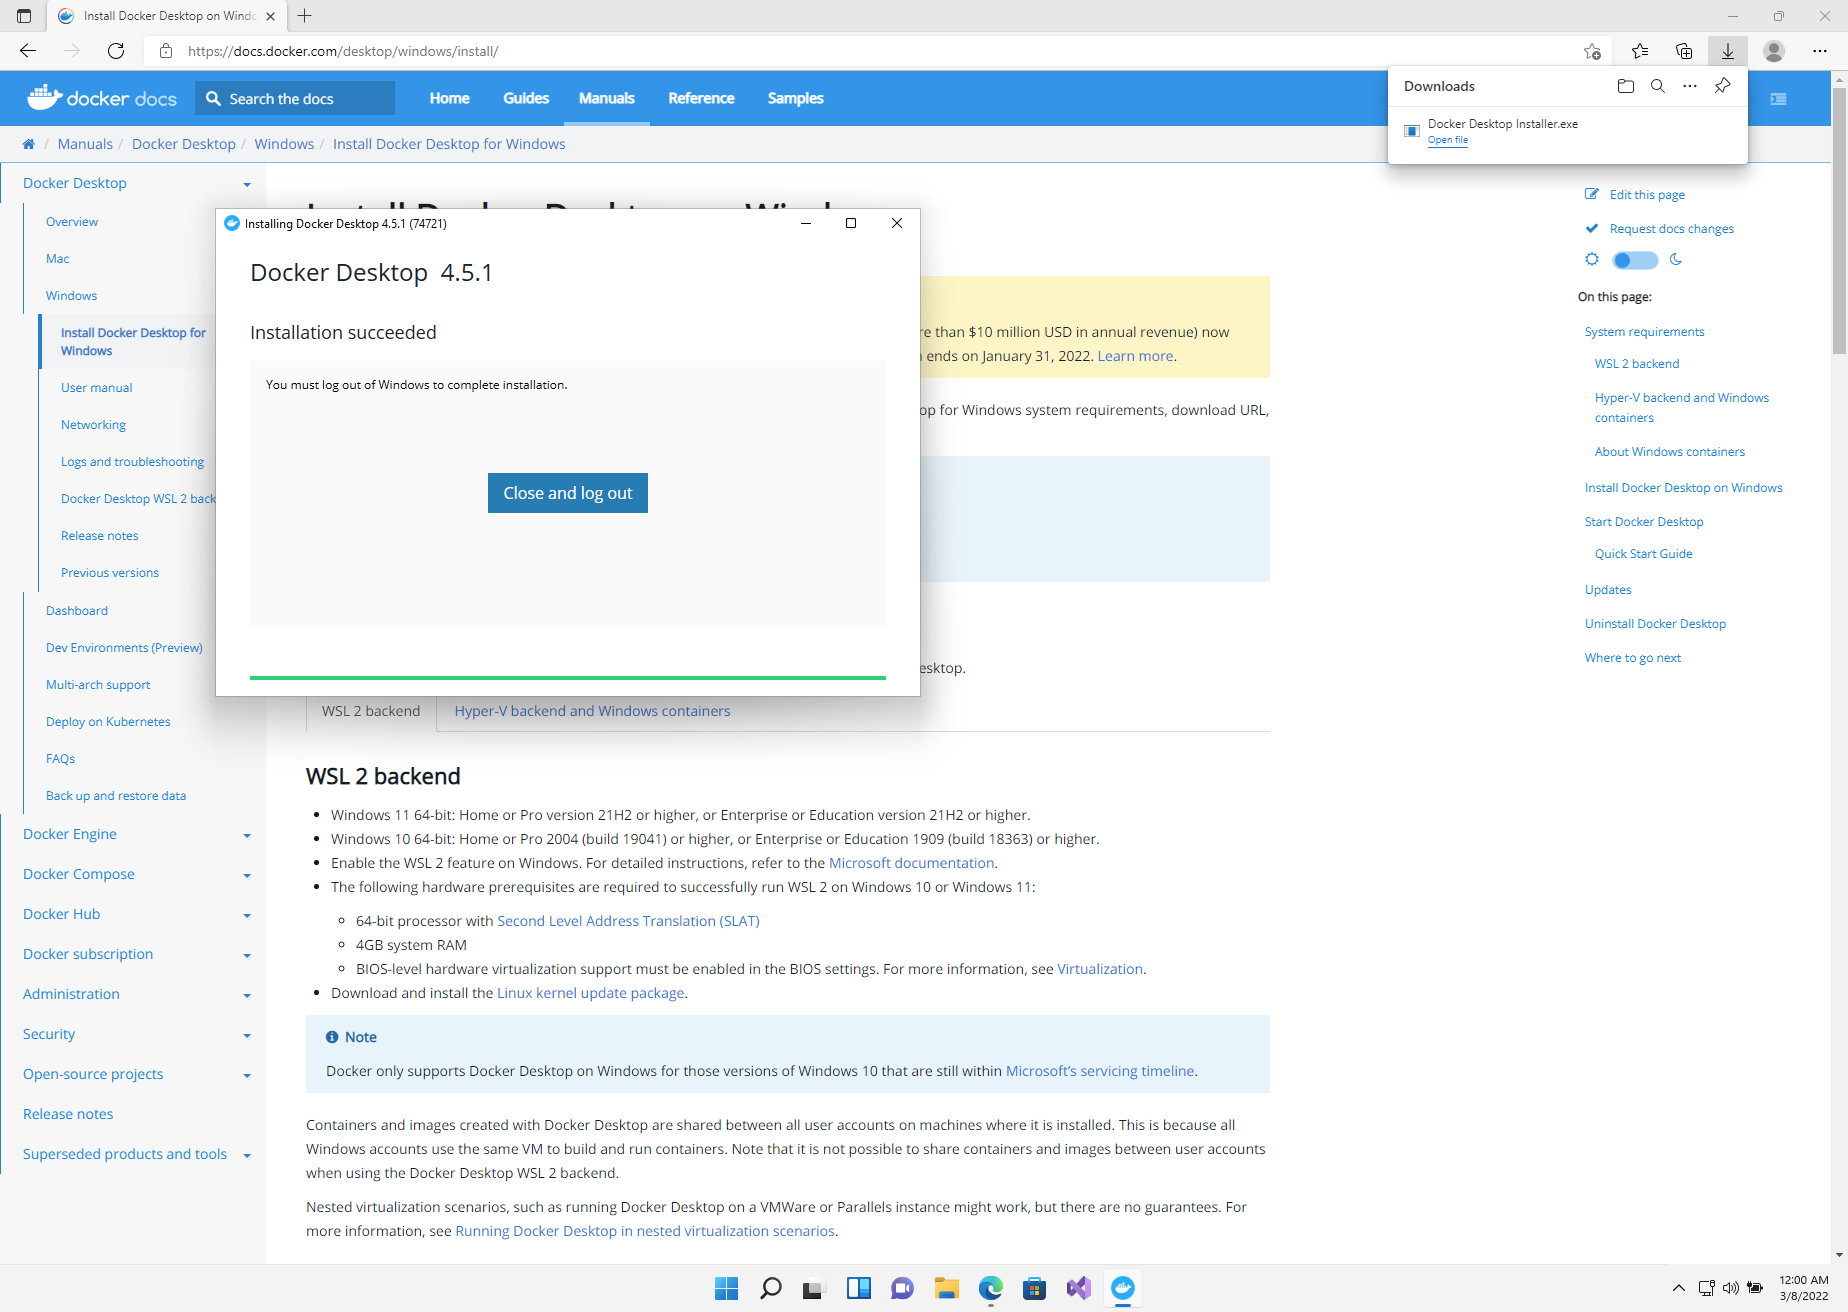
You will need to logout and login again to complete the installation. You have now completed the Docker Desktop installation !
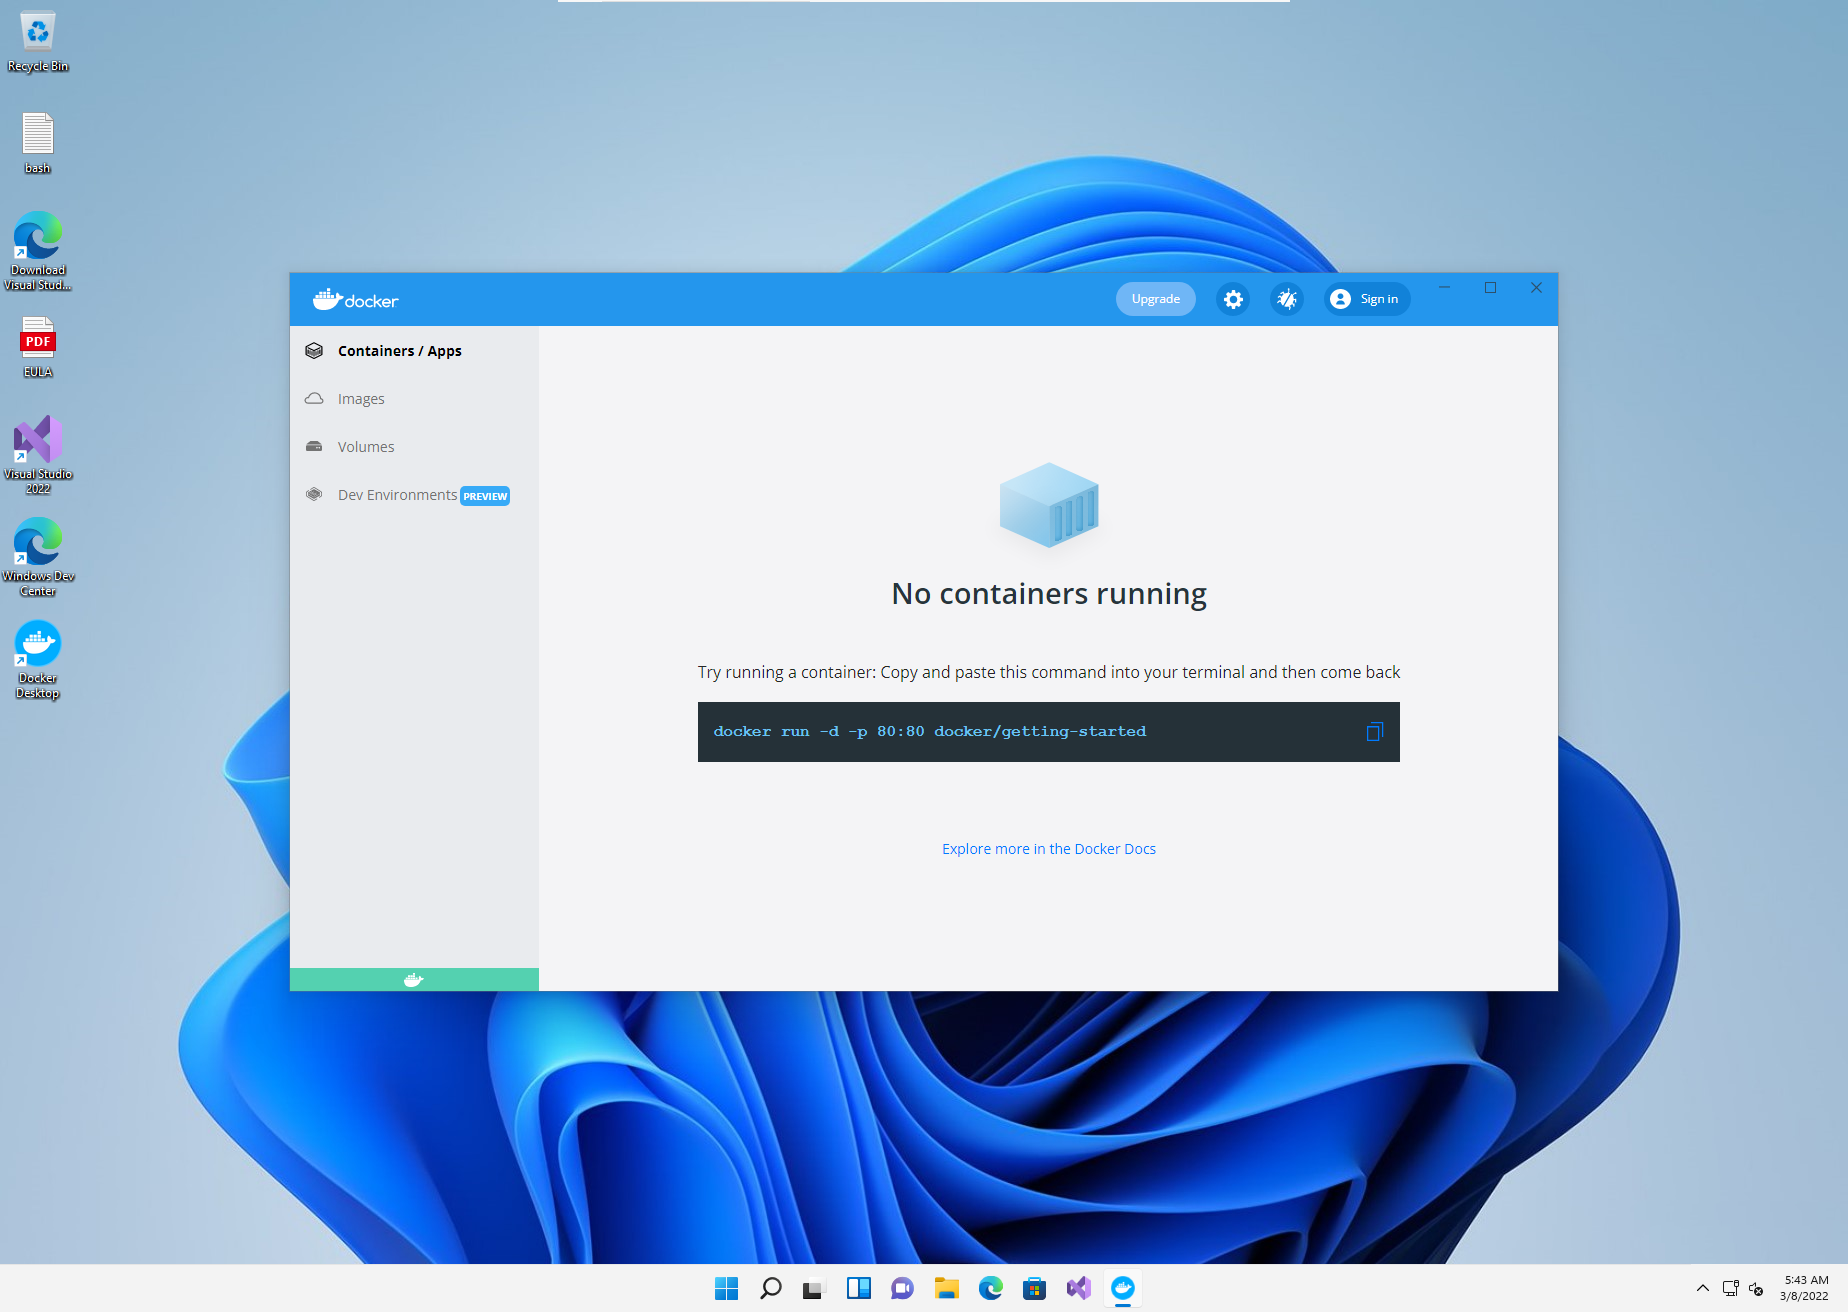
It is not necessary but if you are interested you can open Docker Desktop to have a look around.
Python
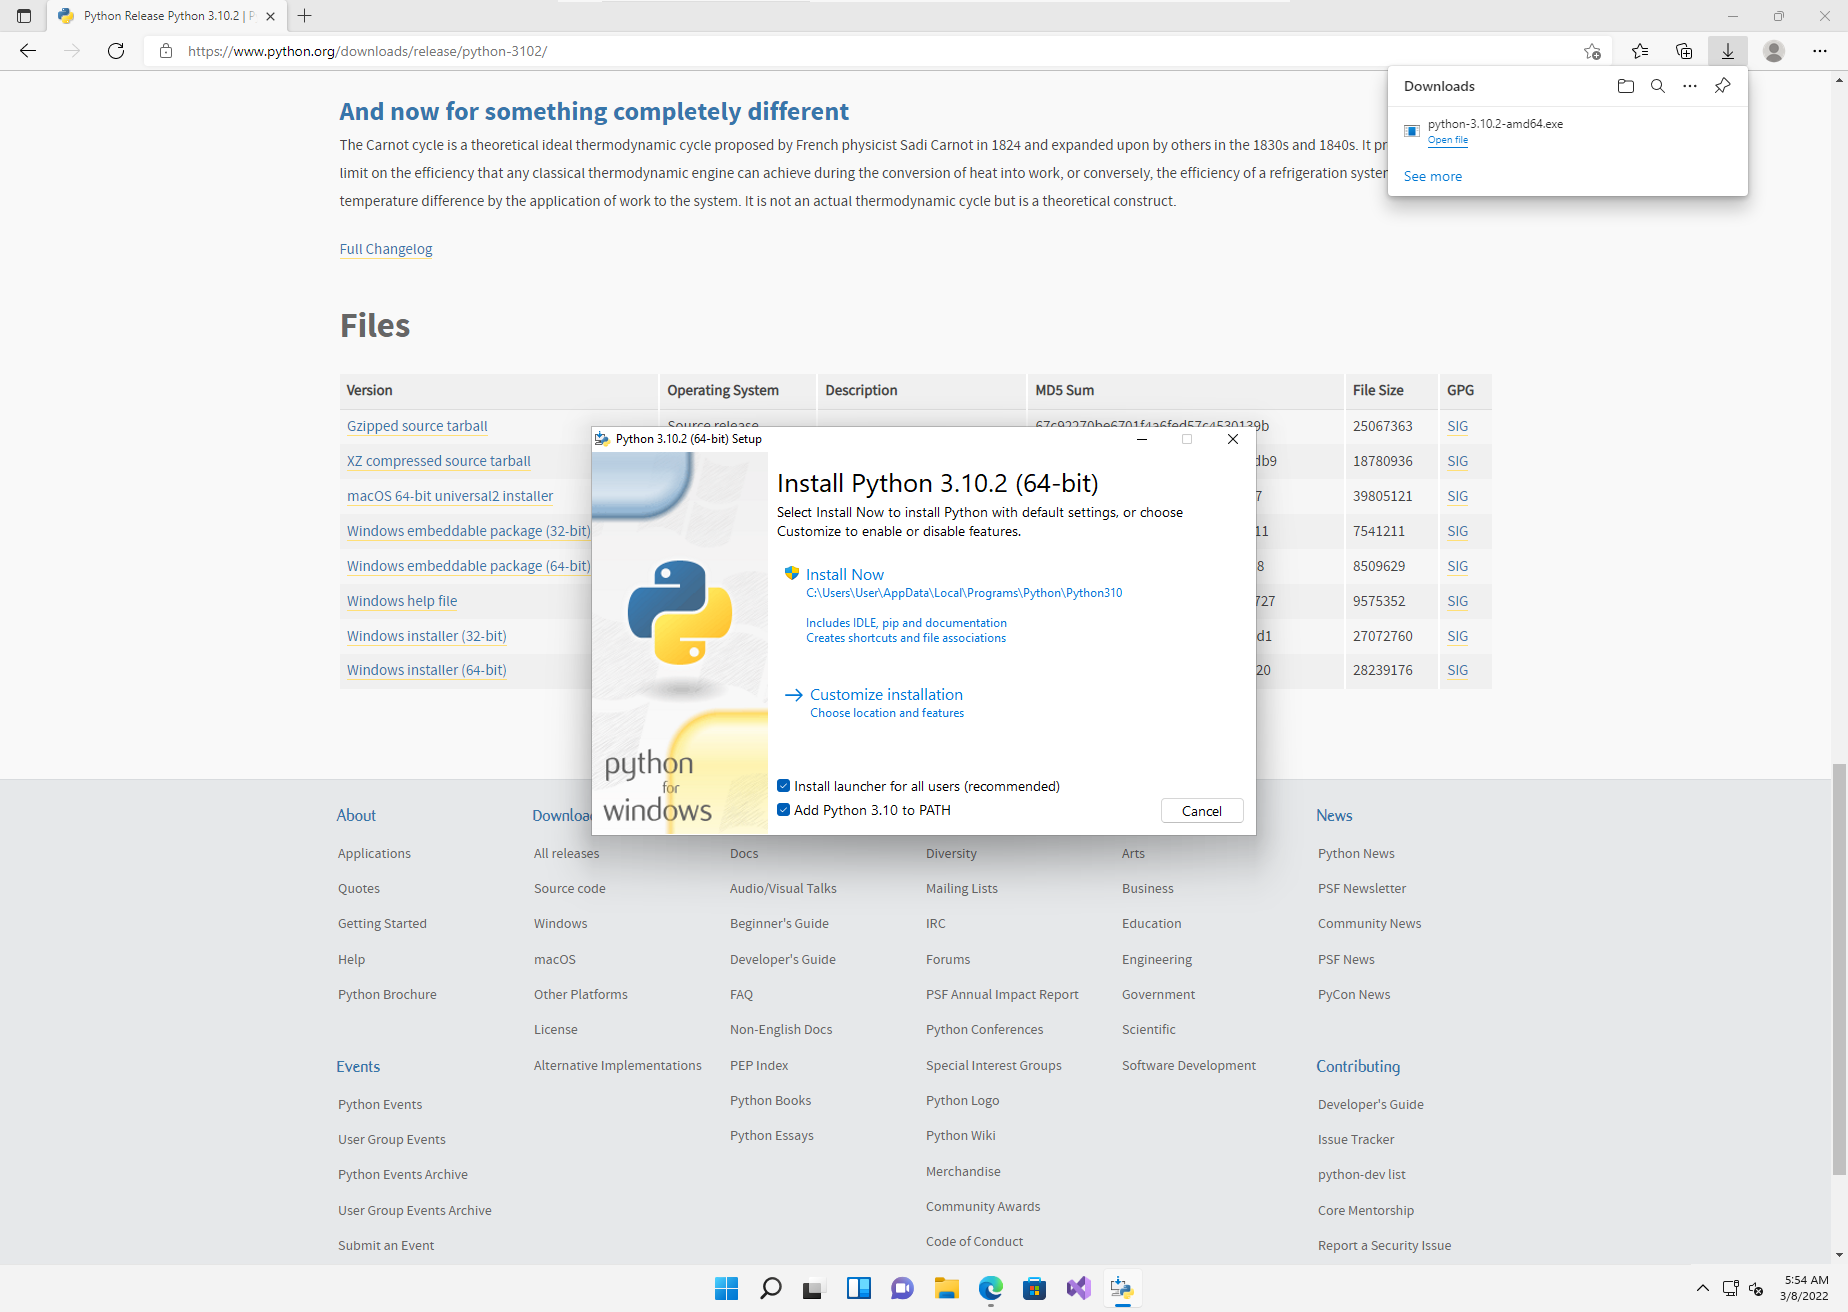
First of all go to the link and download the latest Python 3 Windows installer (64 bit).

When the install file is download then run and follow the install instructions. You can use the Install Now button.
Make sure you check "Add Python 3.10 to PATH". In newer versions of Python they now say "Add python.exe to PATH".
Click on Yes when you get the User Account Control warning "Do you want to allow this app to make changes to your device".
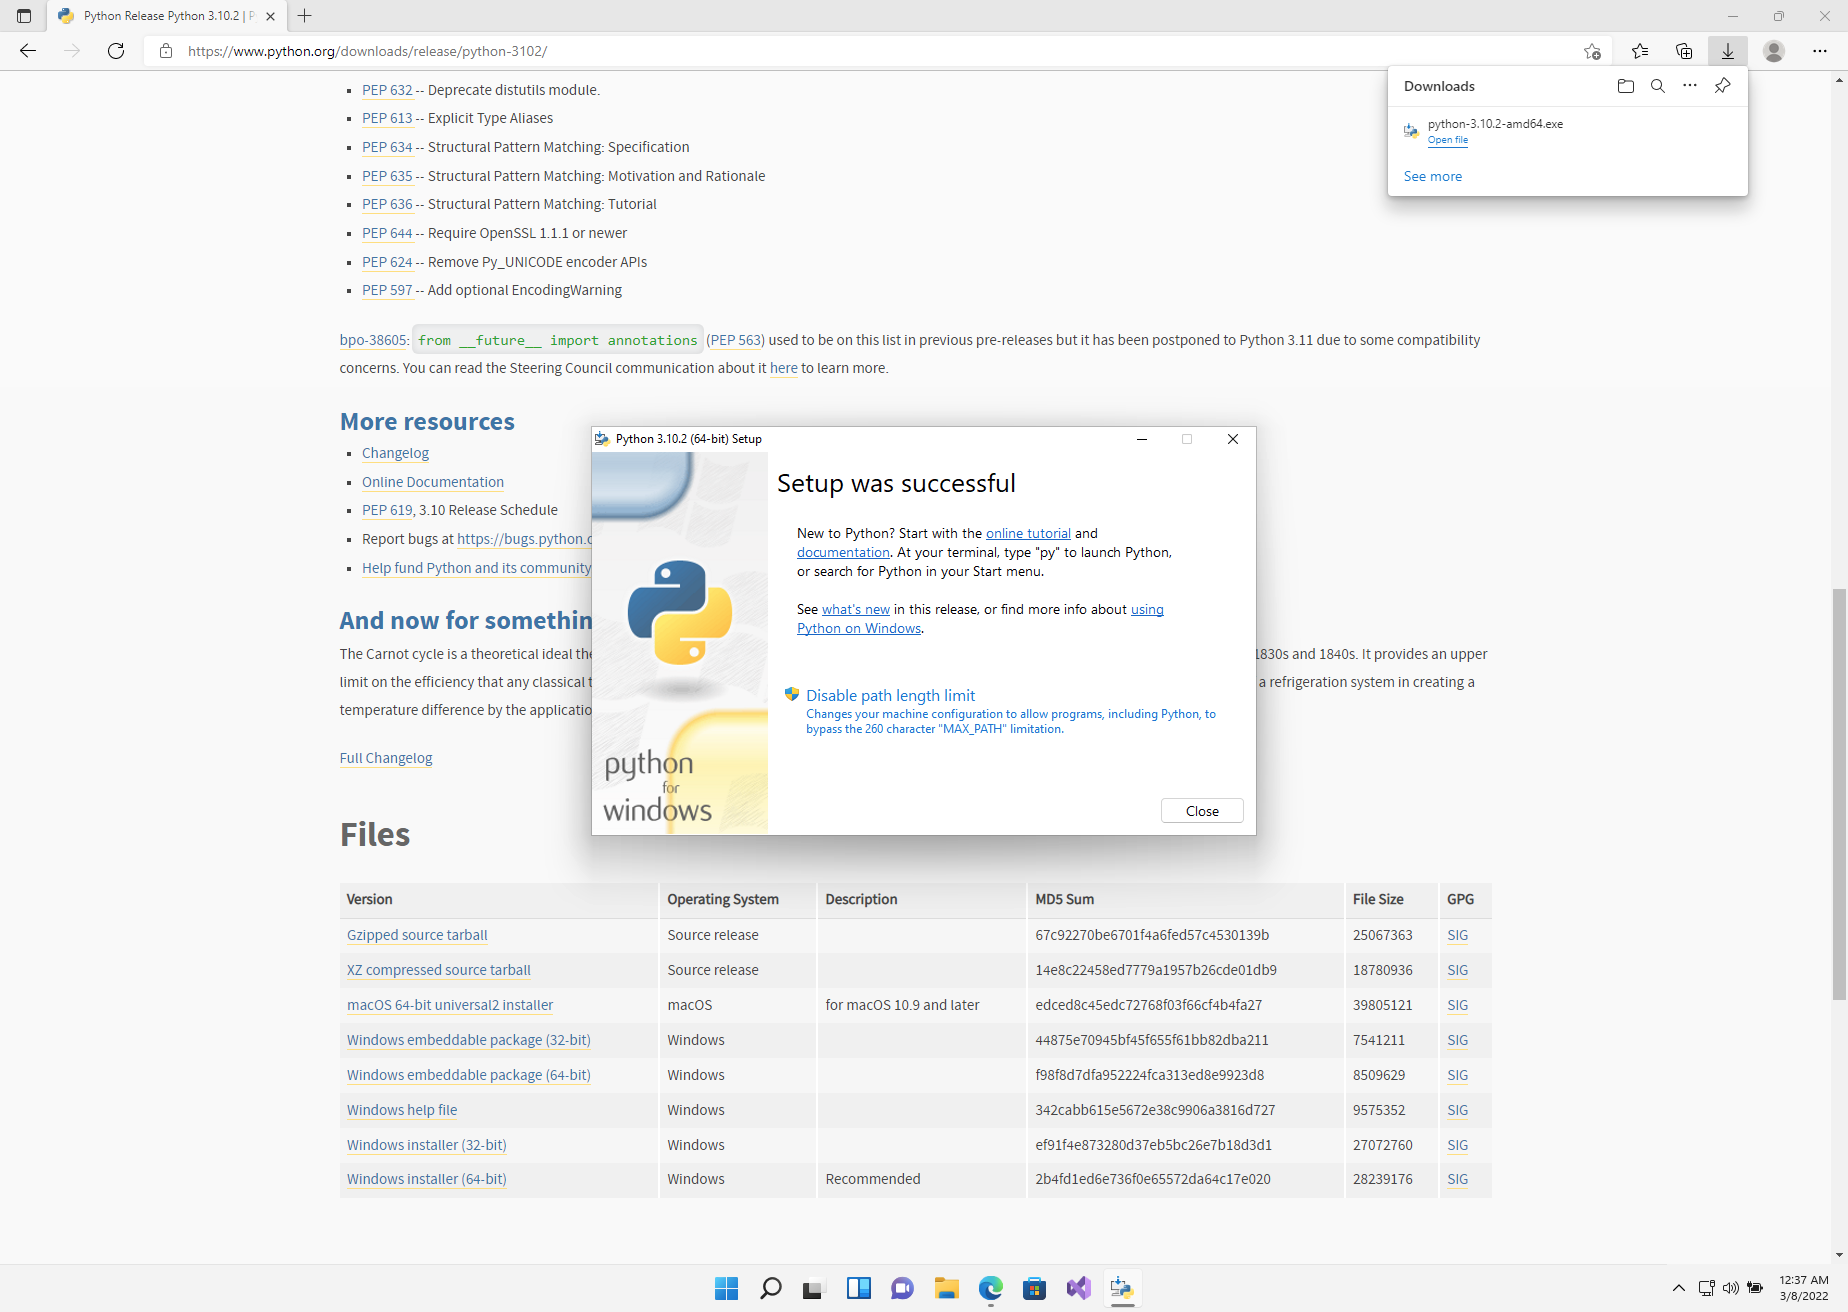
If all has gone well you should receive an Setup was successful message.
Python Virtual Environment
Before installing the Kelvin SDK we strongly recommend you use virtual python environments for your Kelvin SDK so that there are no conflicts, dependency issues or incompatibilities between Kelvin SDK and other python projects you work on.
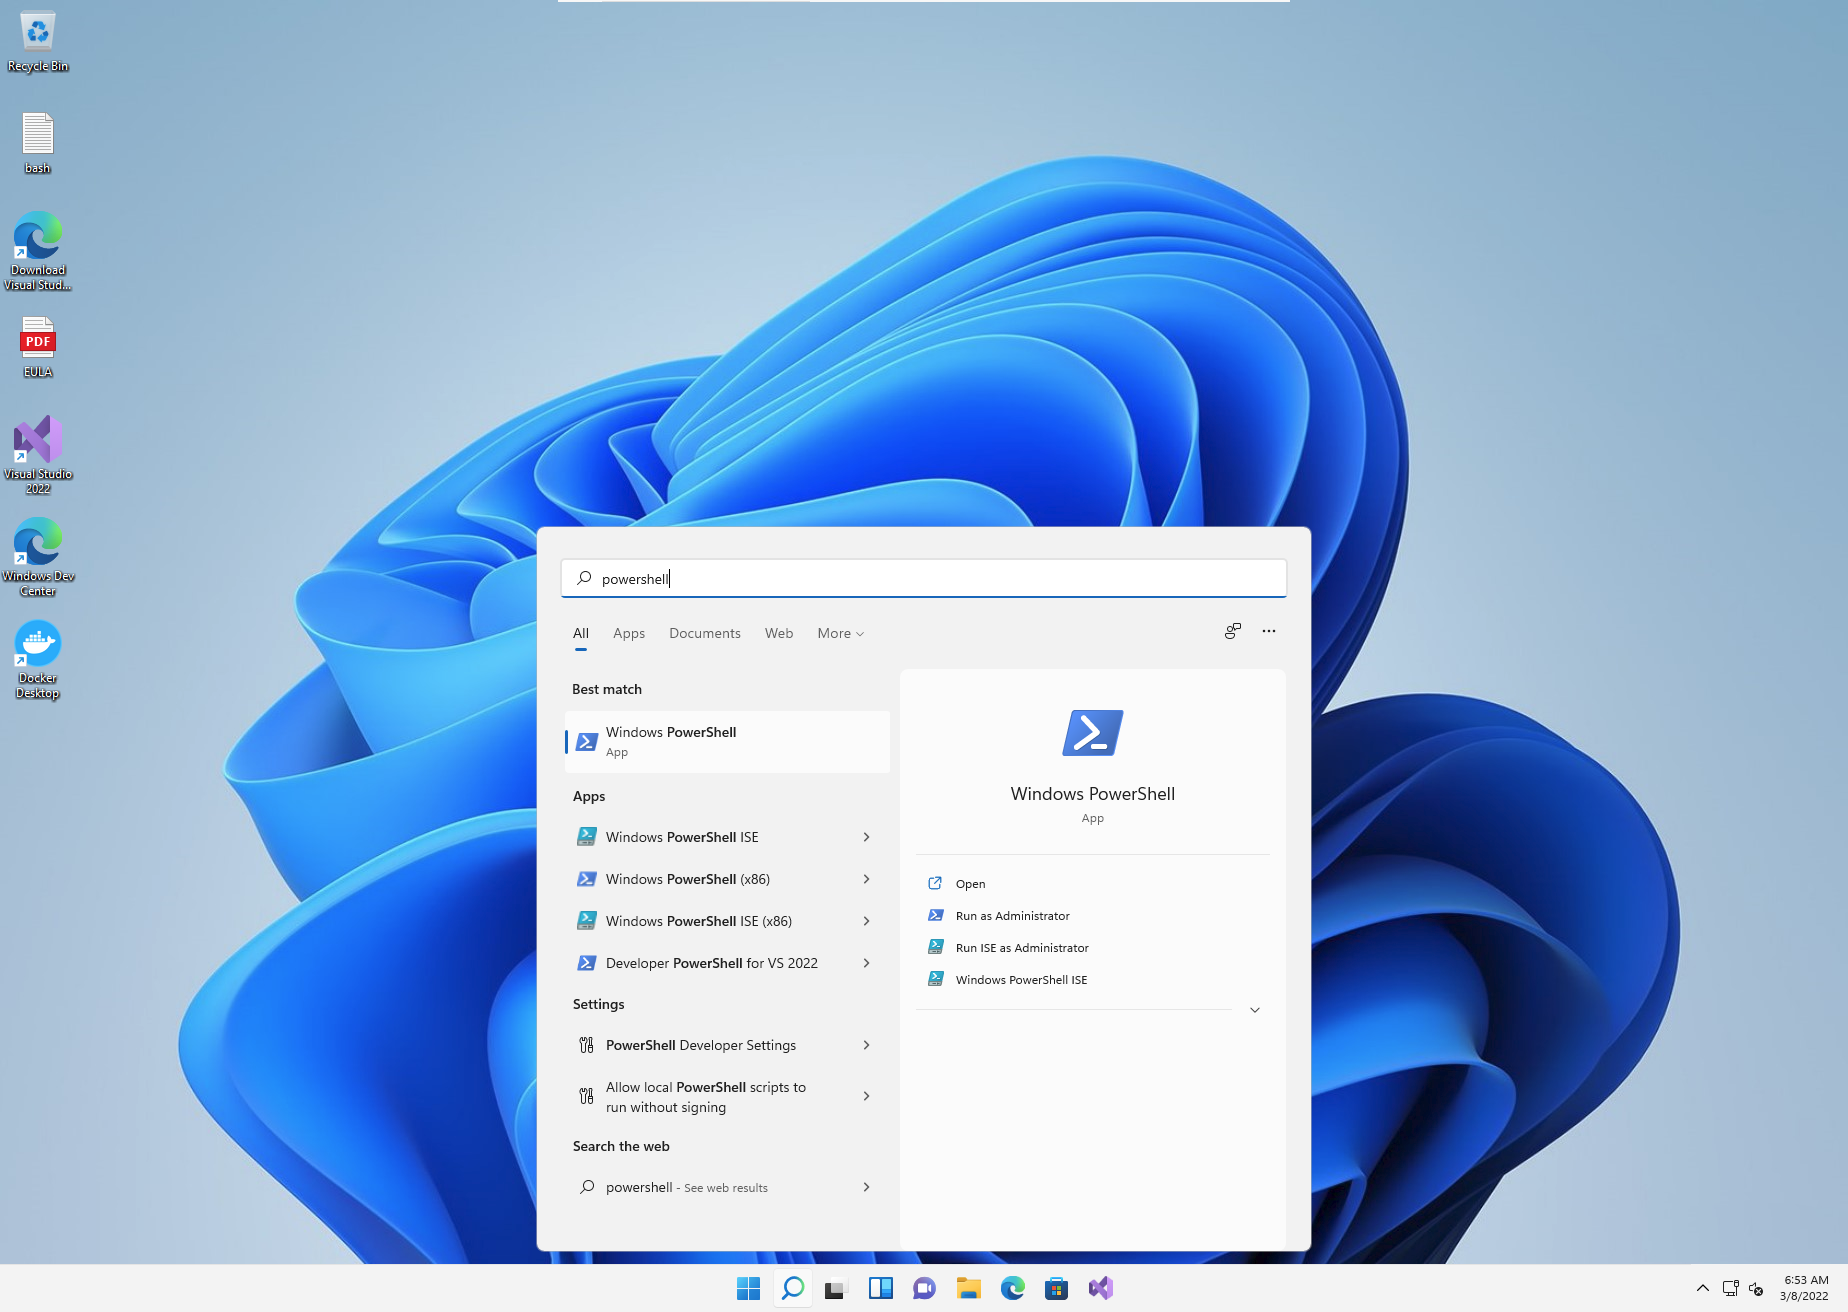
Tot run a Windows Powershell from the Start menu button.
In the Powershell type the following;
| Install Virtual Python Environment | |
|---|---|
1 | |
Then create a virtual environment and give it a name. In this case we will call it kelvinai.
| Create Virtual Python Environment | |
|---|---|
1 | |
When finished, read the results and ensure that Python 3.X environment was created (not a Python 2 environment).
Now to activate the python virtual environment with the following command;
Replace kelvinai with your chosen name if you have used a different name.
If you get an error then you need to first run PowerShell with Administrator permissions and enable running scripts with this command;
Set-ExecutionPolicy Unrestricted
| Activate Virtual Python Environment | |
|---|---|
1 | |
And you are now ready to install Kelvin SDK !

Kelvin SDK
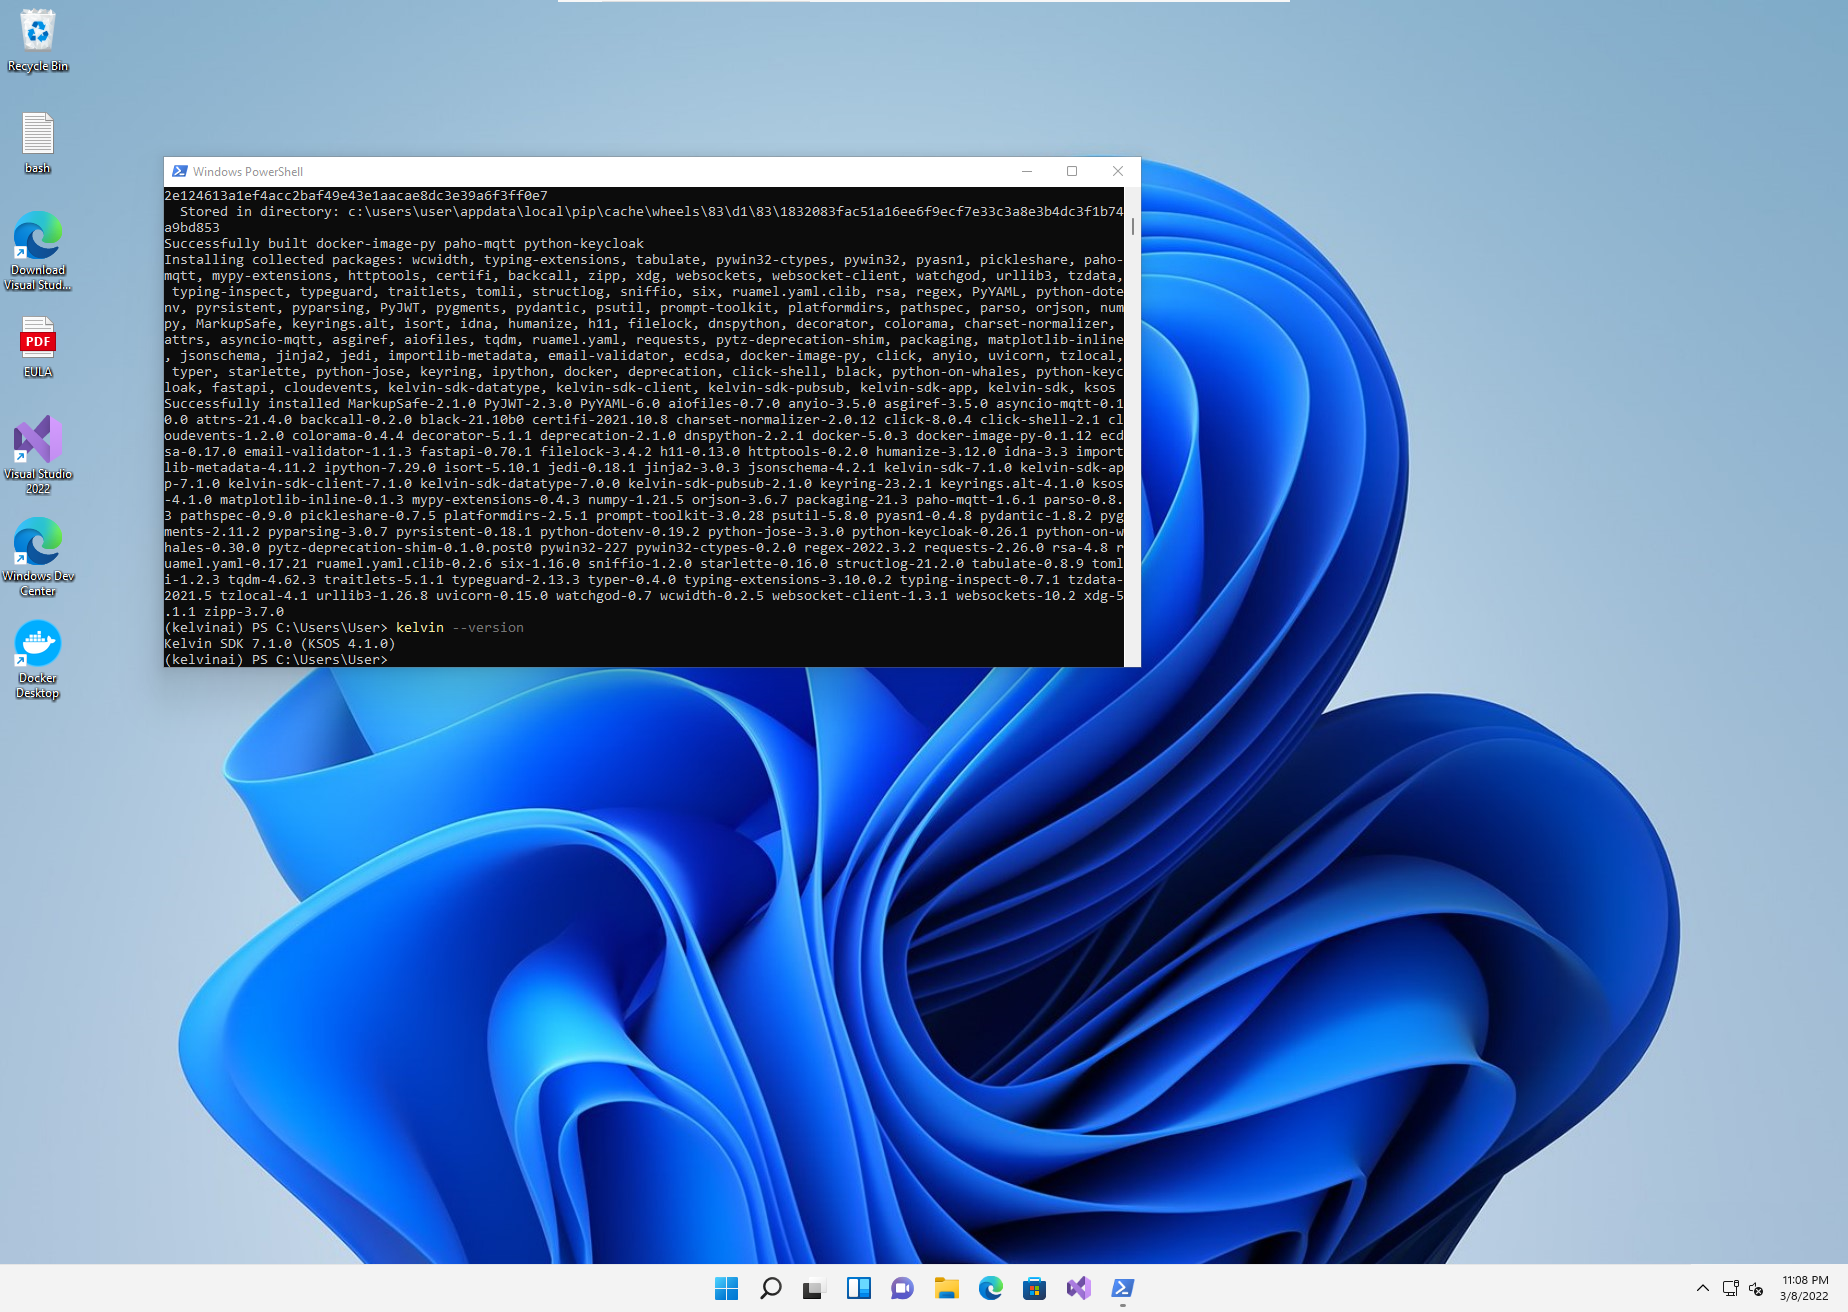
With all preconditions fulfilled you can now install the Kelvin SDK. It takes a lot of preparation to get here, but the install of Kelvin SDK is just one line;
Remember to execute this command when you are in a virtual environment.
| Install Kelvin SDK | |
|---|---|
1 | |
If you get an error that pip3 can not find a version that satisfies kelvin-sdk, make sure you are running a version of Python that is supported by kelvin-sdk.
To check the latest supported Python versions see the kelvin-sdk package details at pypi - https://pypi.org/project/kelvin-sdk/
Congratulations ! You are ready to start using the Kelvin SDK package.
Other related Links
Interesting links related to Kelvin SDK Installation
- Docker Website - https://www.docker.com/
- Python Website - https://www.python.org/
- VirtualEnv Package on Pypi - https://pypi.org/project/virtualenv/
- Kelvin SDK on Pypi - https://pypi.org/project/kelvin-sdk/