Add MQTT Connection - How To
You can add a MQTT Connection through the Kelvin UI.
Connections can be deployed to both x86_64 and ARM64 devices.
To start click on the Connections menu option from the left side bar menu.
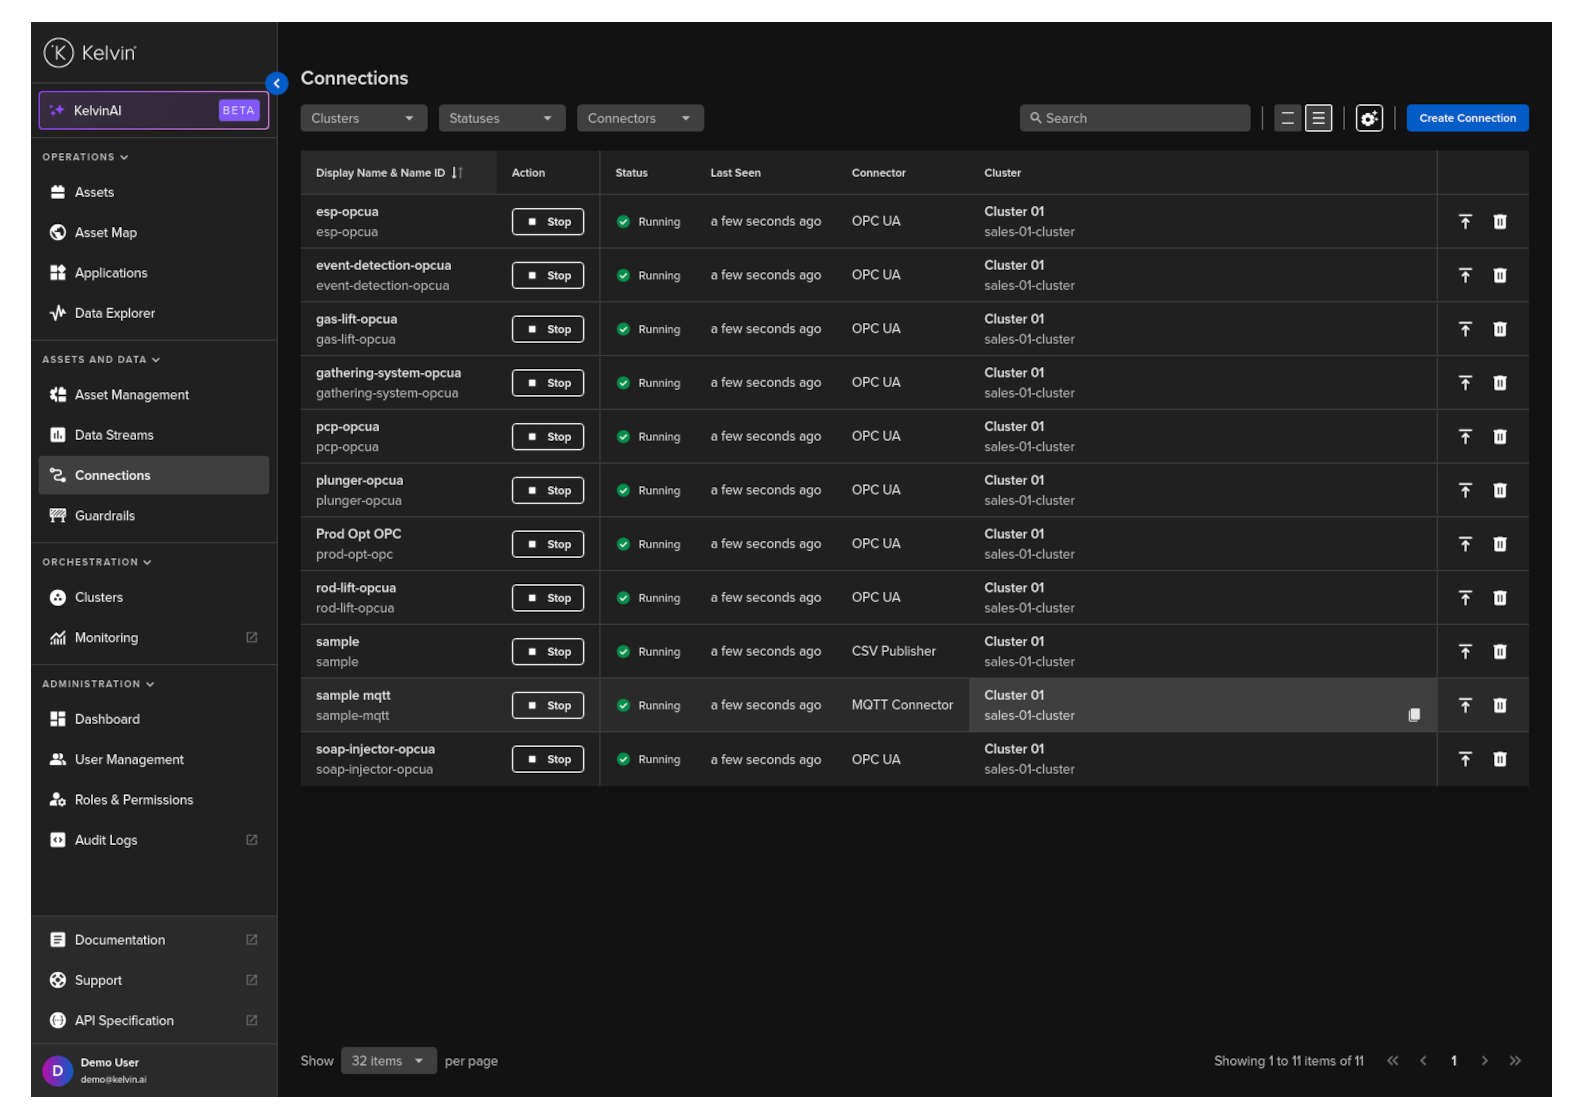
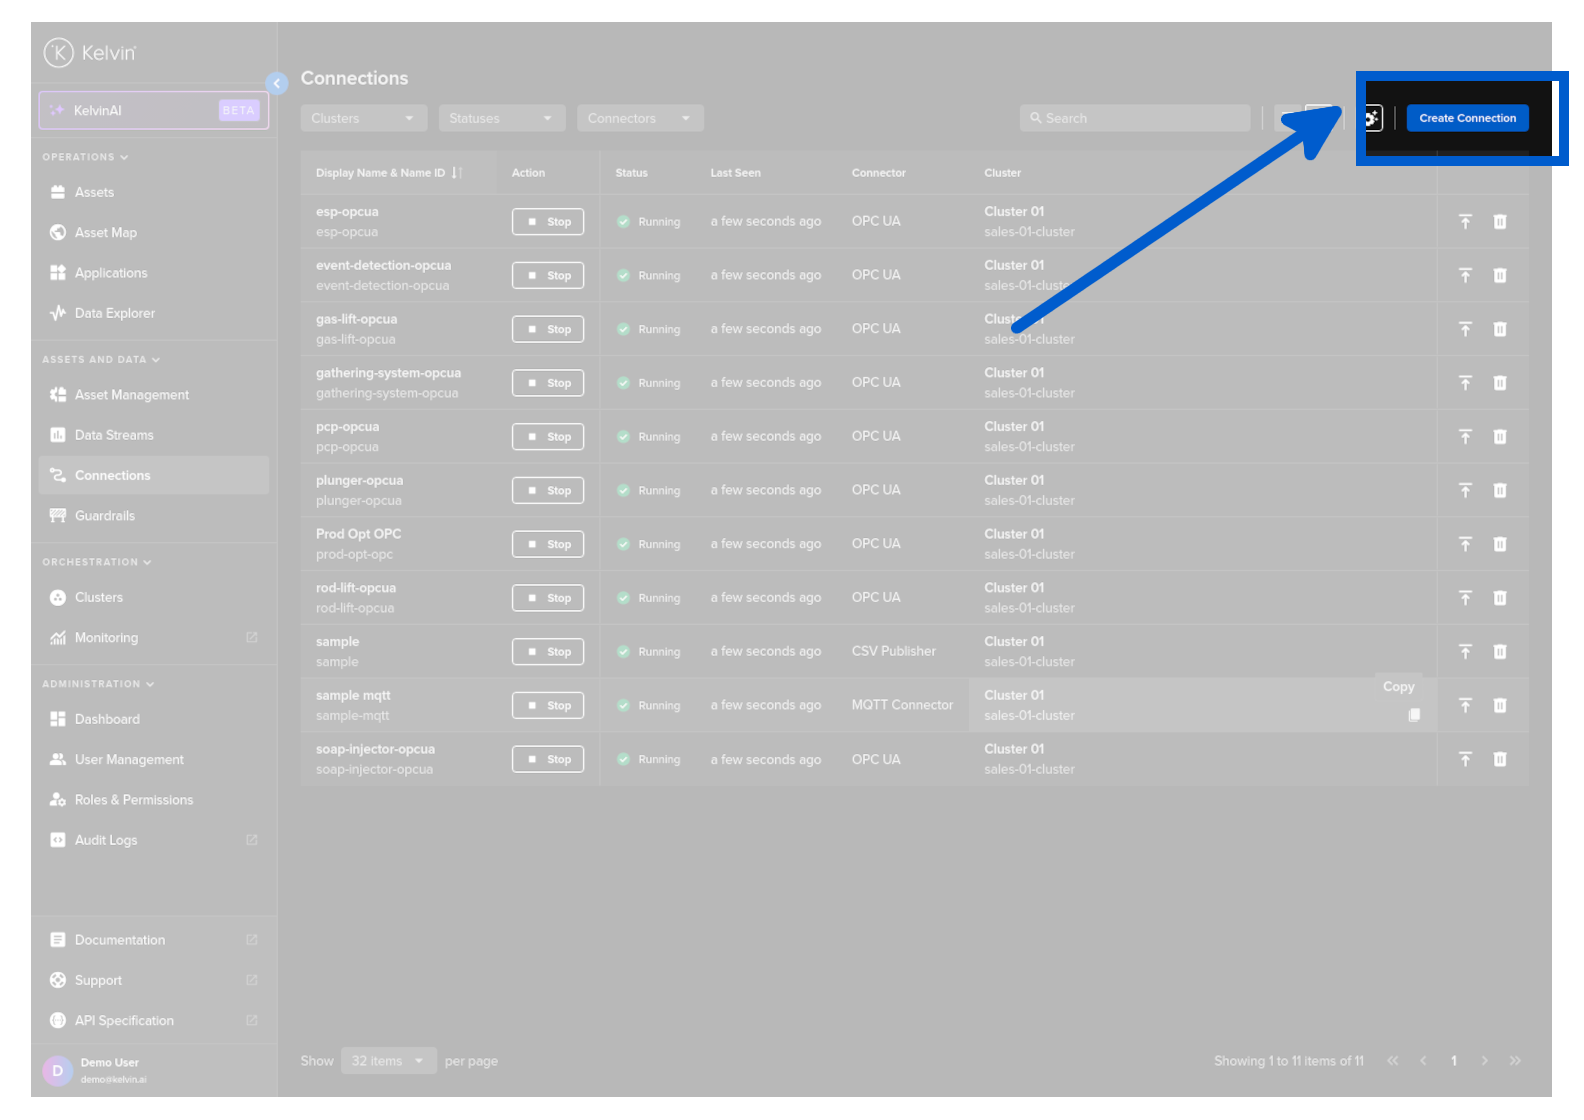
click on the Create Connection button.
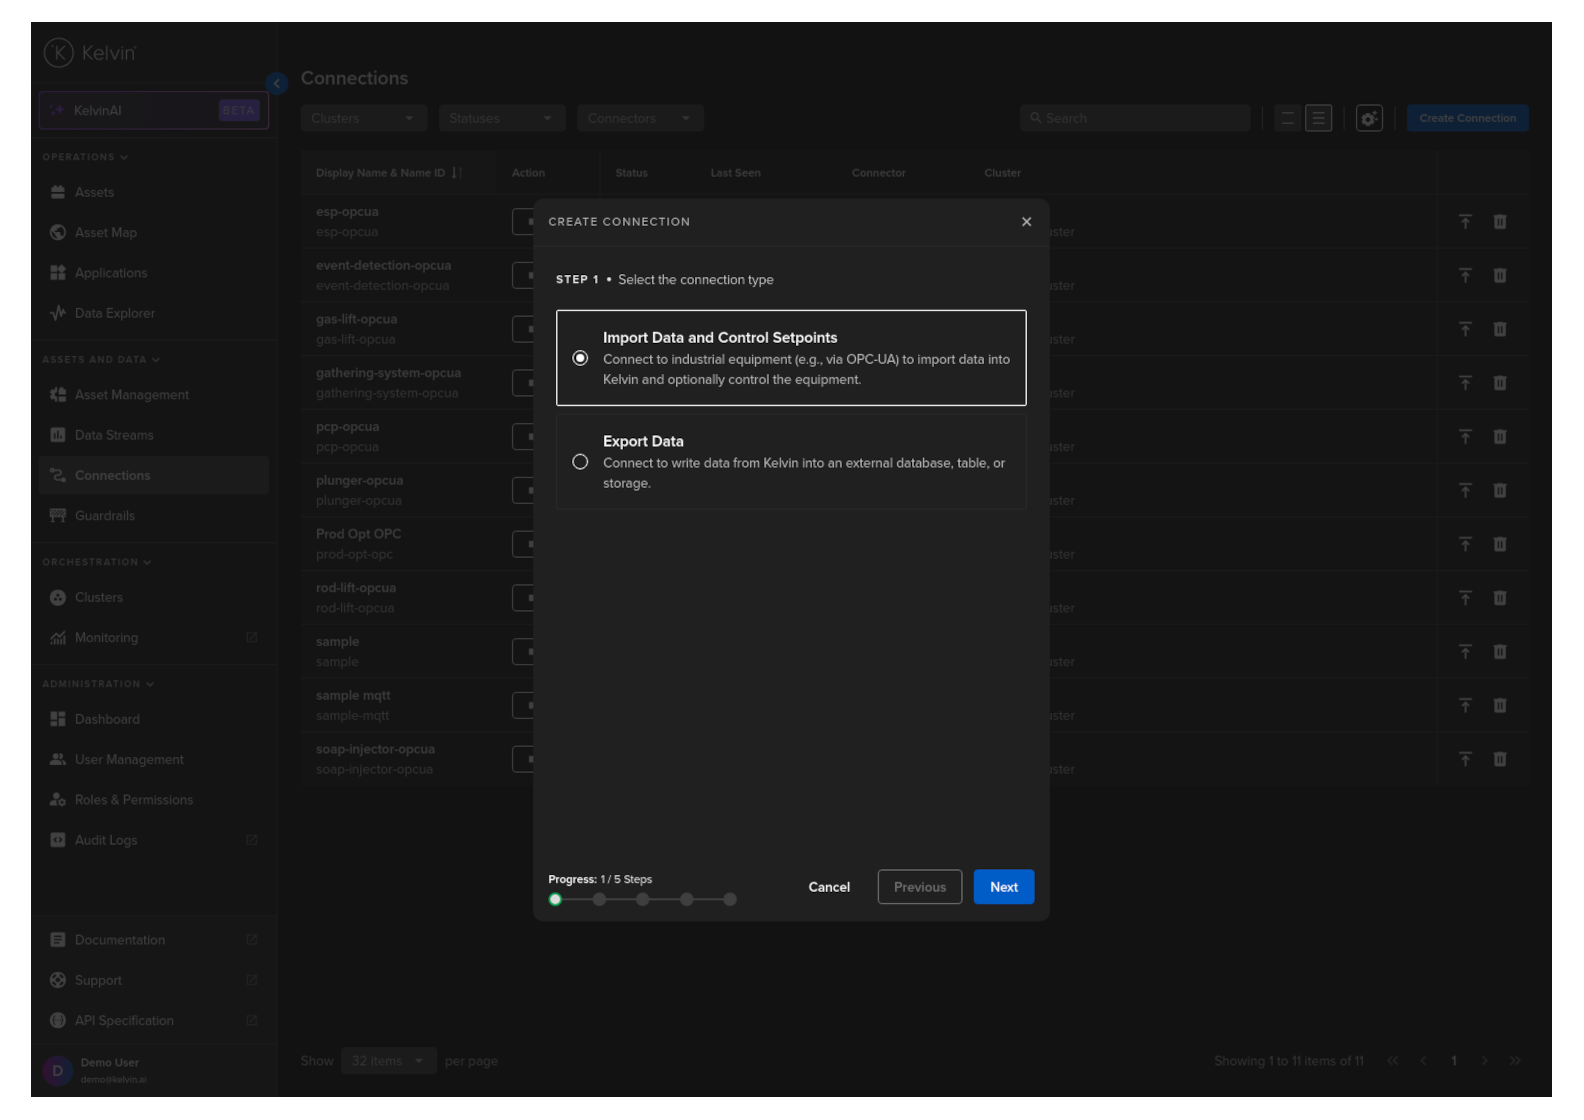
Step 1
Select Import Data and Control Setpoints and click Next.
Step 2
Select the MQTT Connector option, select a Version and click Next.

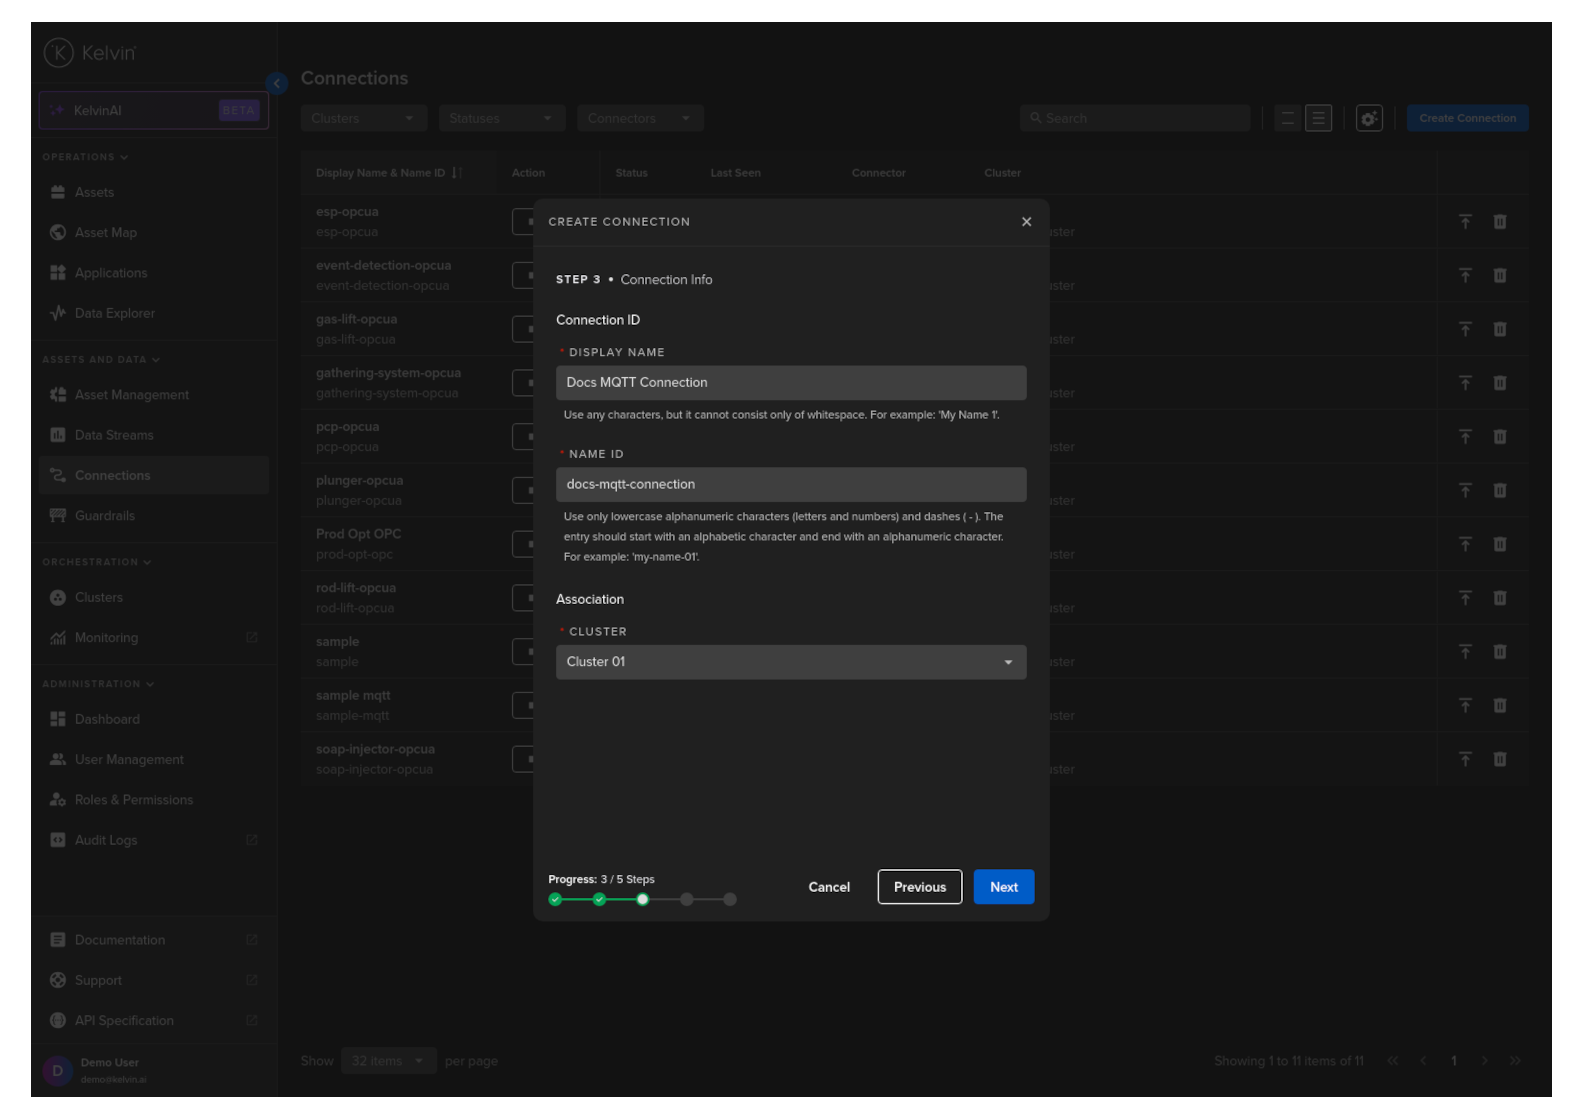
Step 3
Type in a memorable name in the Connection Display Name text input. You can use any letters, numbers and special characters.
The Connection Name text input will be automatically converted and filled in as you type in the Connection Display Name section. The conversion ensures the Connection Name only contains lowercase alphanumeric characters and ., _ or - characters.
Then select which Cluster to deploy the new Connector to.
It is important that the asset is reachable from the selected Cluster.
Step 4
Configure the MQTT connection to the asset.
Info
You can choose to use the UI view, or work directly in YAML or JSON format.
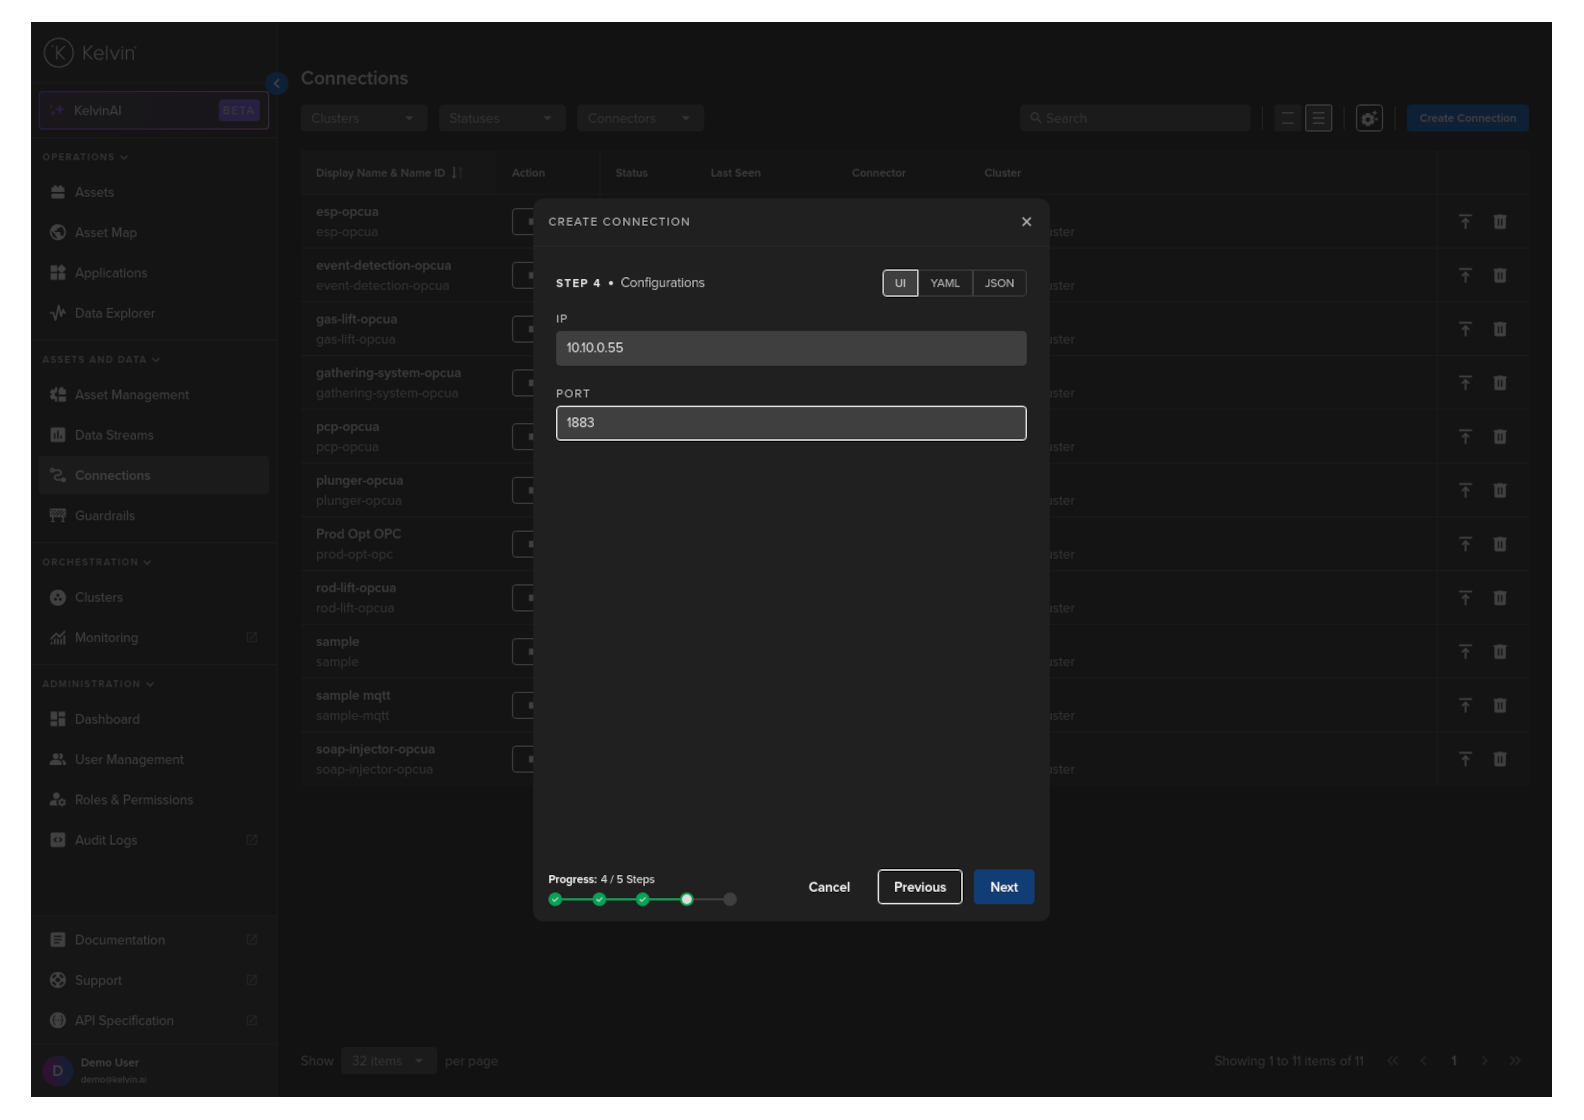
| Parameter | Options | Description | Default | Mandatory |
|---|---|---|---|---|
| IP | String (IP or url) | Address of the MQTT Broker. | Yes | |
| Port | Number | Port Number of the MQTT Broker (Usually 1883). | Yes |
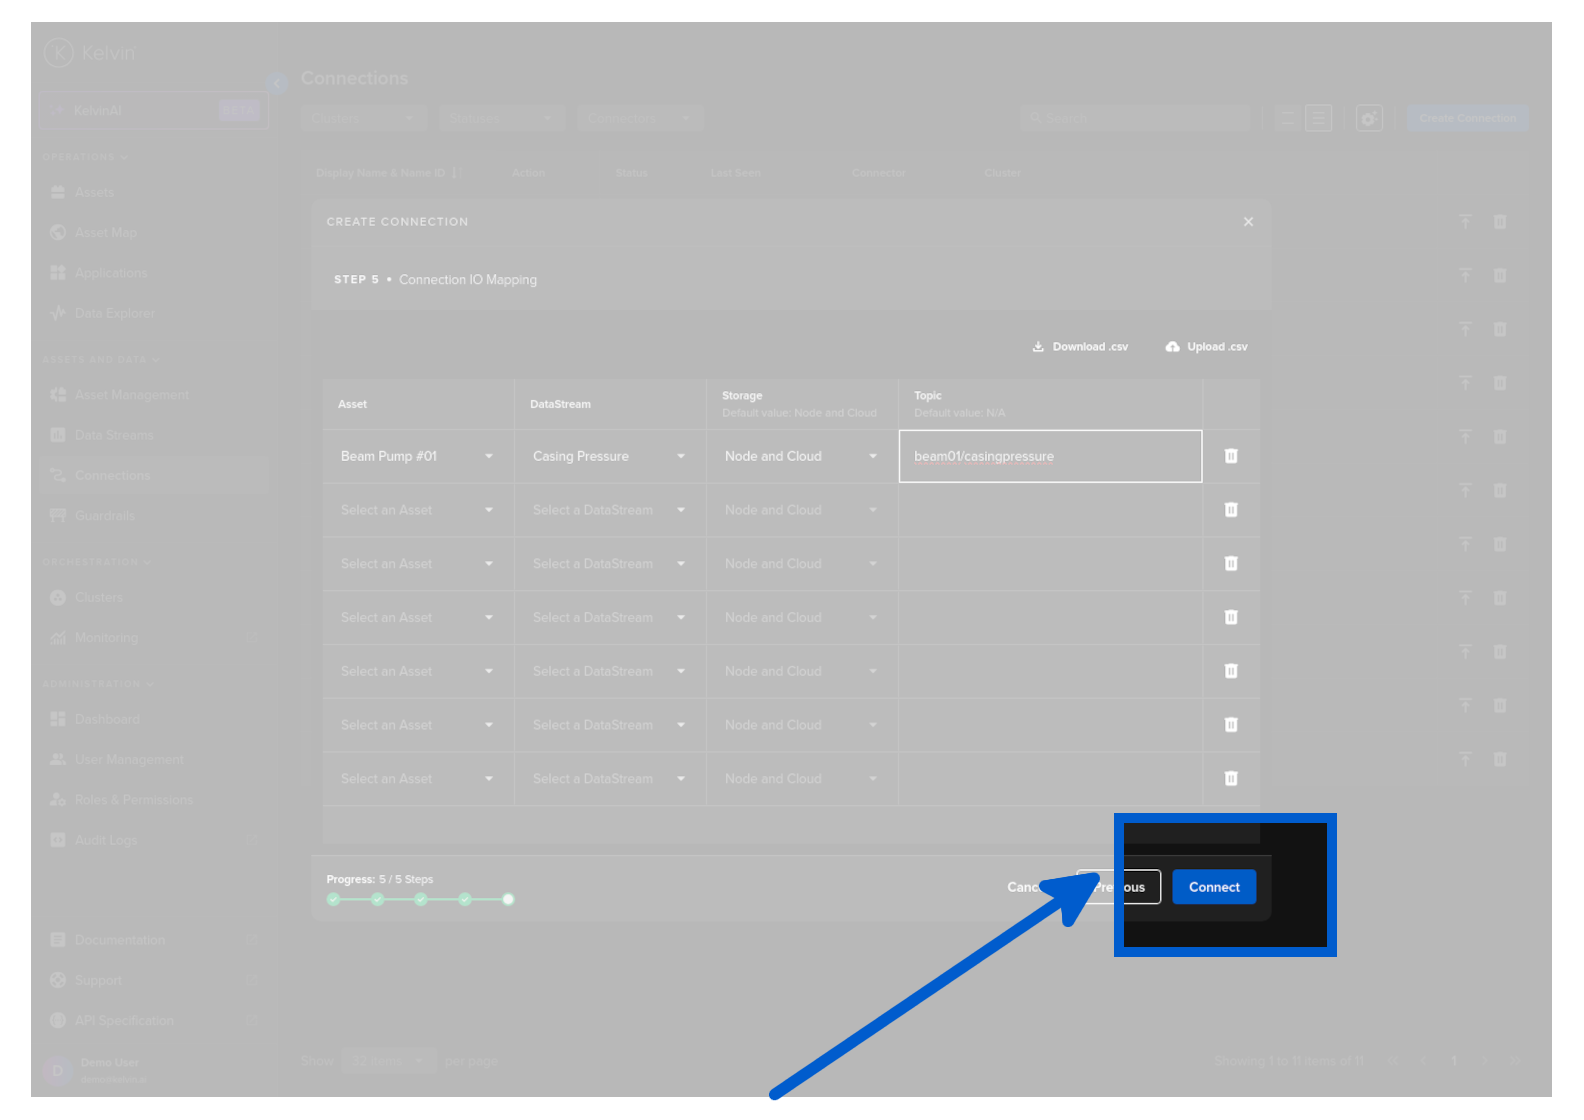
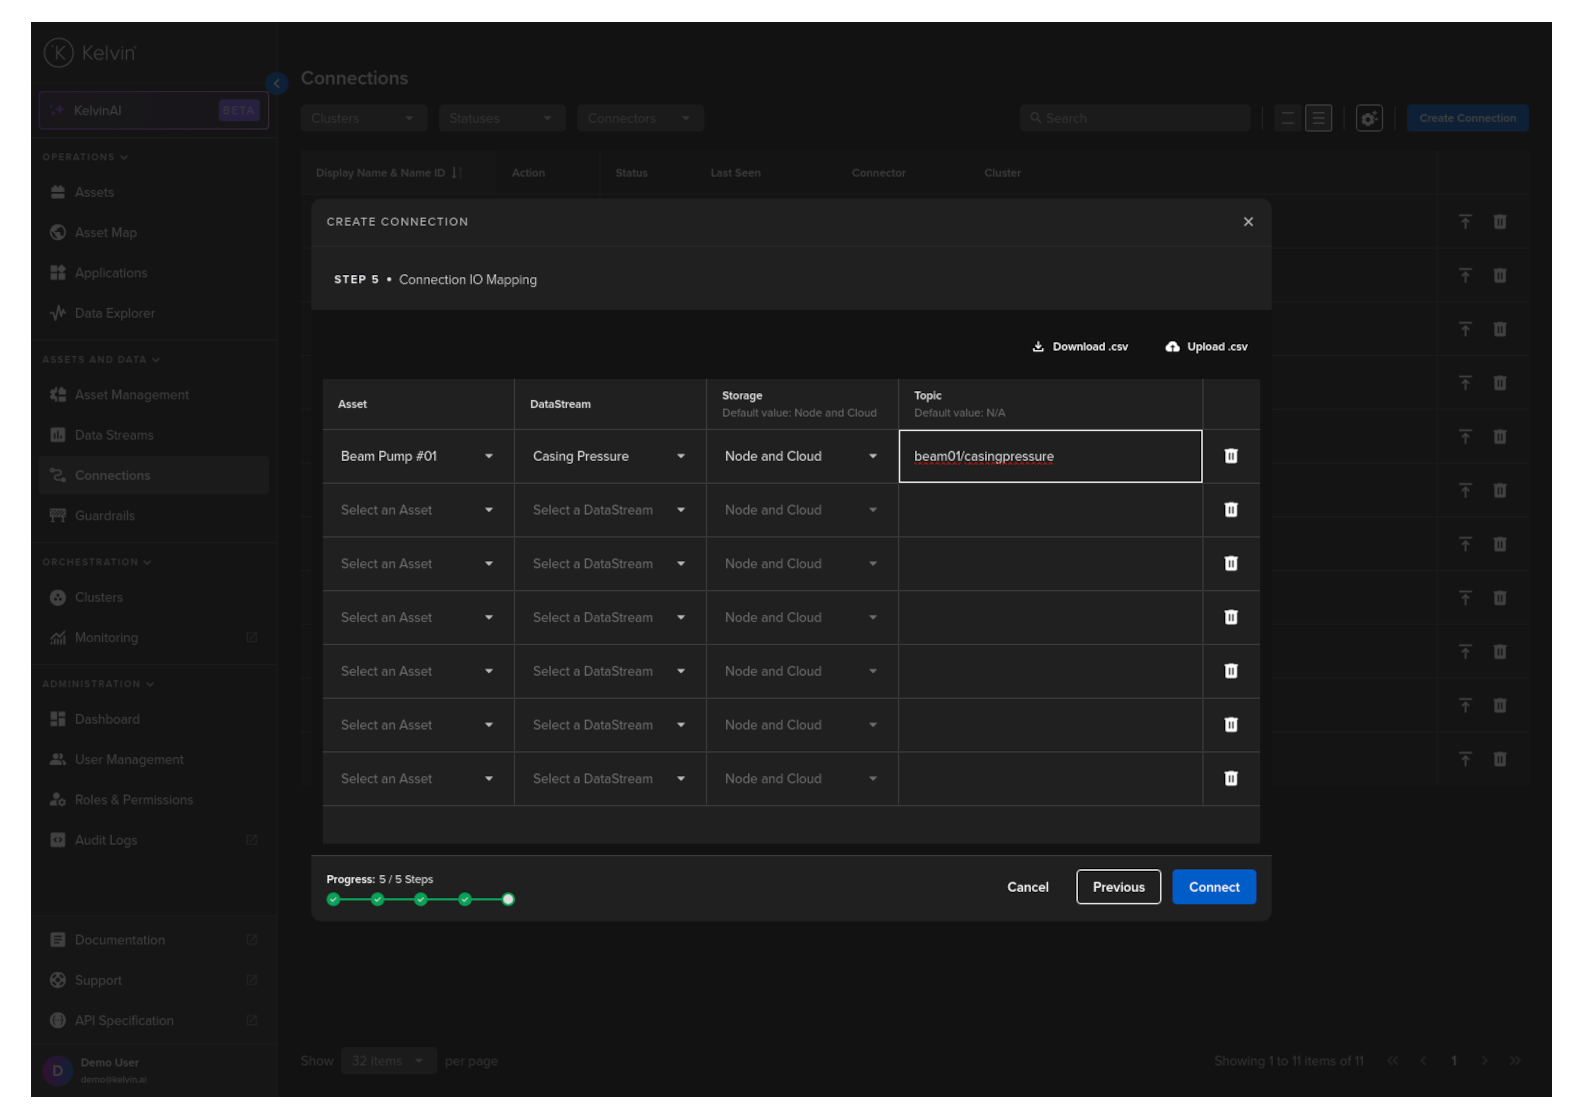
Step 5
Select an Asset, Data Stream and fill in the connection and other optional values.
Full descriptions of each column is giving below.
Success
If you have many connection IO to fill in, you can save time with the download/upload csv file option in the top right hand corner of the popup.
Use Microsoft Excel or Google Sheets to fill in all the Connection IO details.
You can only upload one file. Multiple file uploads is not allowed and only the latest selected file will be used.
Option Descriptions
| Header | Description | Example | Mandatory |
|---|---|---|---|
| Asset | The Kelvin Asset name (must be lowercase alphanumeric with no spaces) | well-01 | Yes |
| DataStream | The Kelvin Data Stream name (must be lowercase alphanumeric with no spaces) | water-flow | Yes |
| Storage | Location of the storage; "none", "node", "node-and-cloud" | node-and-cloud | No |
| Topic | MQTT Topic of the data stream | beam01/casingpressure | No |
Complete the Connection
When everything is validated, then you can click on Connect button to deploy the Connection to the Cluster. It will start automatically, connect to the asset and start collecting data.