Importing Metrics in Bulk
On this page you will learn how to use the Kelvin Control Manager UI to import a list of Metrics from a CSV file. This makes it easy for you to important many Metrics at one time from an Excel sheet.
What is Metrics ?
Kelvin Metrics is a standard way to transform your data in your Kelvin Platform Server. You can link this to an Asset to transform the data in real time. You can read more about Assets at Managing Assets and Asset Types.
What is importing Metrics in Bulk ?
In the documentation you have learnt how to use the Kelvin Control Manager UI to create Metrics. If you have dozens, hundreds or thousands of Metrics this is very time consuming.
Instead of individually entering the Metrics, you can create a Microsoft Excel sheet or Google Sheet with a full list of all your Metrics. Once your sheet is ready, you can export this sheet to a CSV file. This CSV file can then be uploaded to the Kelvin Control Manager UI which will read and automatically generate all the Metrics for you. Easy !
Info
When you create the excel sheet, be careful with your headers and their names. The Kelvin Platform Server will use this header to read all the Assets in your list.
Creating the CSV File 
Download the Assets CSV Template
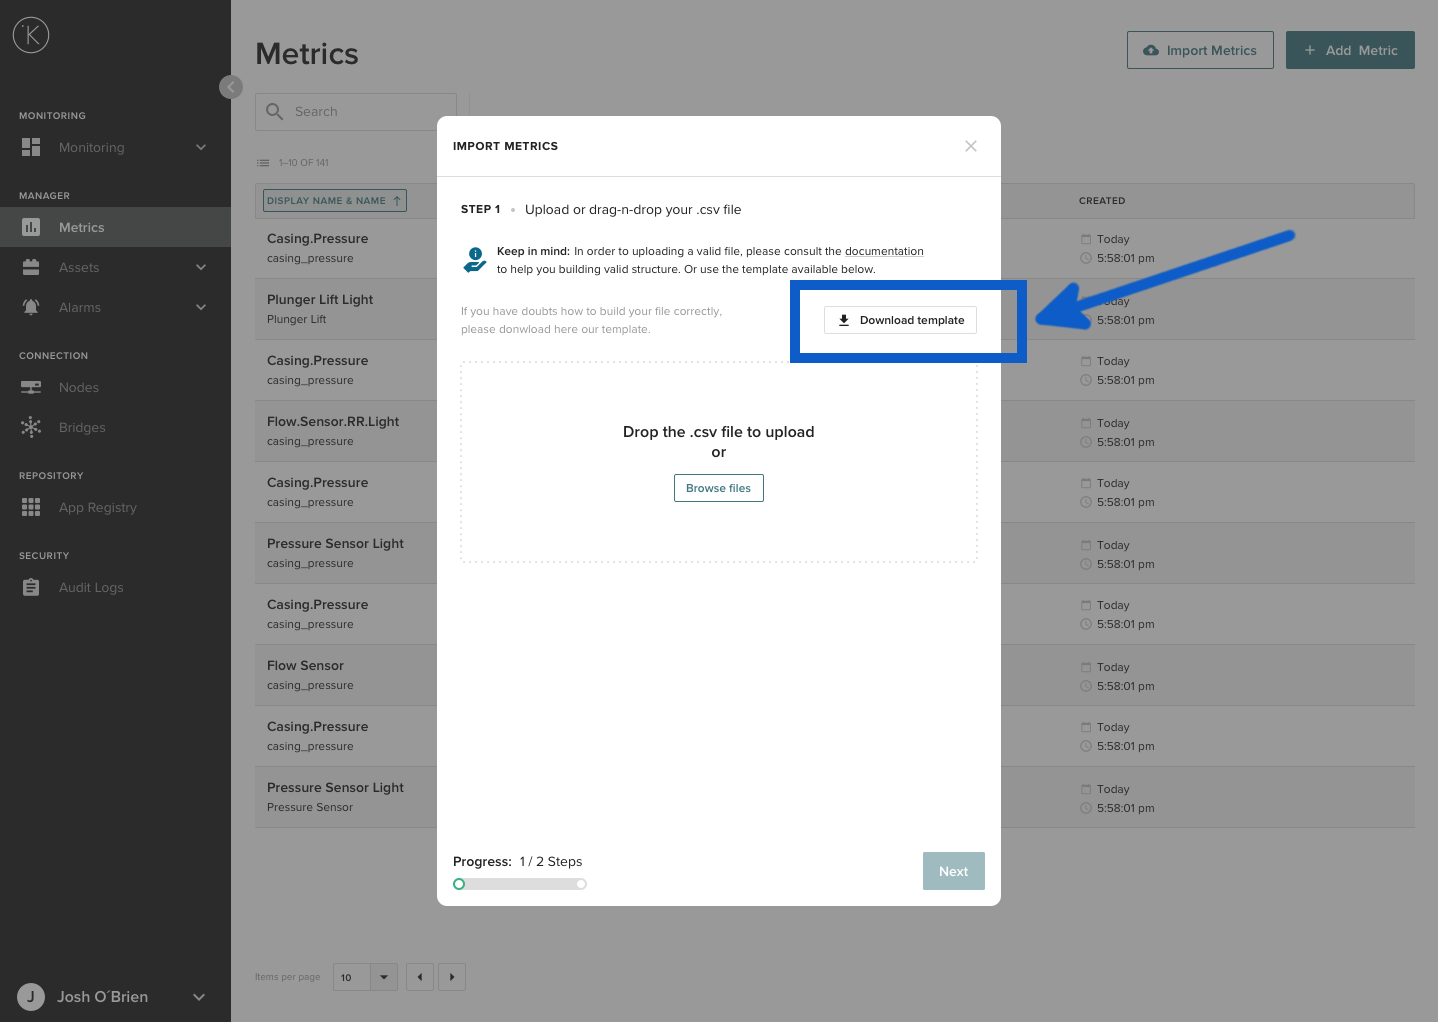
You can download a template CSV file from the Import Assets in Step 1.
Creating in Microsoft Excel
Here you will learn how to create your excel file in the right format and save it to a CSV file.
To start, open an excel sheet with a blank sheet
Now in the first row you have to create the headers. Each header will represent one of the input values that the Kelvin Control Manager UI import script will use.
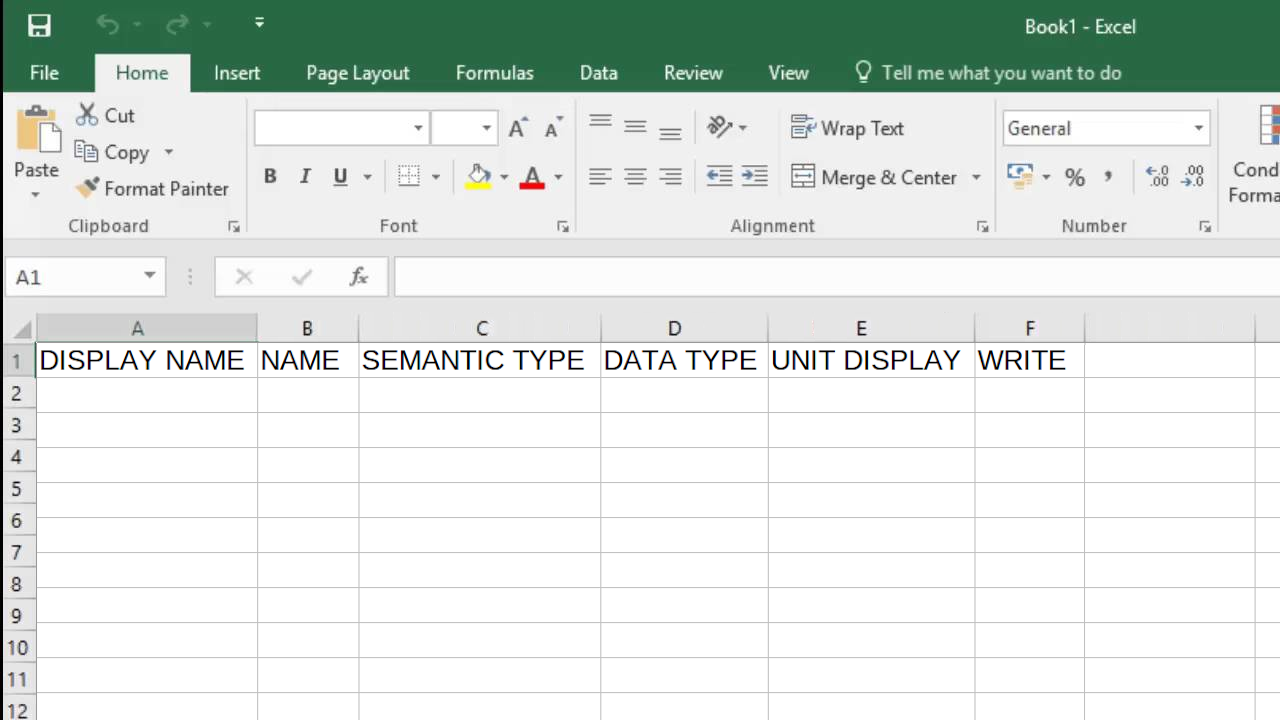
Now add all your Metrics. Each row below the header (row 1) represents one Metric to be imported. Add as many Metrics as you need
Info
The maximum number of Metrics (rows) per CSV file is 20,000. If you have more than 20,000 Metrics to import, then split them up into multiple CSV files, each with a maximum of 20,000 Metrics (rows).
When you have finished your Metrics list, you can export it to a CSV file. Make sure the Excel sheet you are looking at on your screen is the sheet you want to export. Excel will only export the active sheet to the CSV file.
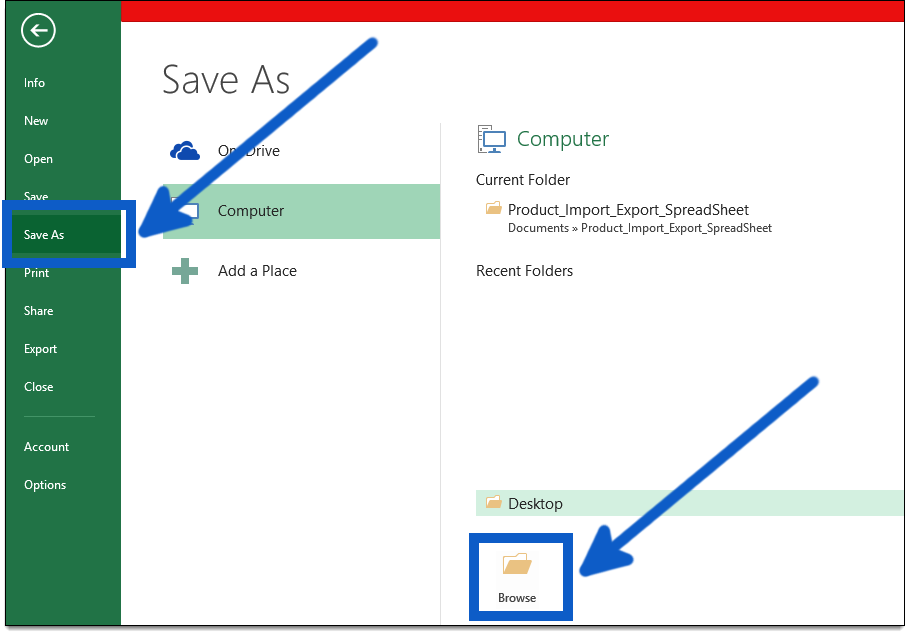
Click on Save As
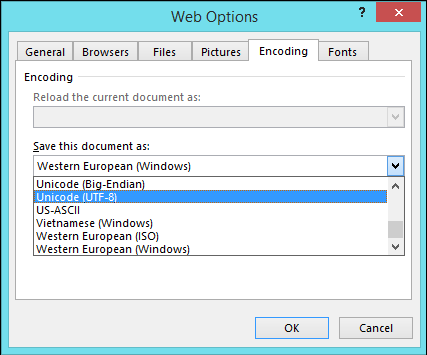
In Save as Type, select CSV (Comma delimited) (*.csv), select location where you want to save. Make sure it is UTF-8 format by clicking on Tools.
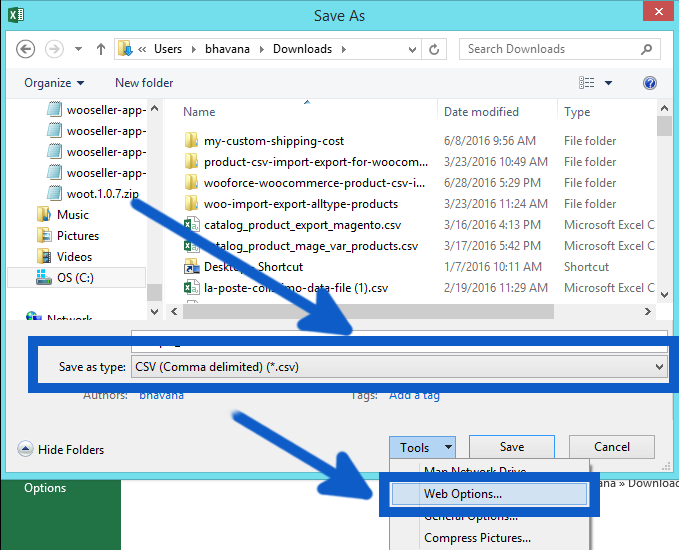
And make sure Unicode (UTF-8) is selected and click OK.
Then you can click Save. Now you can import this file into the Kelvin Control Manager UI.
Creating in Google Sheets 
Here you will learn how to create your spreadsheet file in the right format and save it to a CSV file.
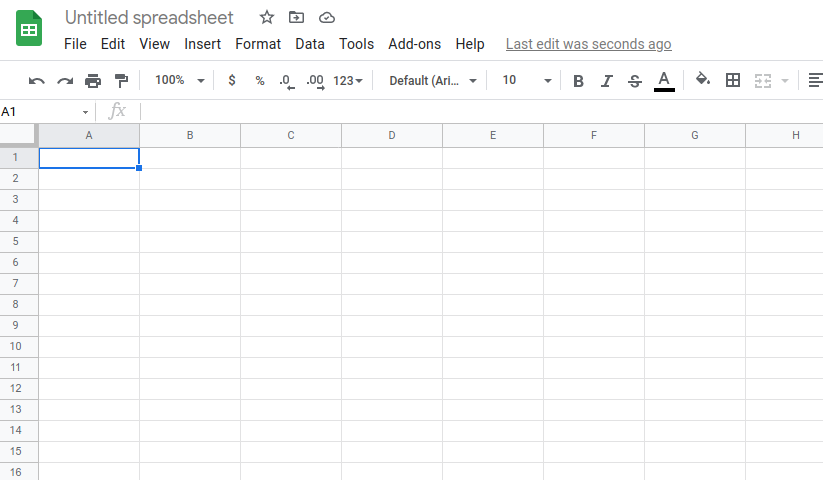
To start, open an Google sheets book with a blank sheet
Now in the first row you have to create the headers. Each header will represent one of the input values that the Kelvin Control Manager UI import script will use.
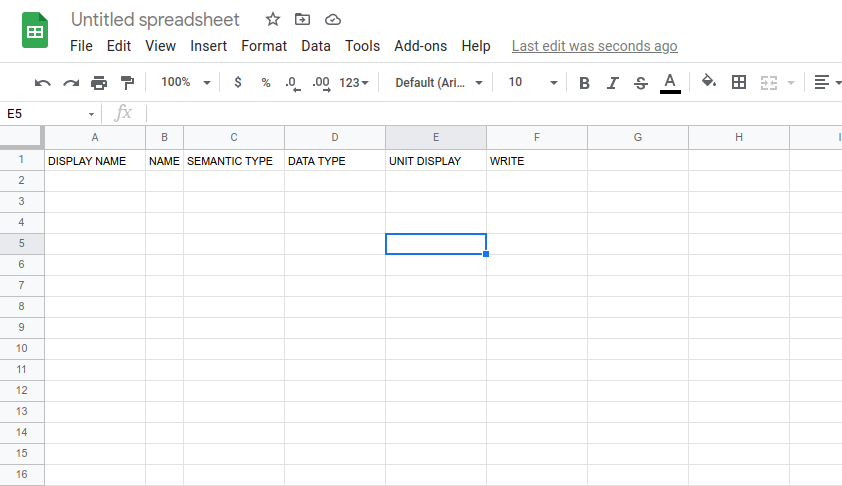
Each row below the header (row 1) represents one Asset to be imported. Add as many Assets as you need.
Info
The maximum number of Assets (rows) per CSV file is 20,000. If you have more than 20,000 Assets to import, then split them up into multiple CSV files, each with a maximum of 20,000 Assets (rows).
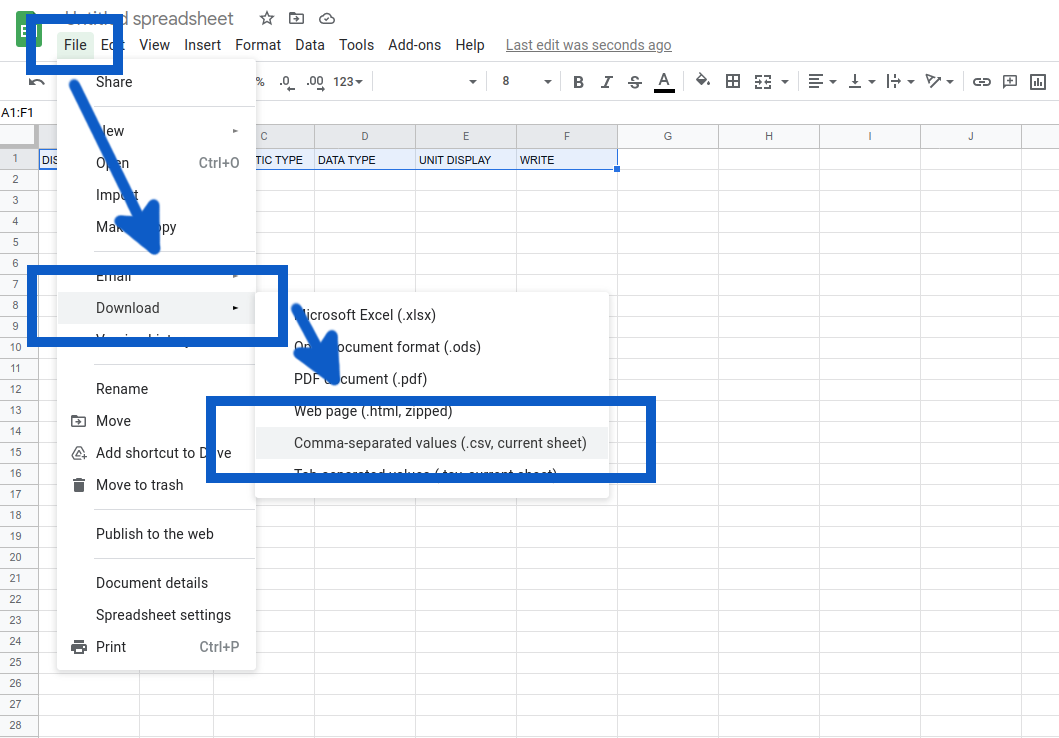
Click on File -> Download -> Comma-separated values (.csv, current sheet)
Info
Google Sheets will automatically format it at UTF-8. You don't have to do anything special like in Microsoft Excel.
Now you can import this file into the Kelvin Control Manager UI.
Importing Metrics from a CSV File 
You can use the file generated to create many Metrics at one time.
Requirements
CSV File 
You must have the CSV file ready with the right header formats. If you are not sure, check out the creating the CSV file documentation above first.
Importing the Metrics from the CSV File
Step 0 : Starting the Process
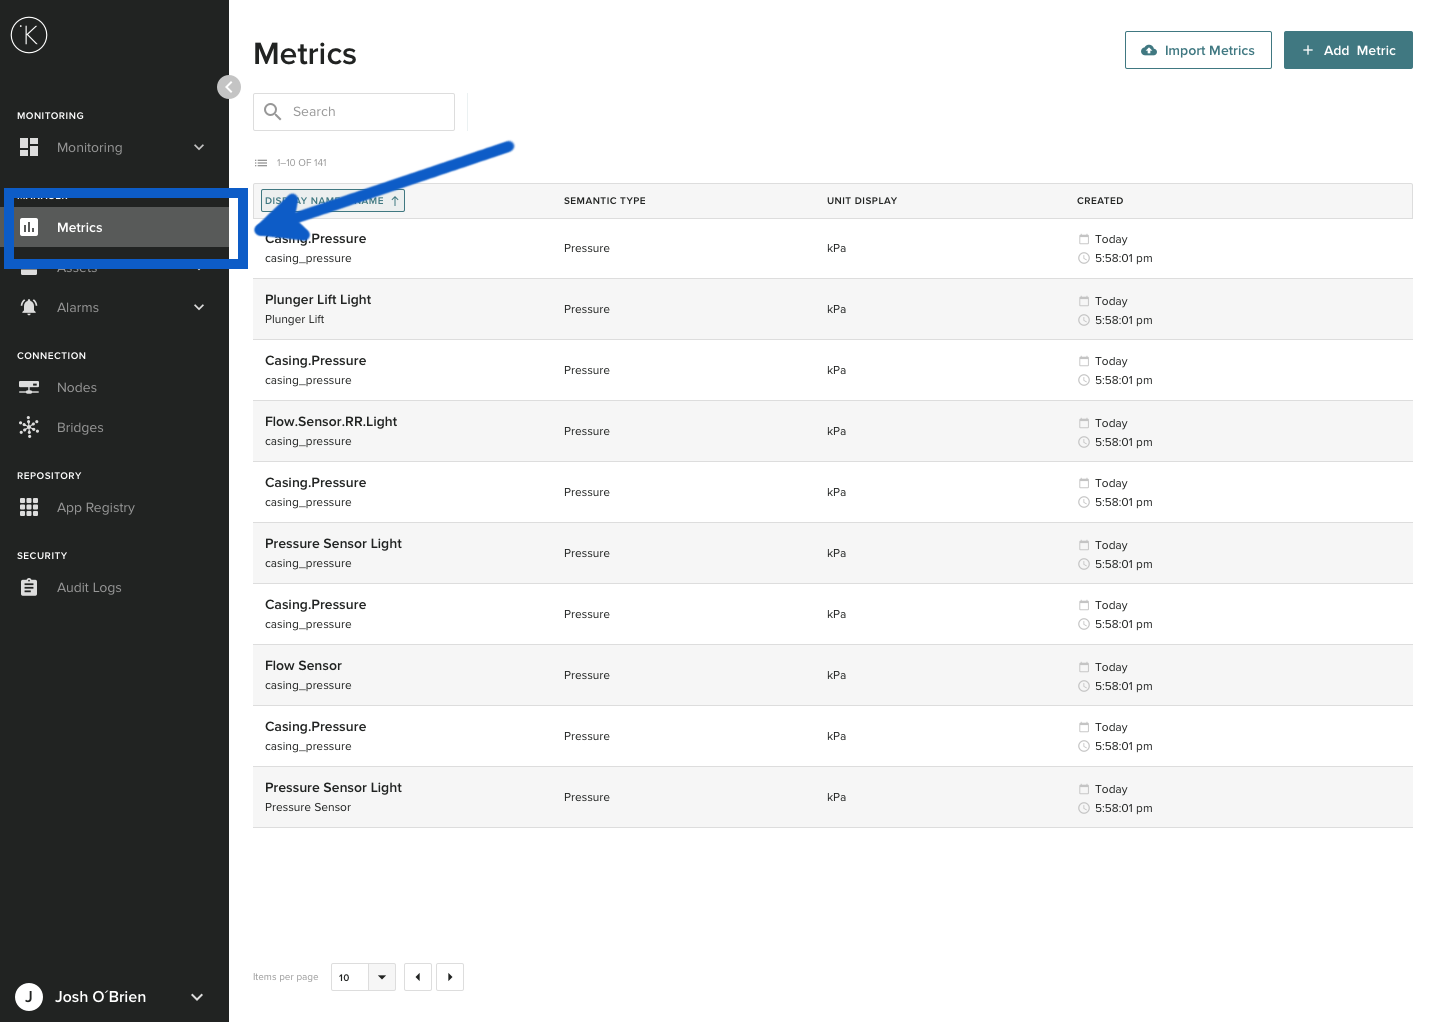
Go to the overview page on the Kelvin Control Manager UI. On the left hand side menu, select Metrics.
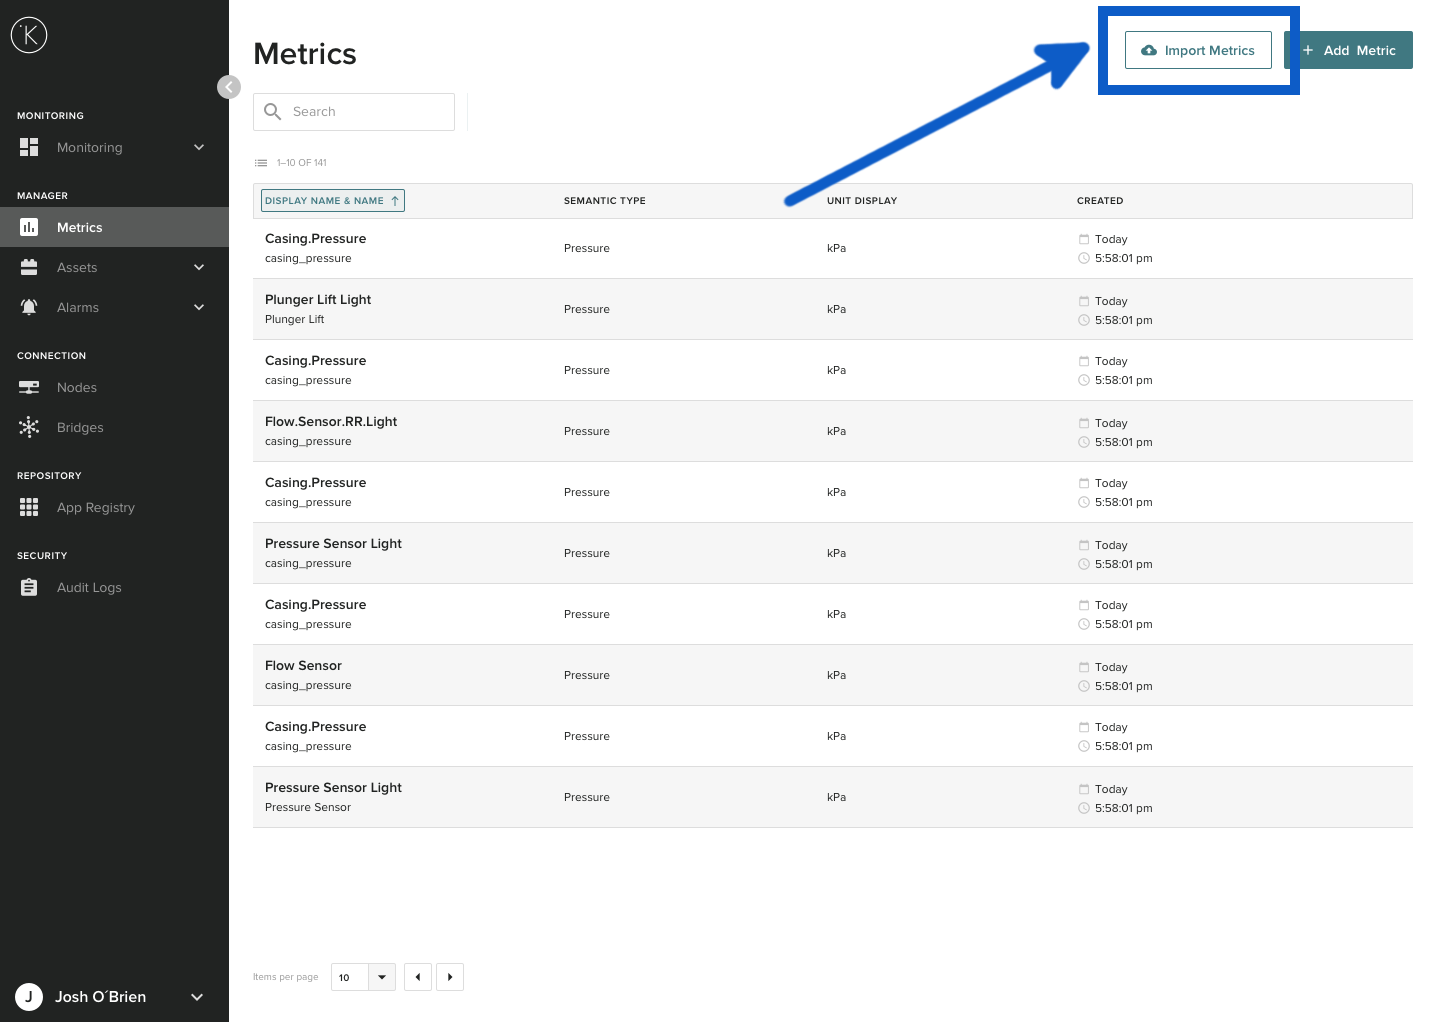
Click on the Import Metrics button.
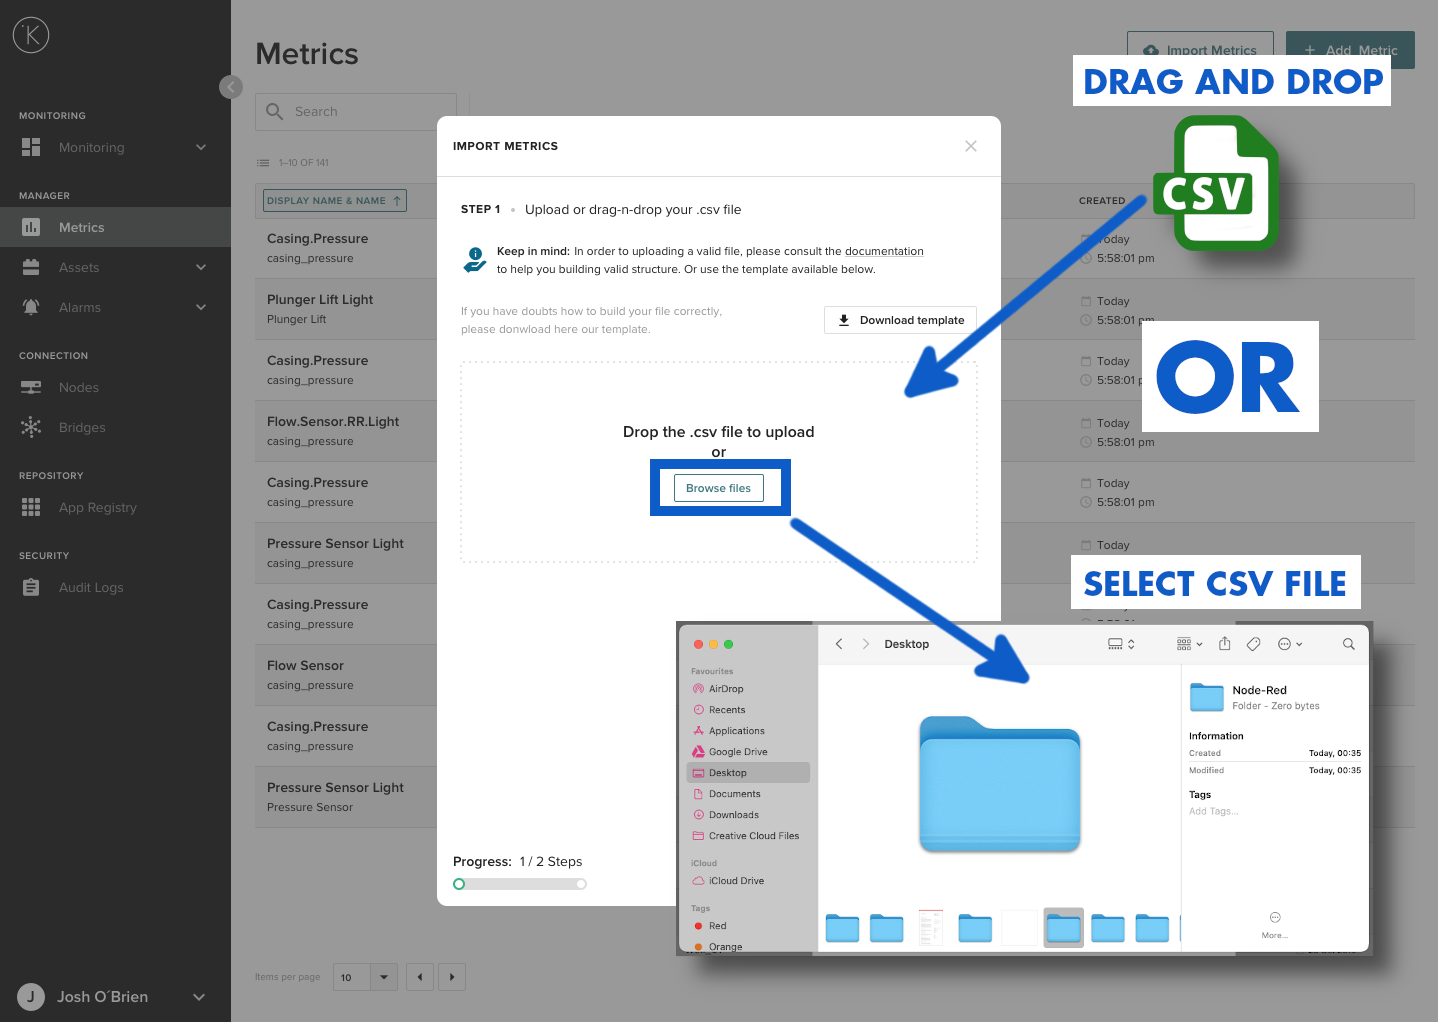
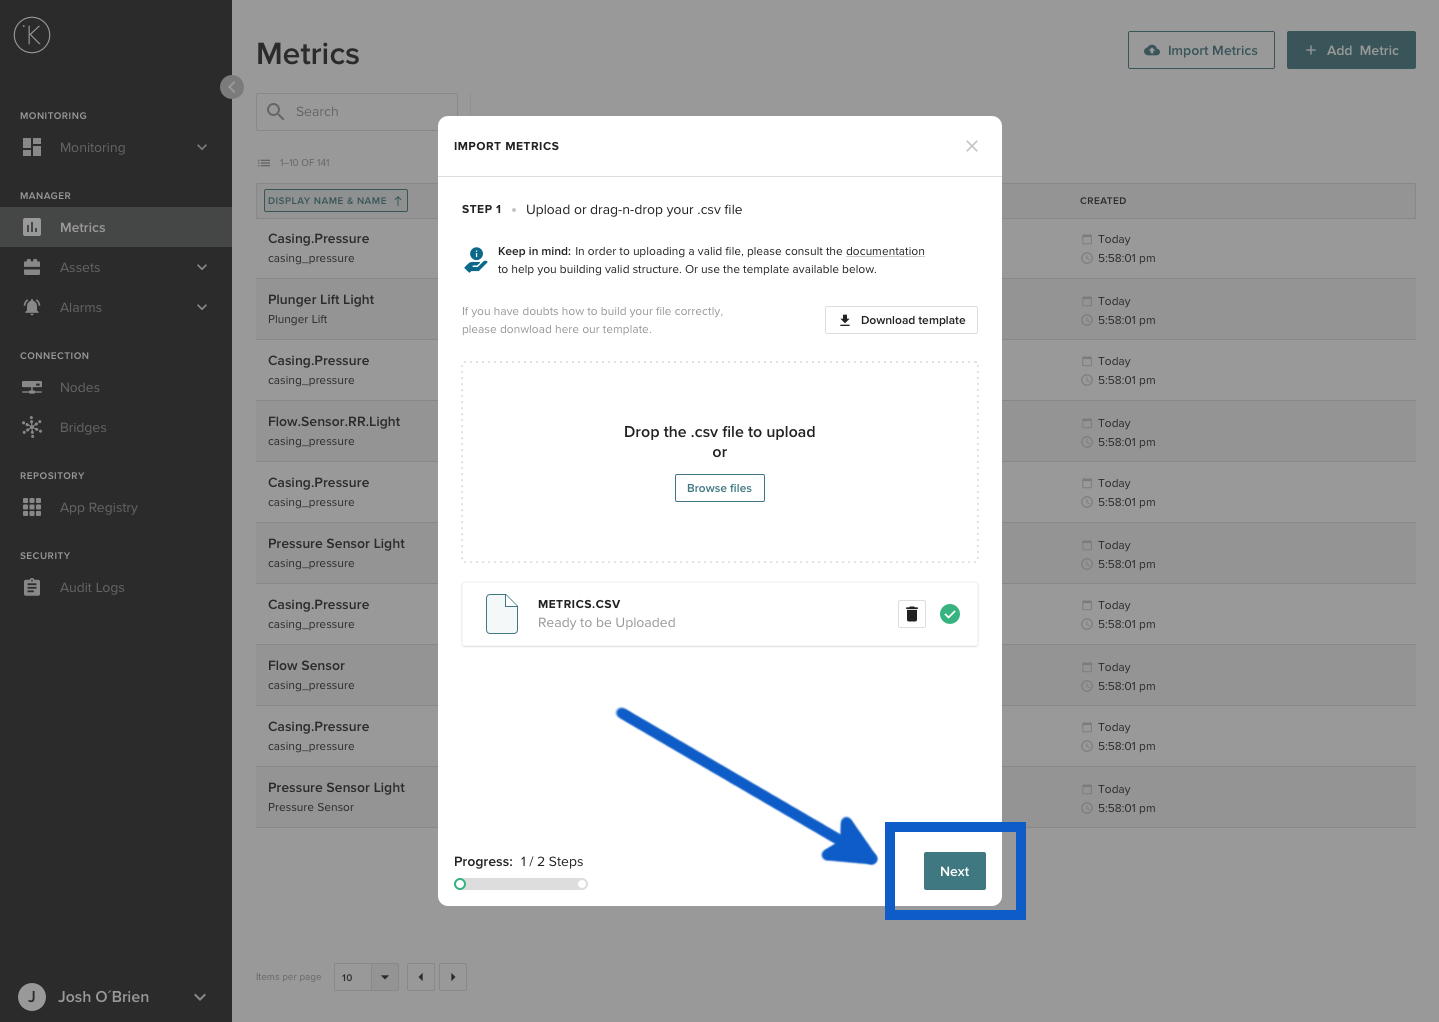
Step 1 : Upload or drag-n-drop your .csv file 
You can now either click on Browse Files to select your CSV file or just drag and drop the CSV file inside the dotted line rectangle.
The CSV file will then be checked to ensure it is a valid file and has the correct formats.
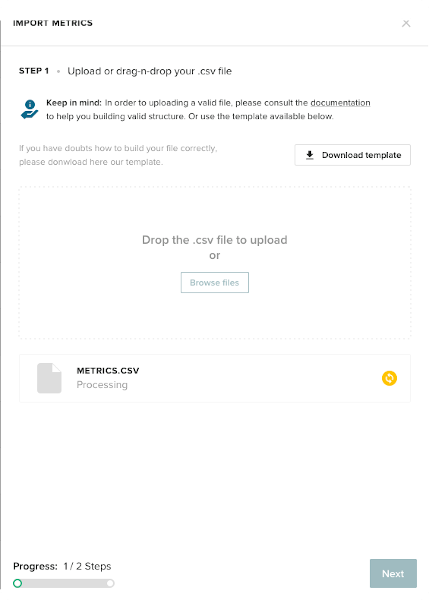
When it is ready to upload simply click the Next button.
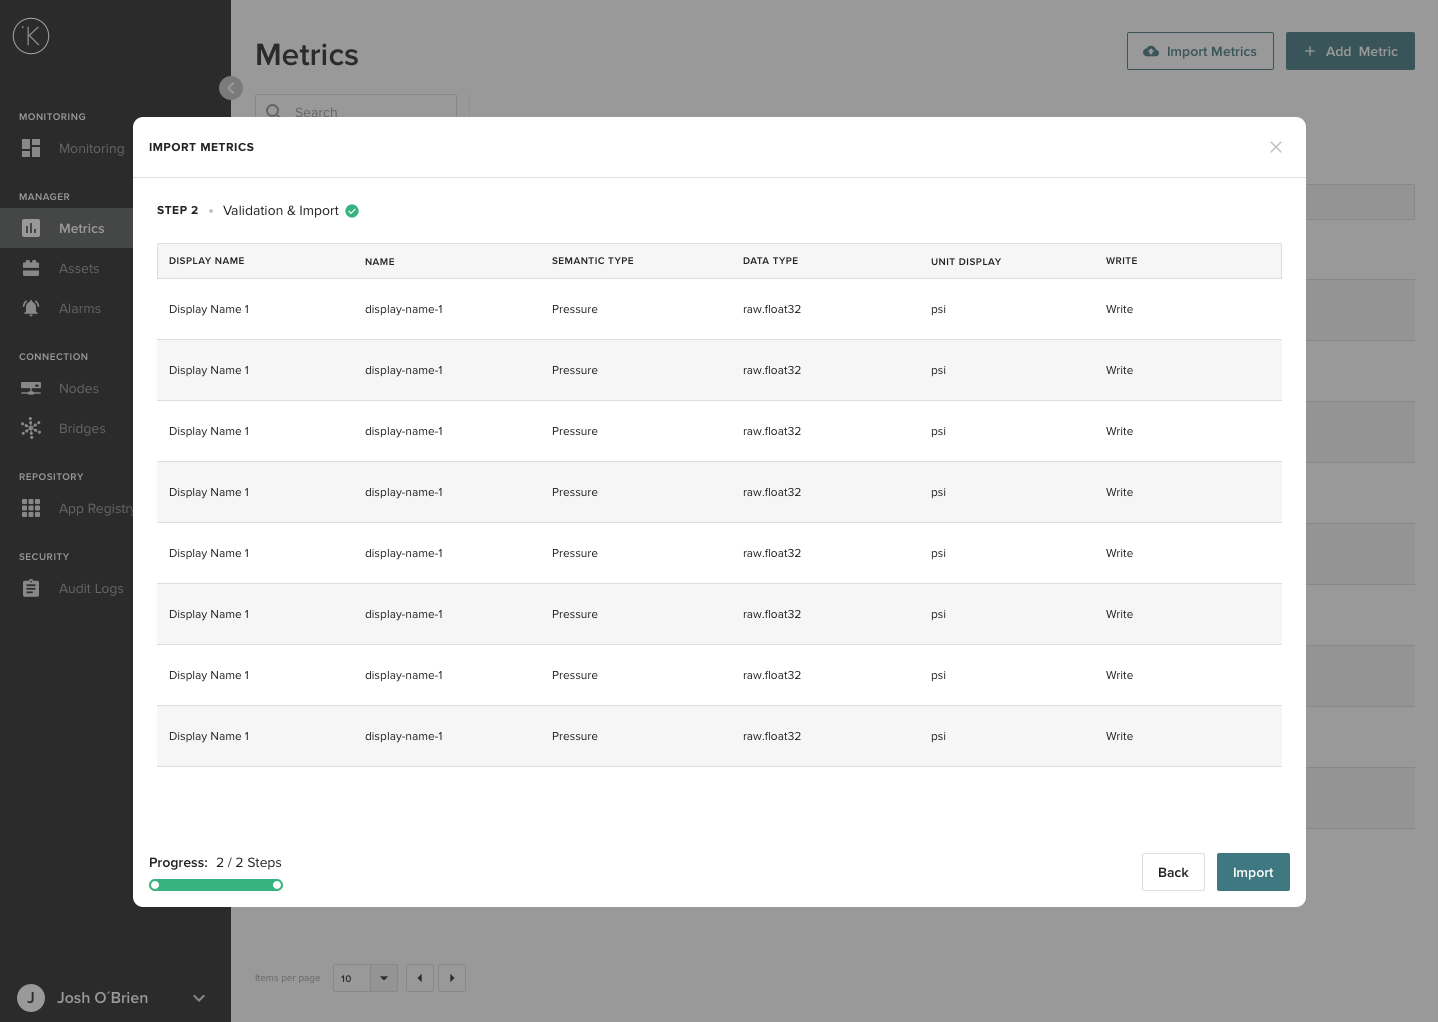
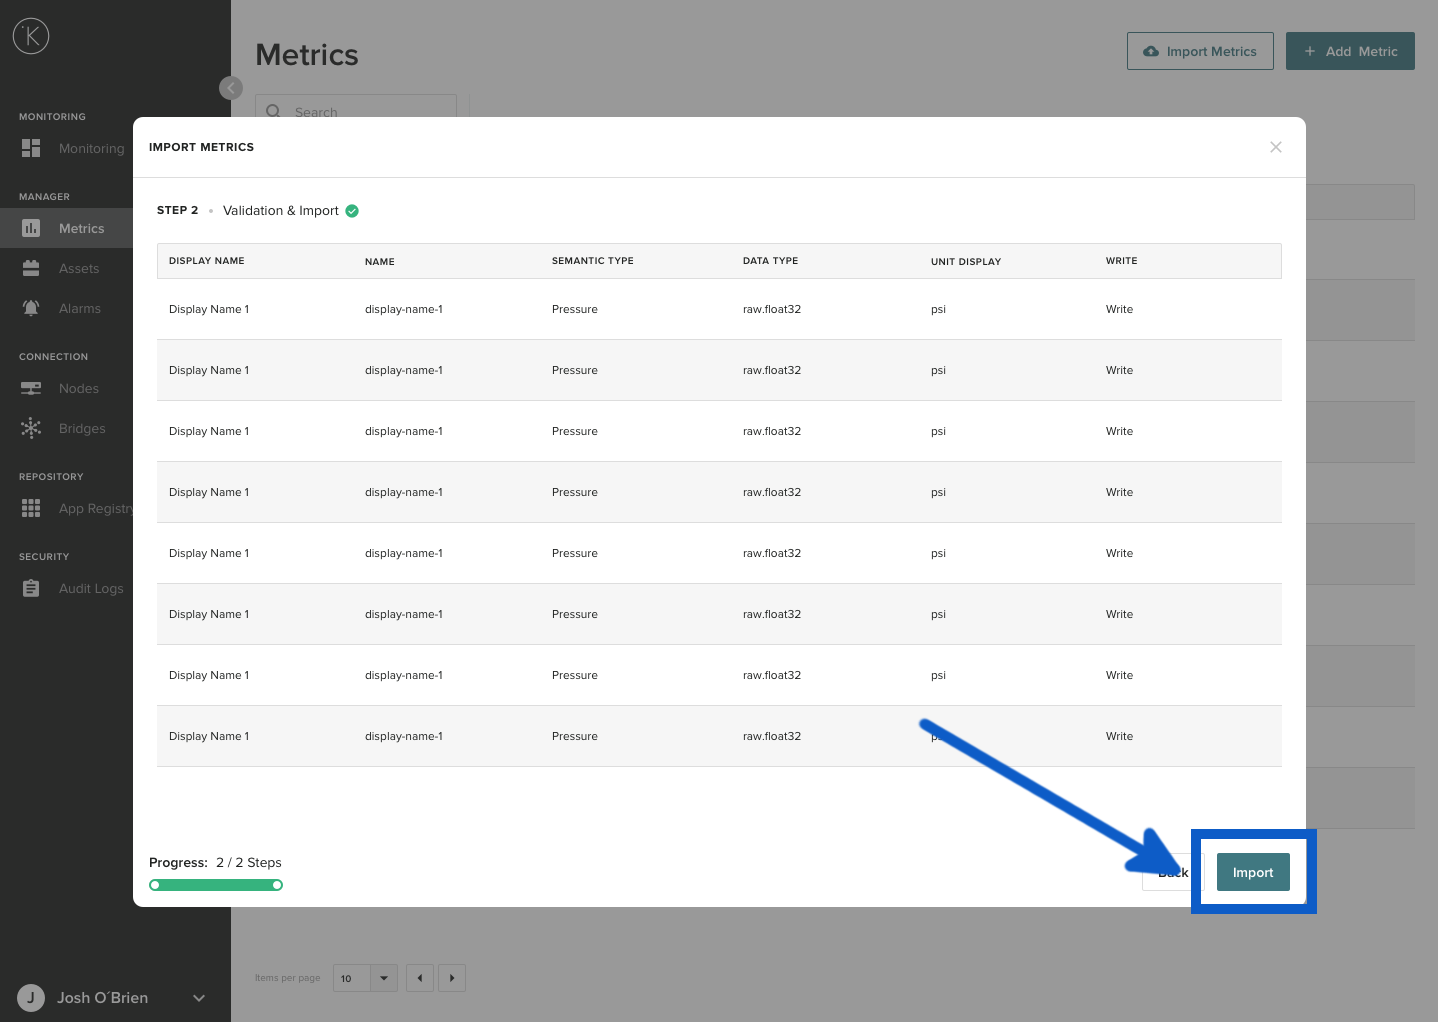
Step 2 : Validation & Import 
The file will then be uploaded and validated. You will then see a List View of all the Metrics to import. Check that the Kelvin Control Manager UI has properly read your CSV file before proceeding.
Info
If there is any problems with the CSV file, the Kelvin Control Manager UI will give you detailed instructions. See below at the troubleshooting section how you can solve any problems.
If you have any errors, the screen will look like the image below. Before you can proceed to import, you will need to solve all issues that are identified.
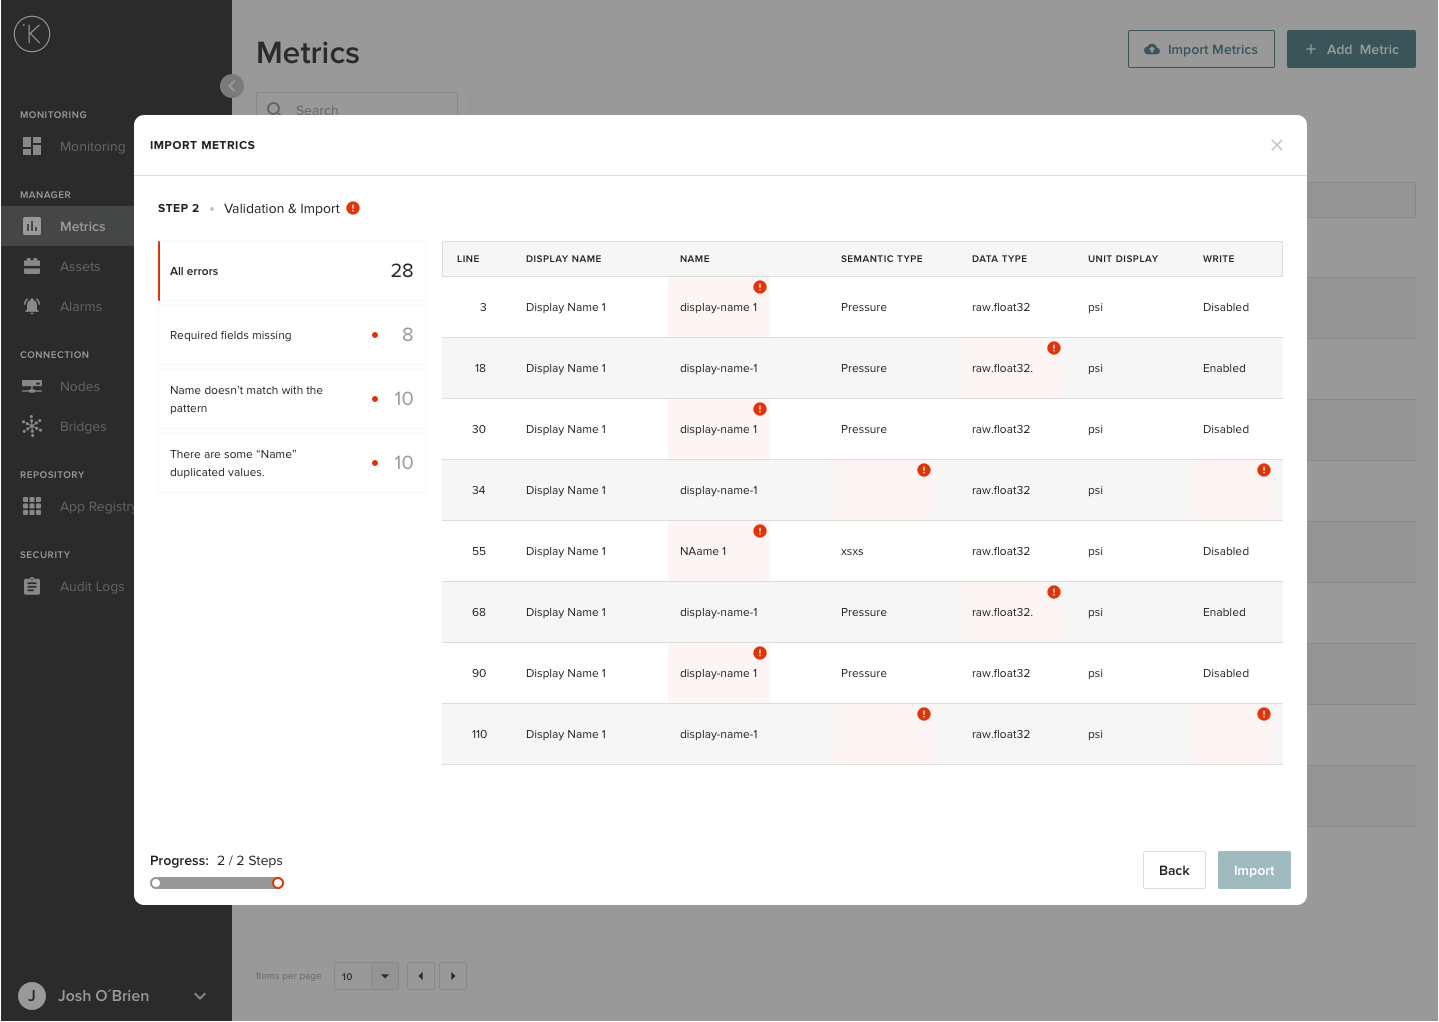
You can click on one of the error reports on the left hand side to see more details about the error.
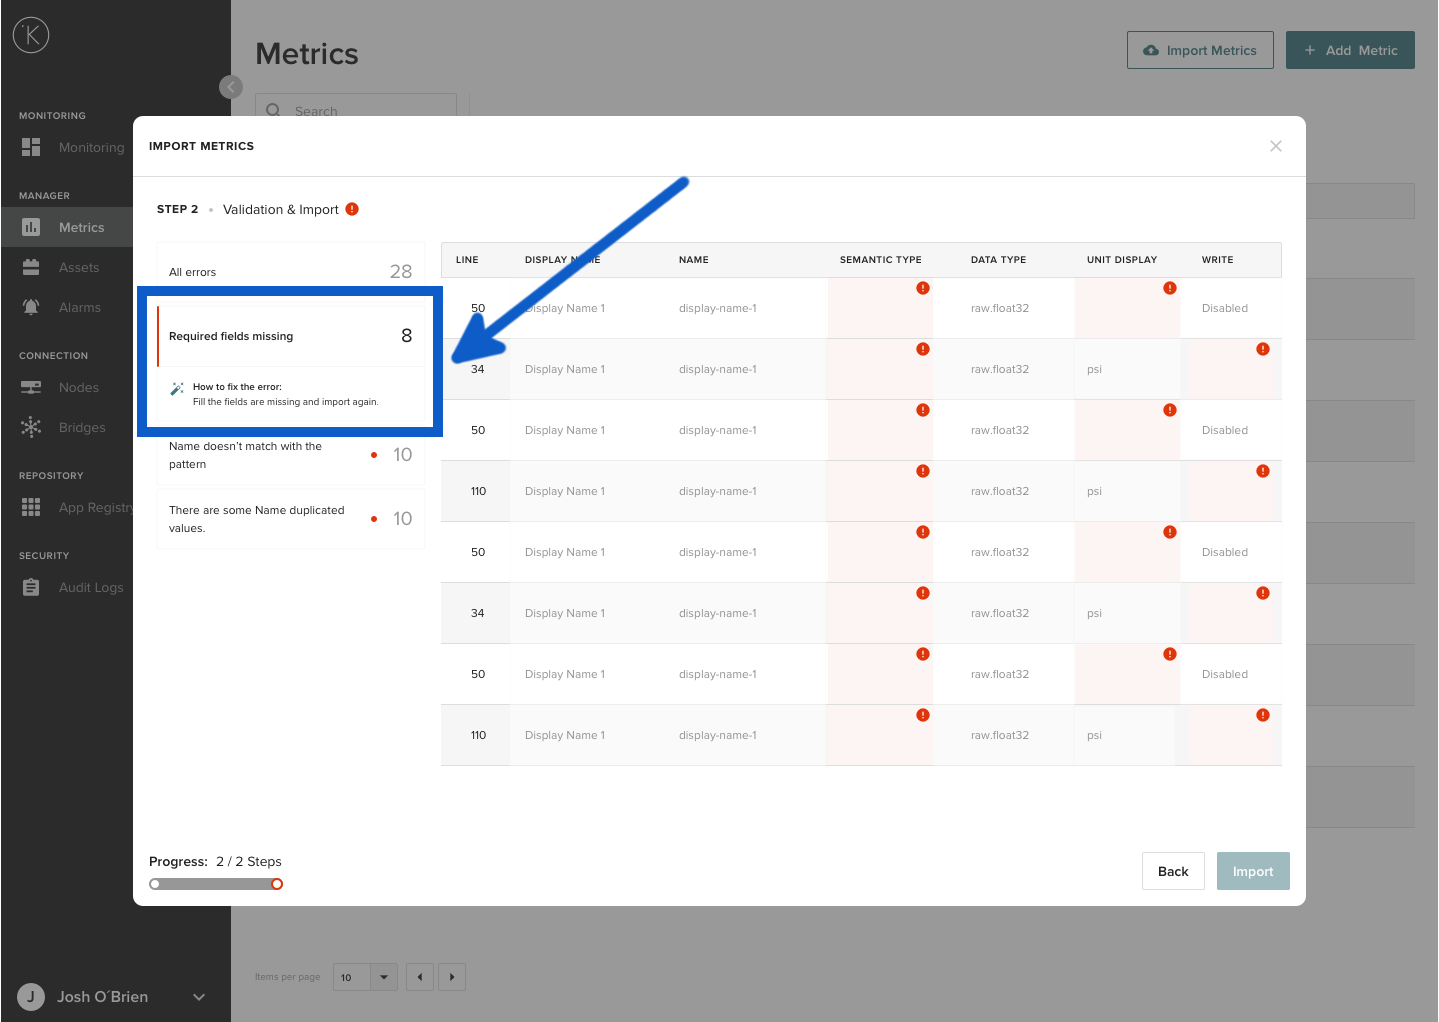
Info
To see a full list of possible errors and solutions, go to the Troubleshooting section at the bottom.
Before you can proceed to import, you will need to solve any issues that are identified. When you have no errors and you are satisfied with the list of Metrics to import, then click on Import to continue.
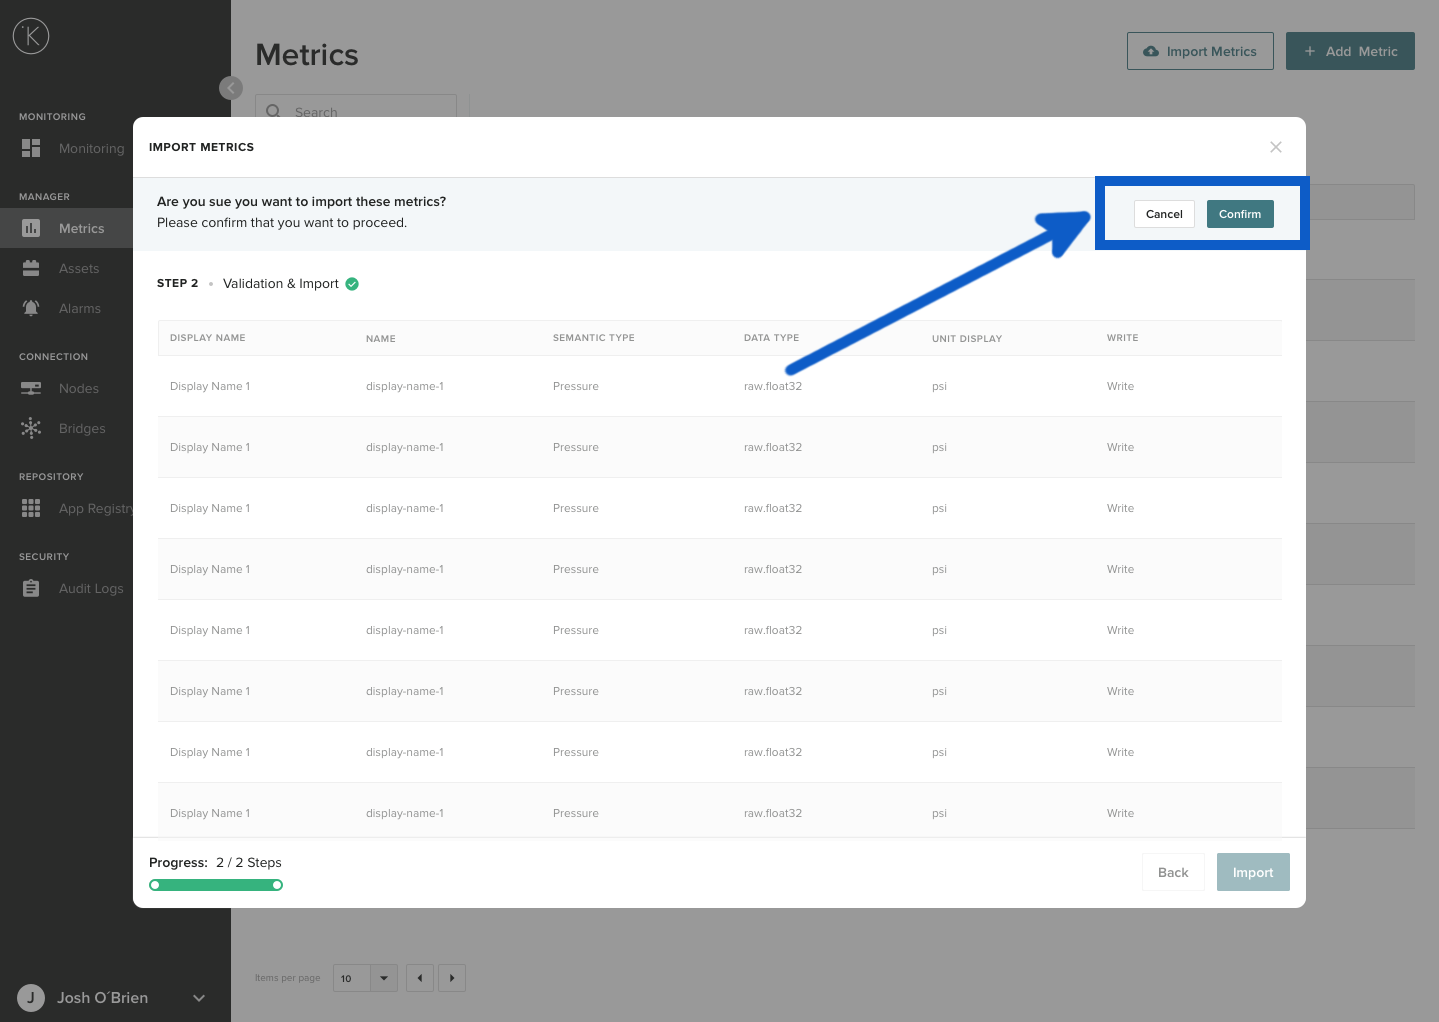
You will then be asked to confirm that you want to import (in case you accidentally clicked the button too fast, it happens to the best of us). Click Confirm t**o proceed, or click **Cancel to go back to the List View.
Info
If you select cancel here you will not lose your work. You will remain at Step 2. You can try and click import again.
Danger
If you click on the close button (x) here at Step 2, you will lose all your work for the import Assets.
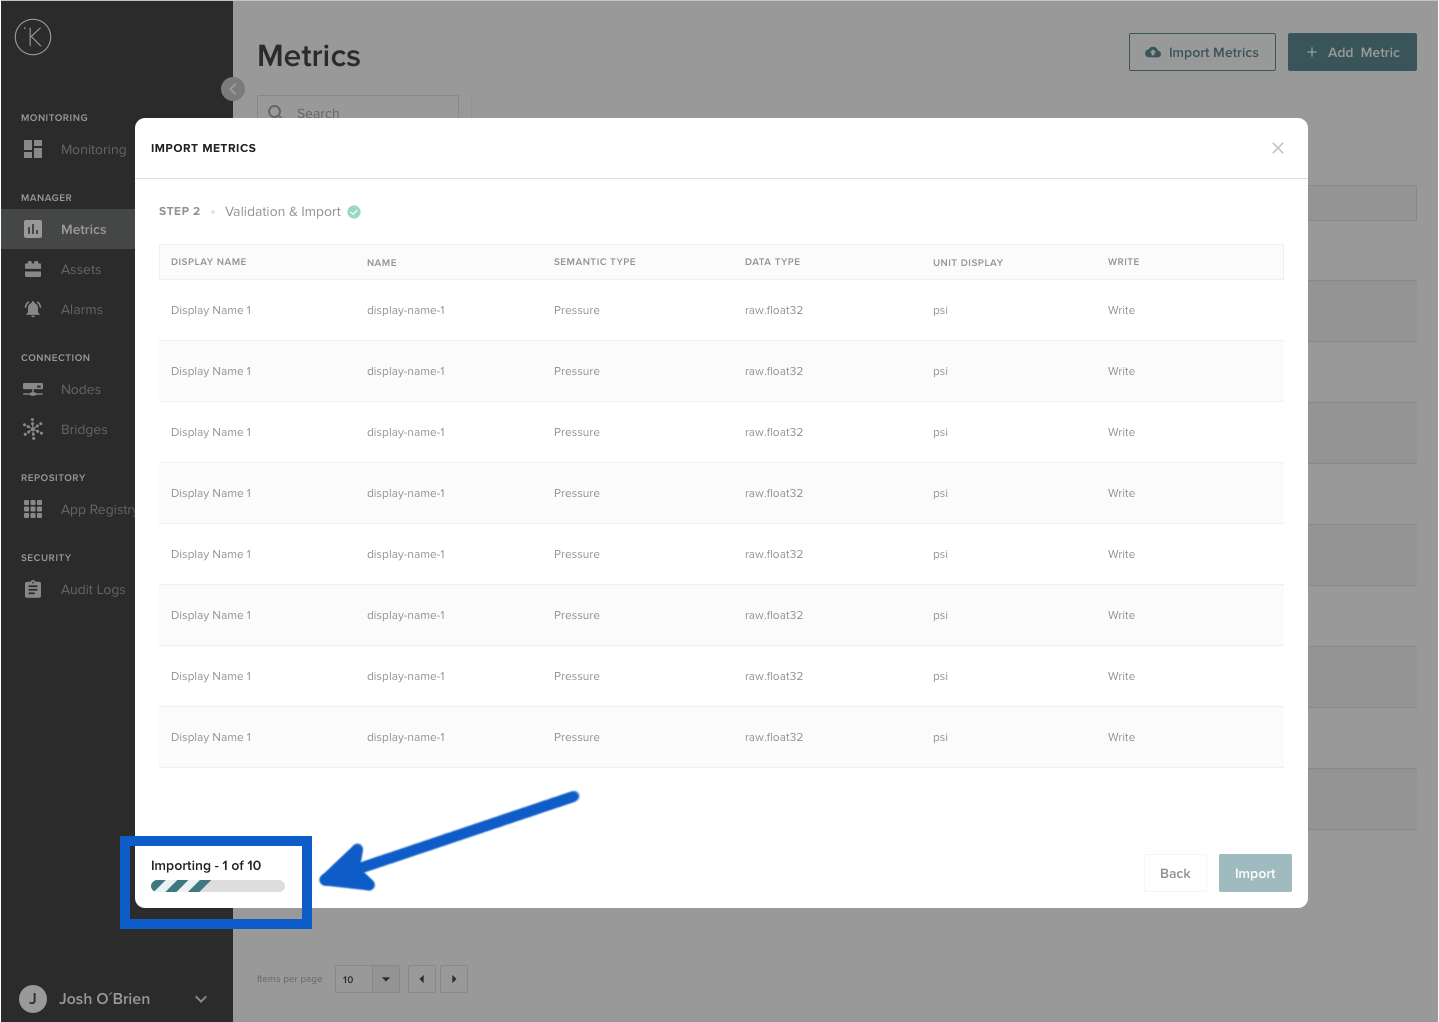
In the bottom left corner you will see the progress of the import. The time required to import will depend on how many Metrics you are importing.
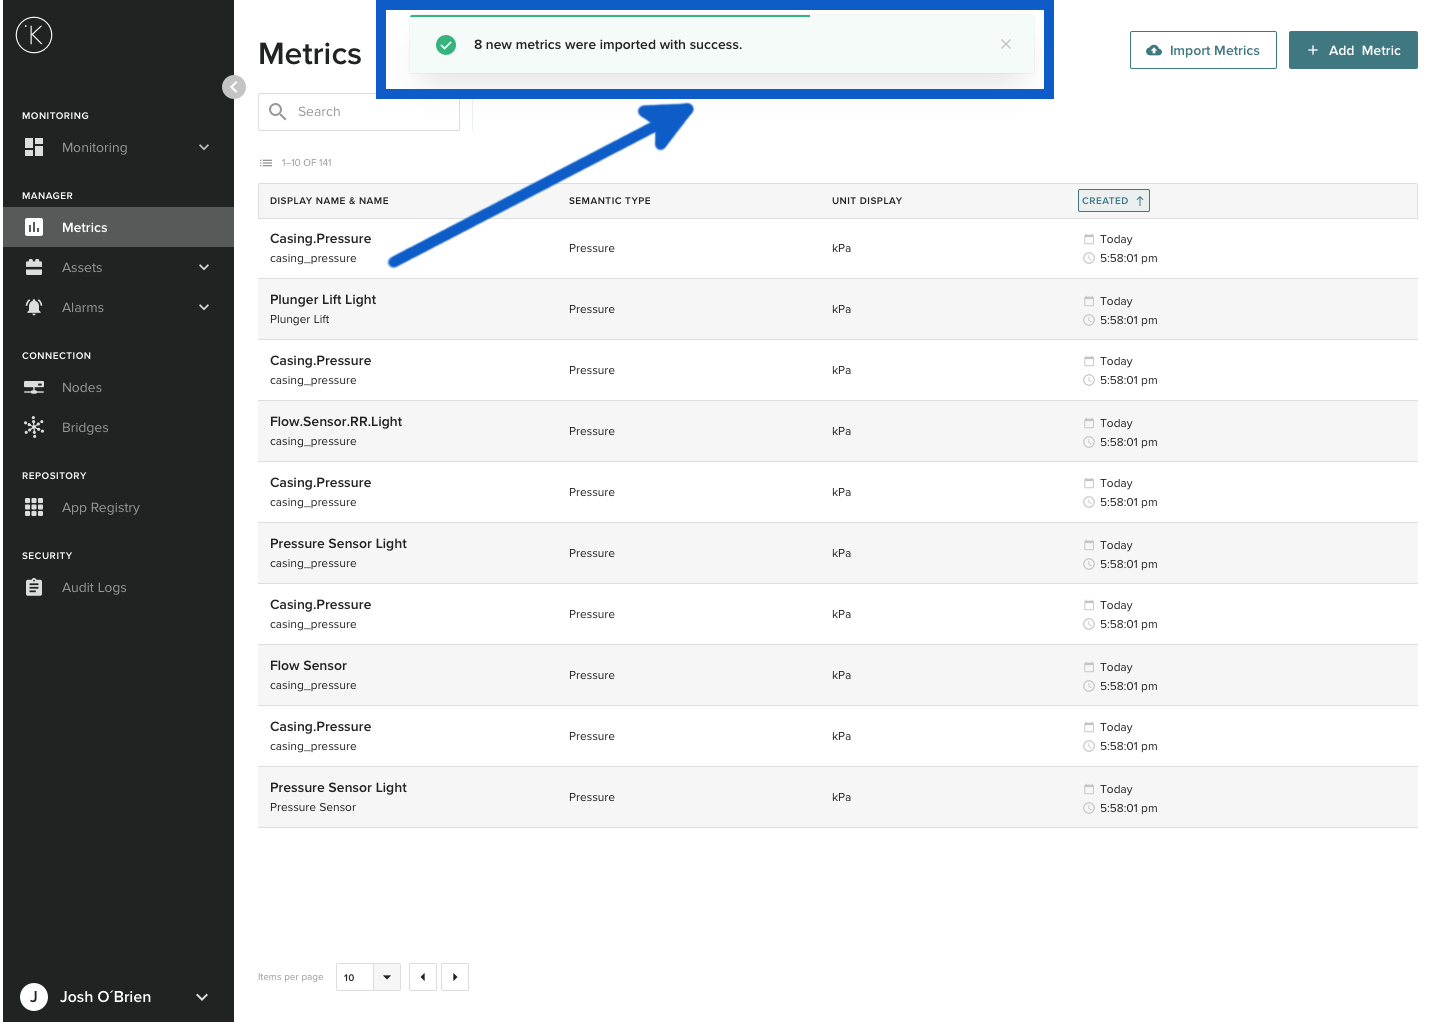
When everything is done and the import is successful then you will see a confirmation box appear. Congratulations ! You can now go to your Metrics and see them listed there.
Troubleshooting
| Problem | Solution |
|---|---|
| An error "This file is not valid" comes up in Step 1 |
The CSV file you have tried to upload is not a CSV file.
|
| An error "The file is not in UTF-8 encoding format." comes up in Step 1 |
When you export or Save As to a CSV file, make sure you select UTF-8 encoding format (if available). If not available in your program, then you can open the file in Microsoft Excel and re-save it as CSV. |
| An error "This file exceeds the numbers of rows allowed." comes up in Step 1 |
Make sure the number of Assets (rows) in the CSV file is less than 20,000. If you have more than 20,000 Assets (rows) to import, split them up into separate files. Each file should be limited to 20,000 Assets (rows). |
| An error "Required fields missing" comes up in Step 2 | Check that your CSV file has values in all columns that are mandatory. See Creating the CSV File in Microsoft Excel for more details. |
| An error "Name doesn’t match with the pattern" comes up in Step 2 | In the Name column, you can only use lowercase alphanumeric characters without spaces. For example: my-metric-01. |
| An error "There are some “Name” duplicated values." comes up in Step 2 | In the Name column, every name must be unique. |
Glossary of Terms
| Term | Definition |
|---|---|
| Node | A node is a Kelvin gateway. It is used by the Kelvin Control Manager UI to deploy programs to the edge and to collect data from the edge. |
| Metrics | Metrics are a group of Assets in the Kelvin Control Manager UI. |
| CSV File | A comma-separated values (CSV) file is a delimited text file that uses a comma to separate values. Each line of the file is a data record. Each record consists of one or more fields, separated by commas. The use of the comma as a field separator is the source of the name for this file format. A CSV file typically stores tabular data (numbers and text) in plain text, in which case each line will have the same number of fields. (Wikipedia, 2021) |