Alarms Monitoring
On this page you will learn how to view the status of all your alarms and monitor the historical and live data.
Kelvin Alarms
To understand what Kelvin Alarms are and how they fit into the Kelvin Sustainable Operations Software, check out our detailed description here.
One of the important aspects to highlight is there are two types of Kelvin Alarms generated;
- API - Alarms created by users through the REST API command.
- Failure Detection - A Kelvin generated alarm
Failure Detection Alarms have some extra features which will be highlight.
Monitoring all your Alarms
To access the Alarms Monitoring page simply click on Monitoring to expand the menu then click on Alarms Monitoring.
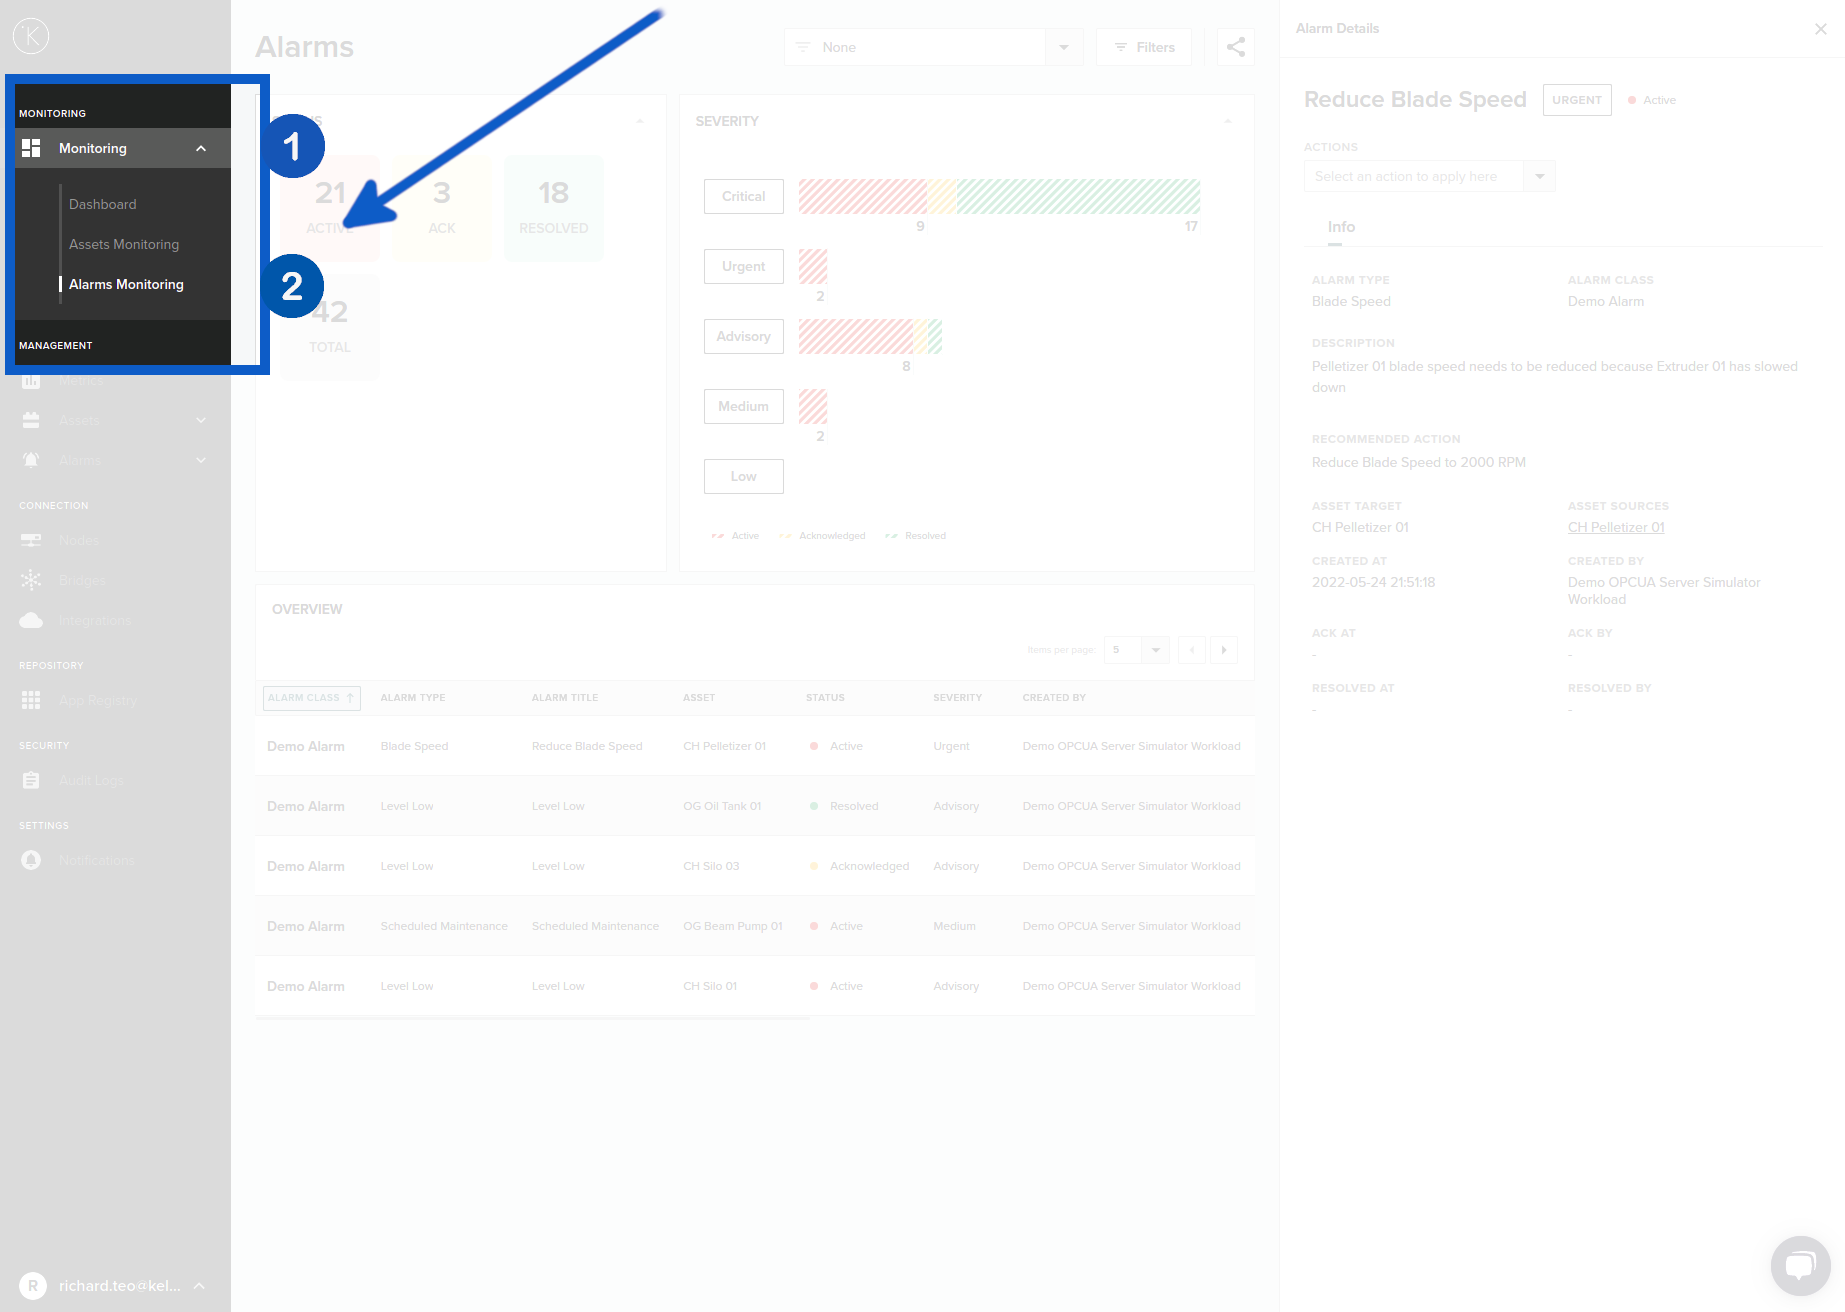
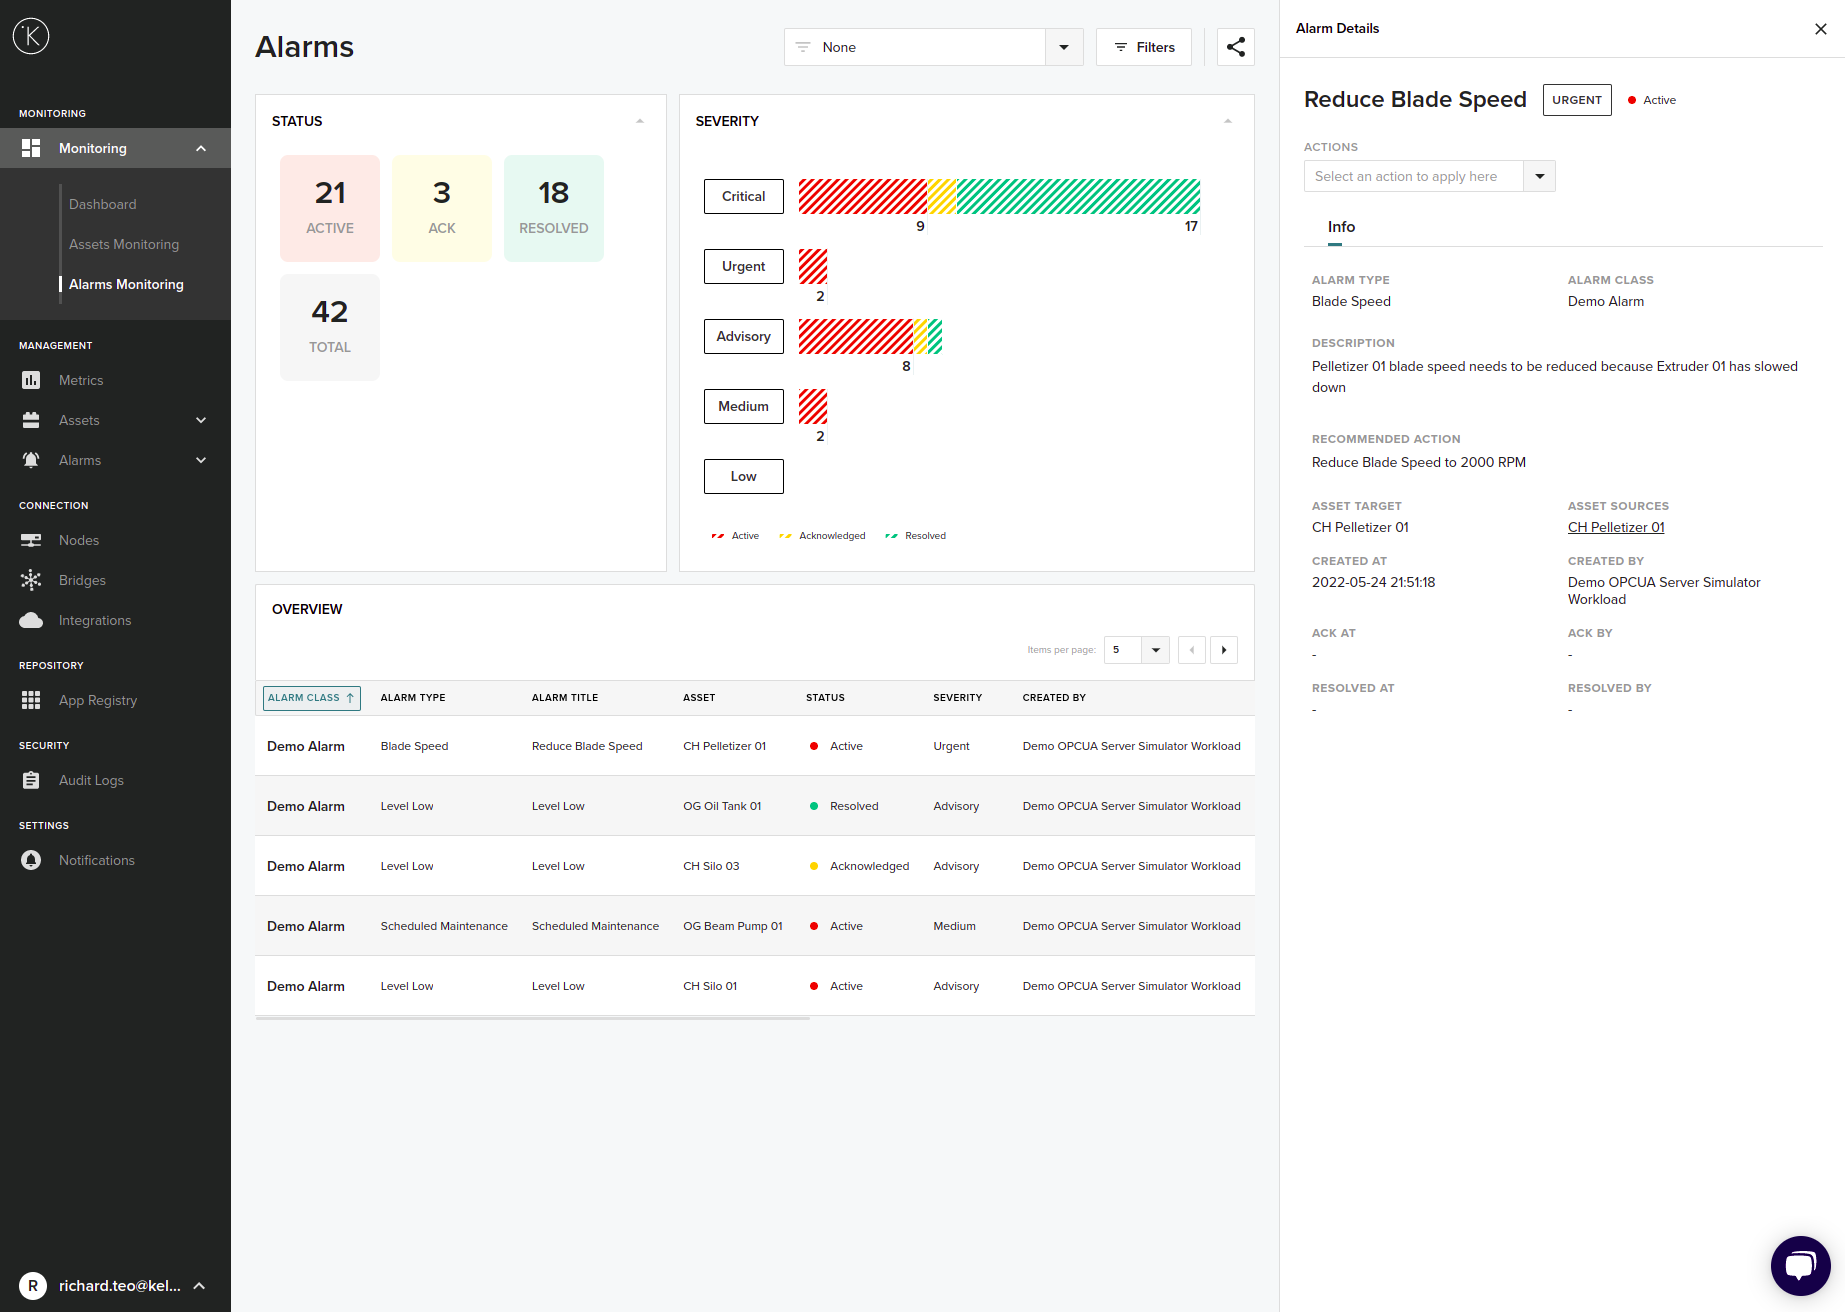
The Alarms Monitoring page allows you to see a full overview of the performance of all your Assets. There are many features we will show you including filtering alarms, expanding individual windows, reading details of individual alarms and changing the status of alarms.
Alarm Details
To view the details of one Alarm you can click on the Alarm Class. A side bar will open up on the right hand side with detailed information about that Alarm.
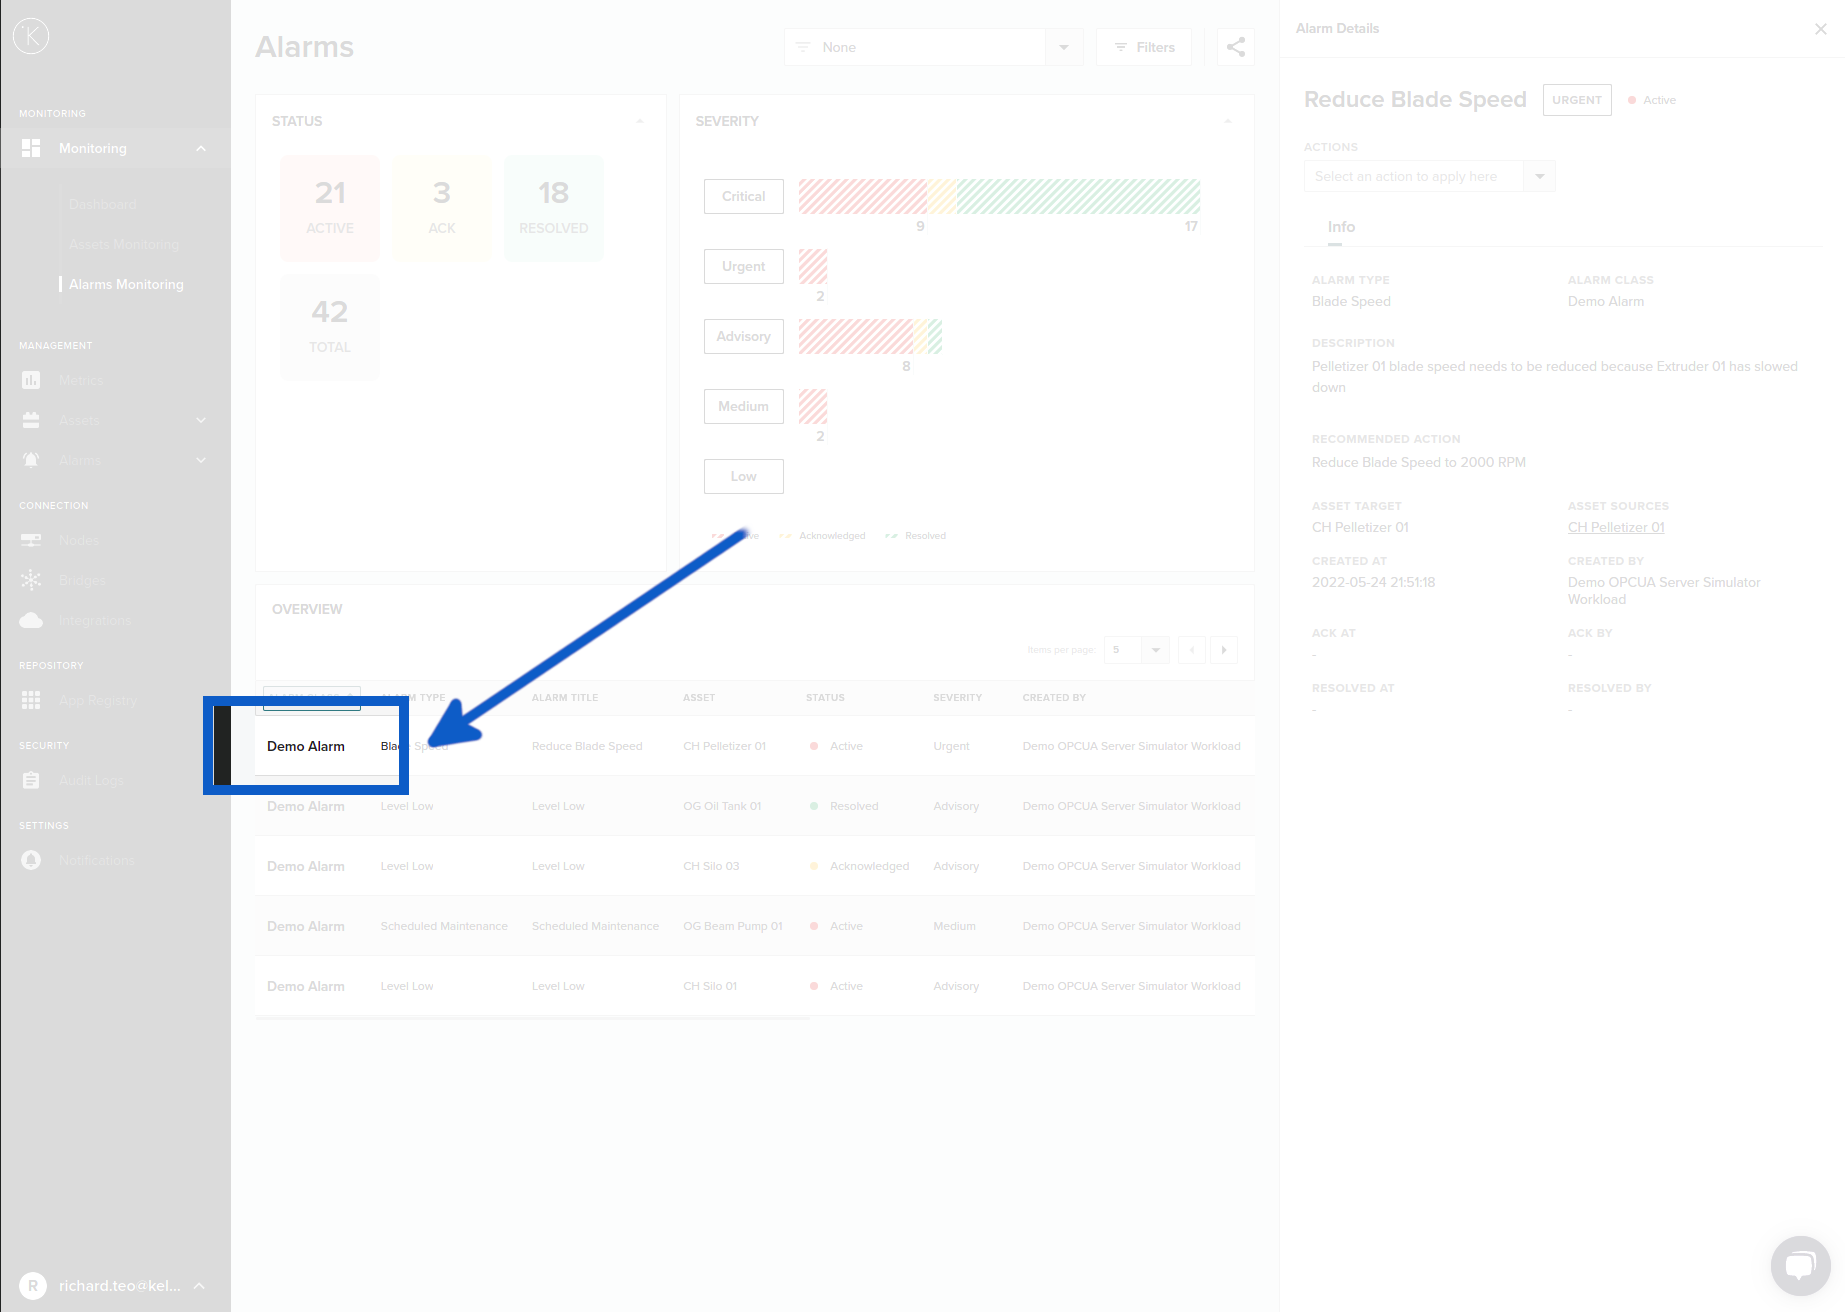
The Alarm Details page has many details and links to help you quickly identify and resolve the alarm.
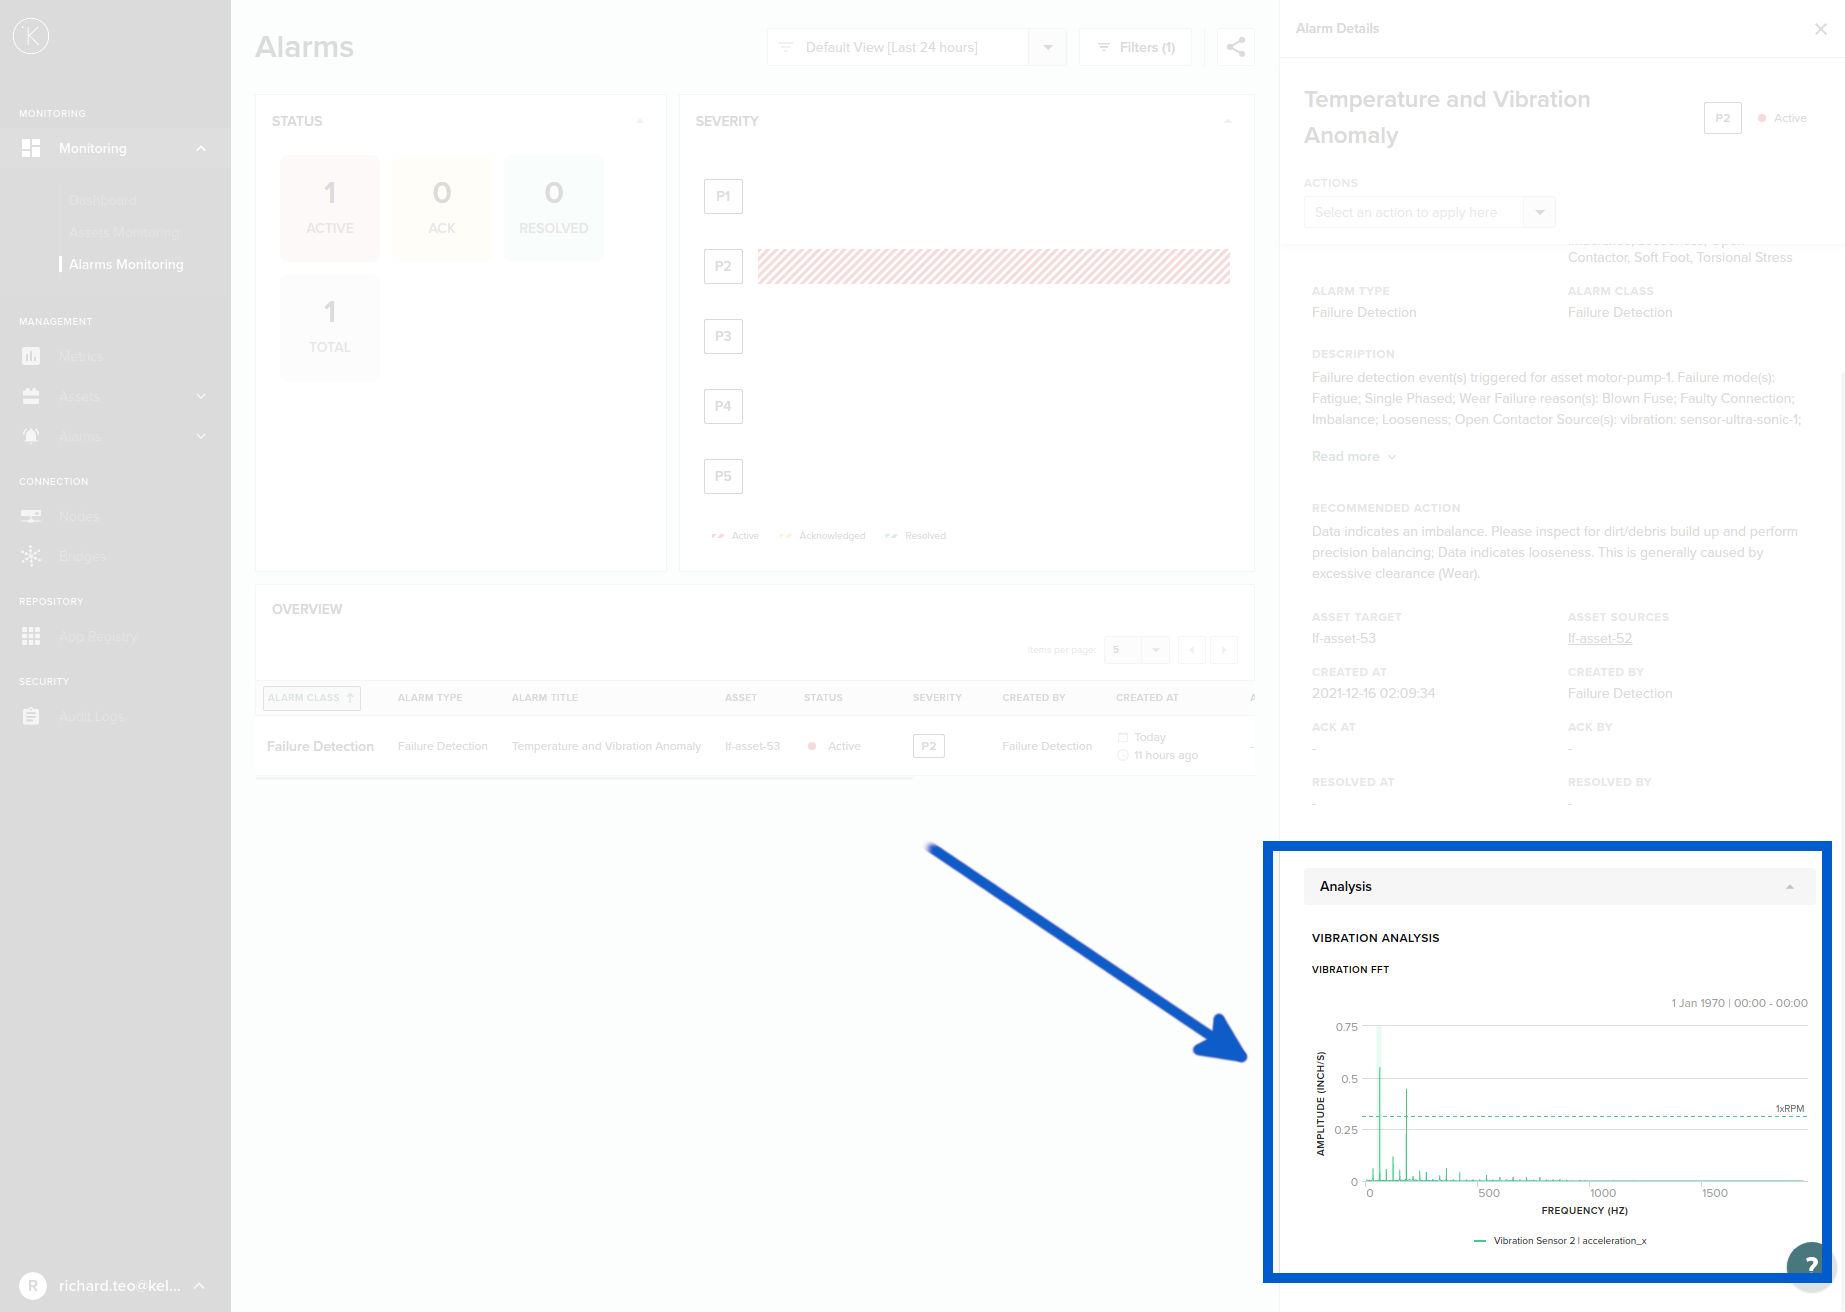
With Failure Detection Alarm, you will also see at the bottom a graph with details of the analytics. The type of graphs will depend on the sensor that produced the alarm. For example, the vibration sensor uses FFT analytics.
Assets Links
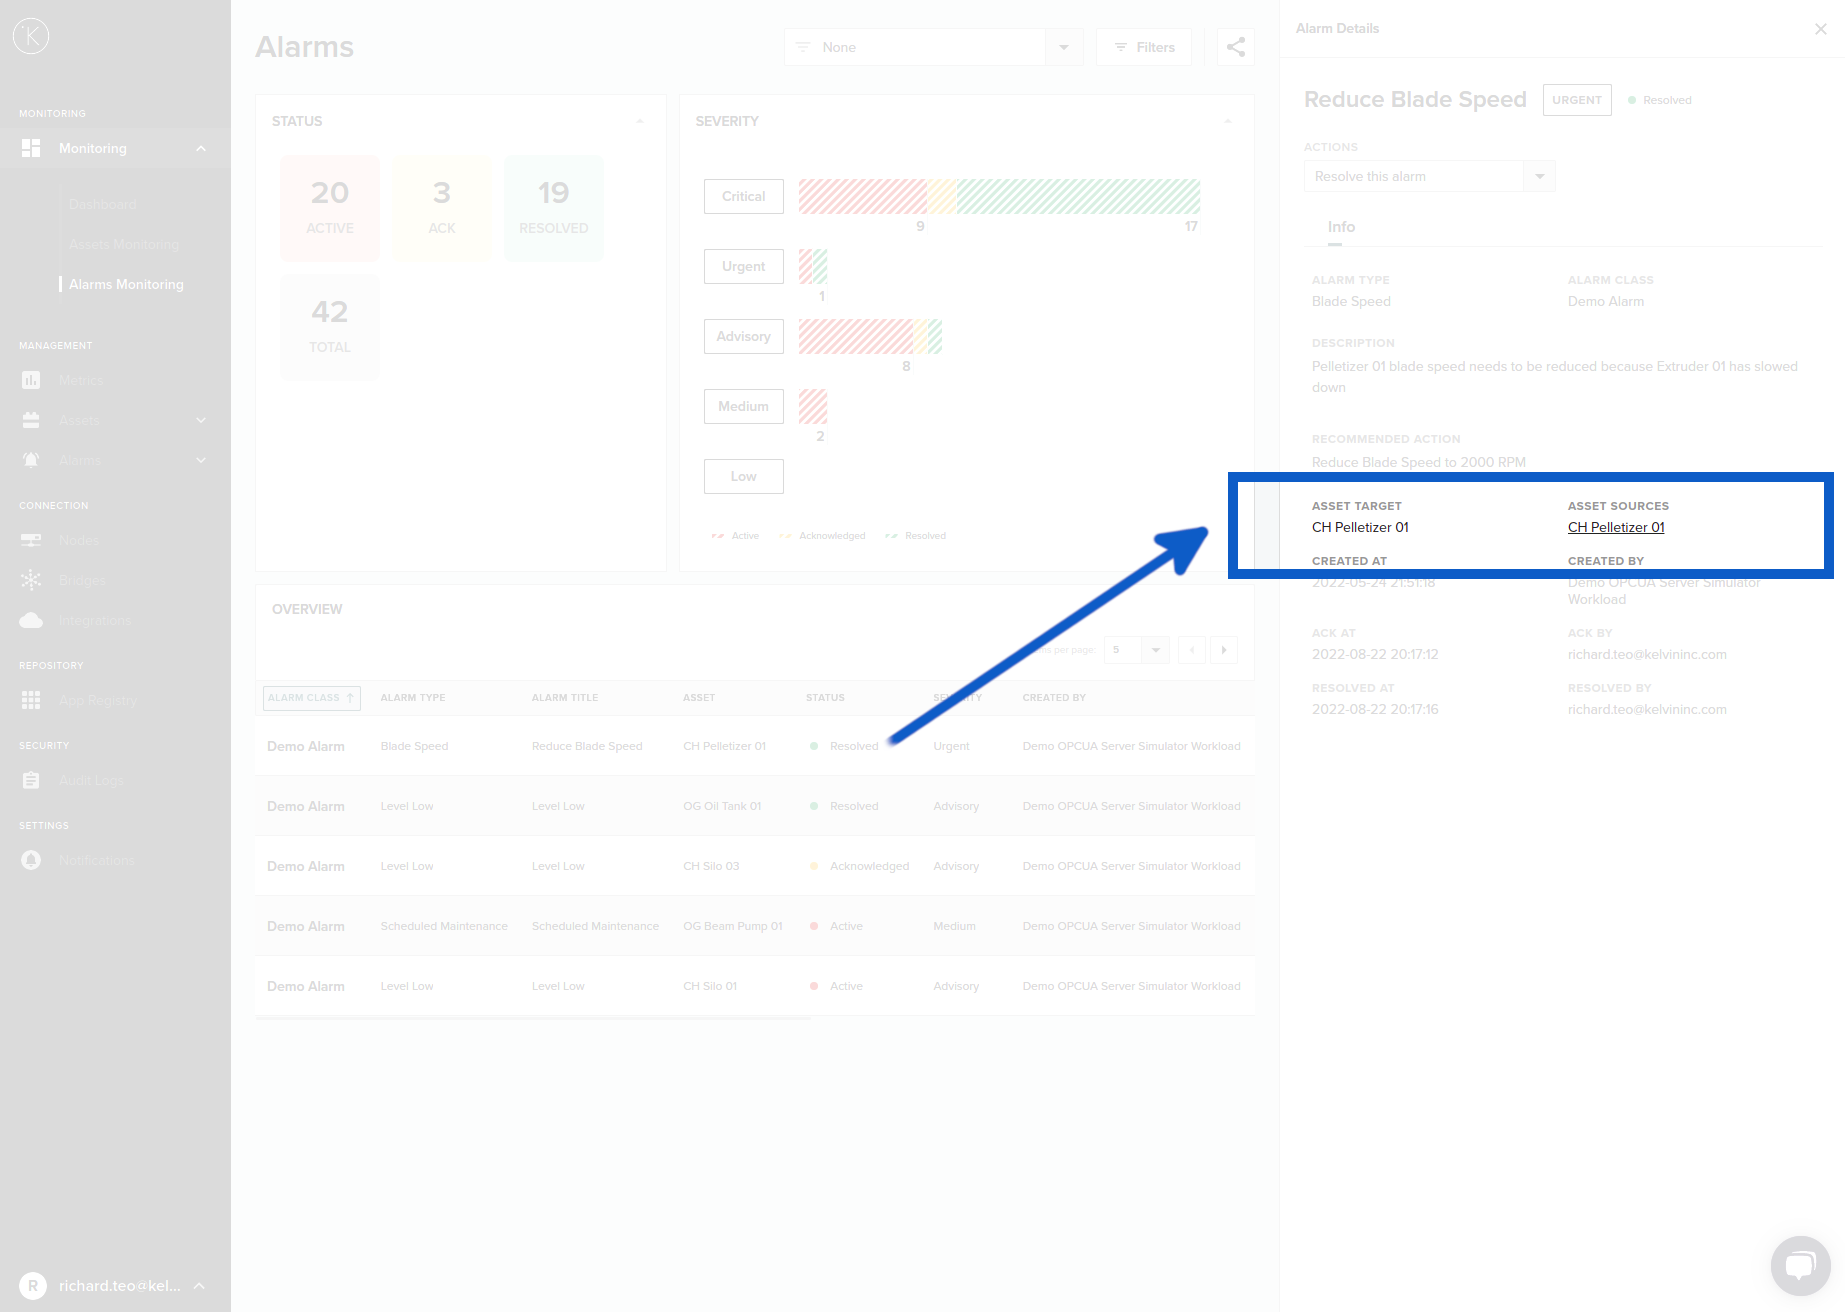
In the Alarms Details page you can see which Asset, Component, Sensor or Part triggered the Alarm. You can click on the link to go over to the Assets Monitoring Page.
With Failure Detection Alarm, you will only see either the Component or Part where the Kelvin analytics have detected the anomaly.
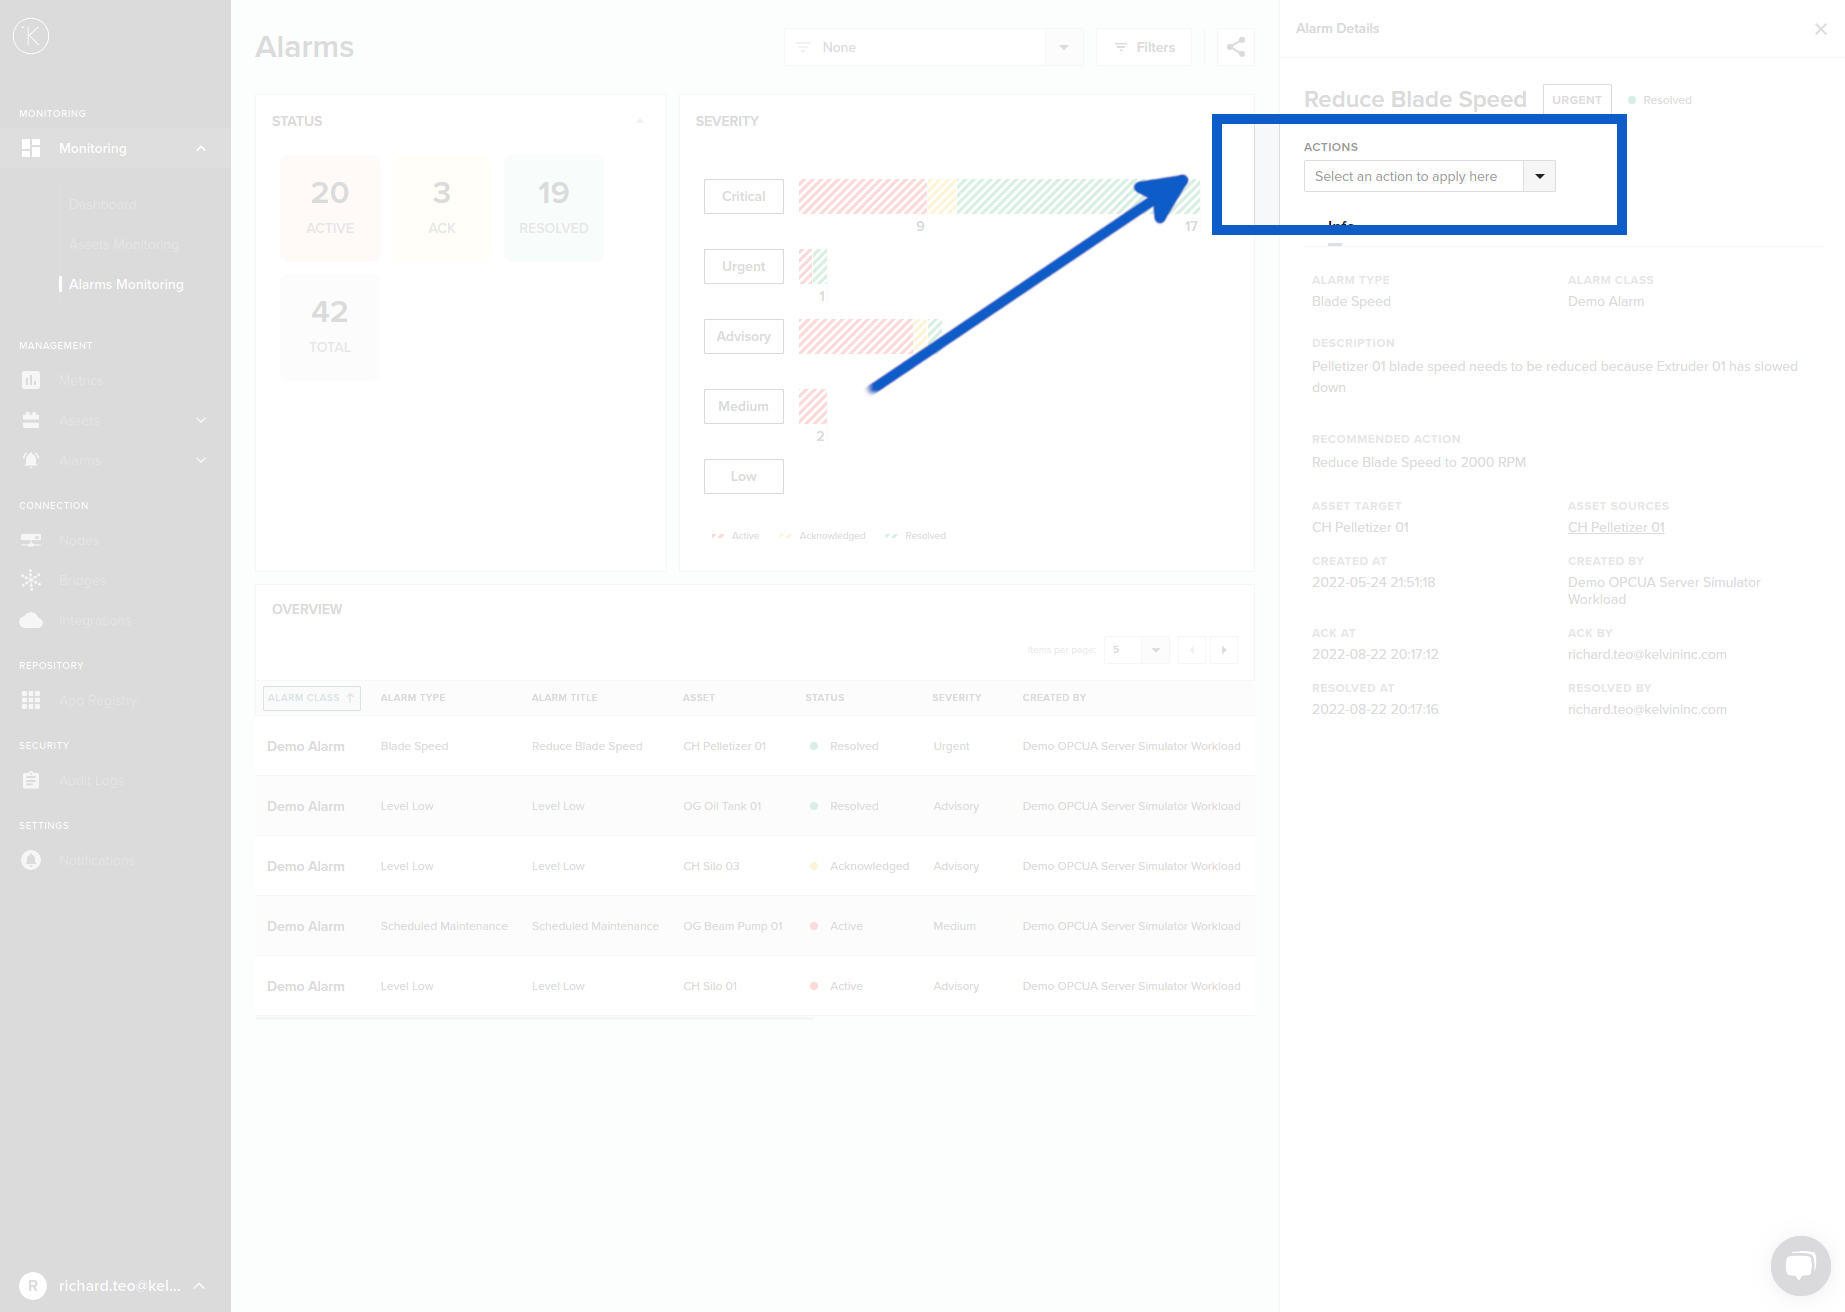
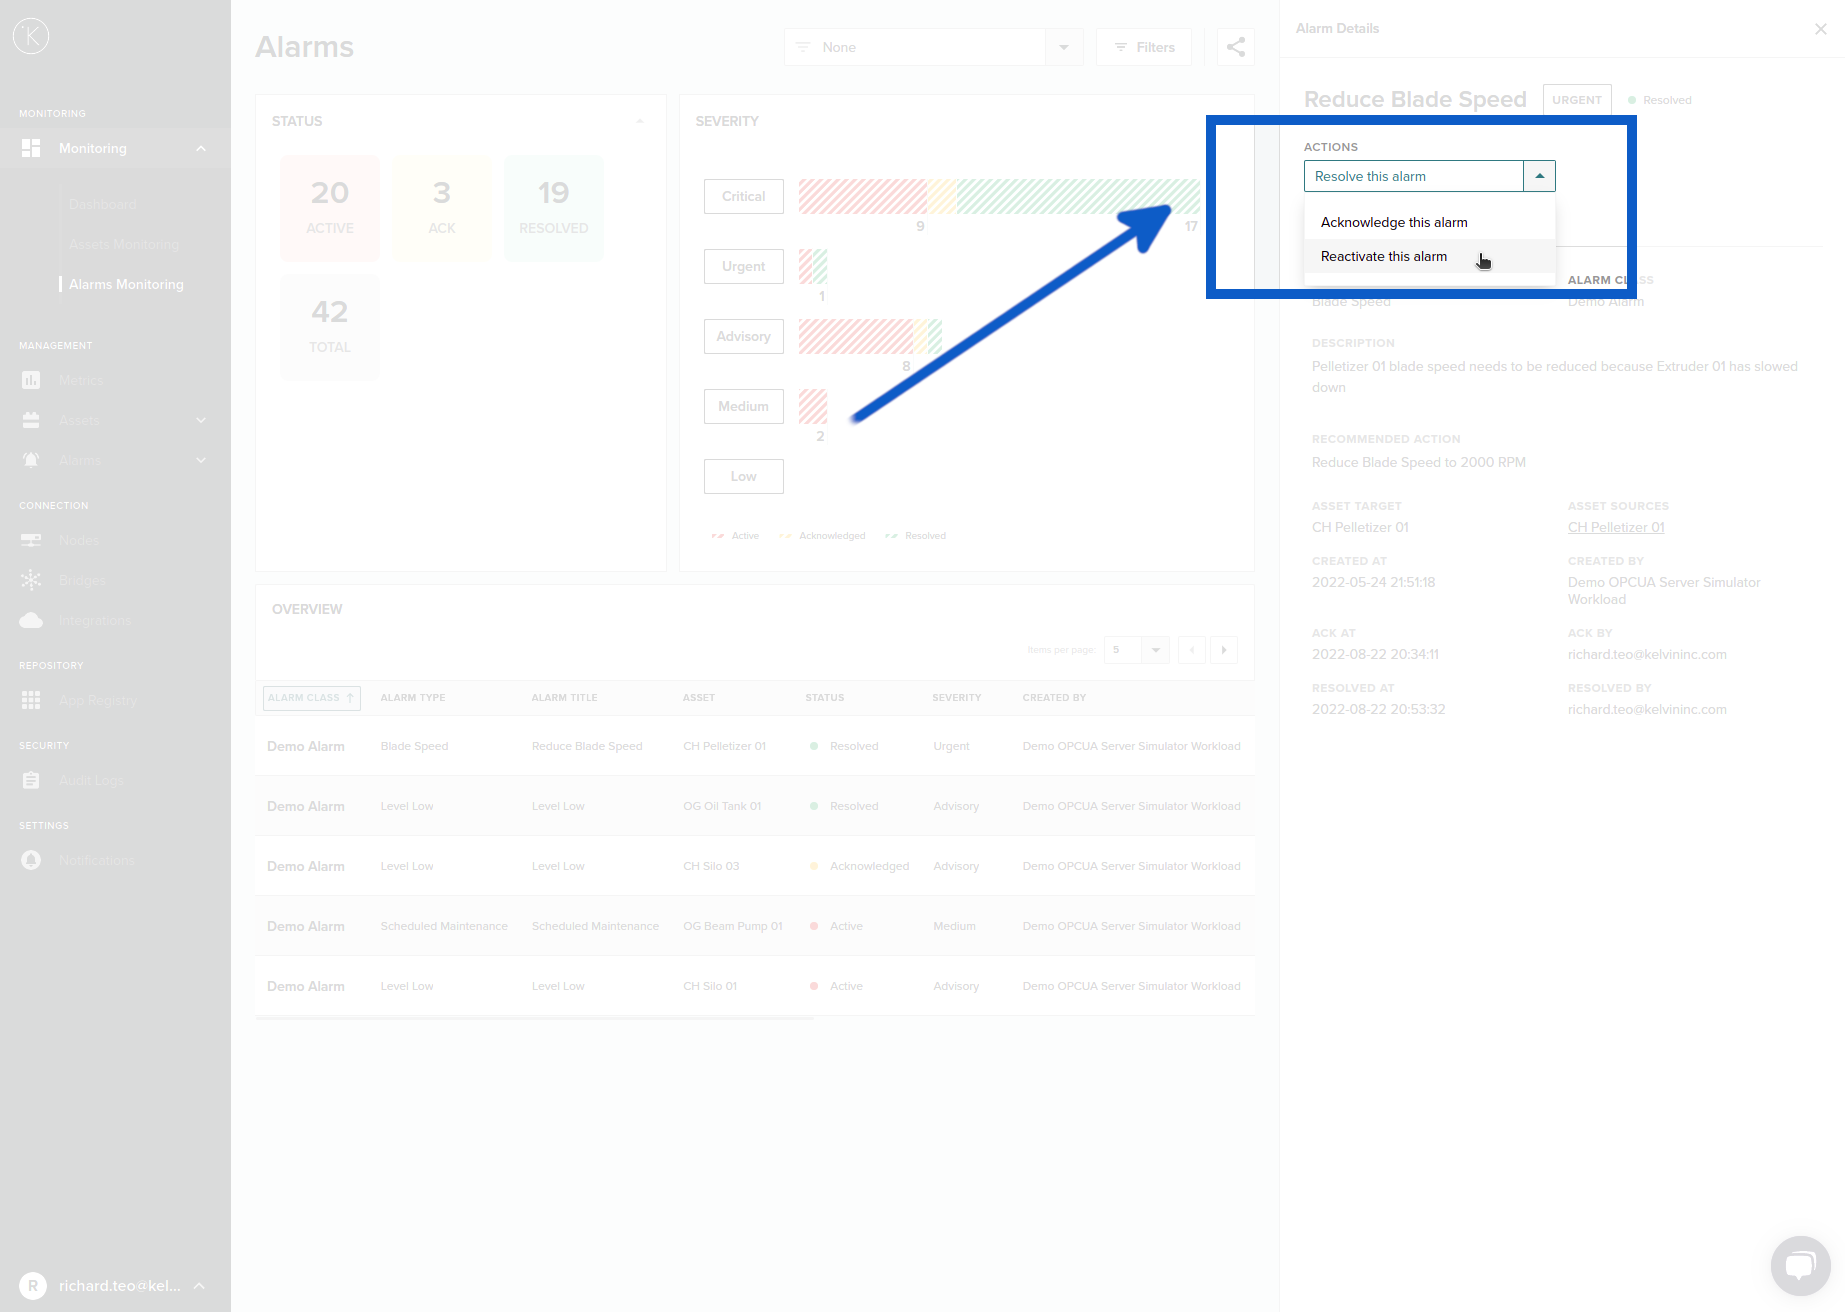
Actions
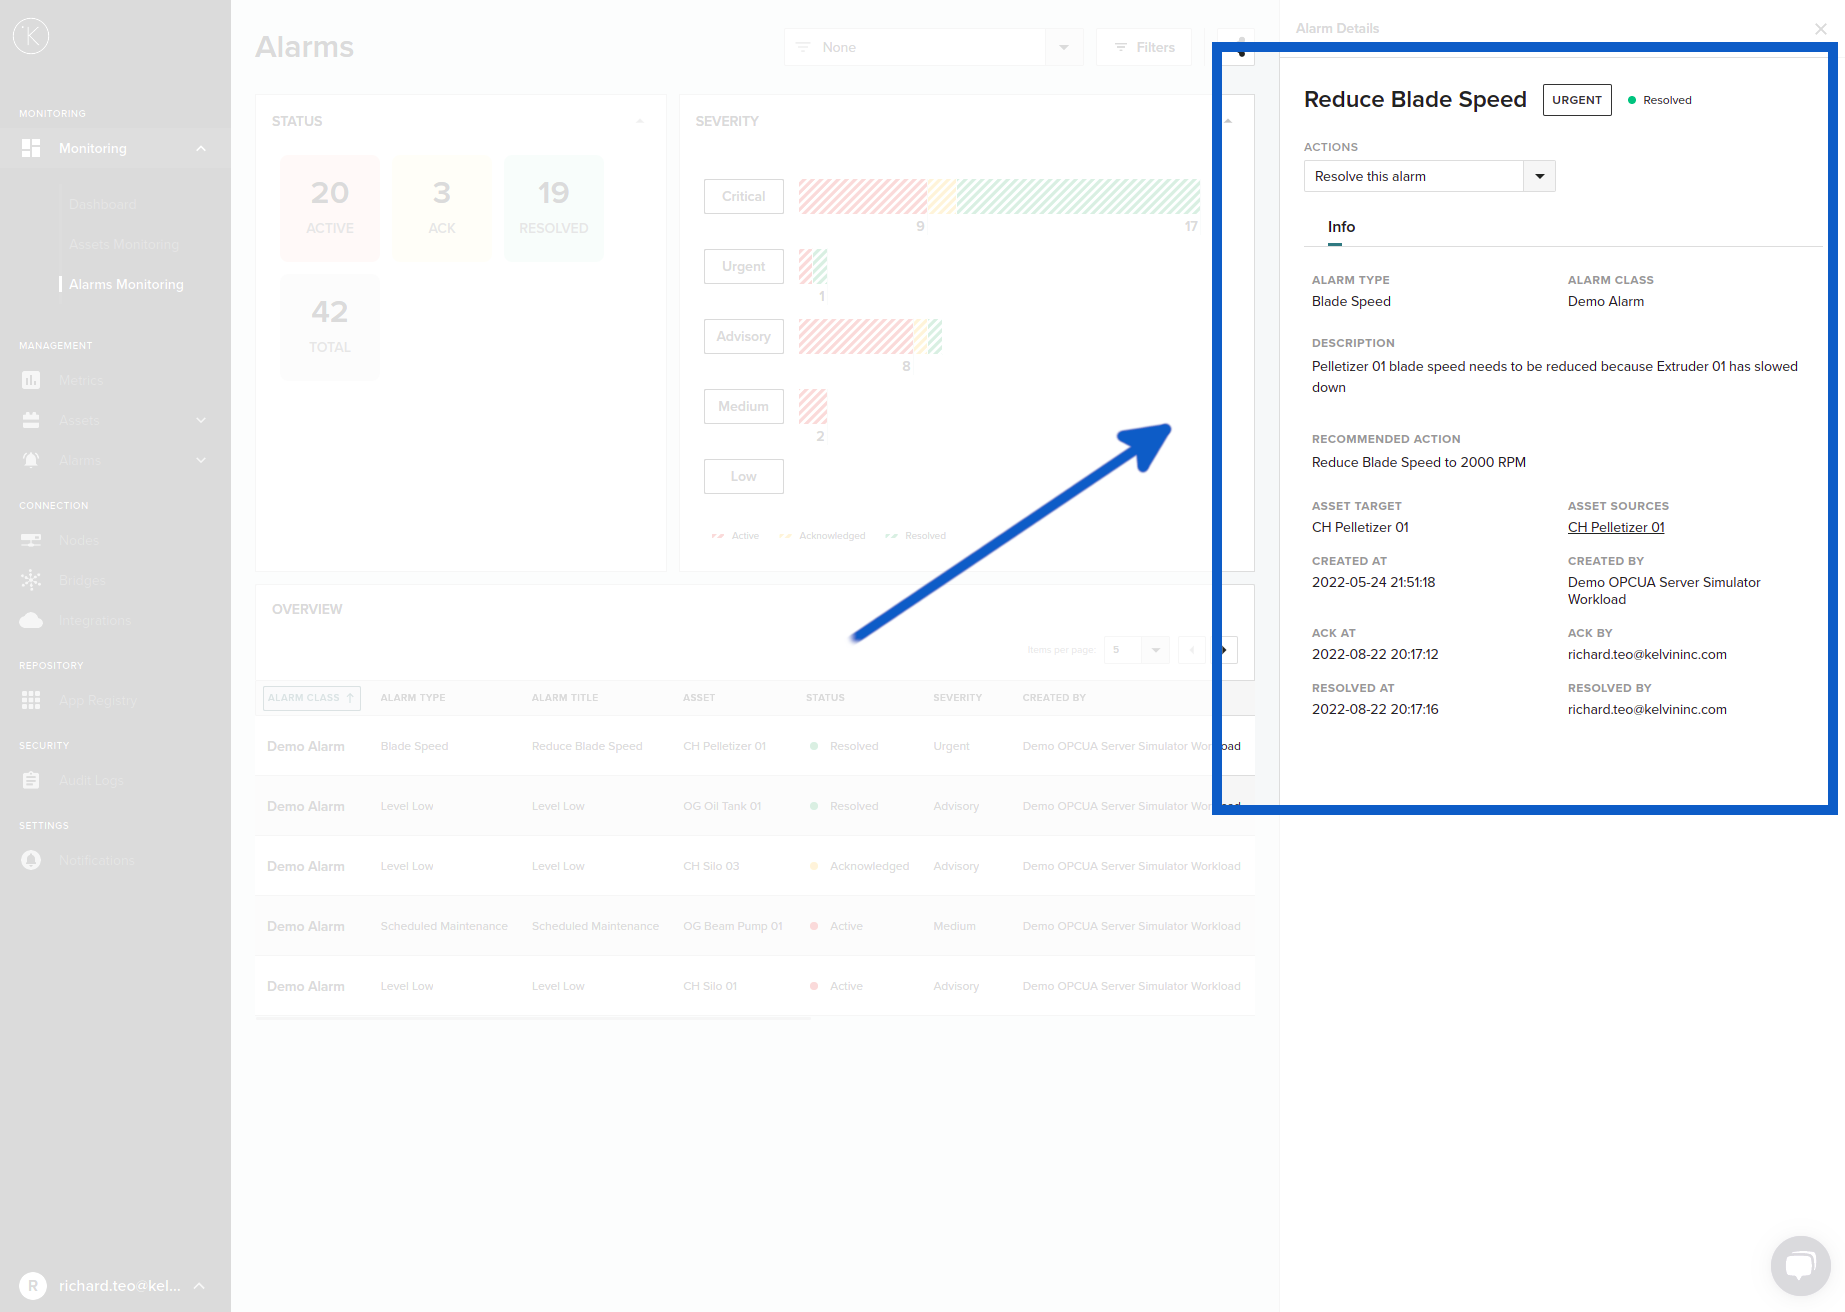
Actions allow you to change the status of the Alarm. Listed here are all the options available.
Not all options will be available on the drop down list. It will depend on the current status of the Alarm.
| Action | Description |
|---|---|
| Acknowledge this alarm | This will change the alarm from active to acknowledged. |
| Resolve this alarm | When the problem has been fixed, you can change the alarm from Acknowledged to Resolved. |
| Re-activate alarm | If the Acknowledge or Resolve status needs to be reversed, then you can re-activate the alarm. This will clear the Acknowledged an Resolved information for this alarm. |
With Failure Detection Alarms, when you click on Resolve this alarm, you will also be taken to a questionnaire feedback form. More information can be found further down under Failure Detection heading.
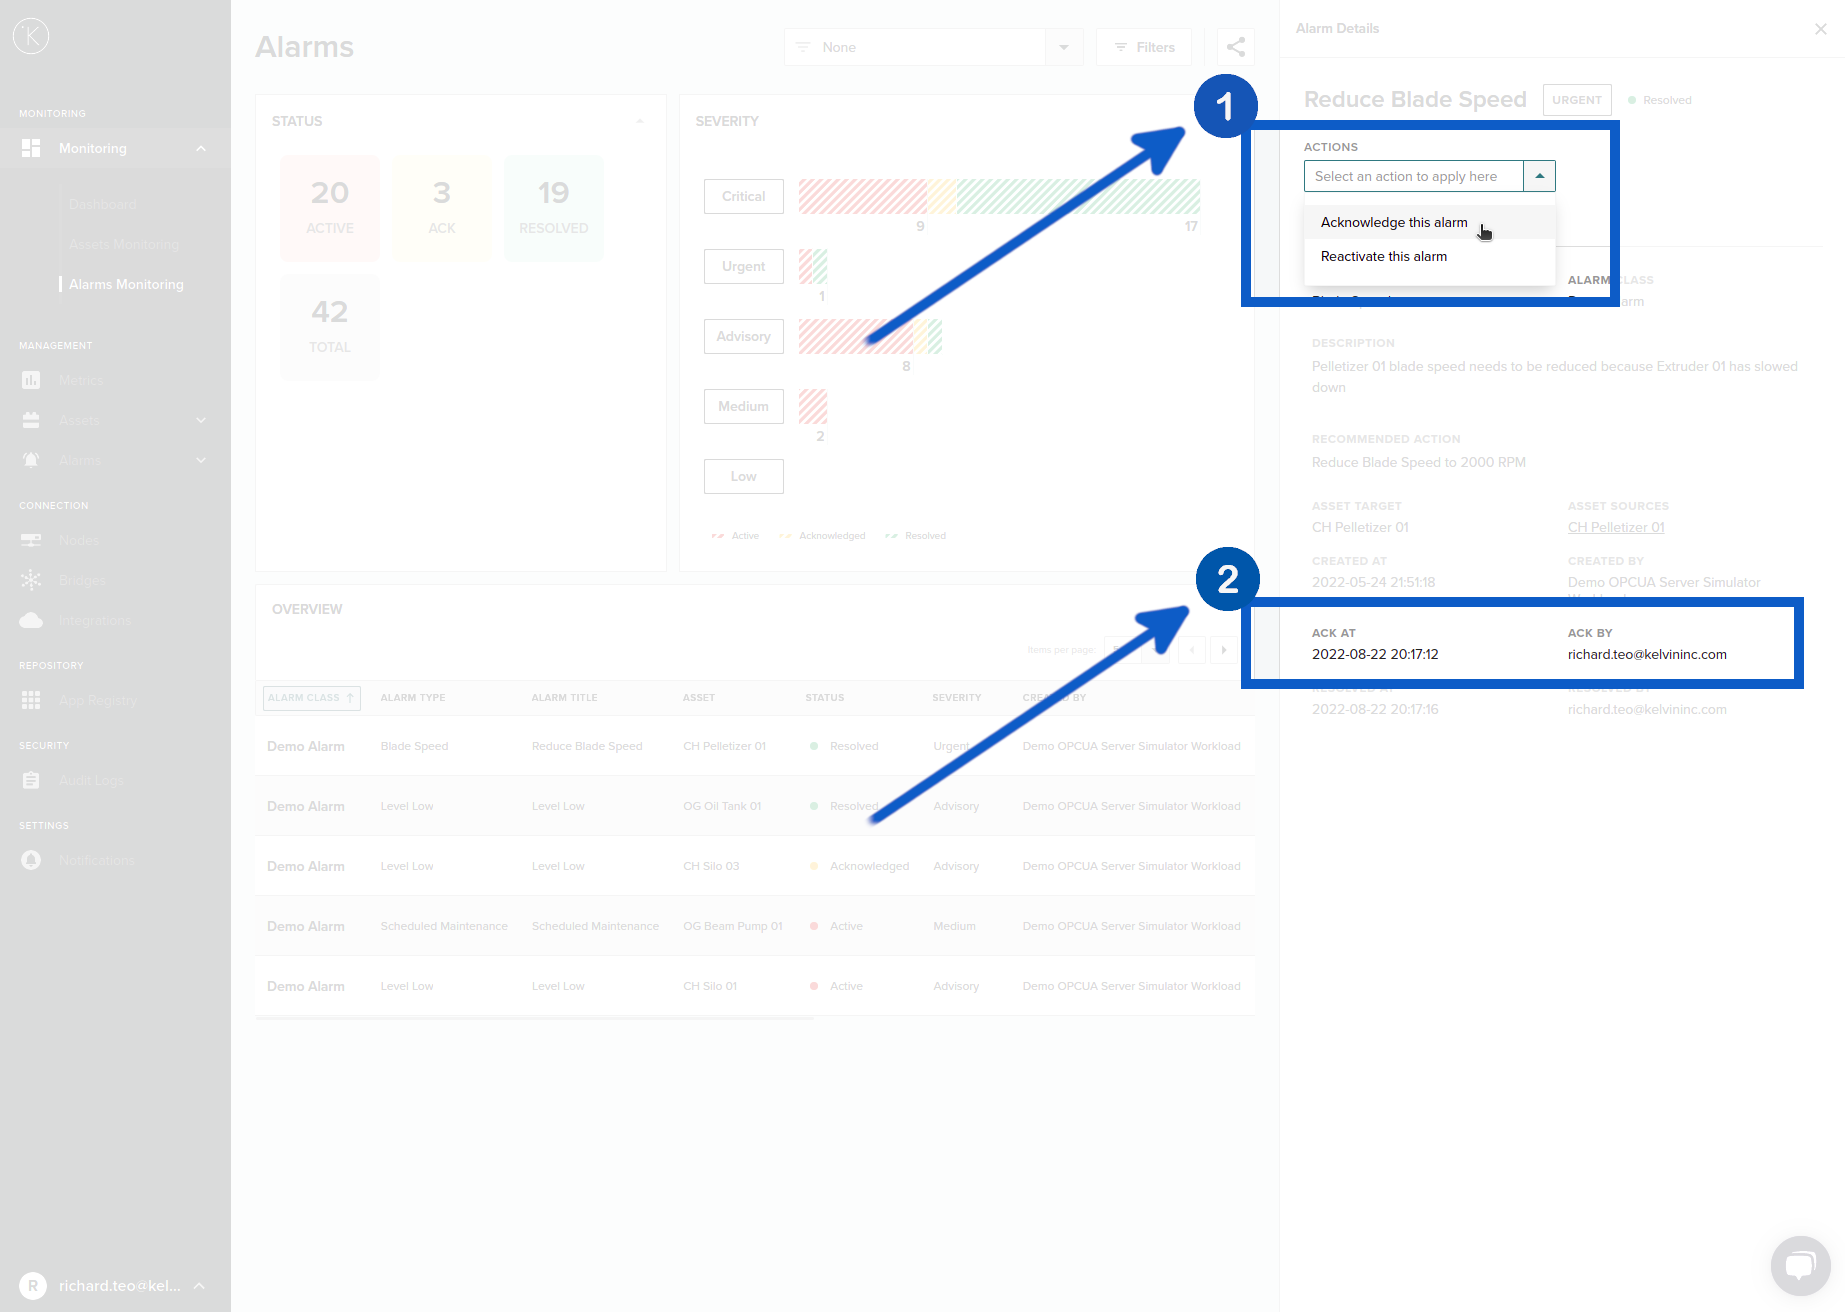
Alarm Active to Acknowledge
When you acknowledge an Alarm, the alarm status will change to Acknowledged and a time will be recorded when the action happened.
When you acknowledge, there will be no confirmation dialog. The Alarm will immediately turn to Acknowledged status. You can always reverse this action, see the instructions further down.
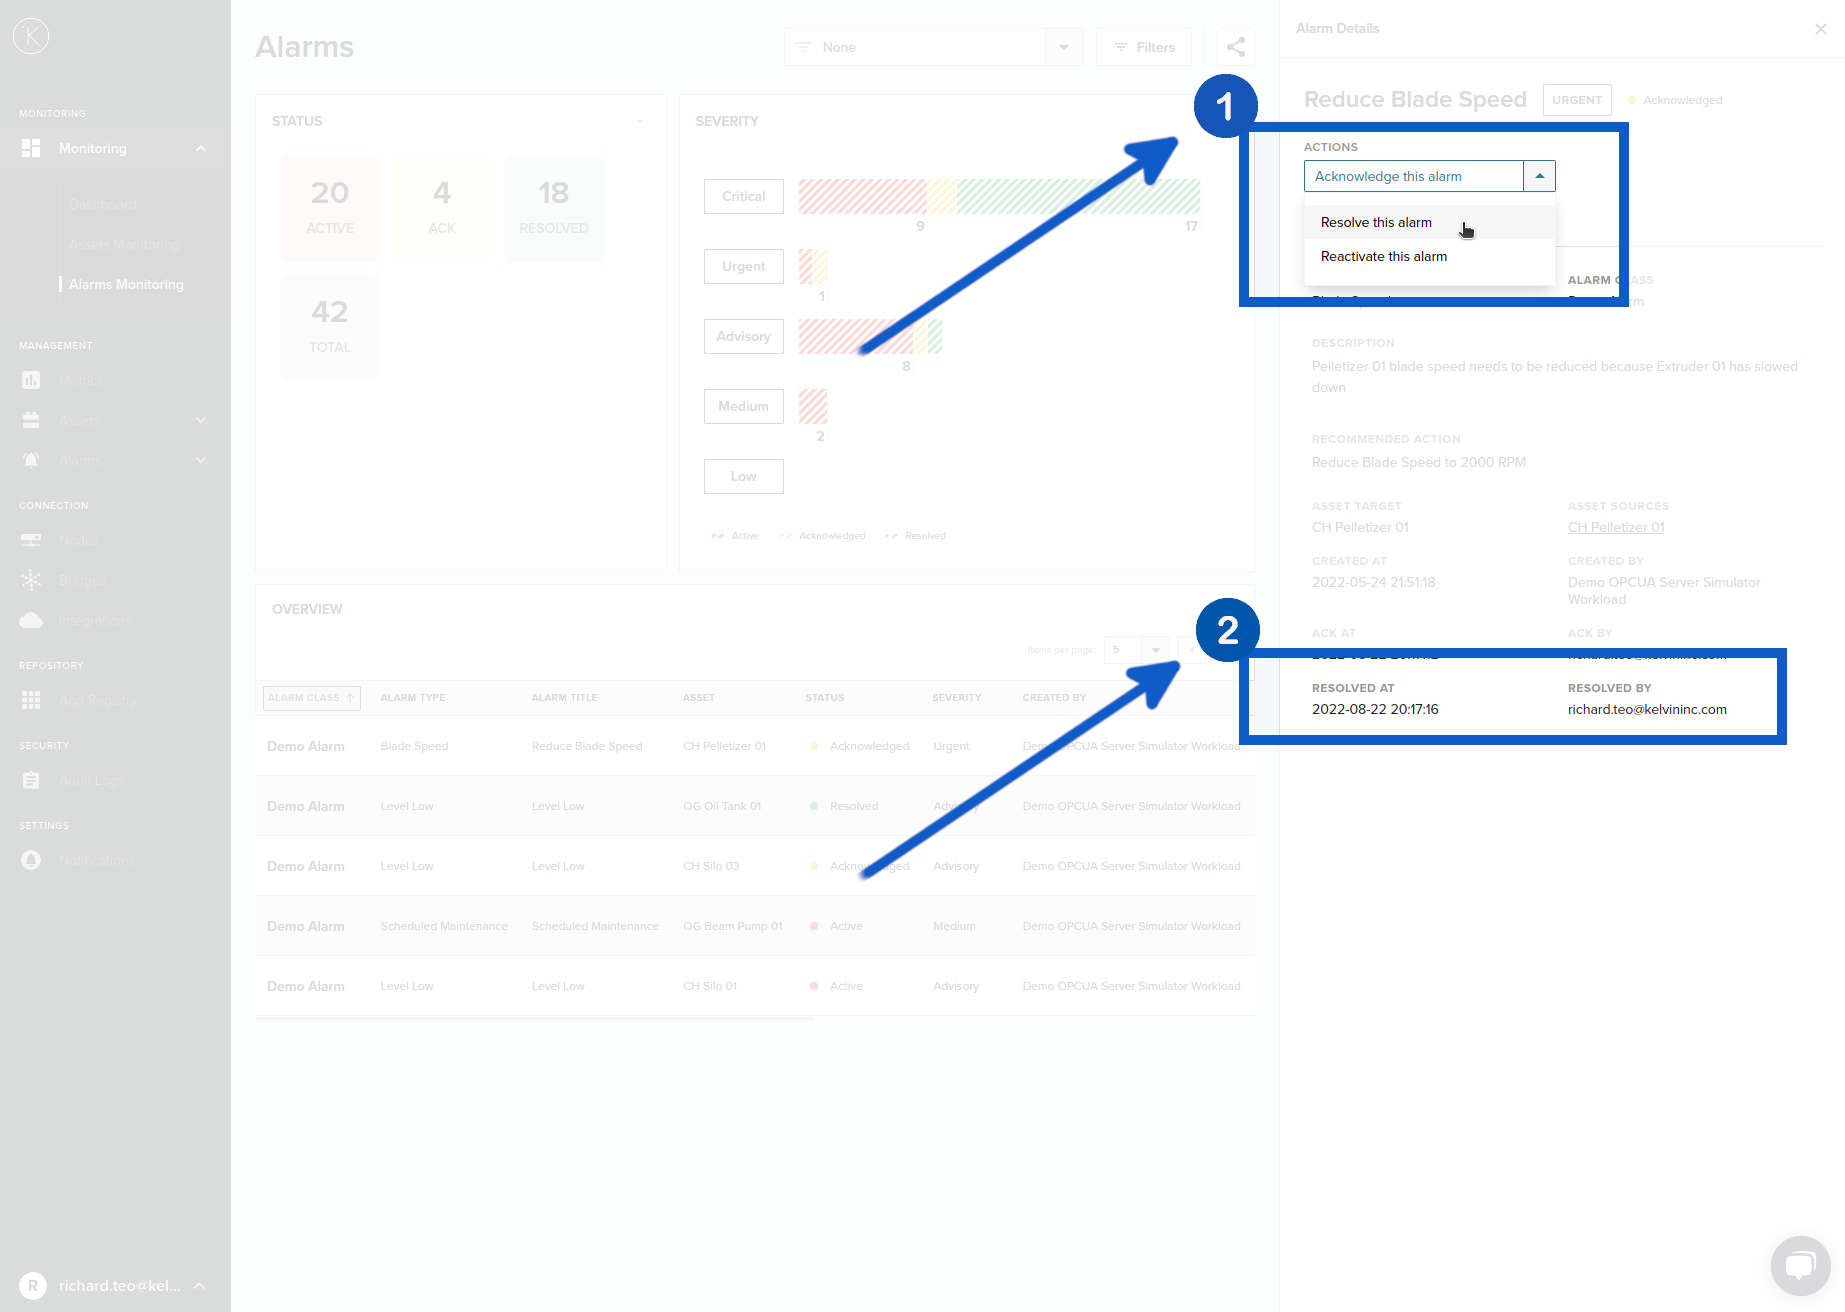
Alarm Acknowledged to Resolved
When you acknowledge an Alarm, the alarm status will change from Acknowledged to Resolved and a time will be recorded when the action happened.
When you change status from acknowledge to resolve, there will be no confirmation dialog. The Alarm will immediately turn to Resolved status. You can always reverse this action, see the instructions further down.
Rollback Actions
In some cases you may need to rollback your actions to Acknowledge or Active. This is not hard.
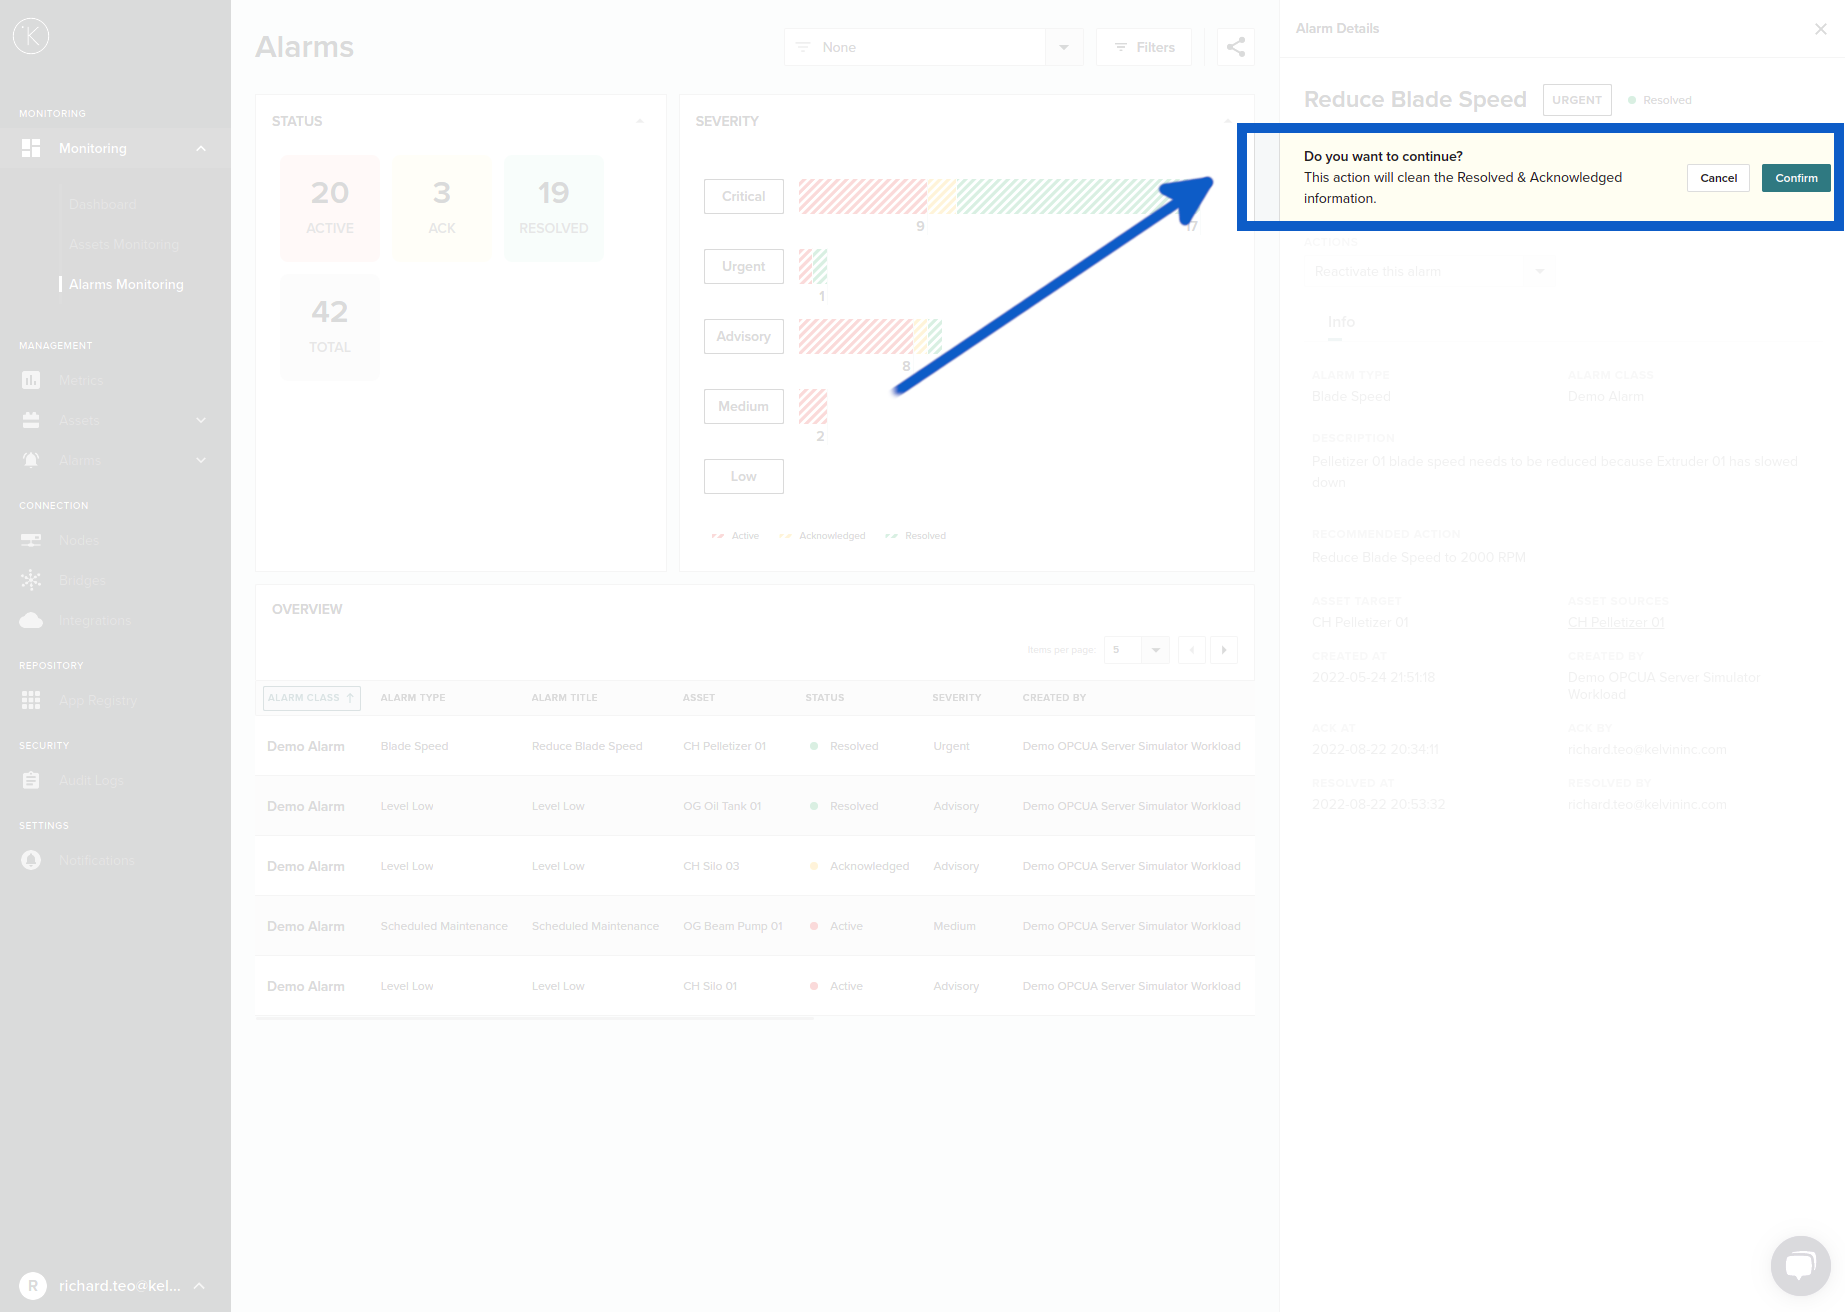
If you roll back your actions, the timestamps on when an action was taken (for example when you Acknowledge an Alarm) will be deleted and is not recoverable. You will receive a warning before the roll-back is performed to confirm your rollback.
Types of Rollback
There are three types of rollback you can do depending on what is the status of the Alarm and what you want to do.
| Roll back | Description |
|---|---|
| Resolved to Acknowledged | This will change the status of the alarm to Acknowledged. The Resolved At and Resolved By information will be erased. The Ack At and Ack By information will not change. |
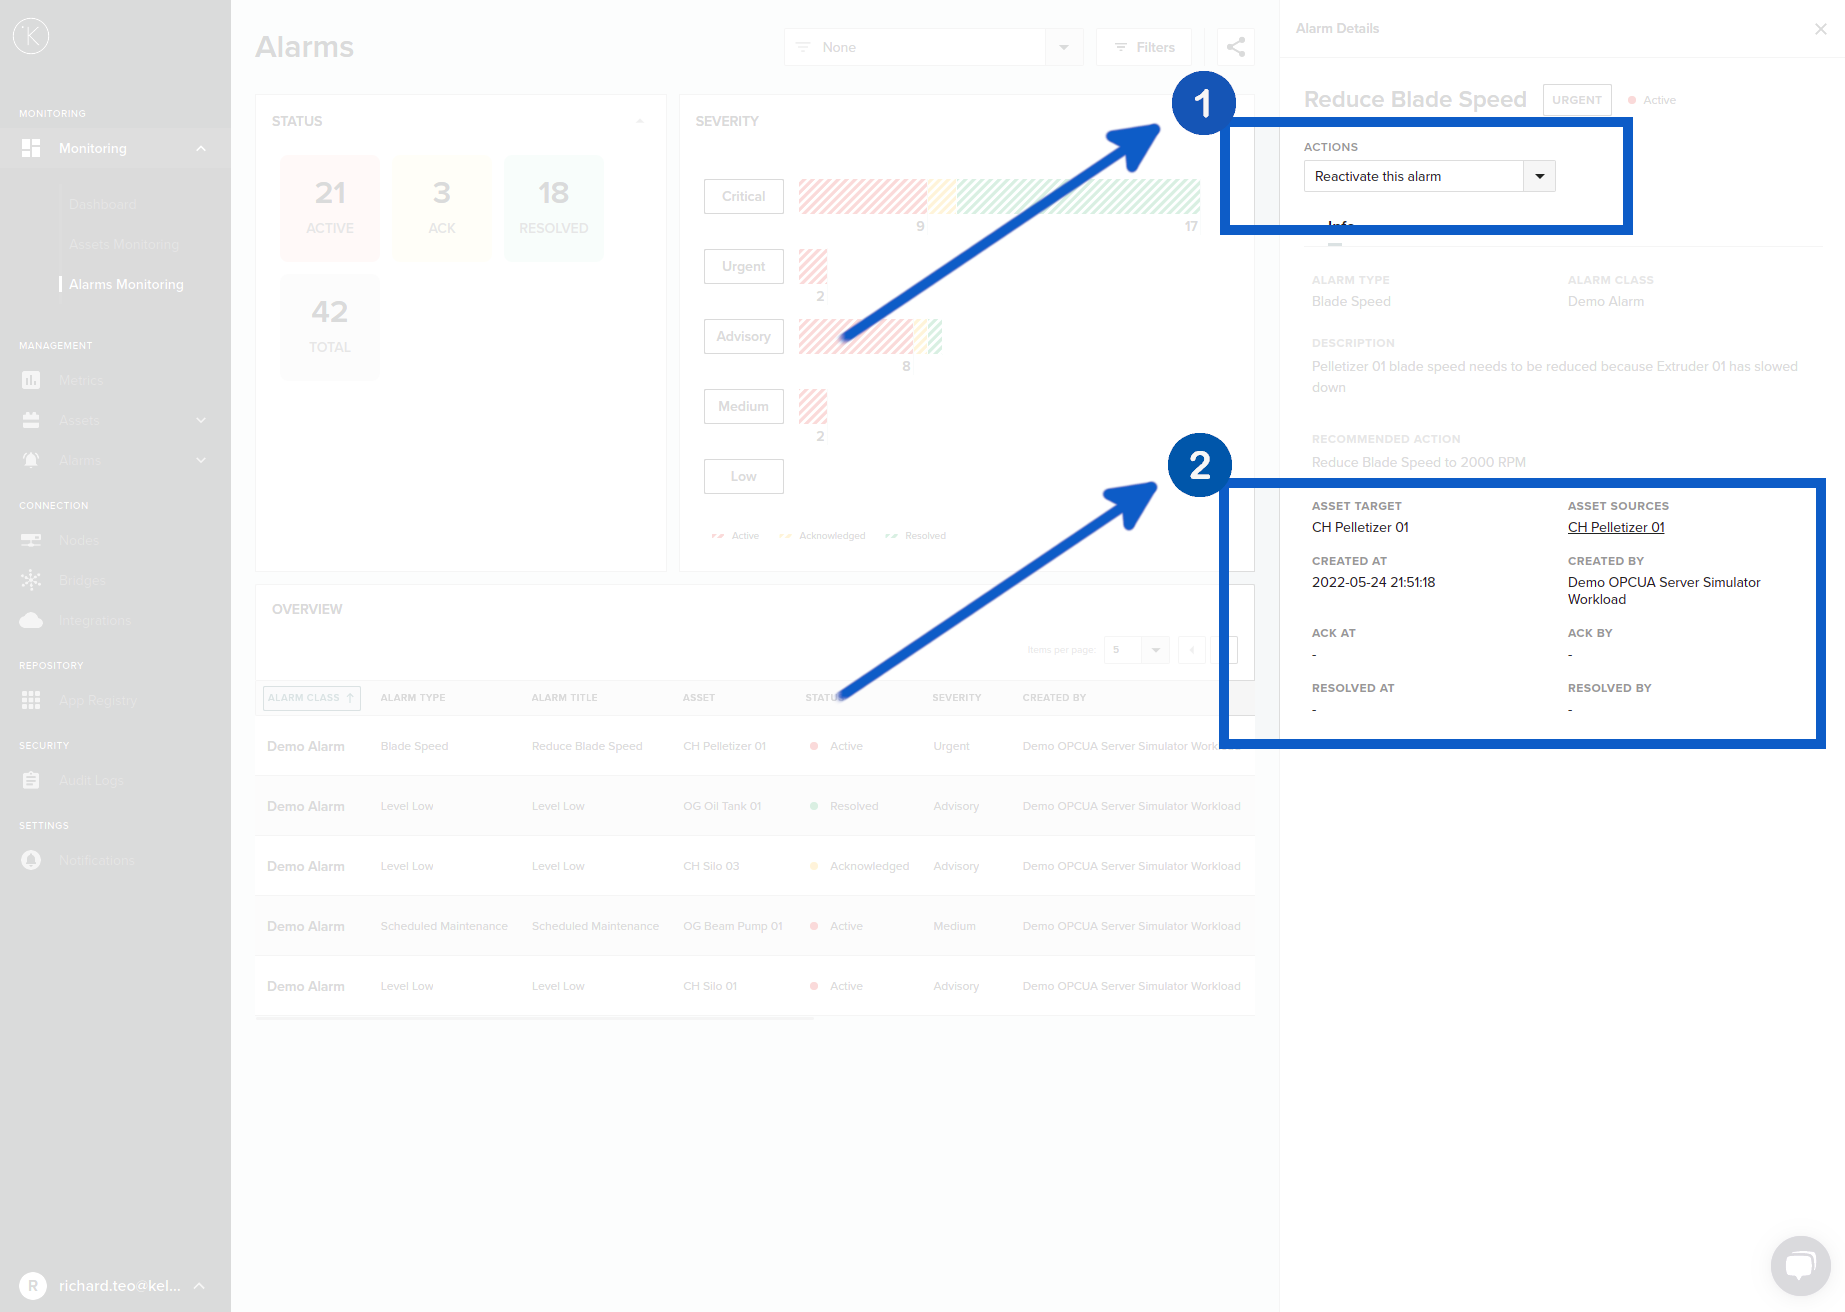
| Acknowledged to Active | This will change the status of the alarm to Active. The Ack At and Ack By information will be erased. The Created At and Created By information will not change. |
| Resolved to Active | This will change the status of the alarm to Active. The Ack At, Ack By, Resolved At and Resolved By information and will be erased. The Created At and Created By information will not change. |
Example Rollback
All the rollback actions follow the same procedure so we will only show one example here. In this example we will rollback two steps from Resolved directly to Active.
From the drop down menu you will have some options for rollback. The options will depend on the current status of the Alarm. In this case the status is Resolved, so you have options to rollback to Acknowledge or Re-Activate. We will Re-Activate the Alarm which will delete the Acknowledge and Resolved information.
When you click on the Re-activate this alarm, a confirmation message will appear warning you that the Resolved and Acknowledge information will be deleted (cleaned). You can click confirm to continue or cancel.
You can see in box two from the beginning of the rollback instructions here and the latest screenshot above that the Ack At, Ack By, Resolved At and Resolved By are deleted (cleaned).
The procedure is the same for other rollback options, just the wording and options will be different.
Alarm Details - Failure Detection
The Failure Detection Alarms have a few extra features than the standard API generated alarms.
Analysis
There is an analysis section in the Details page that will give you more information about what caused the Failure Detection Alarm.
The information will depend on which sensor triggered the Alarm and what type of Kelvin Part it is.
In this sample below the Failure Detection Alarm was triggered for a centrifugal pump bearing from a vibration sensor. In this case FFT analytics was used and the graph displayed in the Analysis section is showing the FFT results and the trigger levels.
Feedback Form
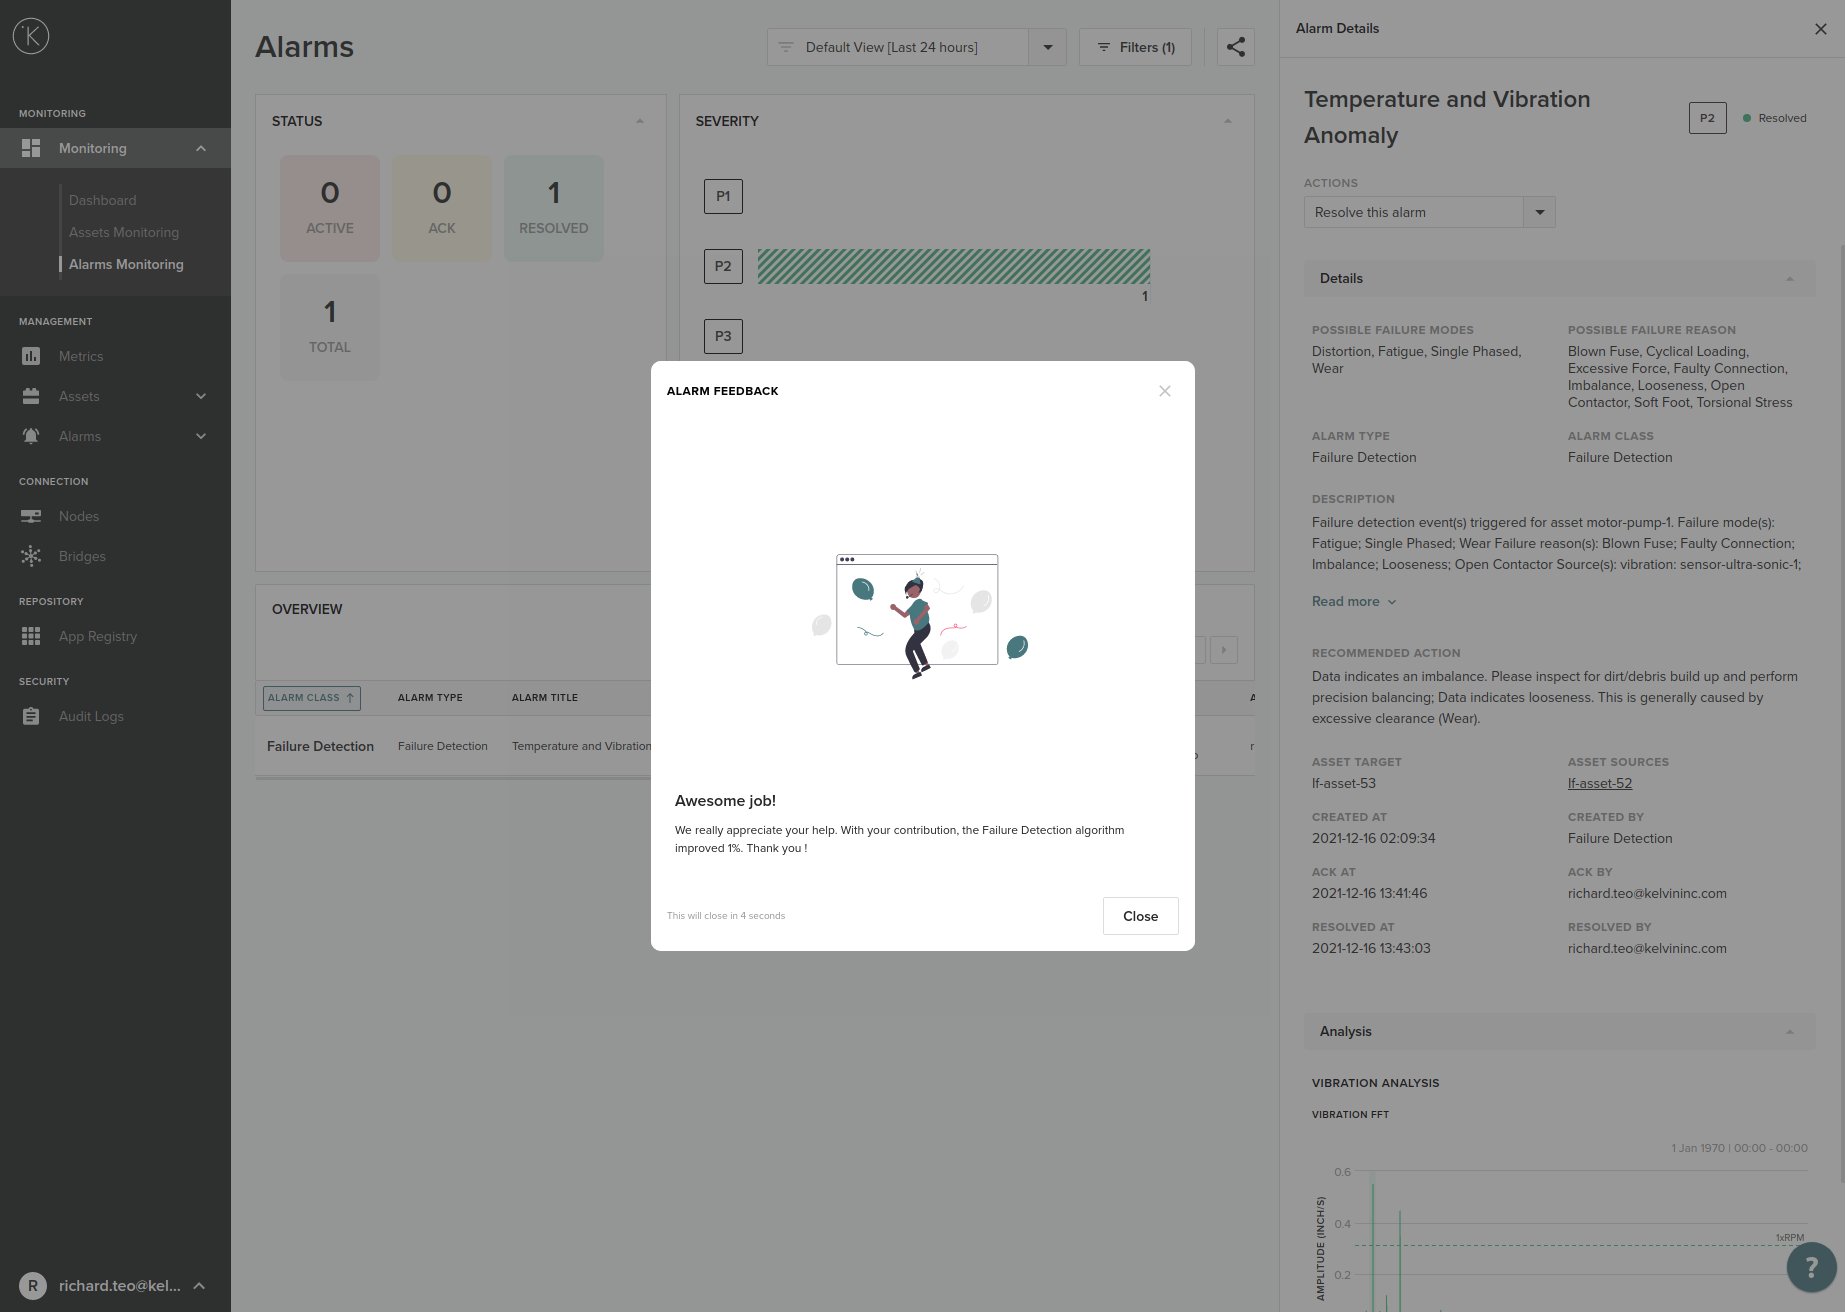
When a Failure Detection Alarm is marked as resolved, then you will be asked a few questions. This only takes one minute and can help us improve the accuracy of your Failure Detection algorithms.
After you click on "Resolved this Alarm" a popup with the questionnaire will appear.
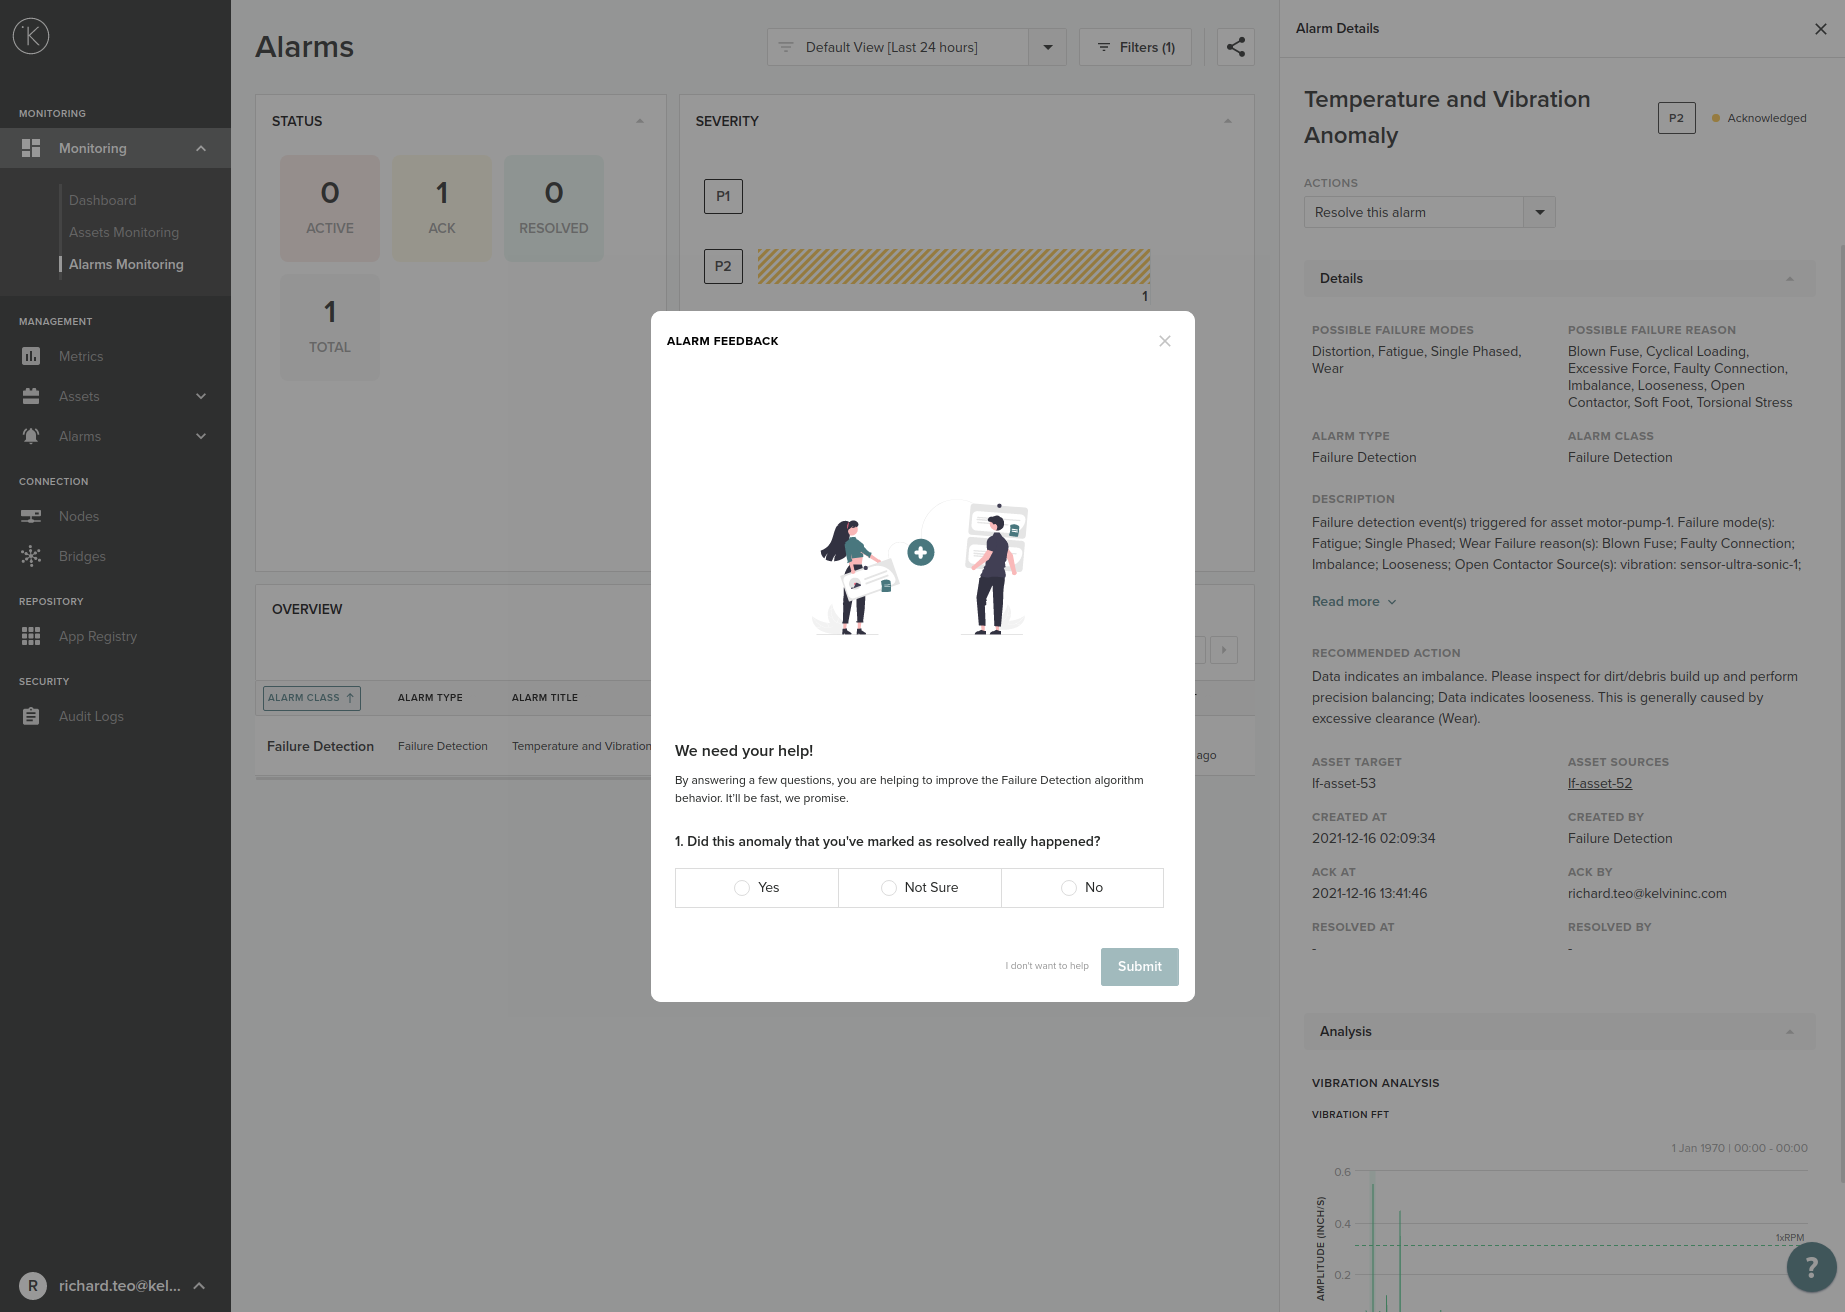
There are only 5 simple multiple choice questions.
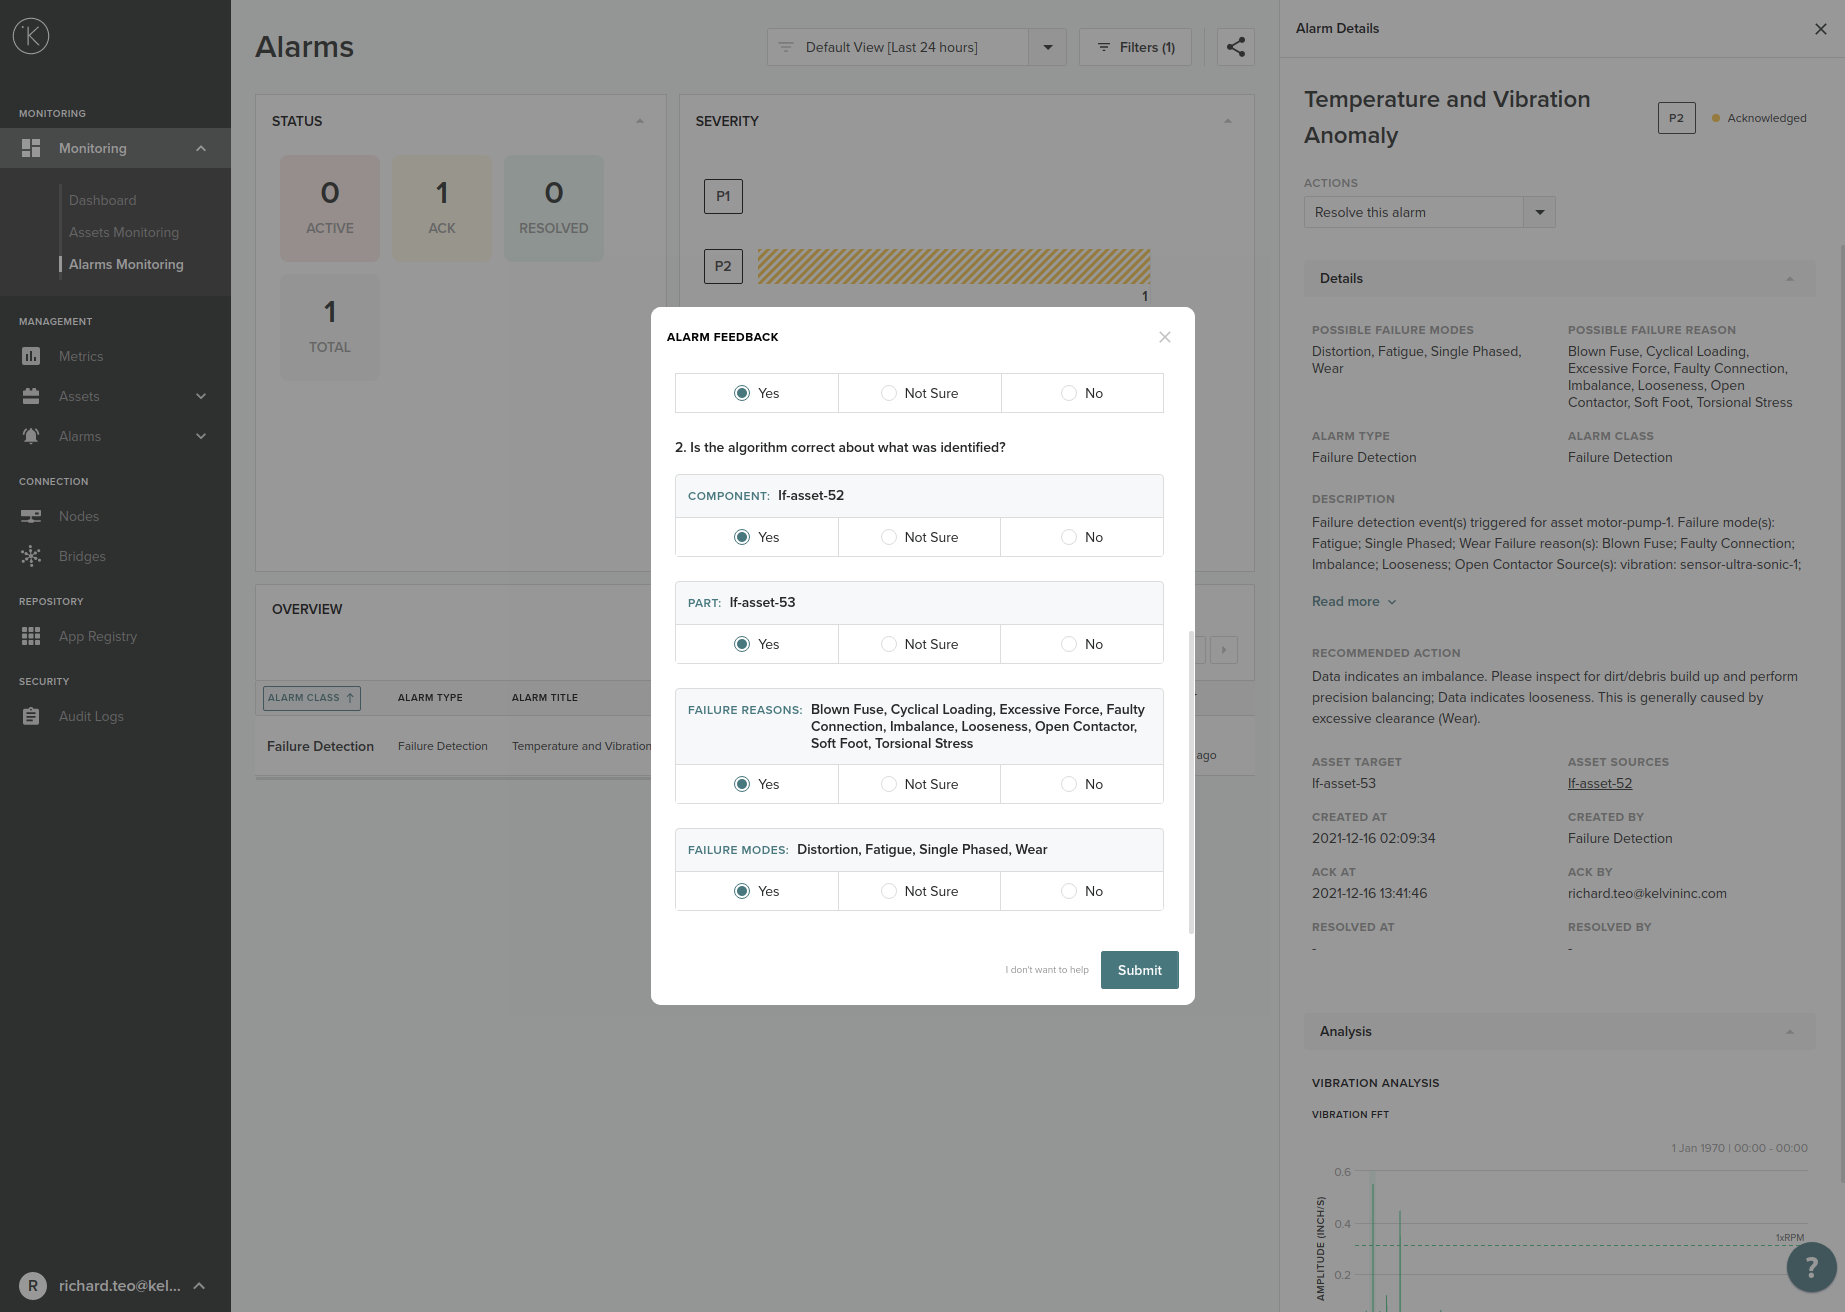
When you are finished, then you can click submit.
Alarm Filtering
Quick Filter
You can create a quick filter with the option to save it as a predefined Filter View for future use.
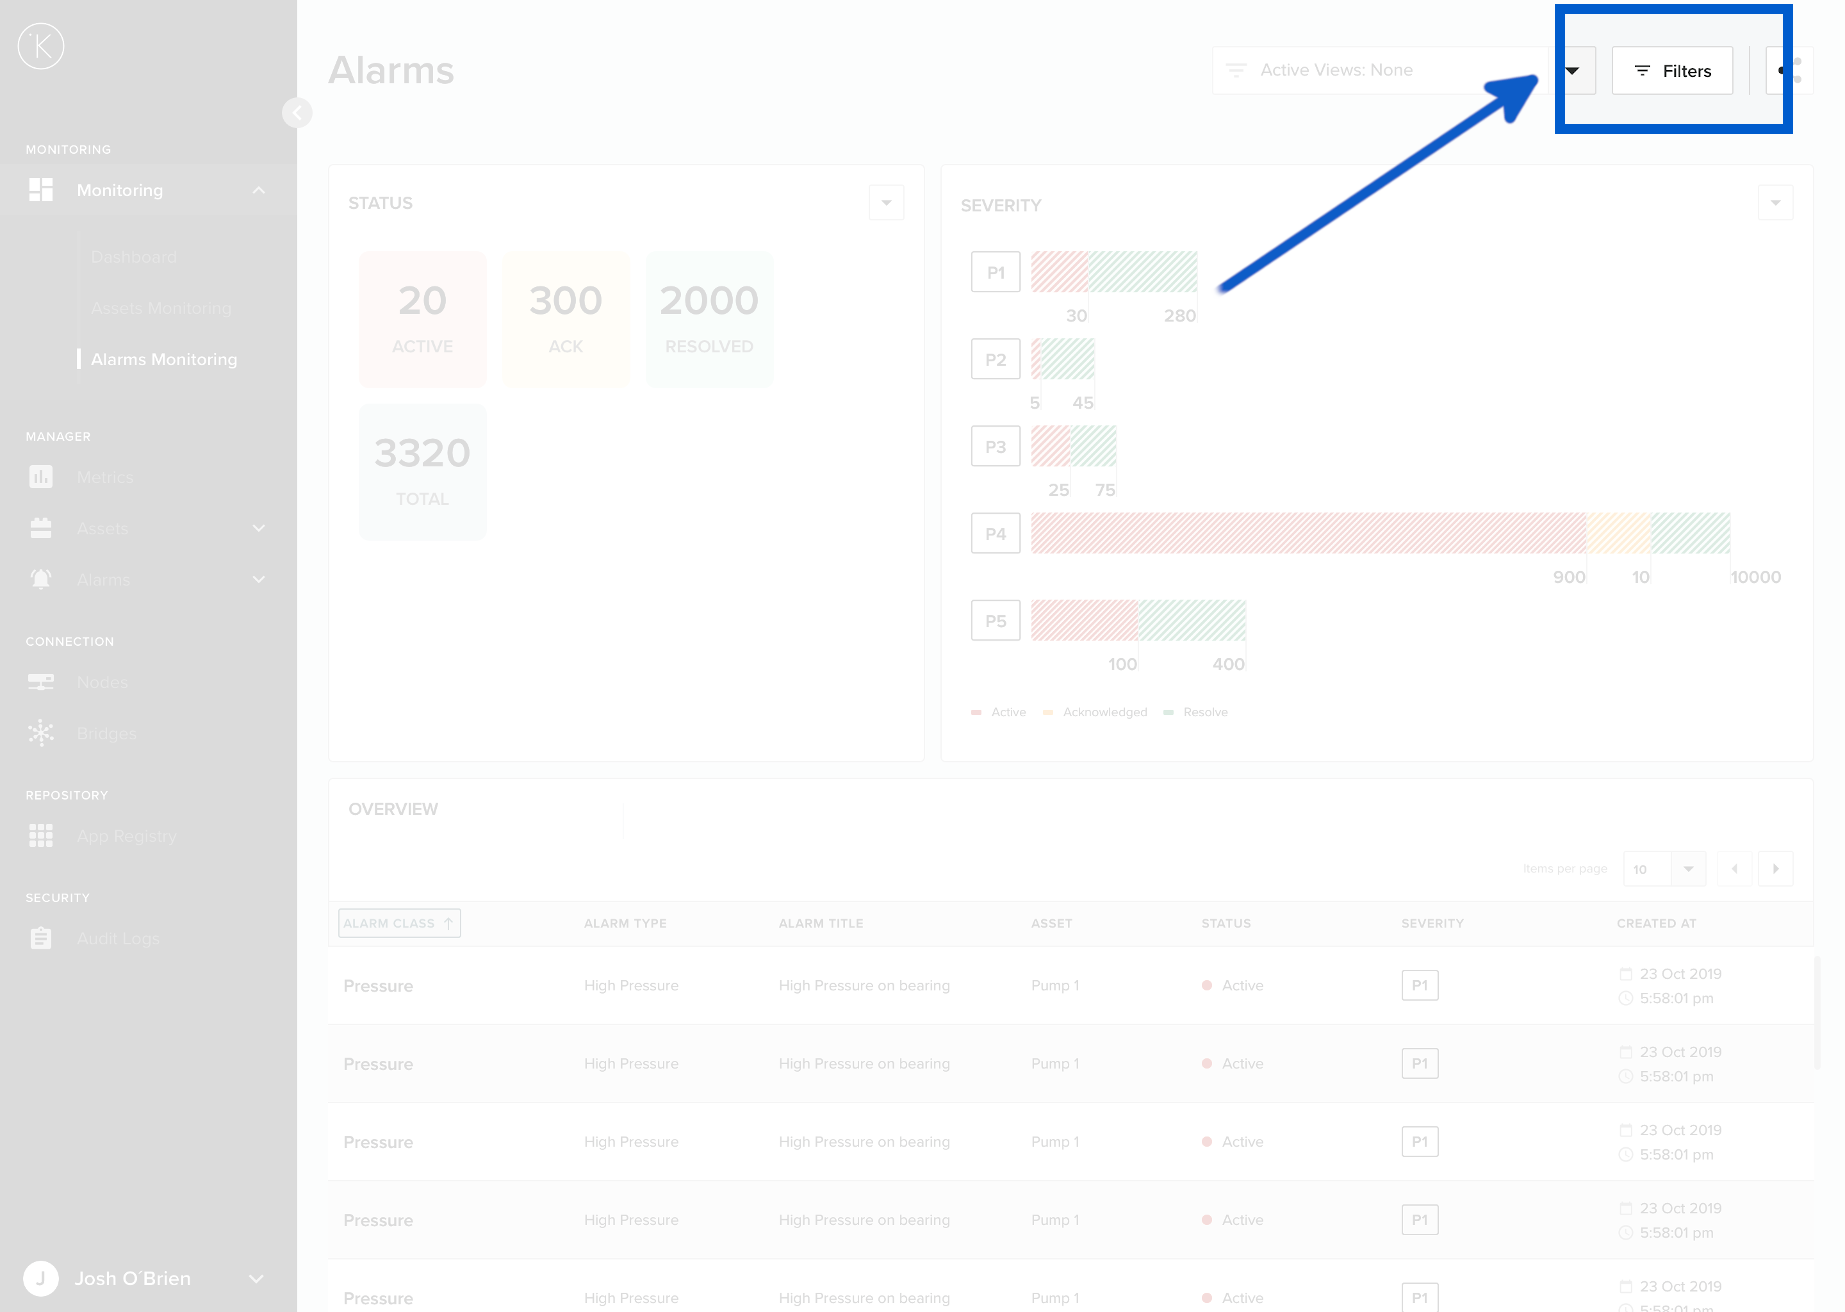
A popup window will appear which is the same as when you create a filter view.
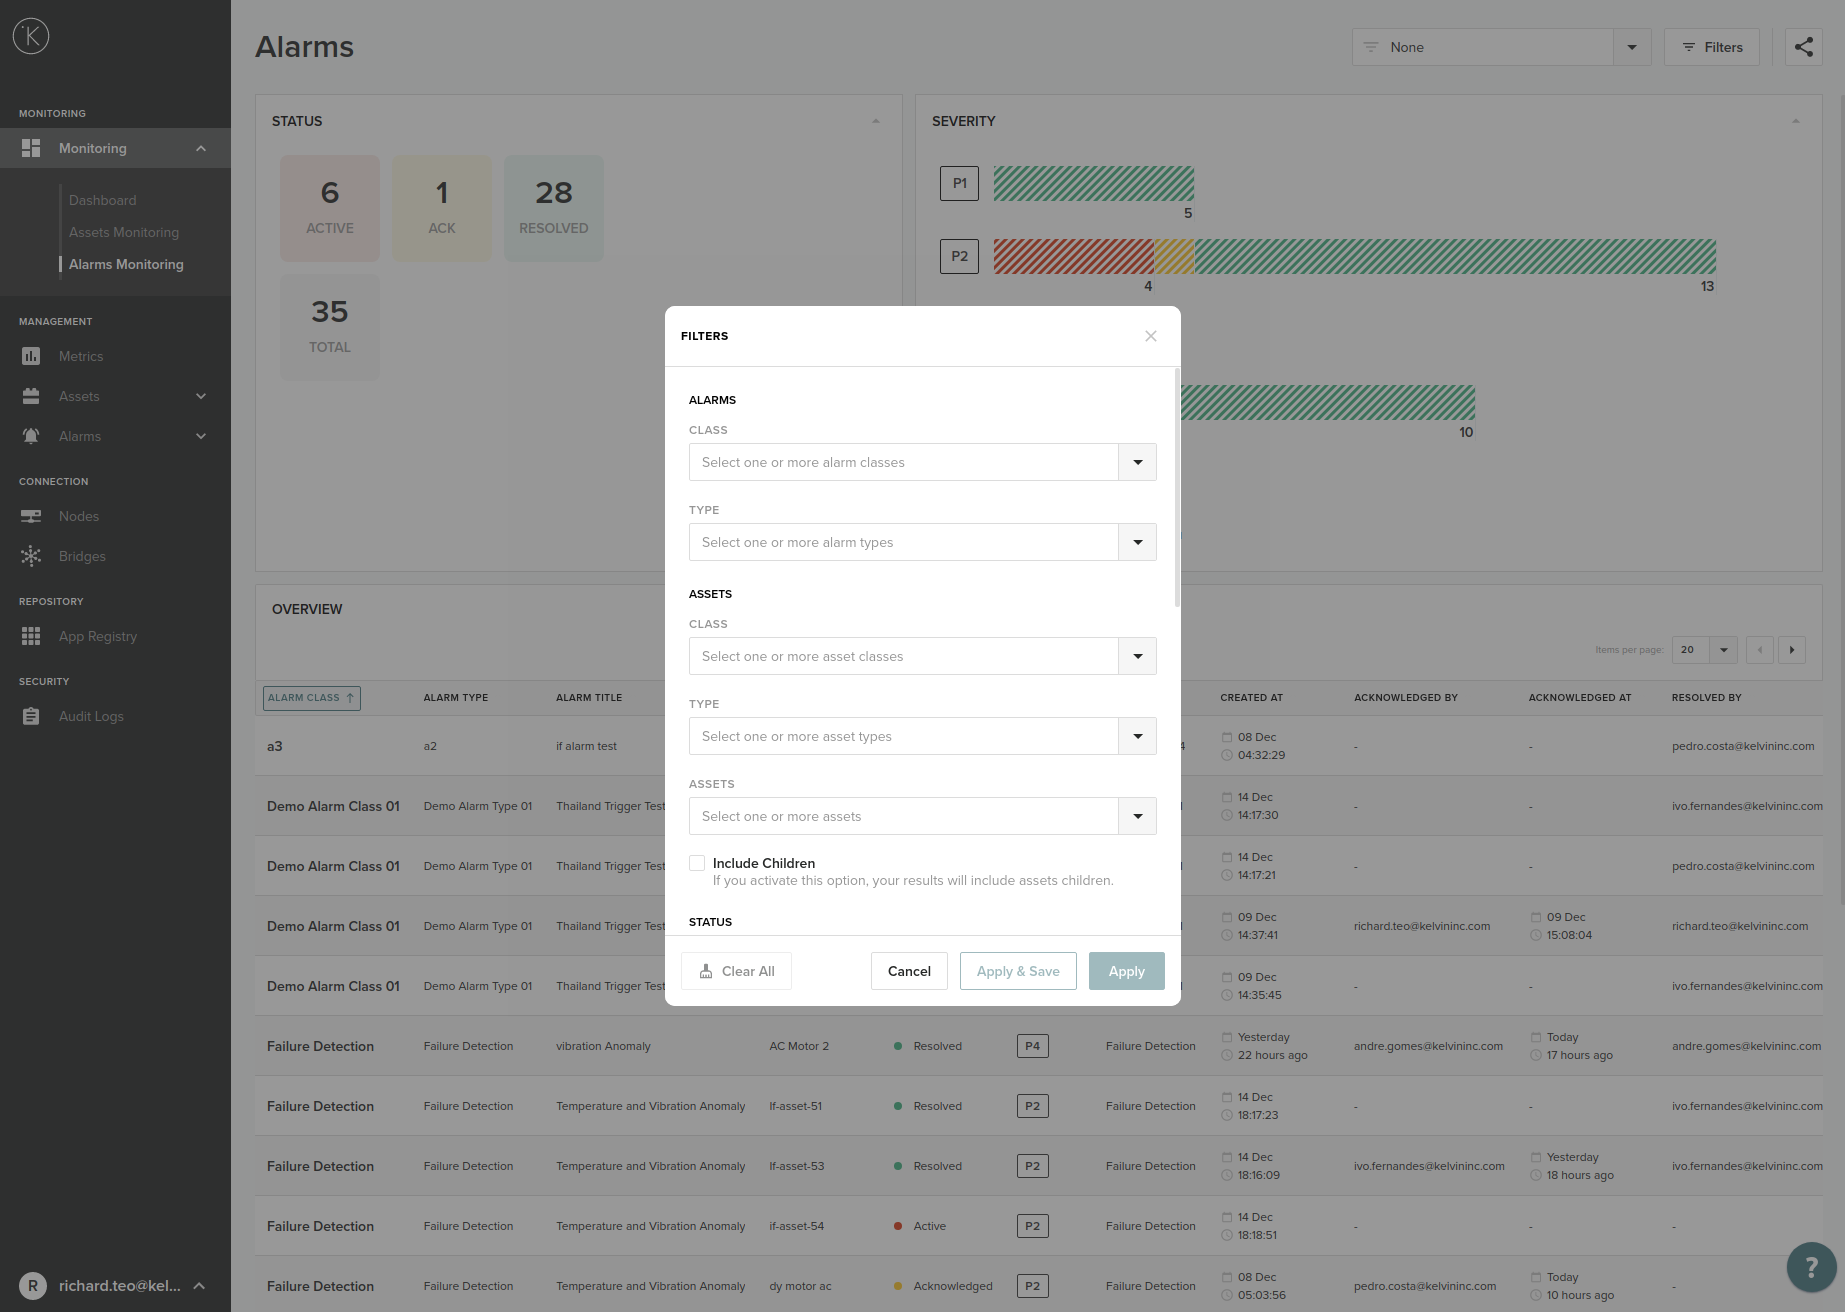
When you have setup the filter to your satisfaction, then you will have a few options;
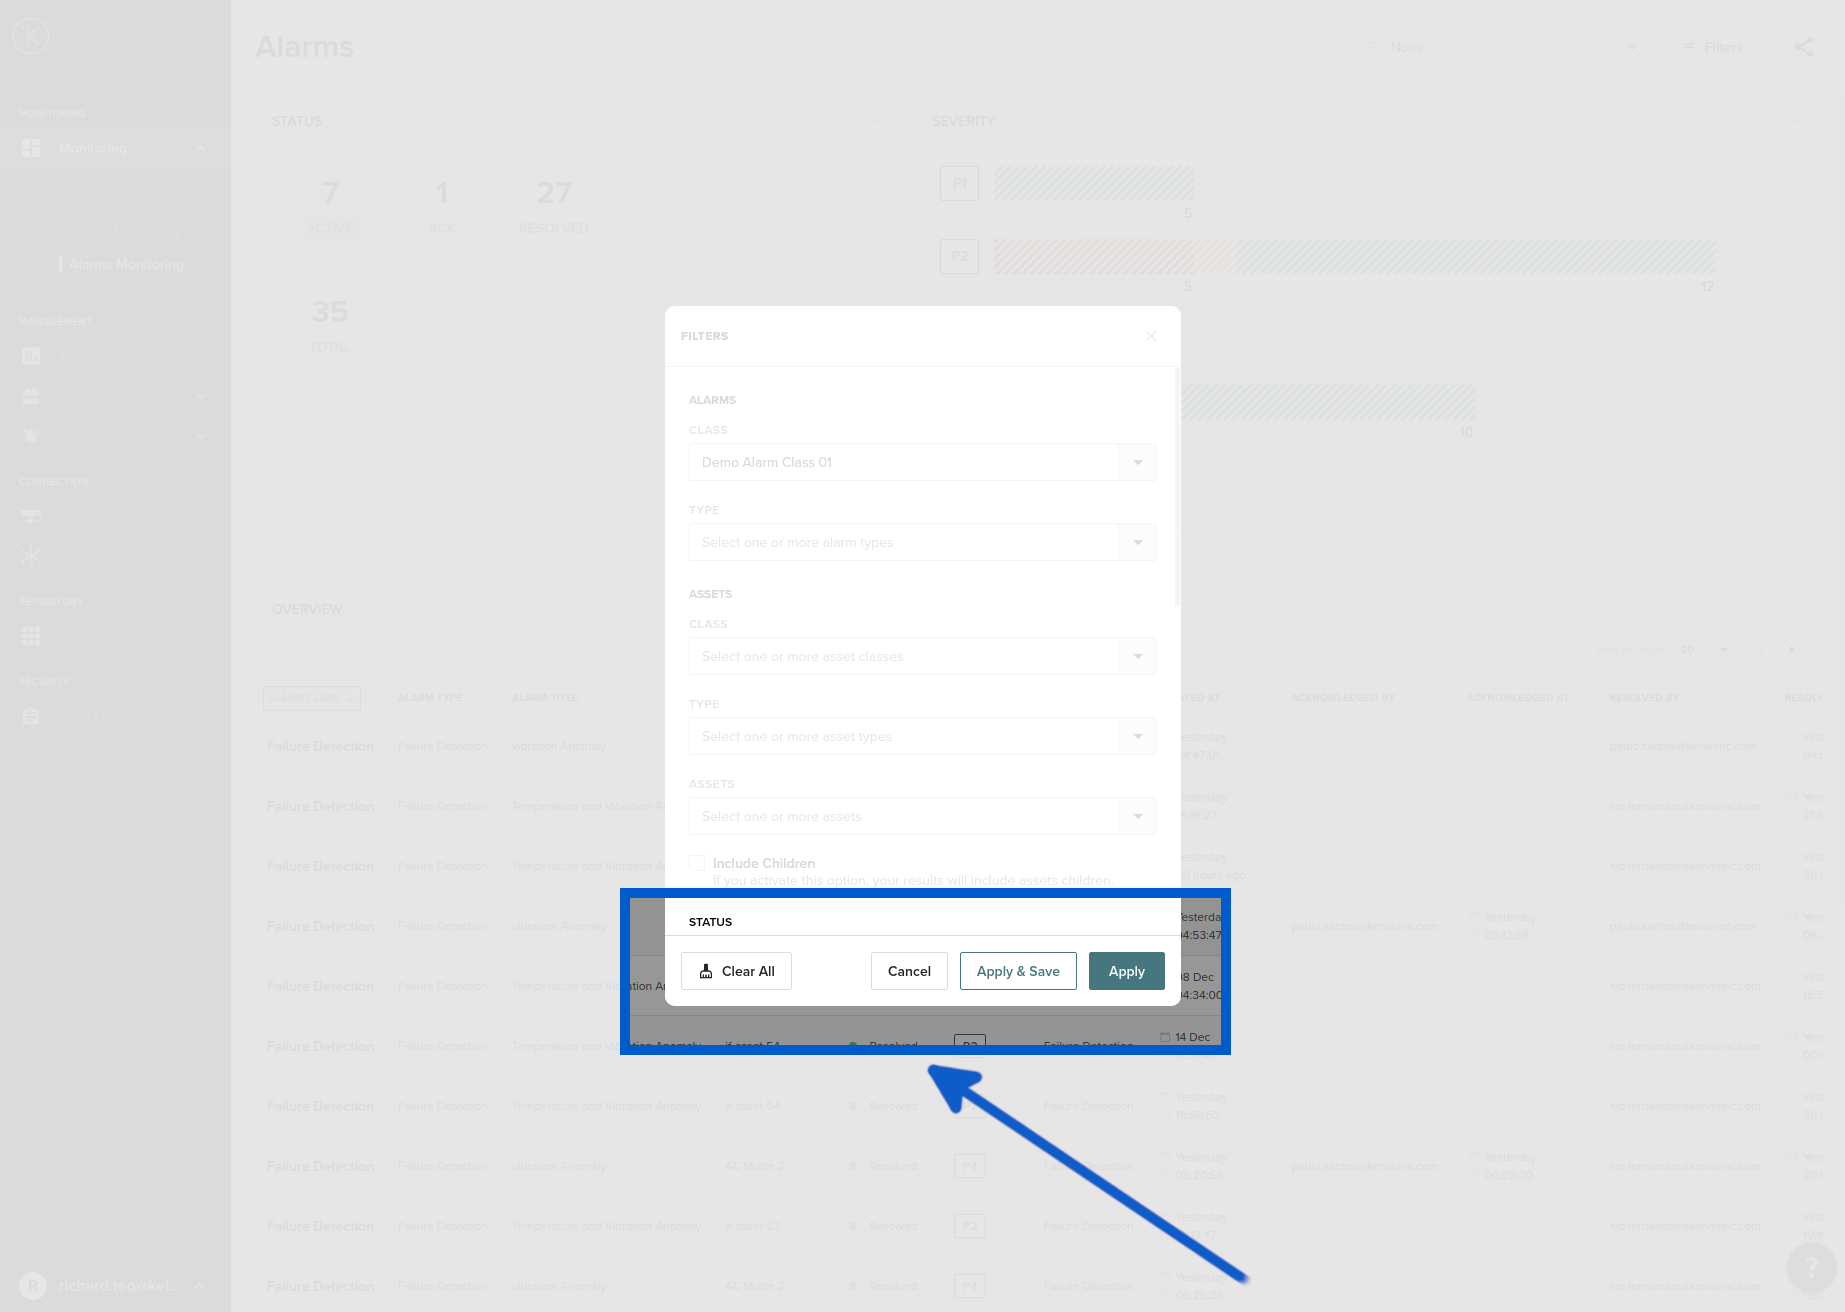
| Option | Description |
|---|---|
| Clear All | This will clear all the filters in place. |
| Cancel | This will not perform any filtering and will return to the list view. |
| Apply & Save | This will apply your filter options to the current view and also save it for future use through the quick filter option. |
| Apply | This will apply your filter options to the current view only. |
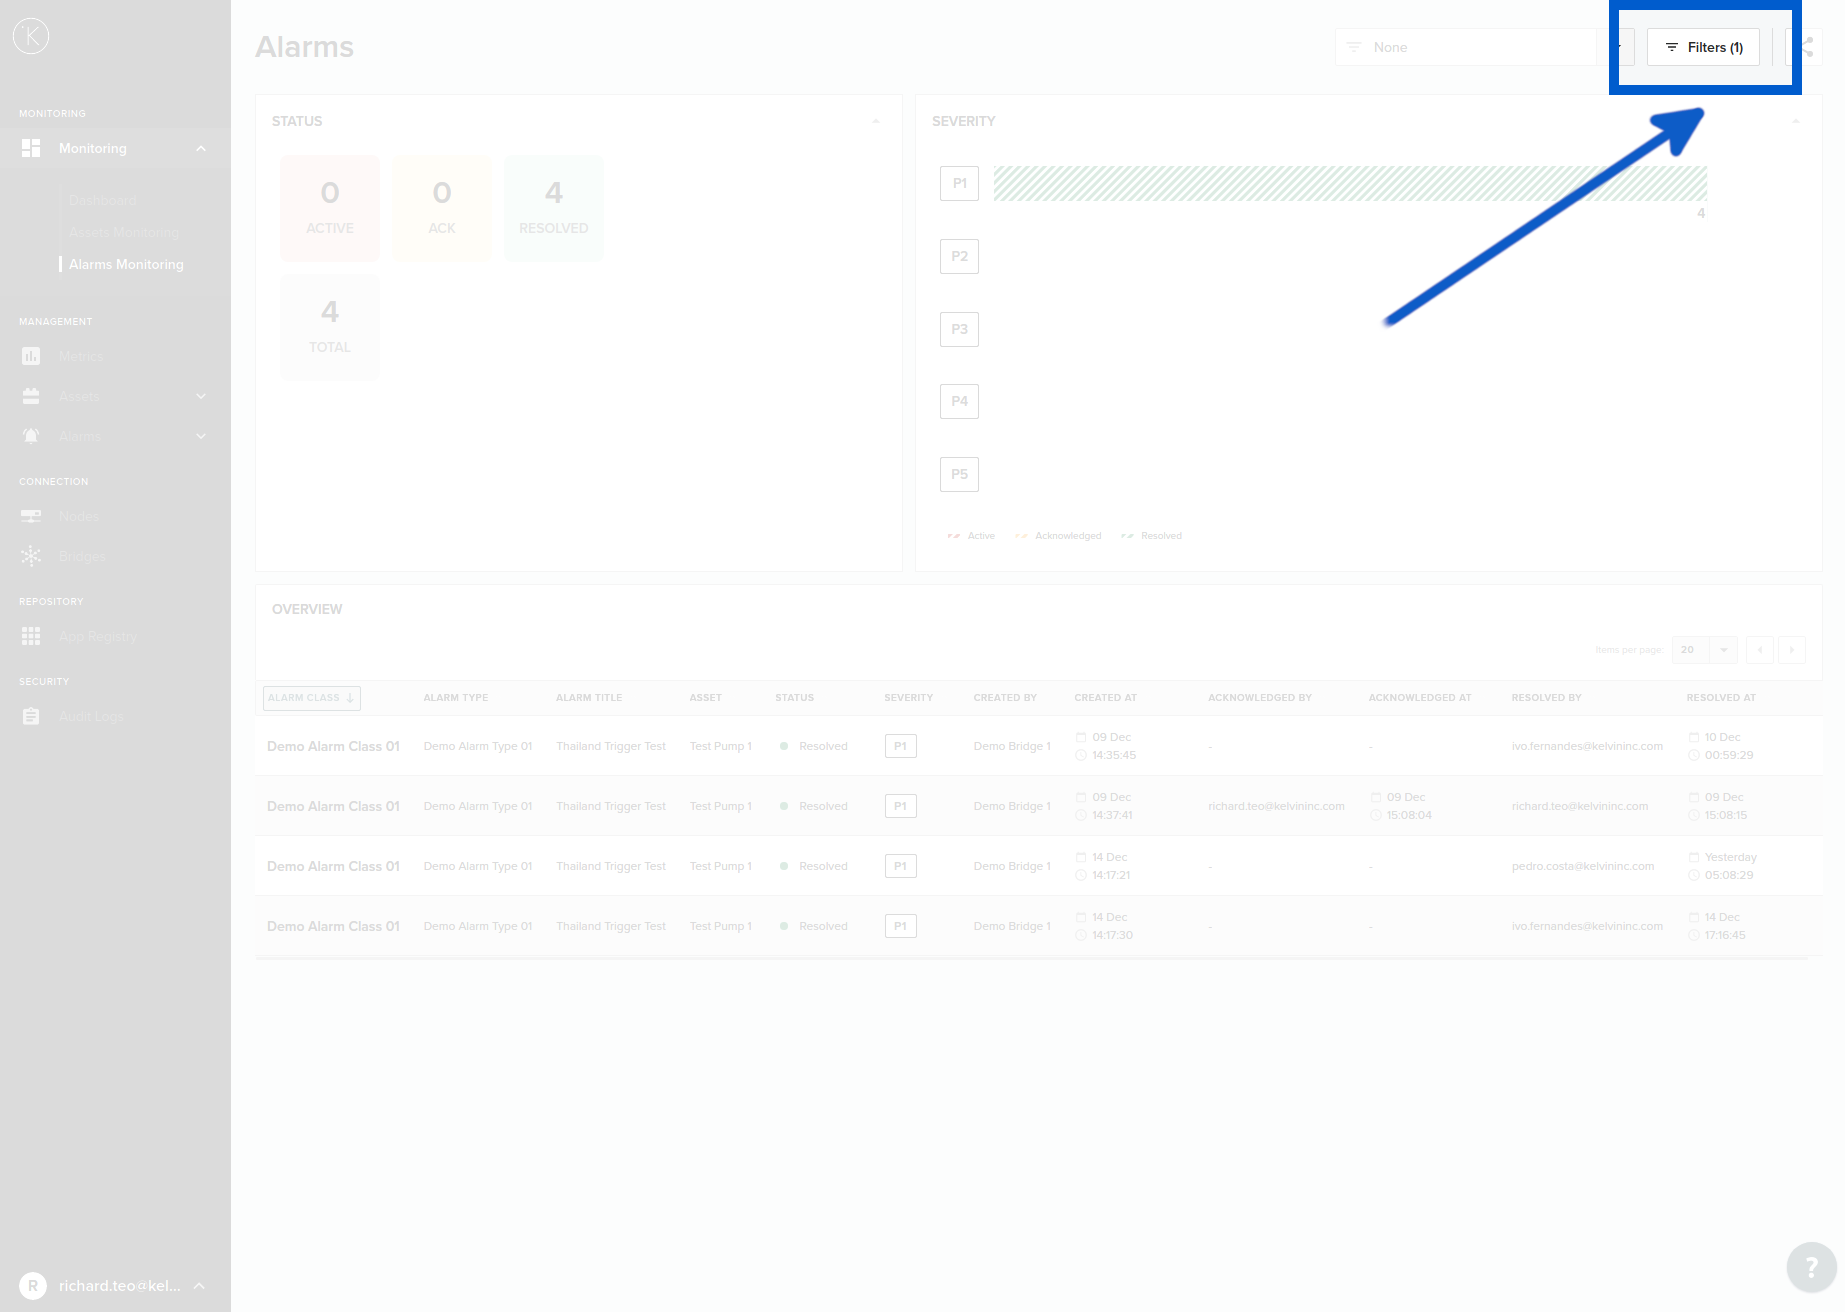
After the filter is applied, you will only see dashboard information related to the filtered alarms.

You can see the number of active filters in a bracketed number beside the Quick Filter button.
Create a Filter View
In the Kelvin Manager UI you can create predefined alarm filter views that you can use at any time.
You can quickly filter Alarms to see the information you desire. It is easy to create, edit and delete these filters which you should not be surprised to know we will show you how to do below.
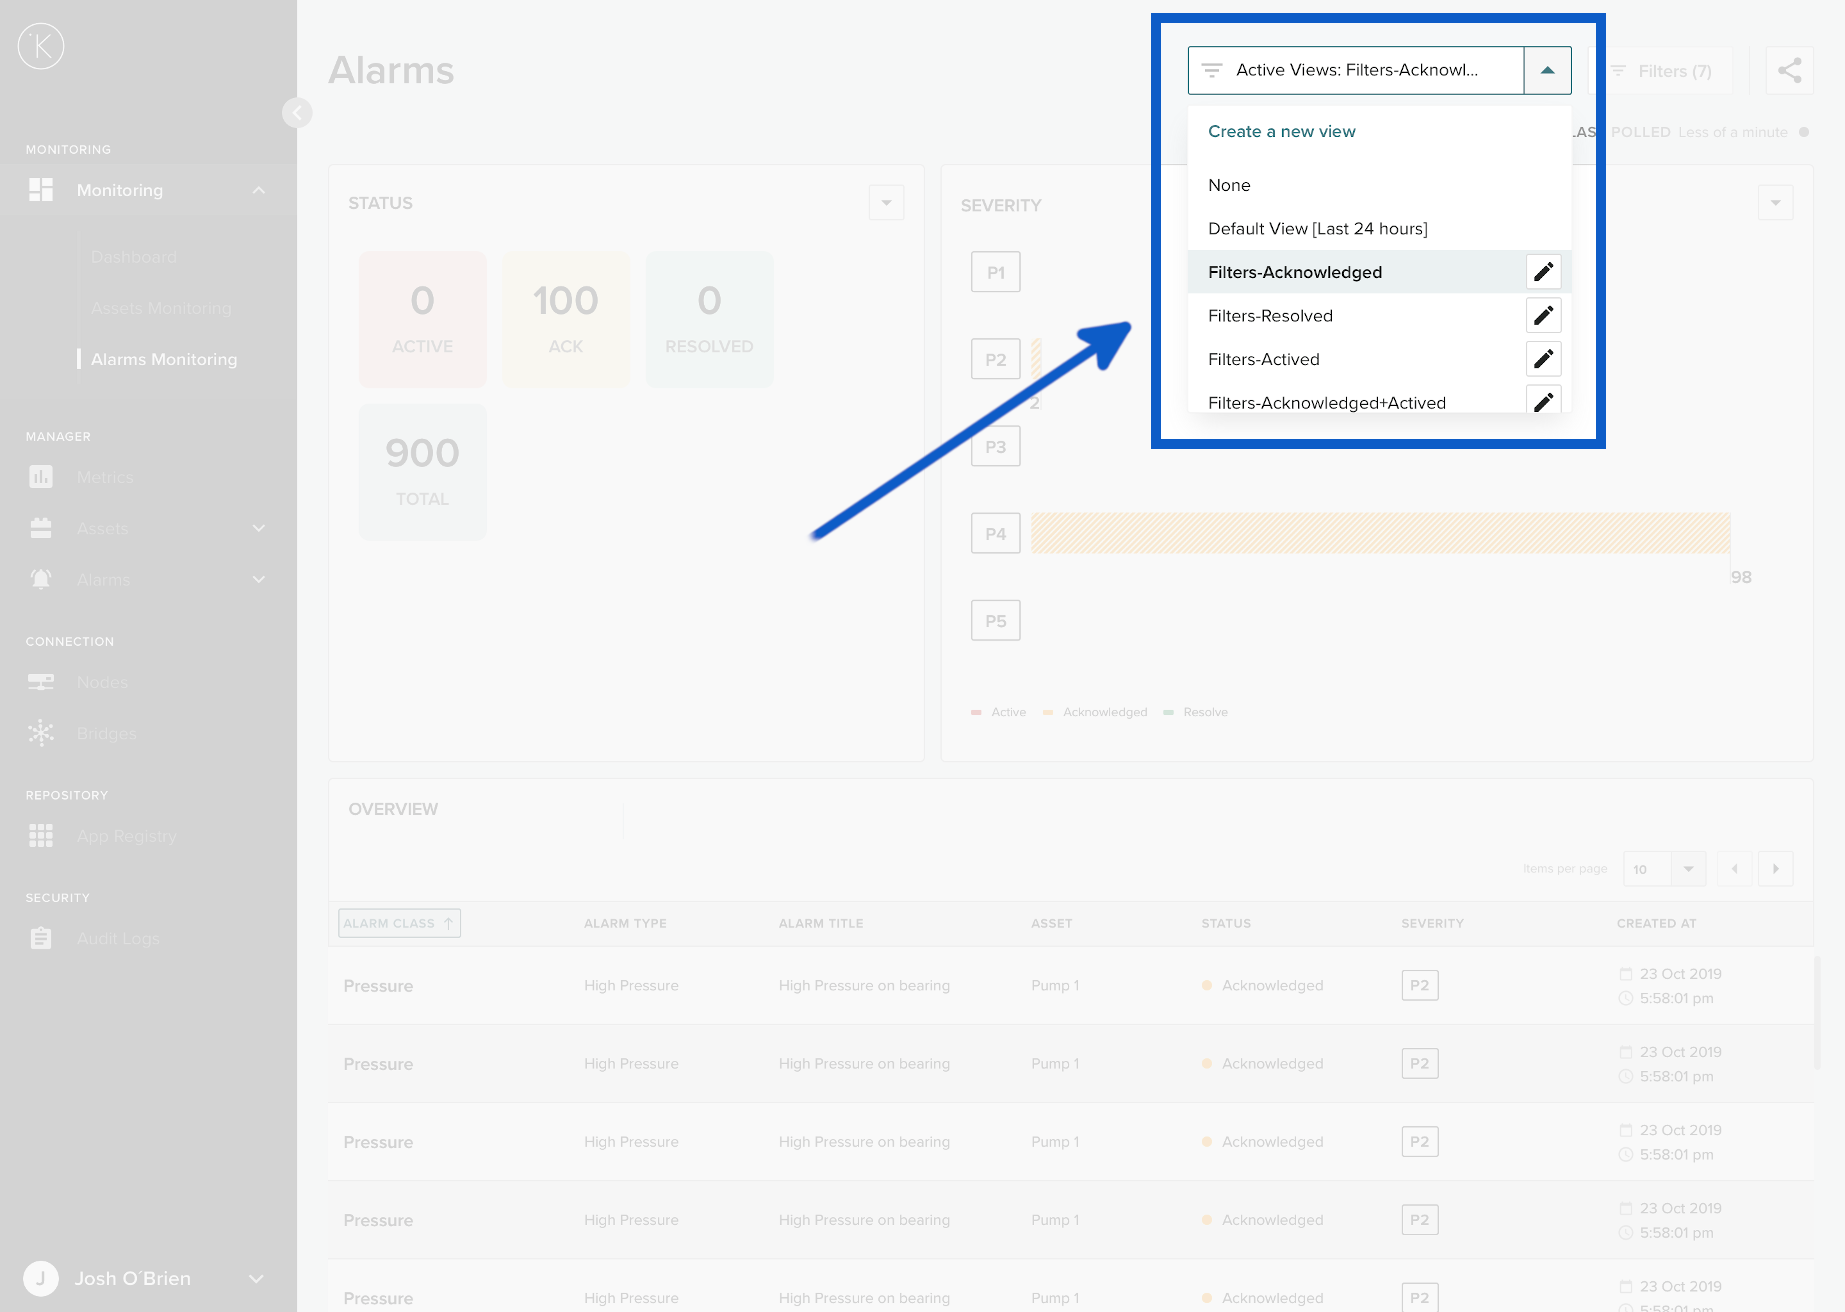
To create a new view, go to the drop down menu and click on Create a new view.
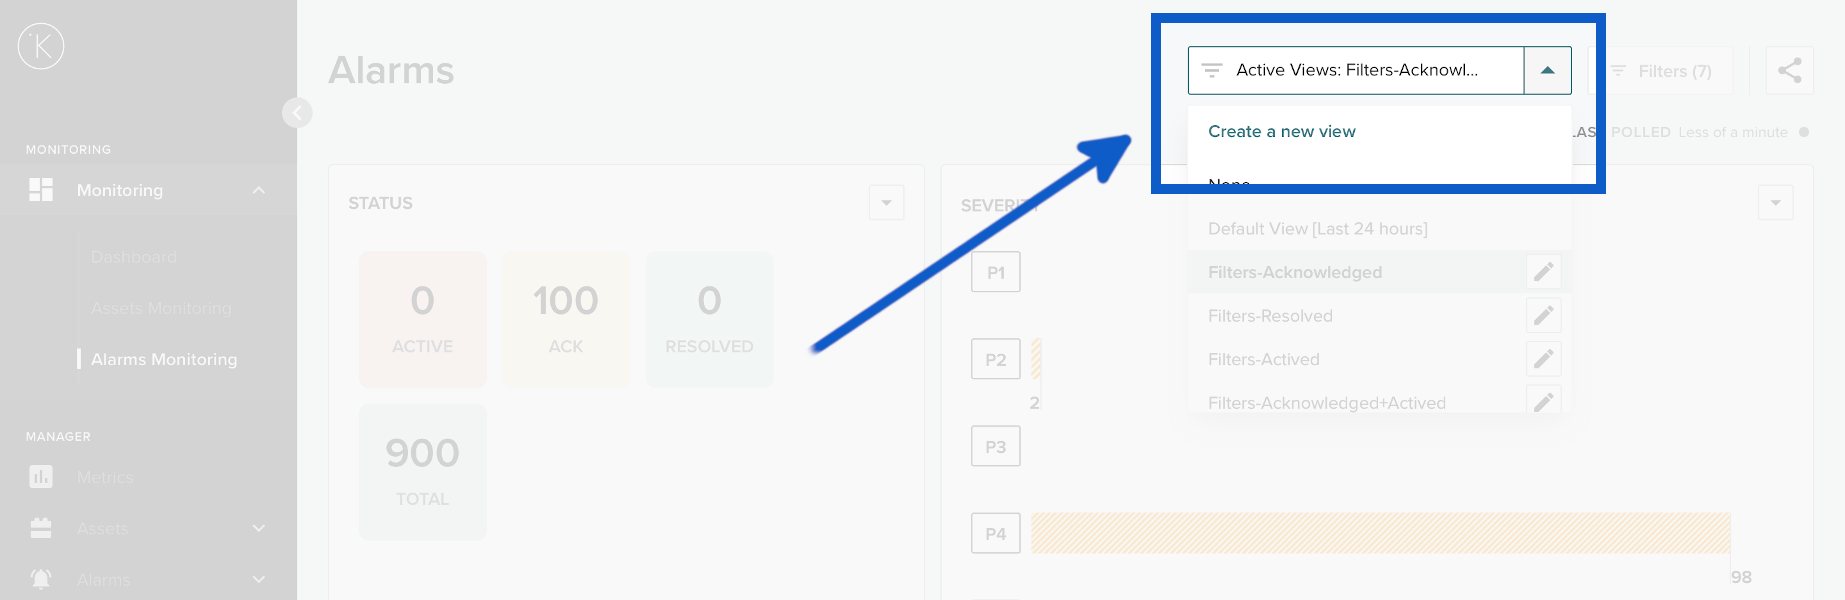
A popup window will appear with all the options you have to create the filter view.
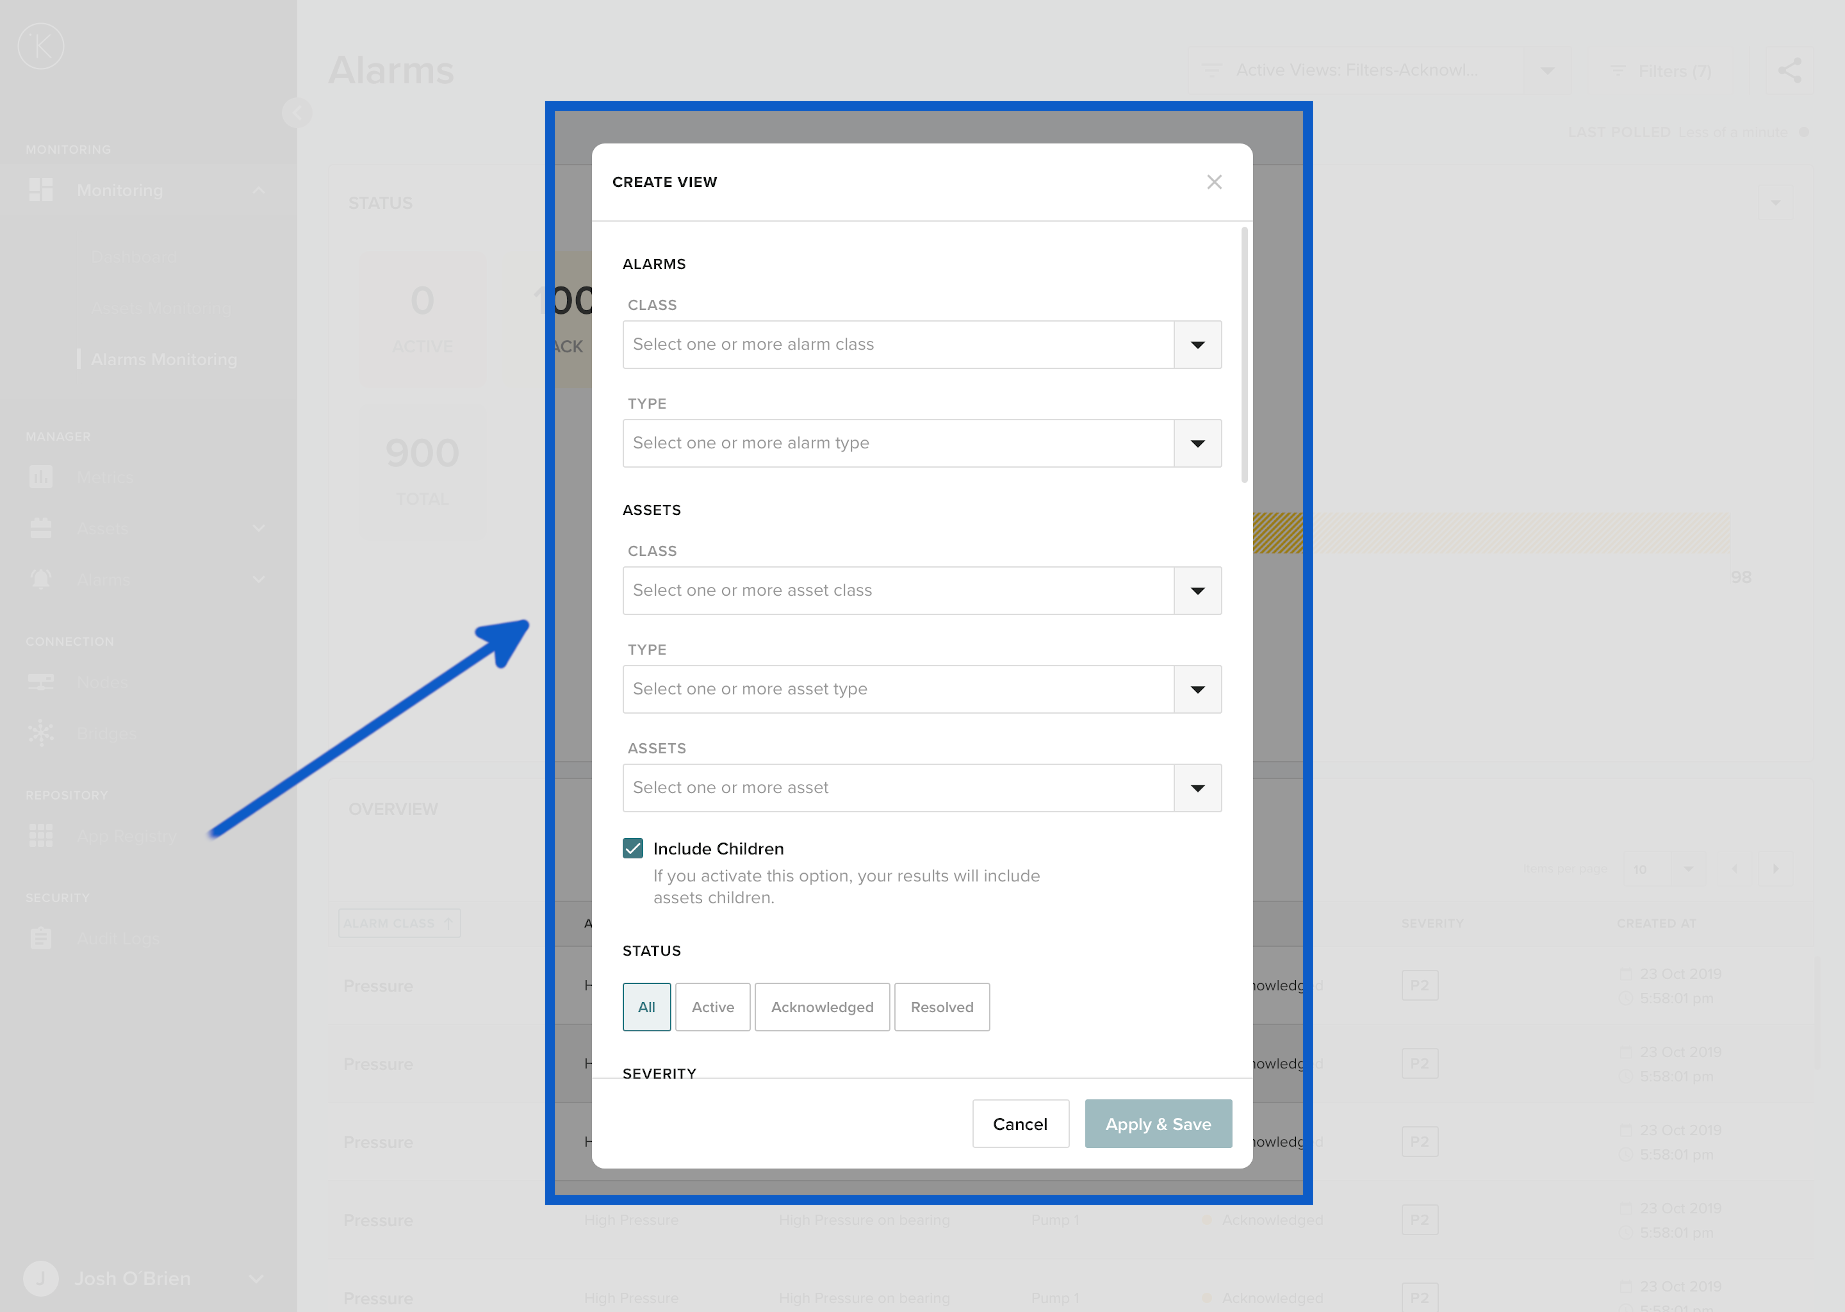
| Option | Description |
|---|---|
| Alarm Class | You can select one or more alarm classes to be included in the filter. |
| Alarm Type | You can select one or more alarm types to be included in the filter. |
| Asset Class | You can select one or more asset classes to be included in the filter. |
| Asset Type | You can select one or more asset types to be included in the filter. |
| Assets | You can select one or more Assets to be included in the filter. |
| Include Children | If you select any Assets to be included in the filter, you can choose whether the sub-Assets (children) of the selected Assets should also be included in the filter. |
| Status | Select the status of the Alarms to be included in the filter. You can choose from All, Active, Acknowledged and/or Resolved. You can choose multiple options. |
| Severity | Select the severity of the Alarms to be included in the filter. You can choose from All, Critical, Urgent, Advisory, Medium and/or Low. You can choose multiple options. |
| Created By | You can choose one or more of the Kelvin Apps that generated the alarm. This could be a Kelvin Bridge or a Kelvin Assets Template or a custom App developed by yourself. |
| Created At | The time frame when the alarm was Created. You can select Last 24 Hours, Last Week, Last Month or a custom time range. |
| Acknowledged by | You can choose one or more of the Kelvin Apps that acknowledged the alarm. This could be a Kelvin Bridge or a Kelvin Assets Template or a custom App developed by yourself. |
| Acknowledged At | The time frame when the alarm was Acknowledged. You can select Last 24 Hours, Last Week, Last Month or a custom time range. |
| Resolved By | You can choose one or more of the Kelvin Apps that set the resolved status on the alarm. This could be a Kelvin Bridge or a Kelvin Assets Template or a custom App developed by yourself. |
| Resolved At | The time frame when the alarm was Resolved. You can select Last 24 Hours, Last Week, Last Month or a custom time range. |
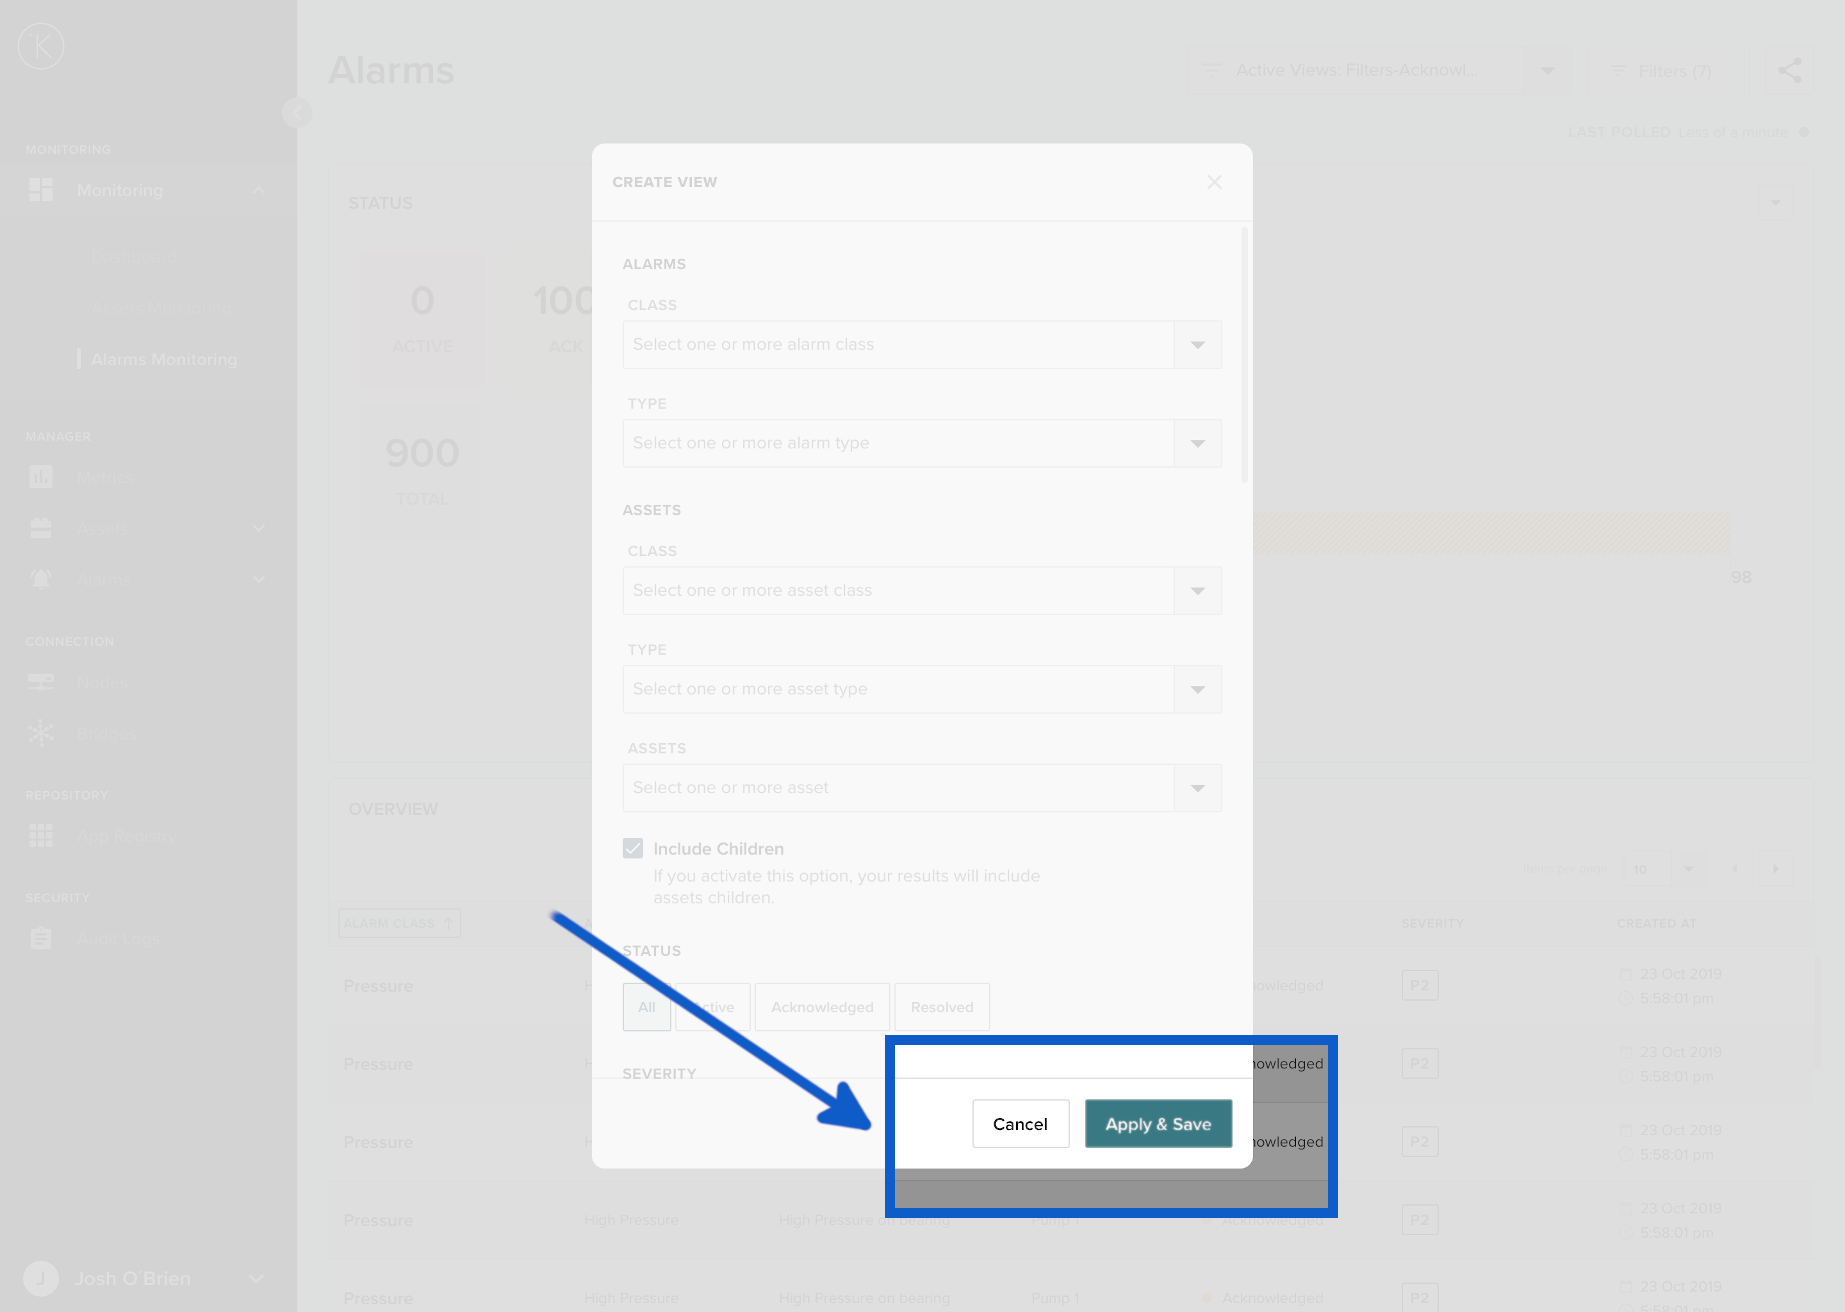
| Naming The View | You can choose any name for this view. This option is mandatory. |
Only the name of the view is mandatory. We suggest you use a name that is easy to understand.
example; all-acknowledged-24hrs or asset1-all
When you are ready and you have entered a name for the View you can save it and immediately apply the filter to the Alarms Monitoring page.
Edit a Filter View
To edit a filter, you can click on the pencil icon on the right hand side of the name of the filter view you want to edit.
When you are in edit mode, the process is exactly the same as creating a new view. You can see all the options in Create a Filter View above.
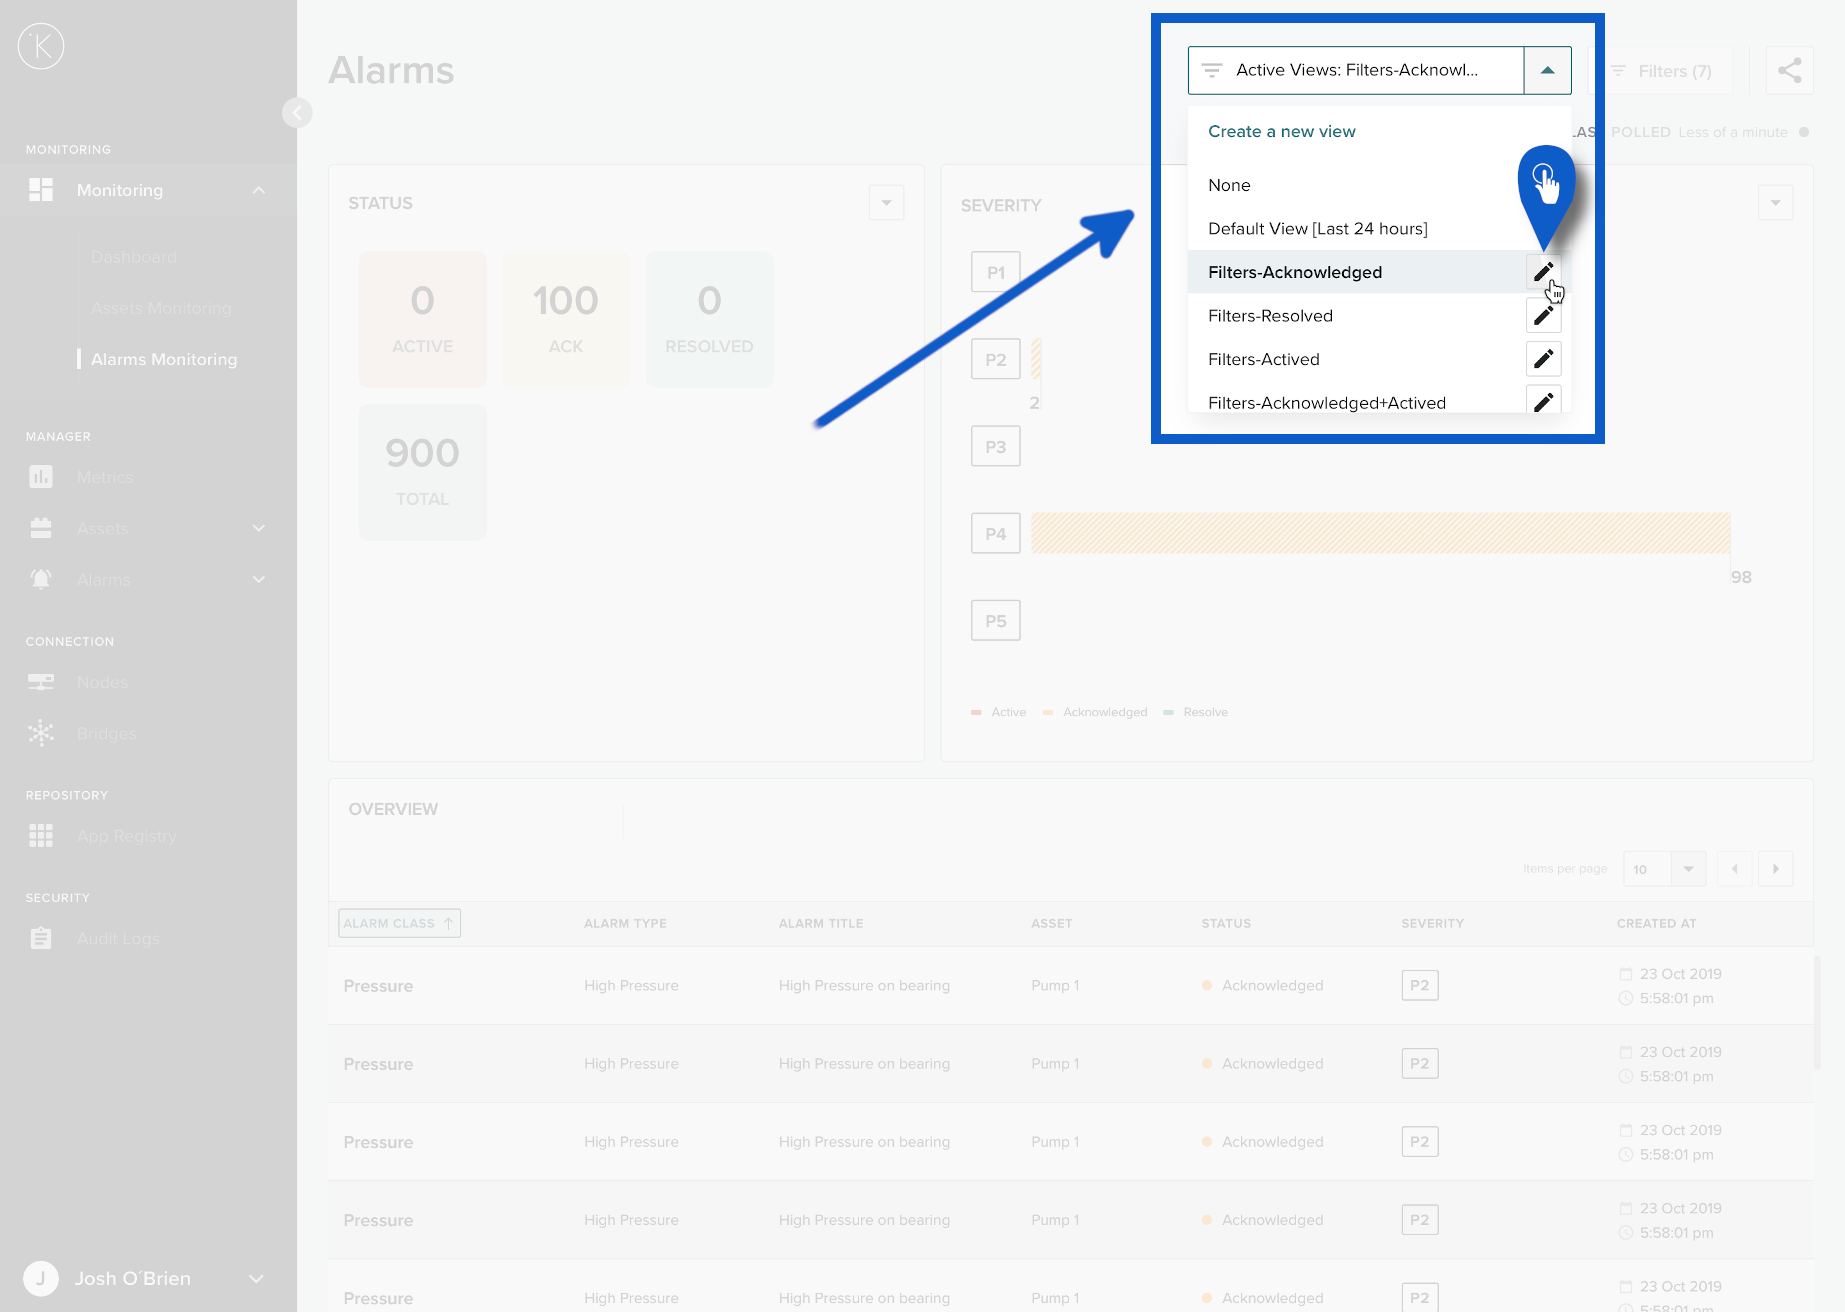
Delete a Filter View
To delete a filter view, first edit the filter by following the instructions Edit a Filter View above.
When in edit mode you have one option at the bottom
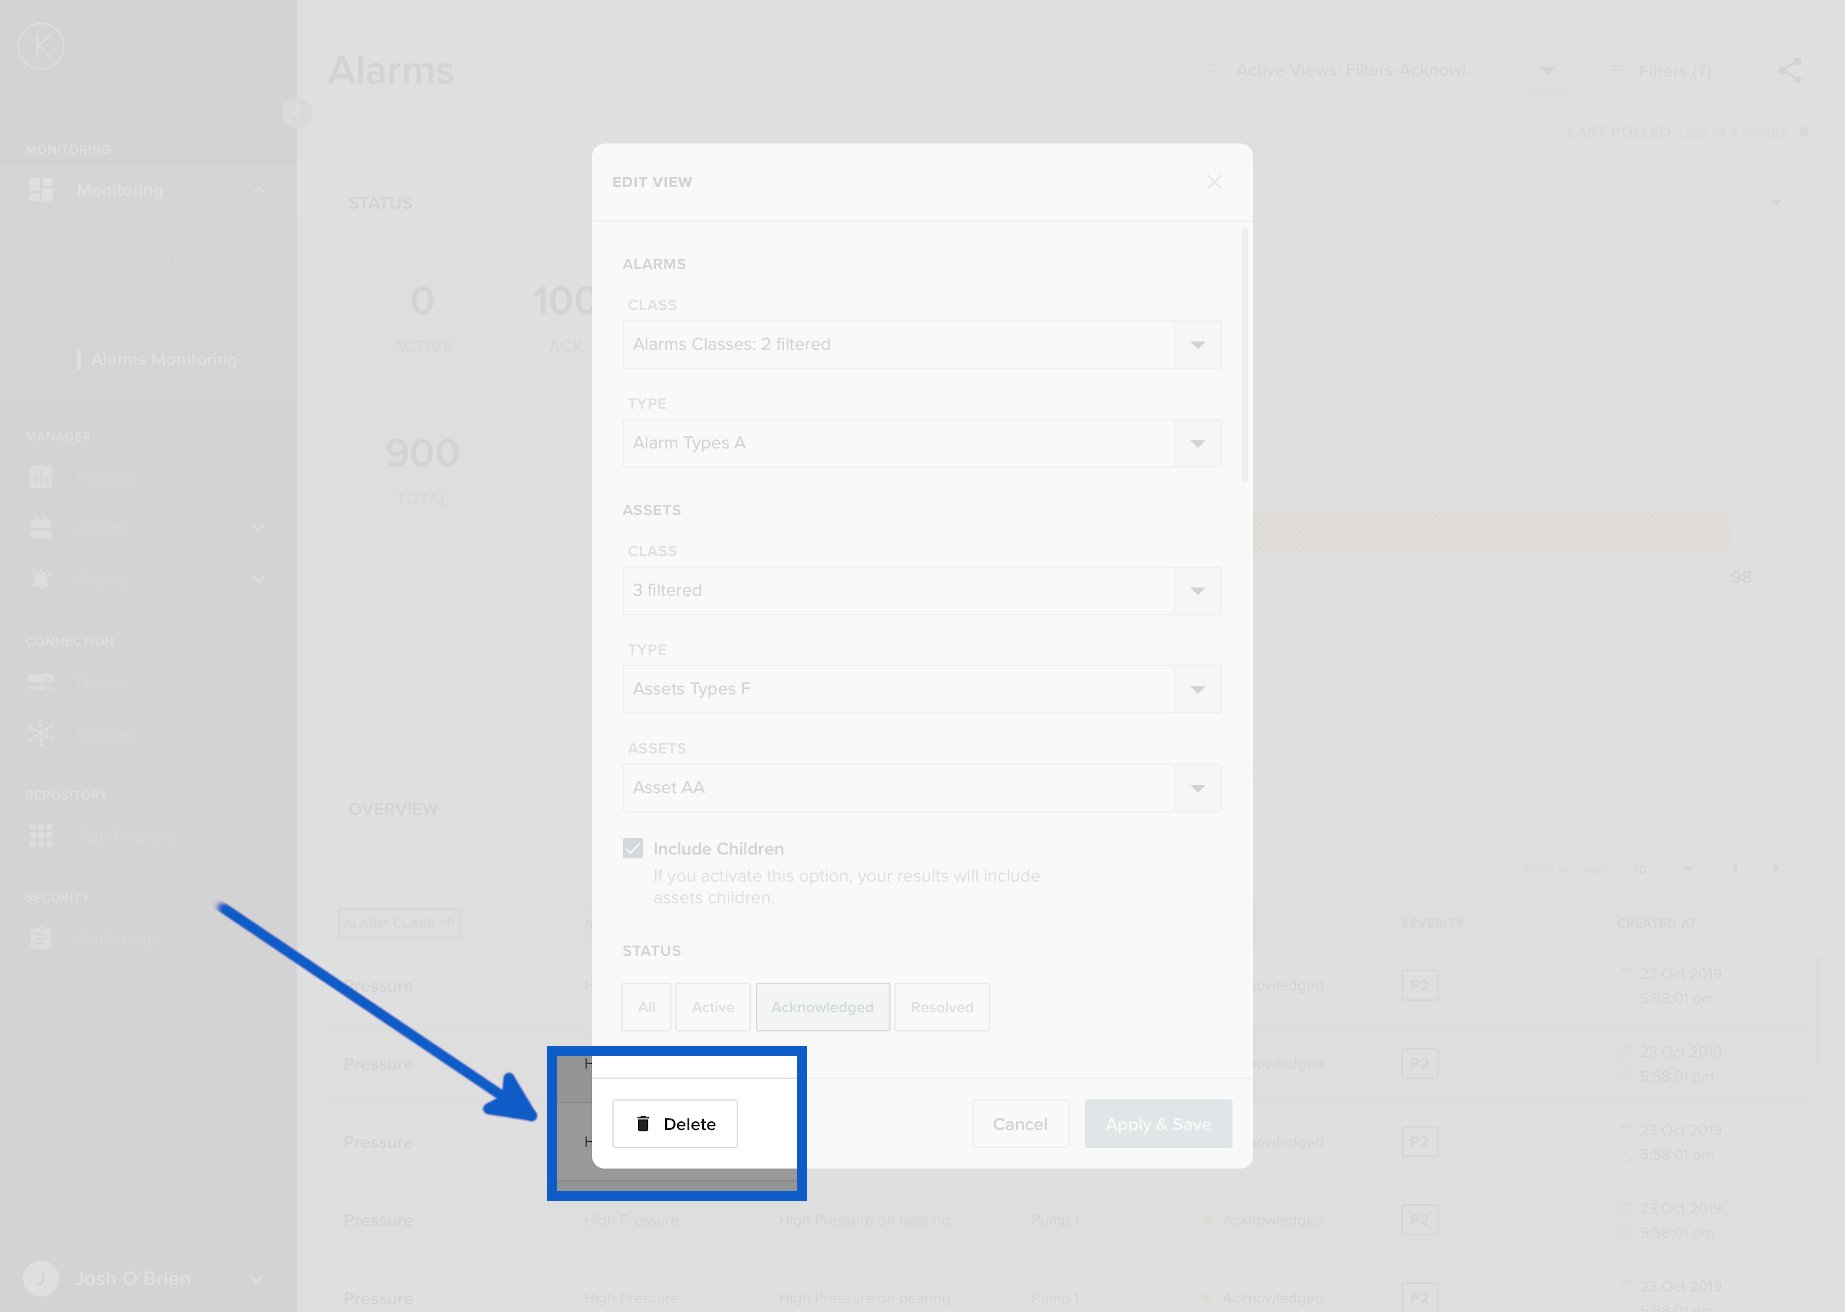
When you click delete, a confirmation box will appear. If you want to proceed click Yes, delete.
When you delete a Filter View, it is permanent. You can not undo or recover the Filter View. You will need to create a new view.

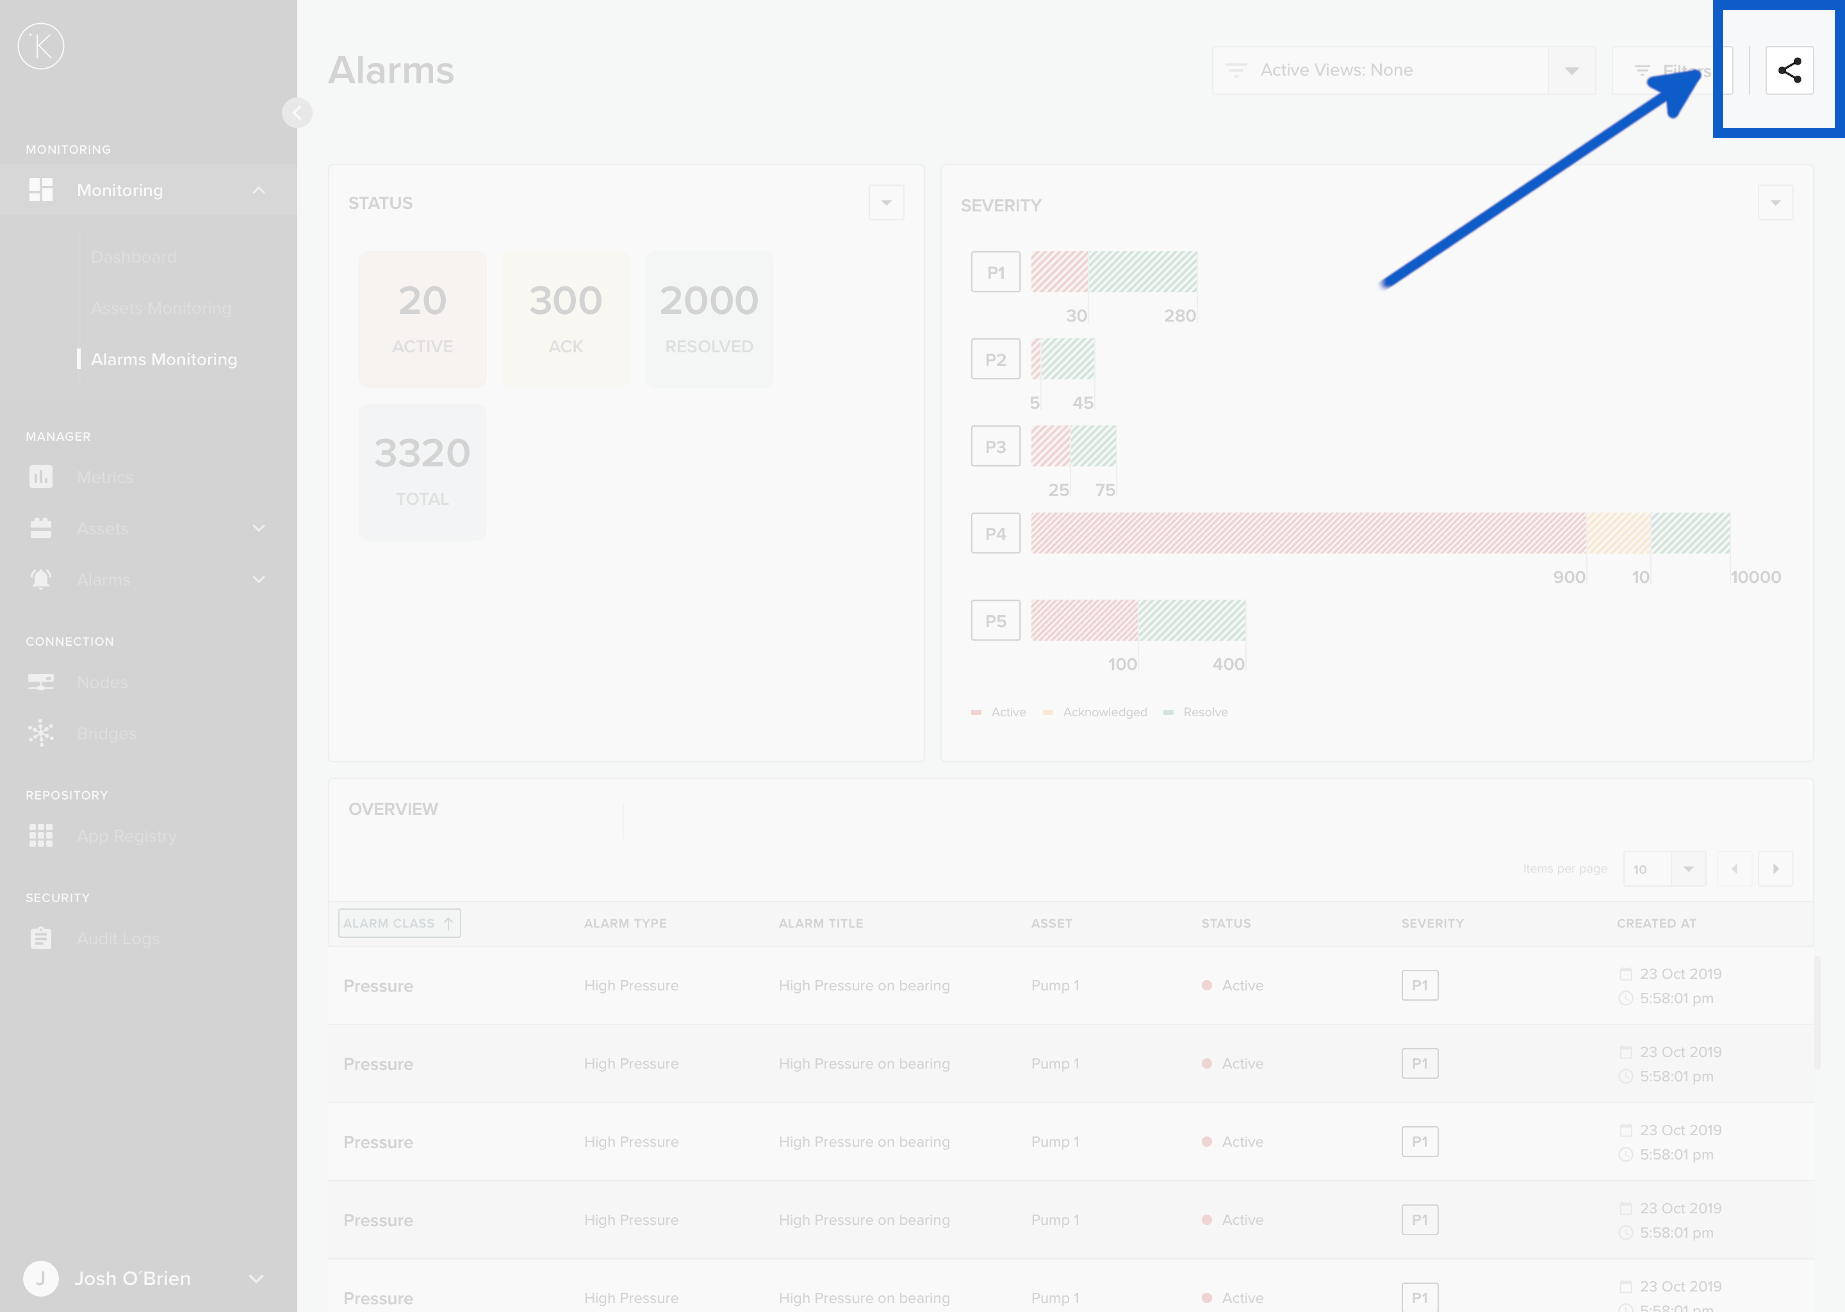
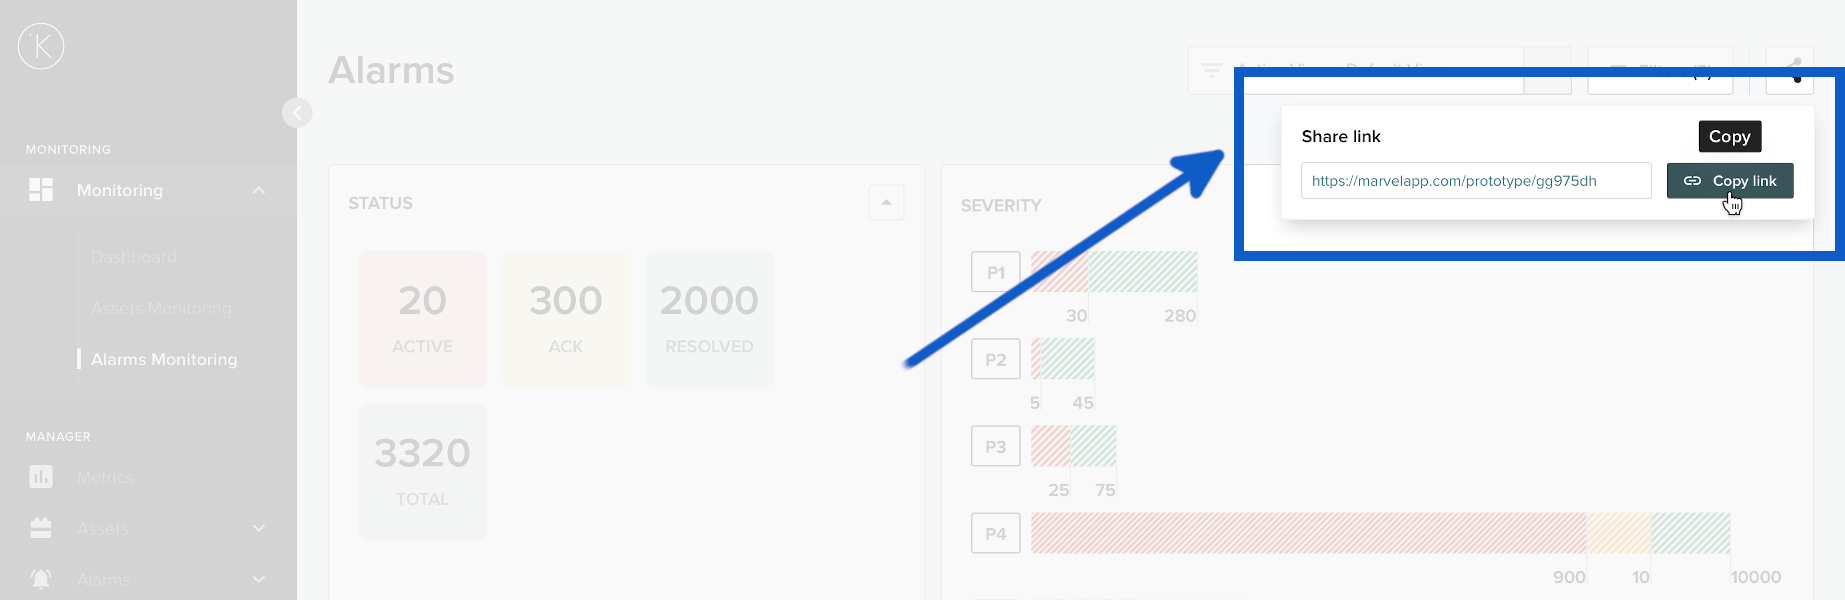
Share Link
If you want to share your alarm screen view with filters with colleagues, then you can click the share button at the top right hand corner to quickly copy the link.
You can send this link via email, IM or in posts. All filters will be applied when the receiver opens the link.
Other Related Links
Interesting links related to Alarms Monitoring
Last Modified
Last Modified on 22nd August 2022
22nd August 2022
* Last update before detail updating records started
Kelvin Documentation AI Support
Hi. My name is KevDocBot. How can I help you?