Creating an MQTT Bridge
On this page you will learn how to use the Kelvin Manager UI to create, edit, delete and control a Kelvin MQTT Bridge. There is a troubleshooting section at the end if you have any trouble.
What is MQTT ?
MQTT (Message Queue Telemetry Transport) is a lightweight network protocol to transport messages between devices. It uses a publish-subscribe architecture and usually runs over TCP/IP but can be used on many other communication protocols.
It has become a popular method to transfer continuous streams of data as it is very simple to implement and requires very low bandwidth. It also allows the clients who create information (publisher client) to be independent and not connected to clients who consume information (subscriber client).
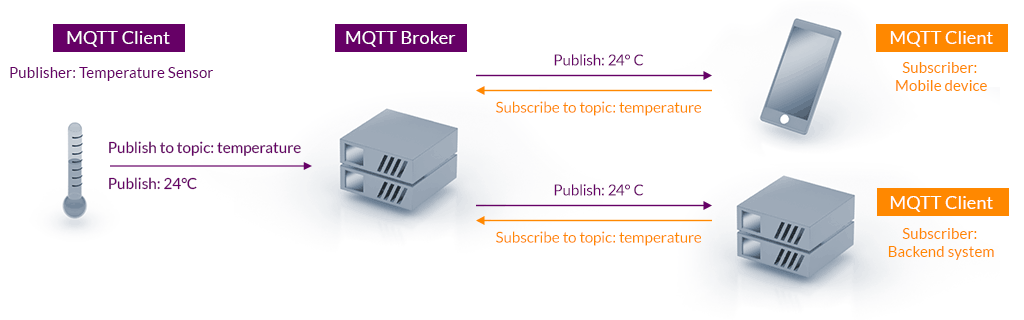
The MQTT broker is the glue which manages the transfer of information between publishers and subscribers. MQTT clients will connect to the MQTT broker only.
What is a Kelvin MQTT Bridge ?
A Kelvin MQTT bridge is an MQTT subscriber client that consumes information generated from an MQTT publisher client. This is the orange colored MQTT client in figure 1 above. The information is stored directly in the Cloud Server as kelvin Metrics.
Be careful, an MQTT Bridge and an MQTT Broker are not the same. An MQTT Bridge is a software development by Kelvin to act as an MQTT Client. An MQTT Broker is developed by many third parties.
Each bridge created will access one MQTT broker through a Node. You can setup multiple bridges to access multiple MQTT brokers, through the same or different Node.

Before you can setup an MQTT Bridge, you must setup a Kelvin Cluster, at least one Kelvin Metric and at least one Kelvin Asset first. See requirements below before starting.
API Only Options
For the Kelvin Bridges there are some options that are only available through the Kelvin API.
Metric Guardrail
In some cases you may need to limit the metric value range. For each Kelvin Asset / Kelvin Metric pair you can set min / max limits.
    metrics_map:
      - name: demo-metric
        asset_name: roc_107
        access: RW
        data_type: raw.float32
        configuration:
          protocol_type: FLOAT
          polling_rate: 5
          address: 4.10.6
          min: 1.5
          max: 47.0
In this example the value coming in from the Bridge or being sent by the Control Change Manager will be limited between these values. Any values outside of this range will be ignored.
Deploy New MQTT Bridge
The MQTT bridge acts the same as an MQTT subscriber. It will connect to an MQTT broker, subscribe to topics and send the information directly to the Kelvin Metrics on the Cloud Server. You can also write data from Kelvin Metrics to a Topic on the MQTT Broker.
The Node acts as a gateway between the MQTT Bridges and the MQTT Brokers. All configurations to connect to the MQTT Broker are done in the MQTT Bridge deploy. You do not need to do any configuration on the Node.
Requirements
MQTT Broker
- An MQTT broker IP address or name (from your MQTT broker service provider or from your own setup PC)
- The MQTT broker's security credentials or certificates (from your MQTT broker service provider or from your own setup)
- A list of topics you want to subscribe to (Topics are defined by the client publishers. Usually this is done in the settings of the sensors or edge devices connecting to the broker)
The topics are defined by the publishers who send the data to the broker. This is normally programmable in the sensor configuration or the edge devices.
If you use an MQTT service provider like CloudMQTT (https://www.cloudmqtt.com/), they will give you the security credentials to use.
It is not mandatory to have credentials for your MQTT broker, but we strongly recommend you consider securing your data communication lines with SSL with either a login/password or certificate based authentication.
Create a Node
A Kelvin Cluster must be setup with direct access to the brokers. This requires two steps;
- Installing a computer at your premises to run the Kelvin Cluster software. The computer must be installed on the same local network as your MQTT brokers.
- Creating a Kelvin Cluster on the computer in step 1. This will automatically connect the Kelvin Node to the Cloud Server. See here on how to install a Kelvin Node onto the computer.
You do not need to program the node to connect to the MQTT brokers. You will configure the broker IP address, port, security credentials and topics when first deploying the MQTT Bridge.
Create a Metric
Every piece of data is connected to a Kelvin Metric. Normally each Kelvin Metric will represent one sensor or data point. It can also be a data point representing a calculated formulae of many data points.
Metrics for all the Topics must be created or exist before you can create an MQTT Bridge.
If you don't have any Metrics yet, then see here on how to create Kelvin Metrics and create them before proceeding.
Create Assets
Kelvin Assets are a group of Components, Parts and Sensors that make up a piece of equipment or machinery. It can be something as simple as a pump or as complex as a well.
Kelvin Assets will be composed of many Metrics that are the individual data that is collected by the Kelvin Bridges and stored in the Kelvin Core Manager.
When you create the bridge you can connect the Kelvin Asset to the Kelvin Metric to the Topic. One Kelvin Asset can have many Kelvin Metrics and thus Topics associated to it.
Firewalls
Ensure that there is a direct connection between the Node and all the MQTT brokers.
If not, then you will need to configure any firewalls or ip routing tables to guarantee communications between the Node and all MQTT brokers is not blocked.
Deploying with Kelvin Manager UI
If you have not read the requirements above, then please go back and read them carefully. If you do not setup a Kelvin Cluster, at least one Kelvin Metric and at least one Kelvin Asset before coming here, then you will lose time following these steps as they are mandatory.
Step 0: Starting the process
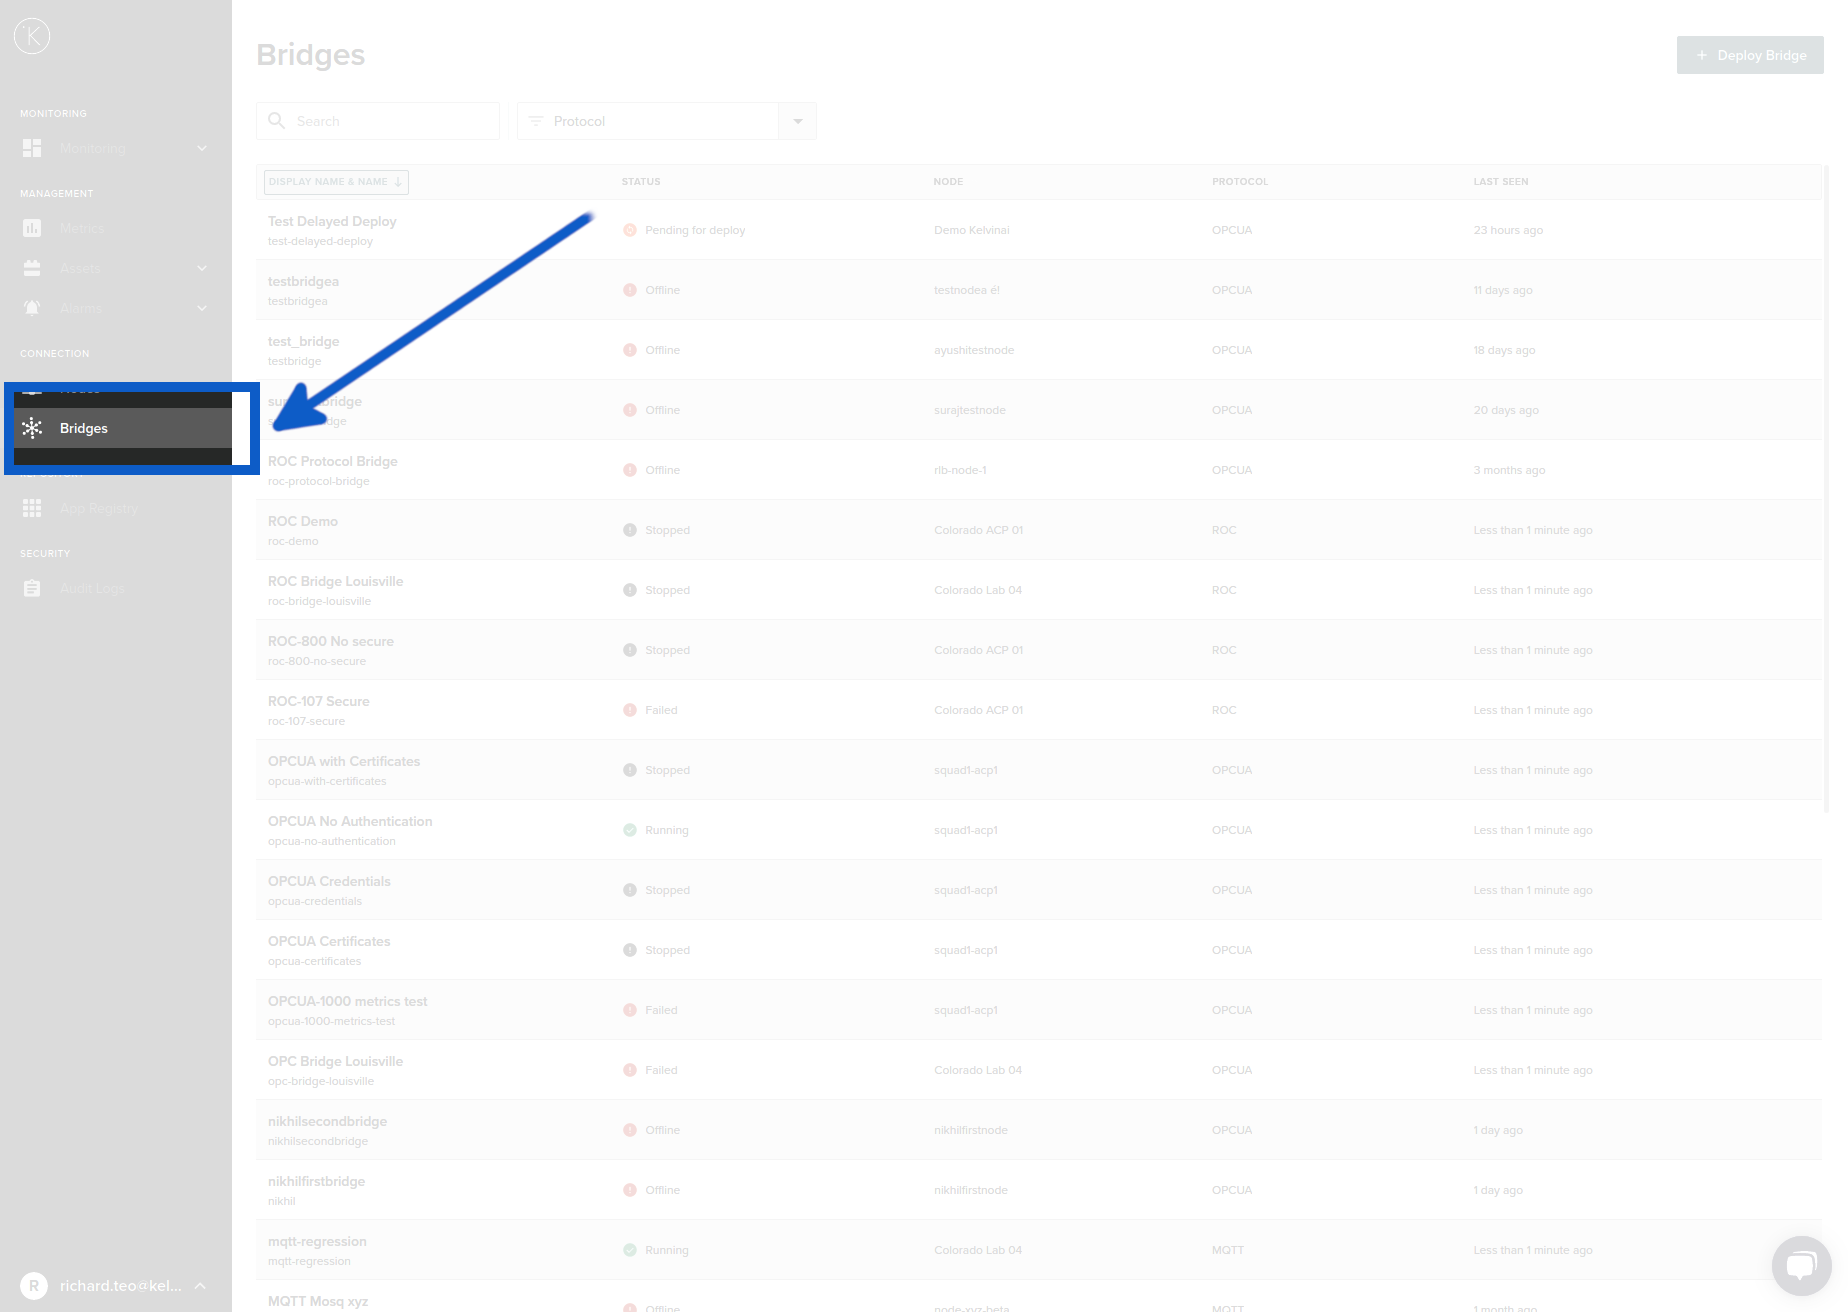
Go to the overview page on the Kelvin Manager UI. On the left hand side menu, select Bridges.
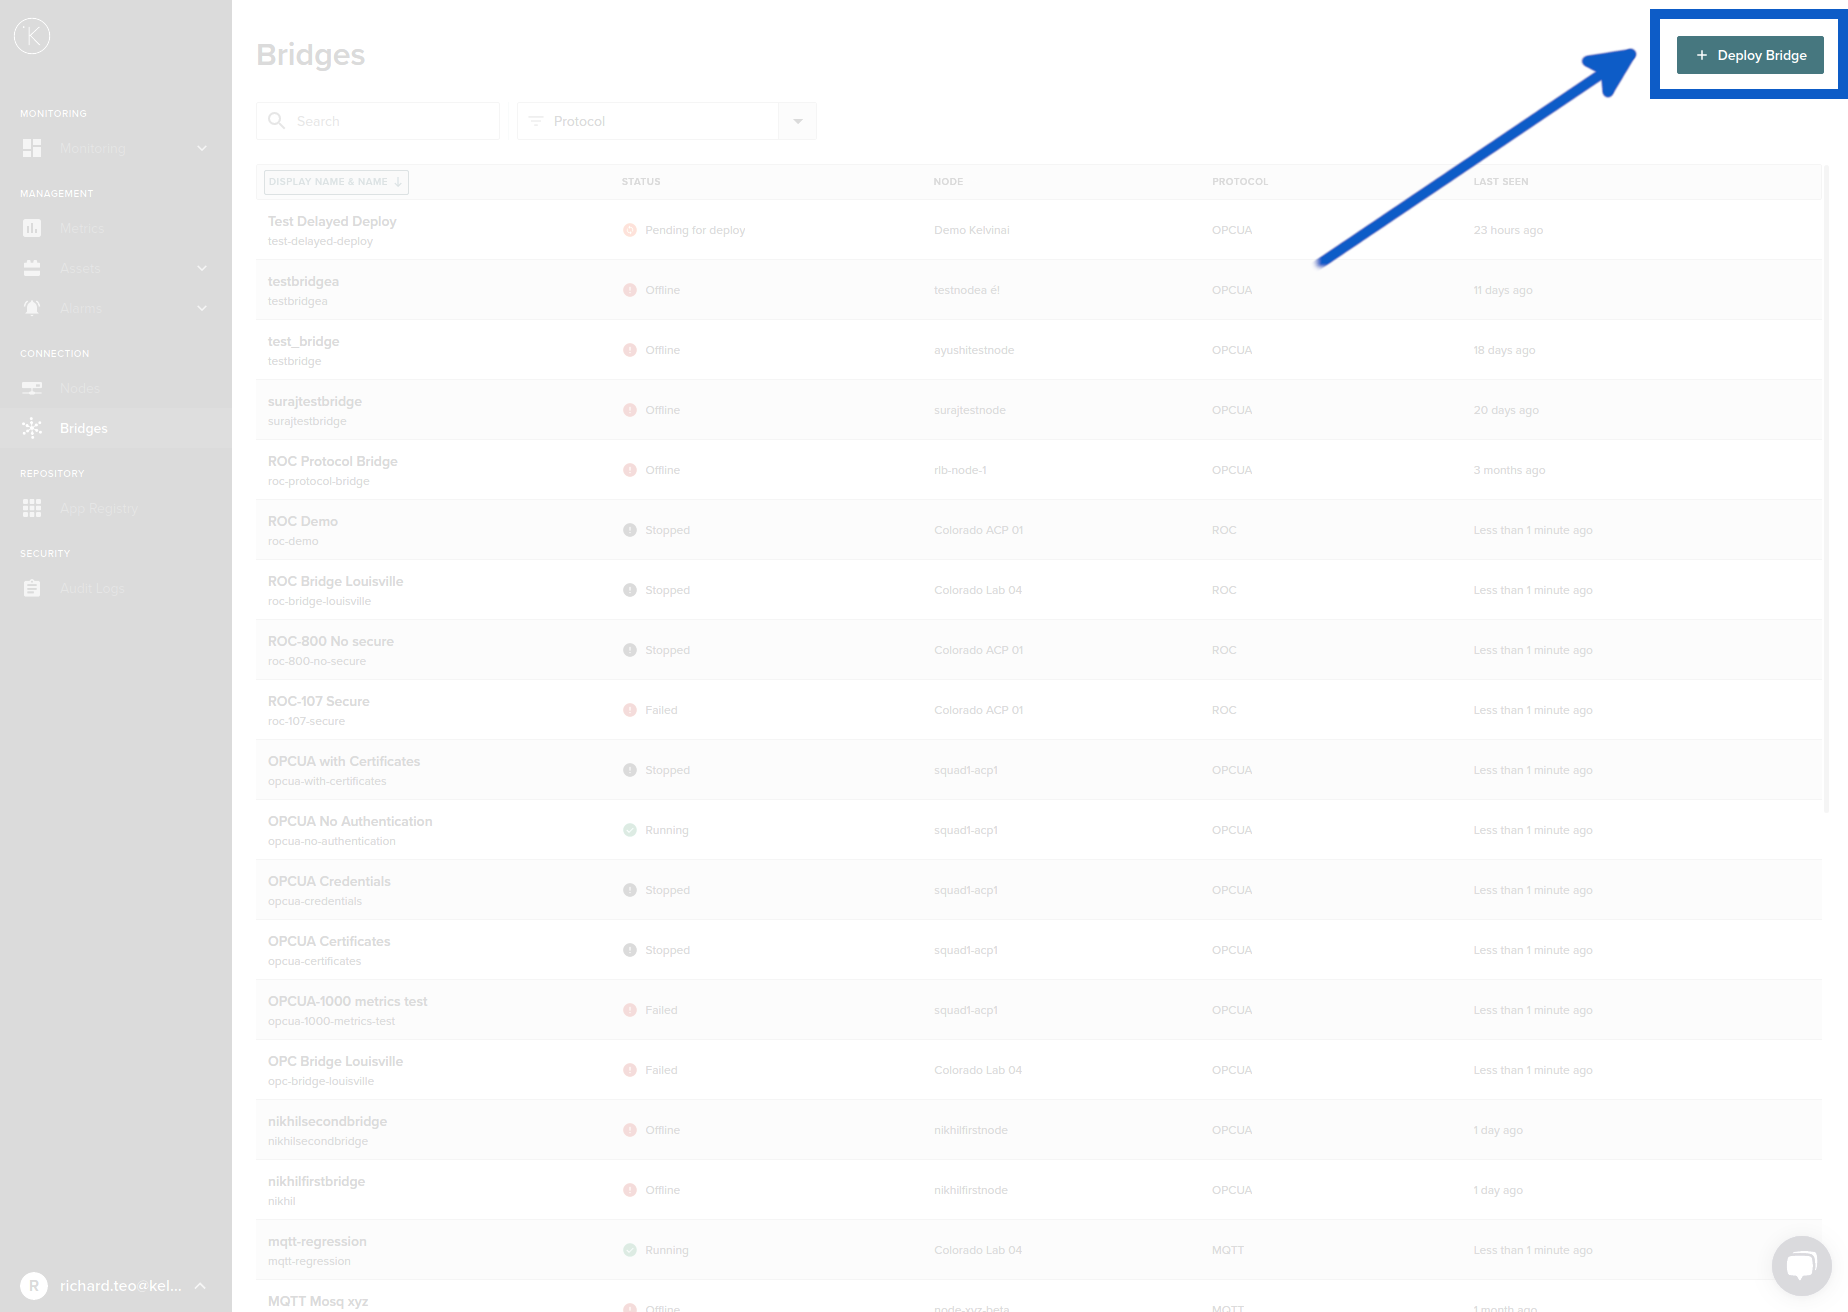
Then select Deploy Bridge.
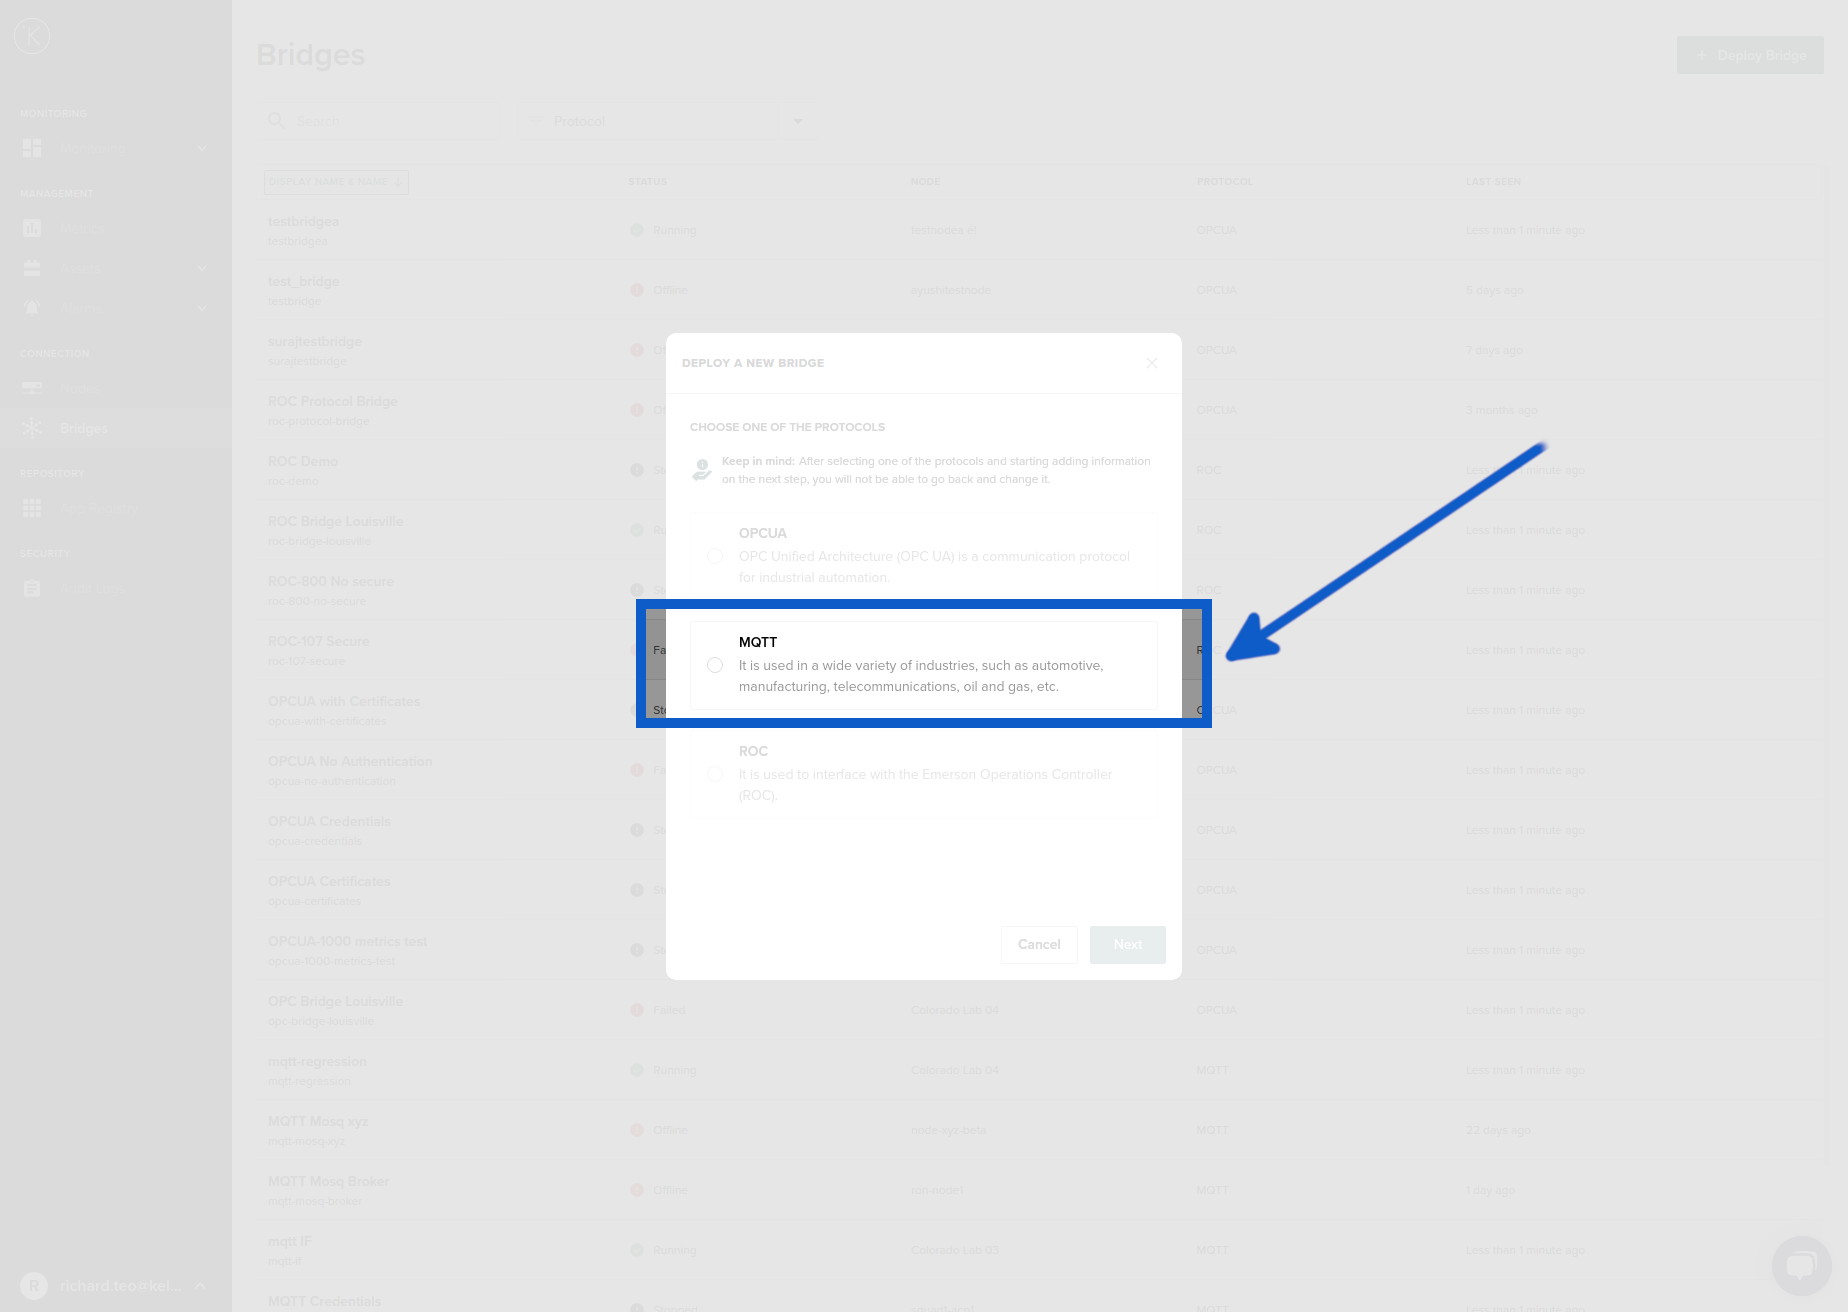
Then select MQTT Protocol and click Next
Now you are ready to deploy a new MQTT bridge. Deploying a new bridge requires 6 steps;
- Info - Selecting which Node to connect to and creating a unique name for your Kelvin Cluster
- Topic and Payload Format - Defining the Topics and Payload format that will come from the MQTT Broker
- Connection - Setting the MQTT Broker connection information
- Security - Setting the security information to connect to the MQTT broker
- Metric Mapping - Assigning the MQTT Topics to the Kelvin Metrics on the Cloud Server
- Deploy - The Cloud Server will connect to the Node and send the MQTT Bridge parameters to it. The MQTT Bridge will automatically start after deployment.
We will now go through each step below and explain in detail every option you have.
Step 1: Info
Fill in the information (descriptions below) and click Next

| Field | Explanation | Mandatory |
|---|---|---|
| Display Name | You can use any name that helps you identify the bridge. You can use any alphanumeric character. | Yes |
| Name | This will be automatically filled after you have added a Display Name. Normally you don't need to change this. |
Yes |
| Node | You select a Kelvin Cluster that you have created previously. The Kelvin Node must be connected and online otherwise you will not be able to select it. See troubleshooting section for more details. | Yes |
| Log Level | This is the type of information about the bridge operations that will be recorded to the Cloud Server logs. | Yes |
In the Node variable you can do a fast filter by typing any part of the Node name. You do not have to start with the first character of the Node name. The drop down list will automatically filter and show you relevant results to choose.
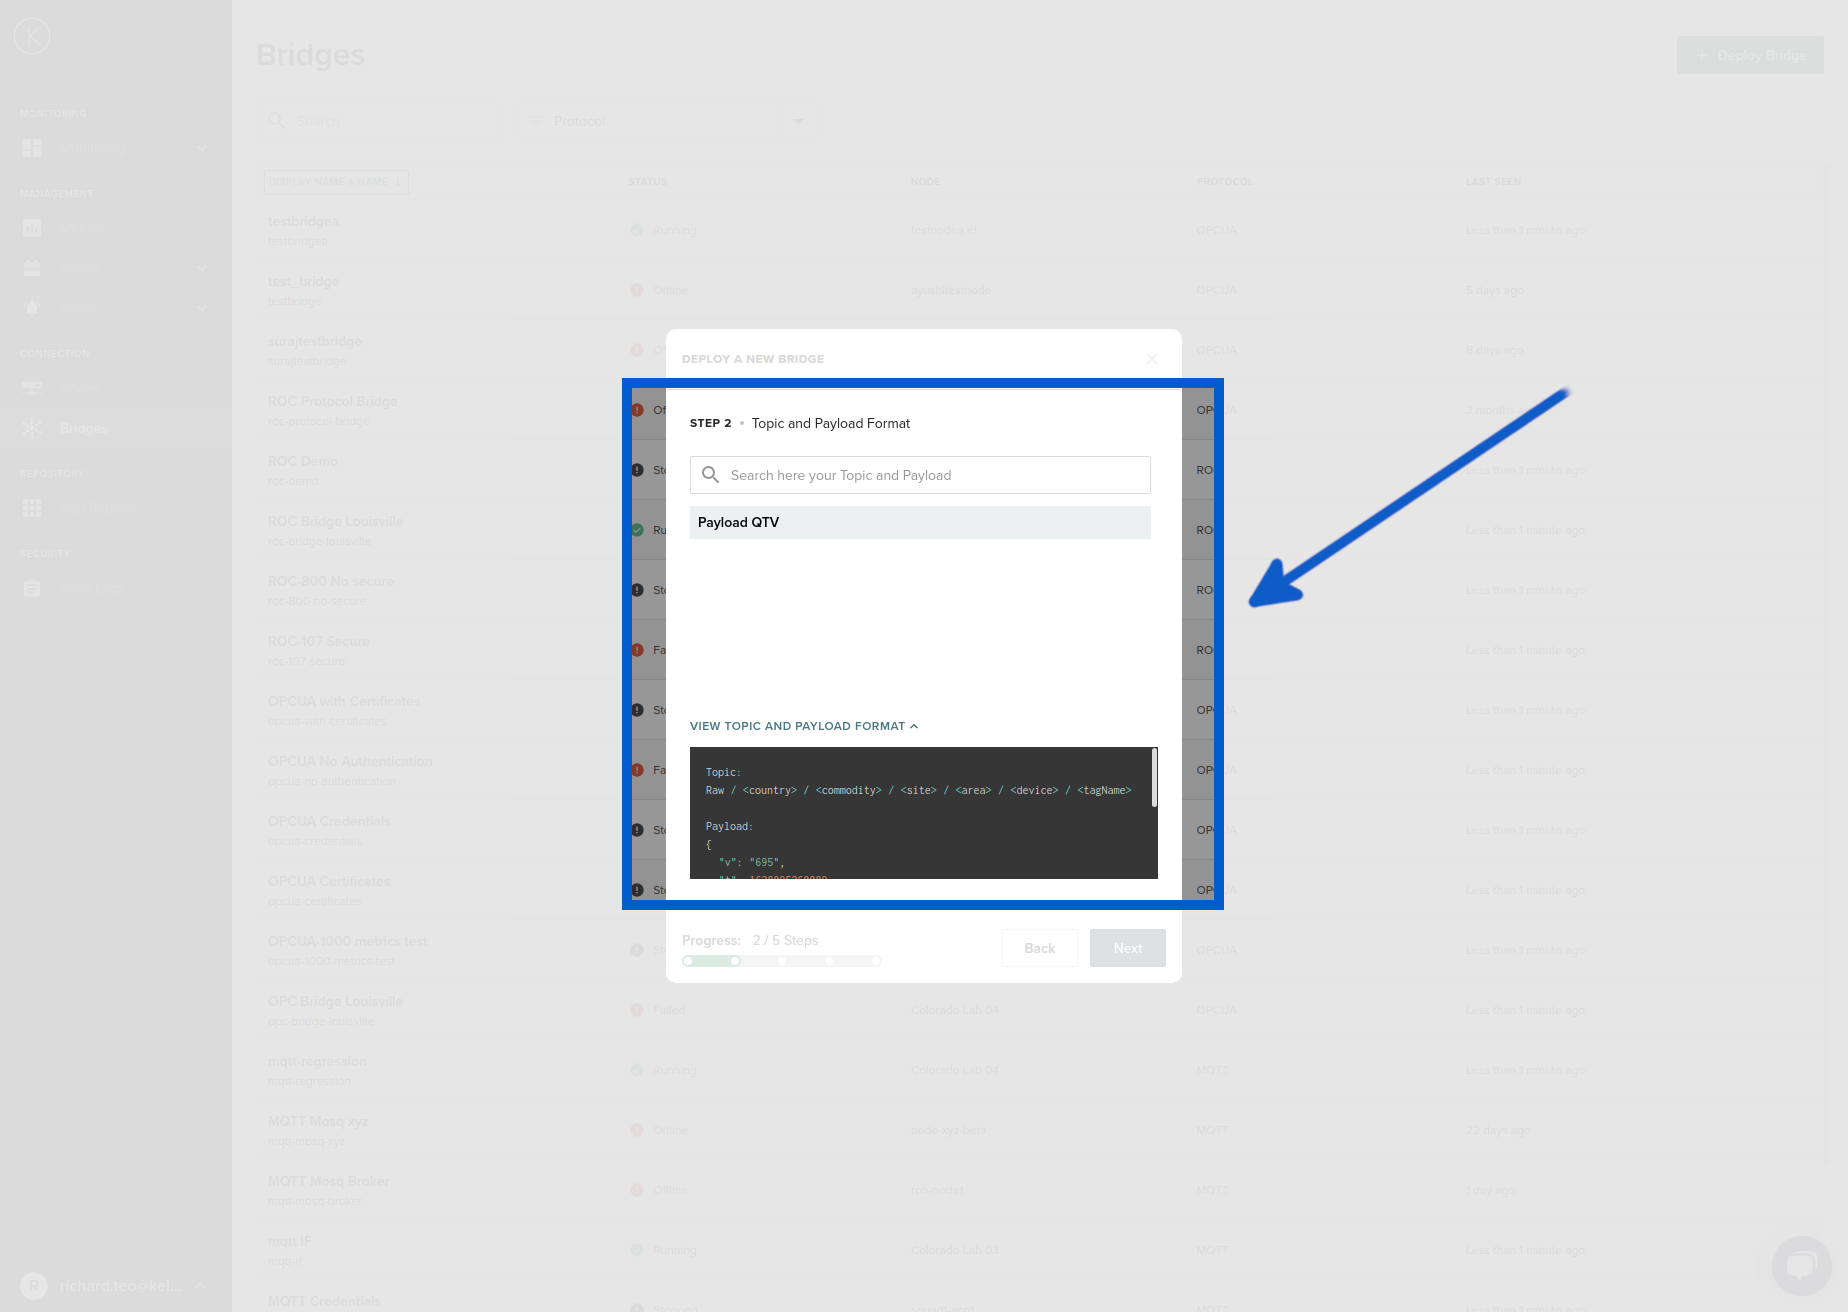
Step 2 : Topic and Payload Format 
MQTT allows you to send any type of data in any format. To make sure Cloud Server can understand and interpret the payload data received, you will need to define the payload format.
Listed here will be all the types of message formats that have been defined. If you click on one of the formats you can see the definition of this payload.
Select the payload format that you will receive and then click Next
You can not create your own payload formats. You must select one of the predefined payload formats available in the list here.
The Kelvin developers welcome all companies that want to implement their own custom topic / payload formats. If you have specific needs, you contact your representatives to get more details.
Payload QTV
The Topic format here is important to follow. You will define the Topics per Kelvin Metric in Step 5 - Metric Mappings.
The Payload format is important to follow. This defines how the data can be read and saved into the Kelvin Metrics in the Cloud Server.
| Field | Data Type | Description |
|---|---|---|
| v | String, Bool or Number | This is the actual data to save to the Kelvin Metrics. The type will depend on how you defined your Kelvin Metric. |
| t | Timestamp in epoch format (ms) | This is the Linux time format which counts milliseconds from Midnight, 1st Jan 1970. |
| q | 1 or 0 | Quality of Data : 1 = Good, 0 = Bad |
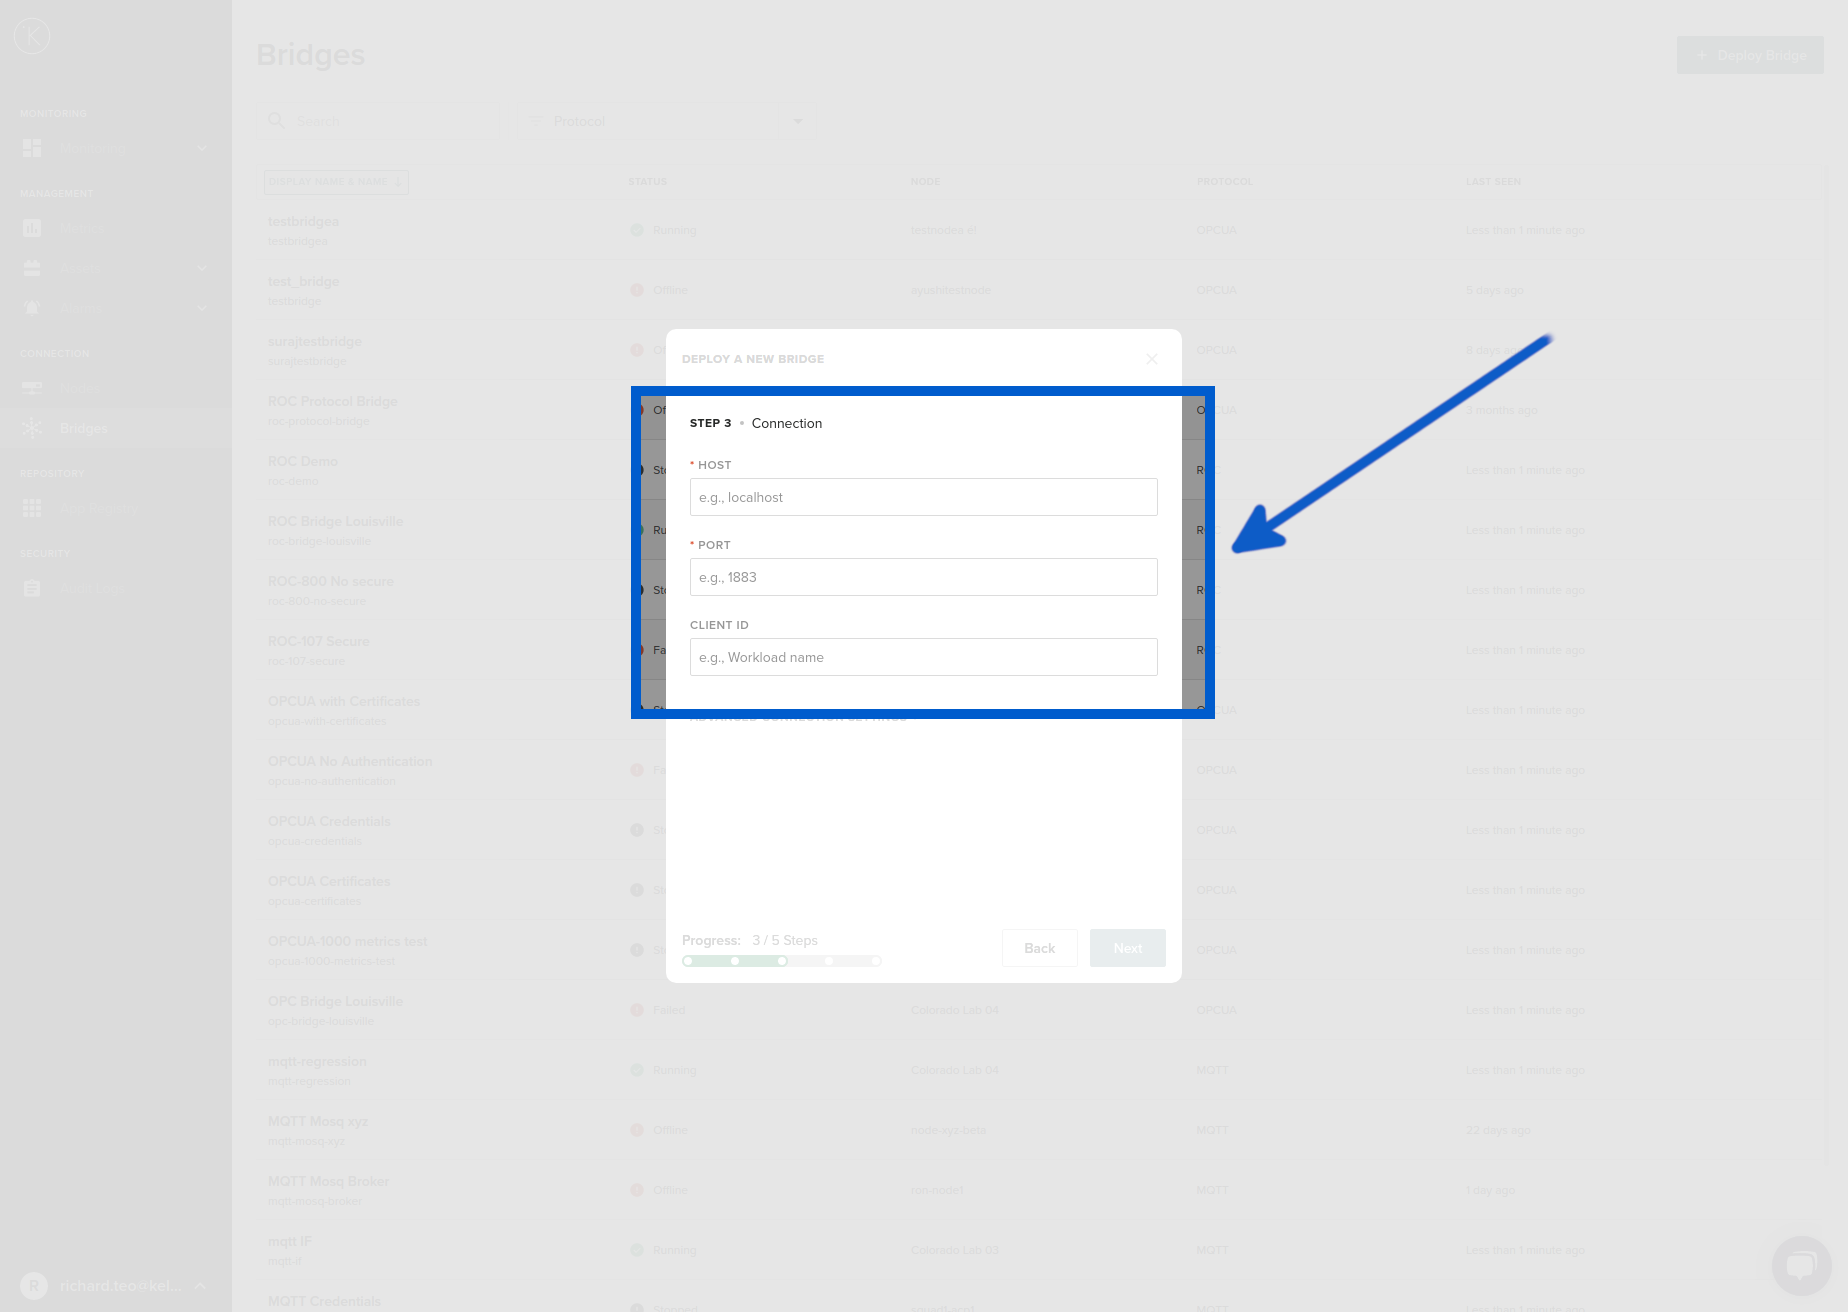
Step 3 : Connection 
Fill in the information (descriptions below) and click Next
| Field | Explanation | Mandatory |
|---|---|---|
| Host | This is the physical address of the MQTT Broker. The address should be a valid address from the point of view of the Node location. This means that local LAN IP addresses will be valid entries. | Yes |
| Port | The port number that the MQTT Broker is listening on. | Yes |
| Client ID | This can be any alphanumeric word or sentence. This is the unique name that the MQTT Broker accepts and identifies for every MQTT Client. This is the name the MQTT Bridge will advertise itself as. | Yes |
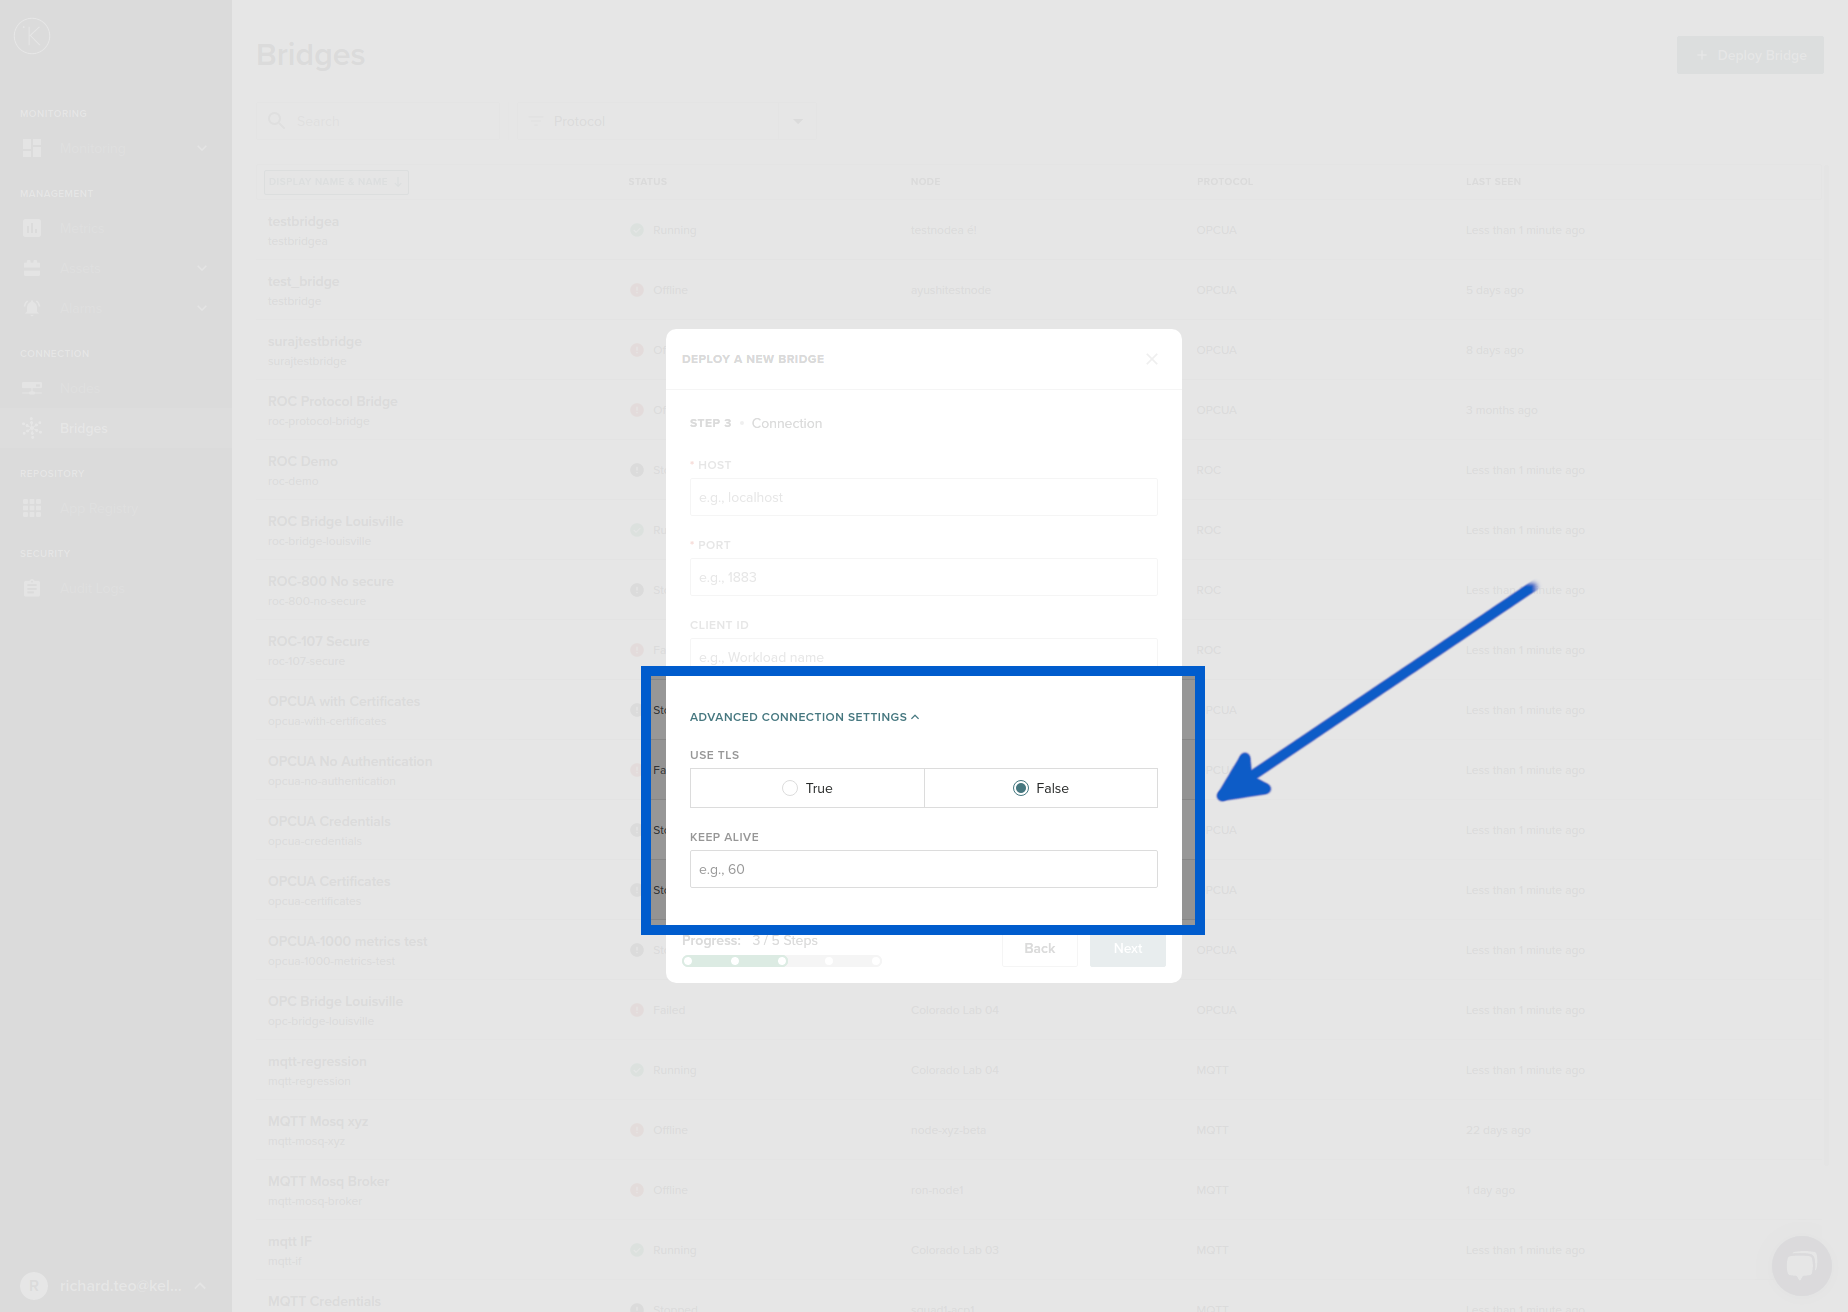
There are some advanced connection settings if you require. They are not mandatory.
| Field | Explanation | Mandatory |
|---|---|---|
| Use TLS | This uses an encrypted communication session with the MQTT Broker. Only use this if the MQTT Broker supports TLS. | No |
| Keep Alive | This is the number of seconds the connection with the MQTT Broker will be kept alive. The default is 60 seconds and is acceptable in most cases. | No |
The host address is references from the Node installed at your location. Normally you will not use a WAN address here unless you have exposed your MQTT broker to the Internet.
Step 4 : Security 
From the drop down box, select a security option. Some options will have extra questions to answer. When finished, click Next
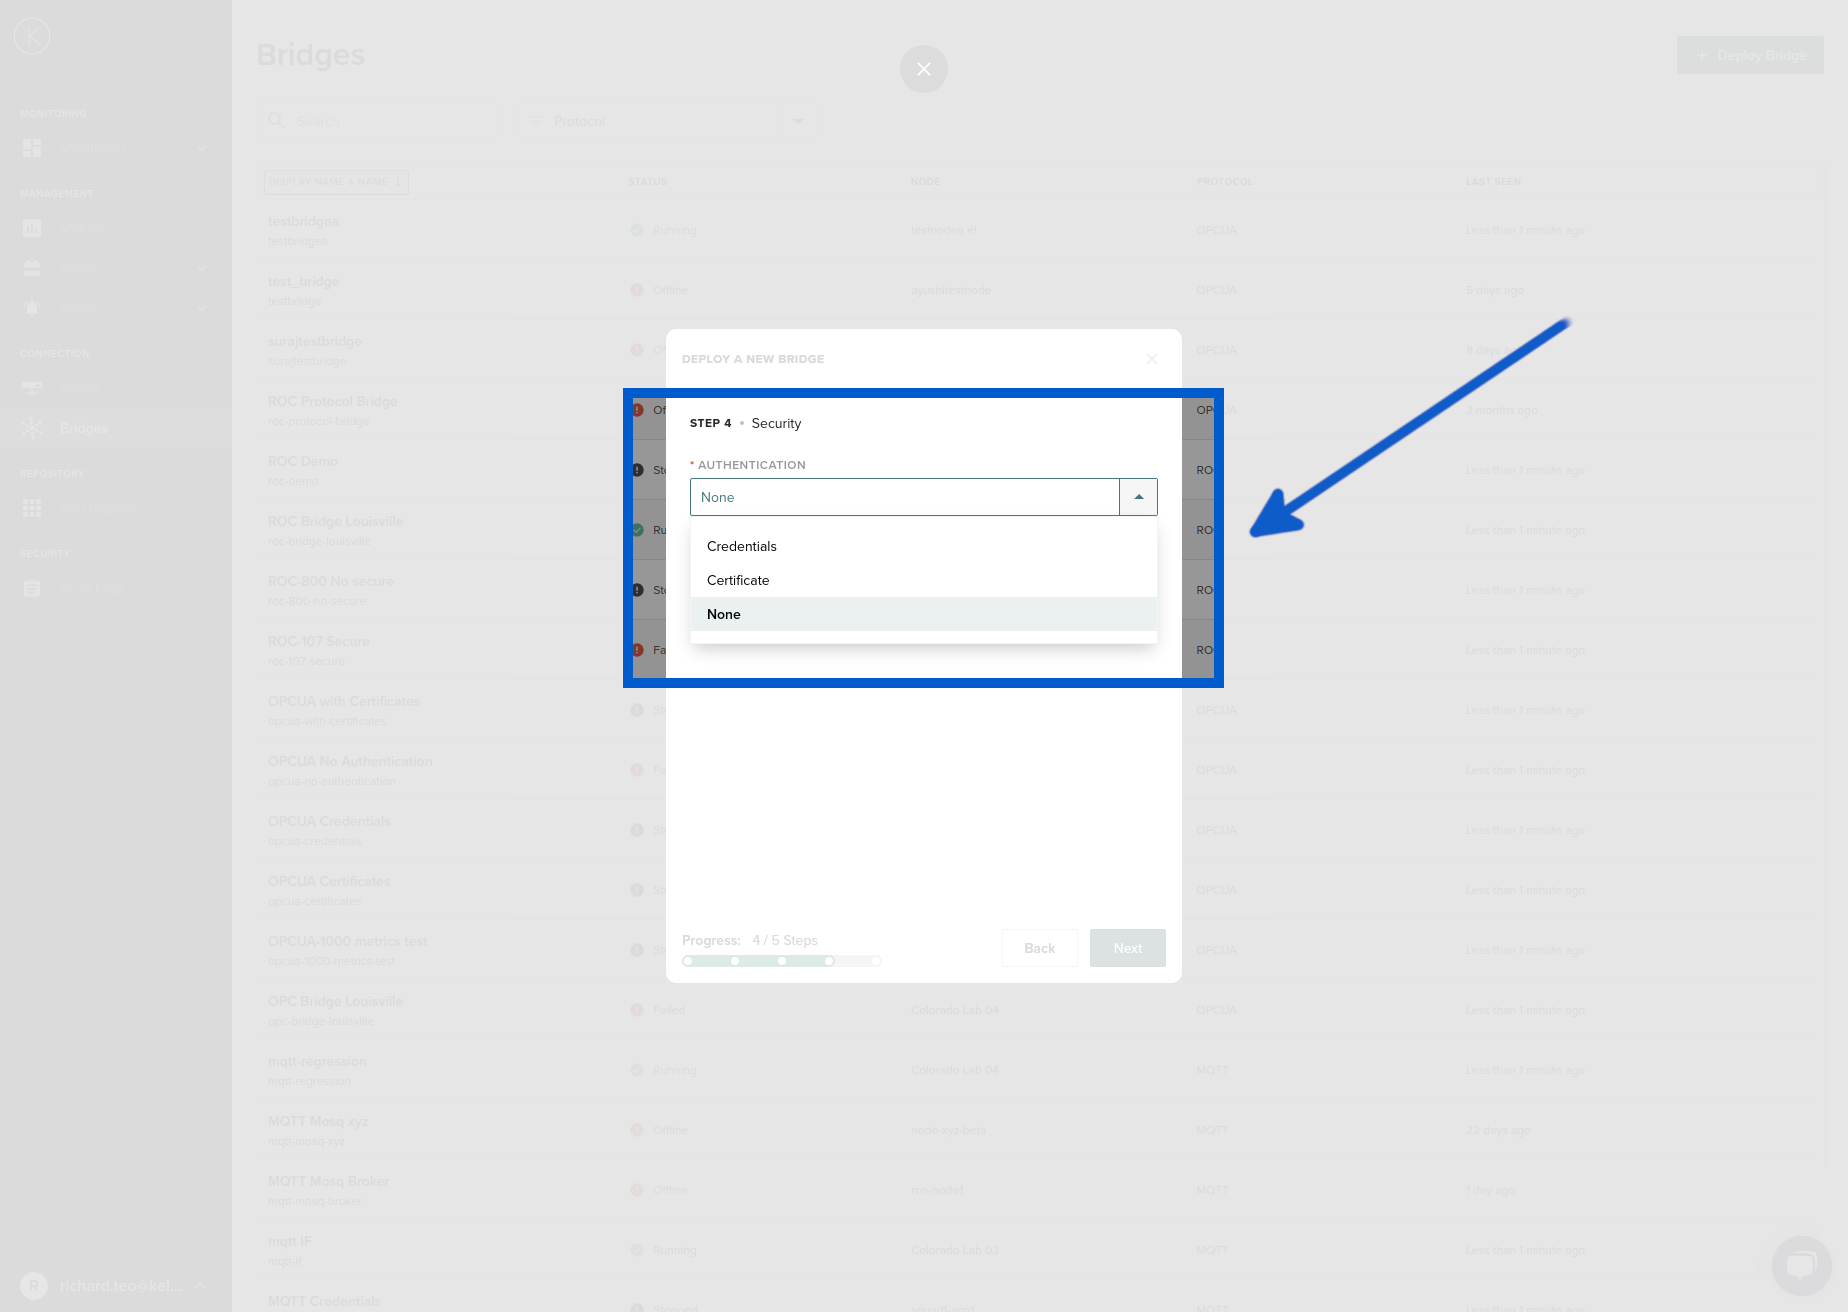
None : There is no security. You can proceed to the next step.
Certificate : You need to upload three certificates;
| Field | Explanation | Mandatory |
|---|---|---|
| Server Certificate | The CA certificate which is commonly called ca.crt. This is used originally to create your client certificate and client key below. | Yes |
| Client Certificate | The client certificate is create on your MQTT Broker while setting up your SSL certificates. This file normally ends with .pem or .crt. | Yes |
| Client Key File | The client private key is create on your MQTT Broker while setting up your SSL certificates. This file normally ends with .key. | Yes |
All certificates must be PEM encoded and the client key file is unencrypted.
Credentials : Enter your login and password for your MQTT broker.
Step 5 : Metric Mapping 
This is the final step. You need to connect each Topic from the MQTT Broker with a Kelvin Asset and Kelvin Metric in the Cloud Server. One row represents one Topic.
If you have many dozens or hundreds of Metrics to put in, then you can make a list in an Excel sheet, then simply copy from excel and paste into here. All the fields will be automatically filled in the same order as the Excel sheet.
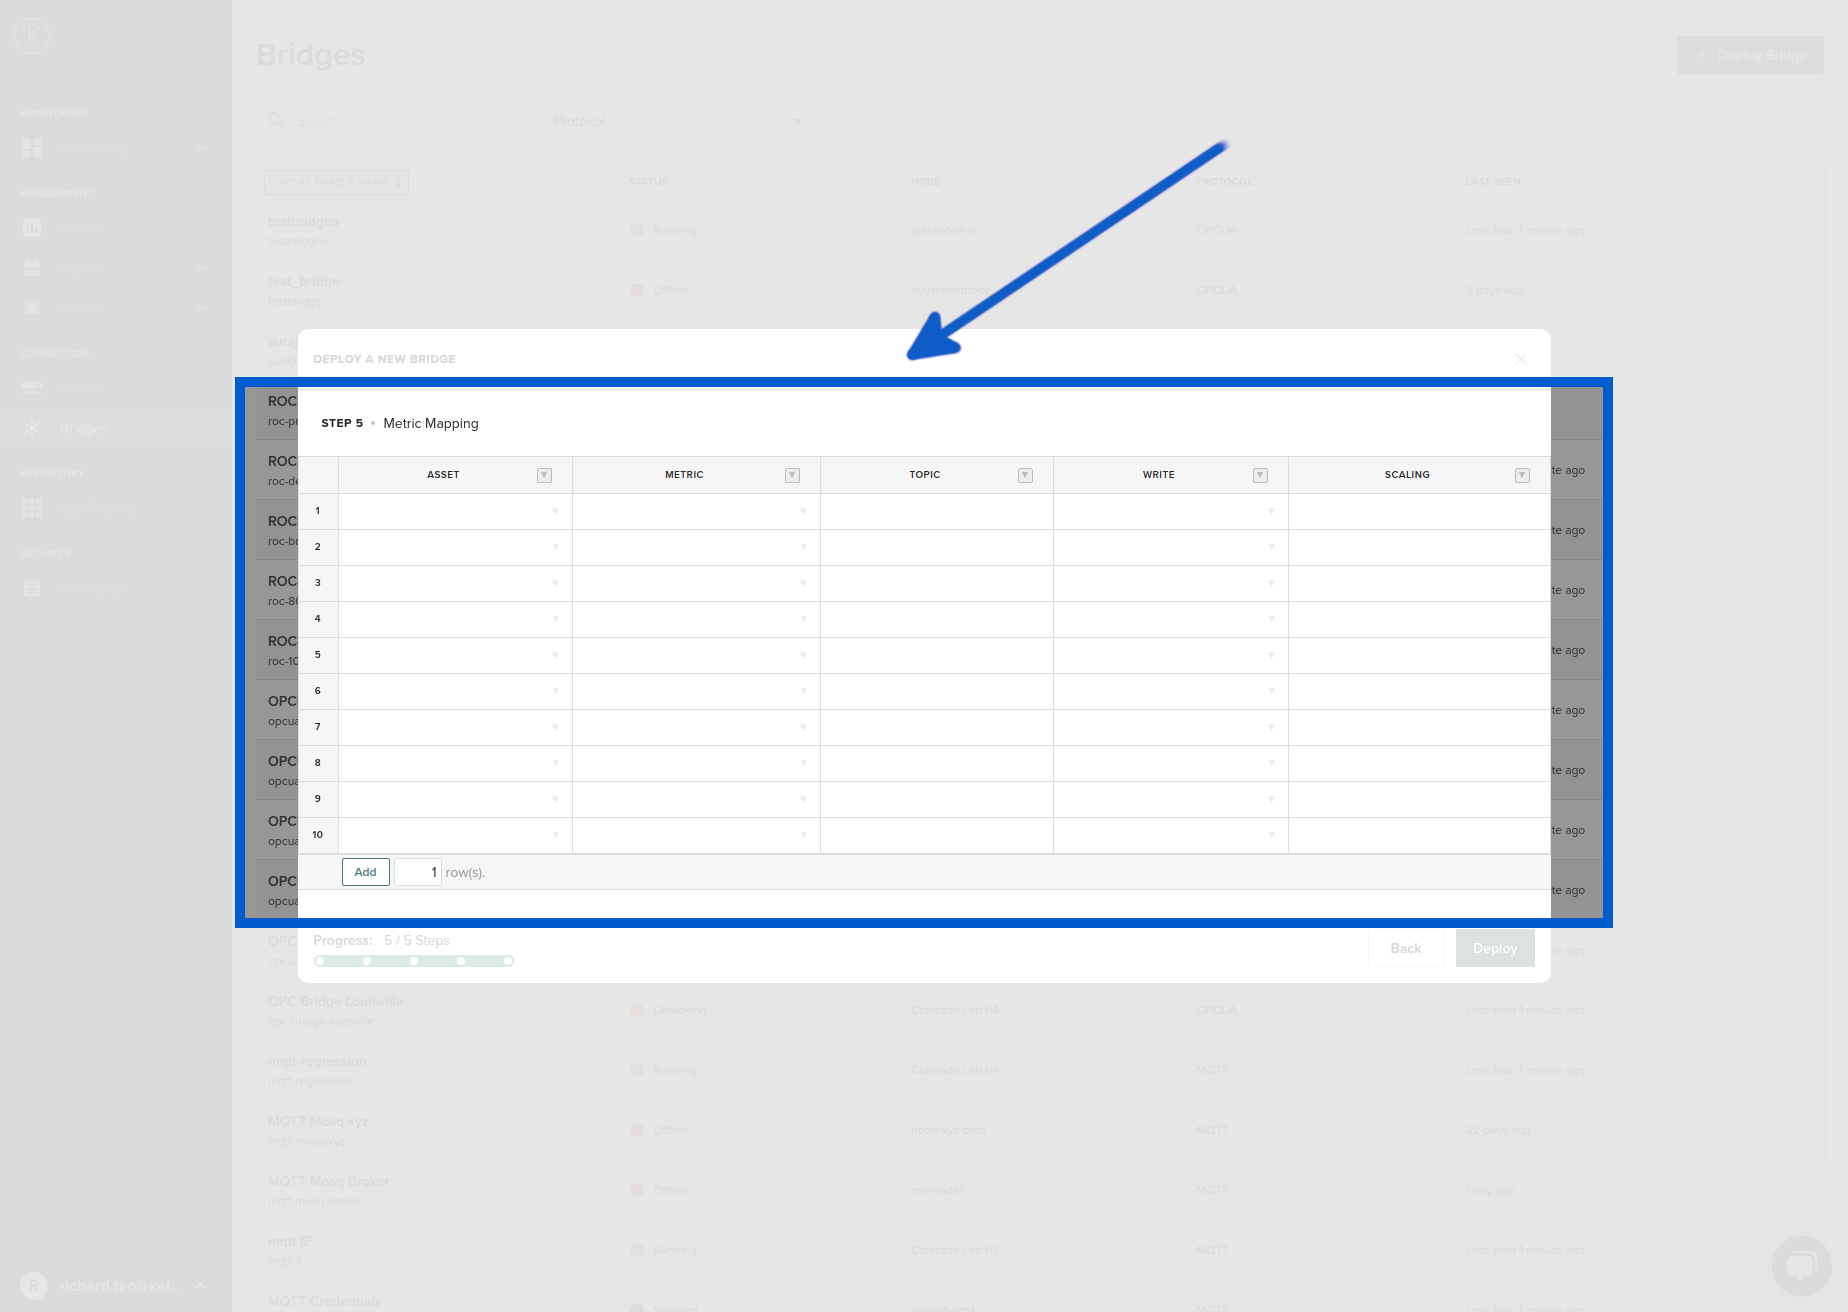
| Field | Explanation | Mandatory |
|---|---|---|
| Asset | This is the Asset you have previously created in the Kelvin Control Manager UI. Select from the drop down list. (Note : If you need to create a new Asset, you will need to go back to Assets first and create it, you can not create it here) | Yes |
| Metric | Select a Metric from the drop down list. (Note : If you need to create a new Metric, you will need to go back to Metrics first and create it, you can not create it here) | Yes |
| Topic | Enter the topic name for the data point. The topic name should match the topic named used by the MQTT Client Publisher. | Yes |
| Write | You can choose if this is read-only (Disabled) or read/write (Enabled). | Yes |
| Scaling | Scale the number before saving it to the Asset. This number will be multiplied by the number received. | No |
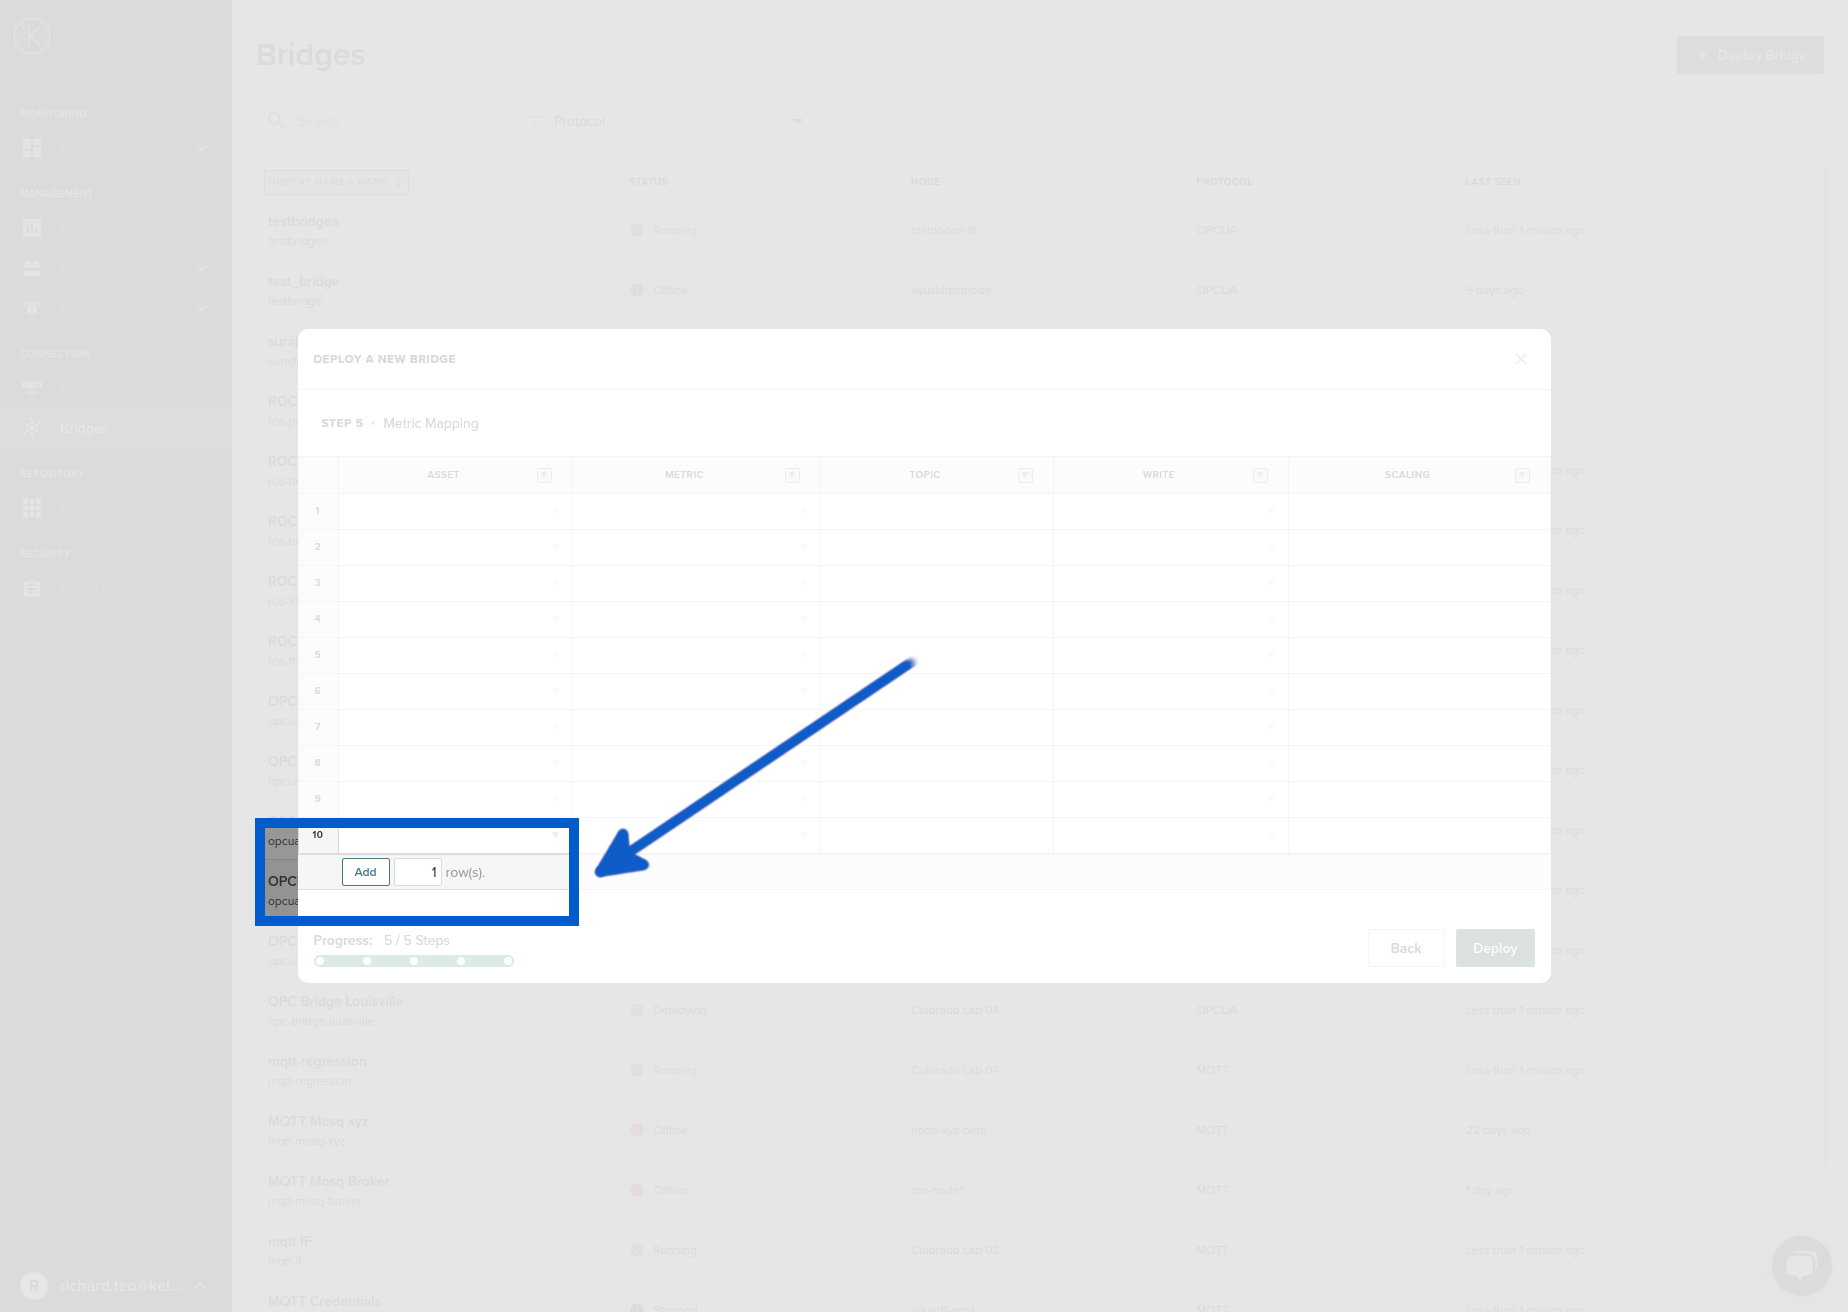
Step 5.1 : Adding extra Rows 
If you run out of rows and need to add more Topics to Assets, you can add extra rows by clicking to the Add button at the bottom left corner.
Do not worry if you have any blank rows when finished. You do not need to delete them. These will be ignored when you click Deploy.
Step 6 : Deploy 
When you are ready and feel good with the information entered, then click Deploy.
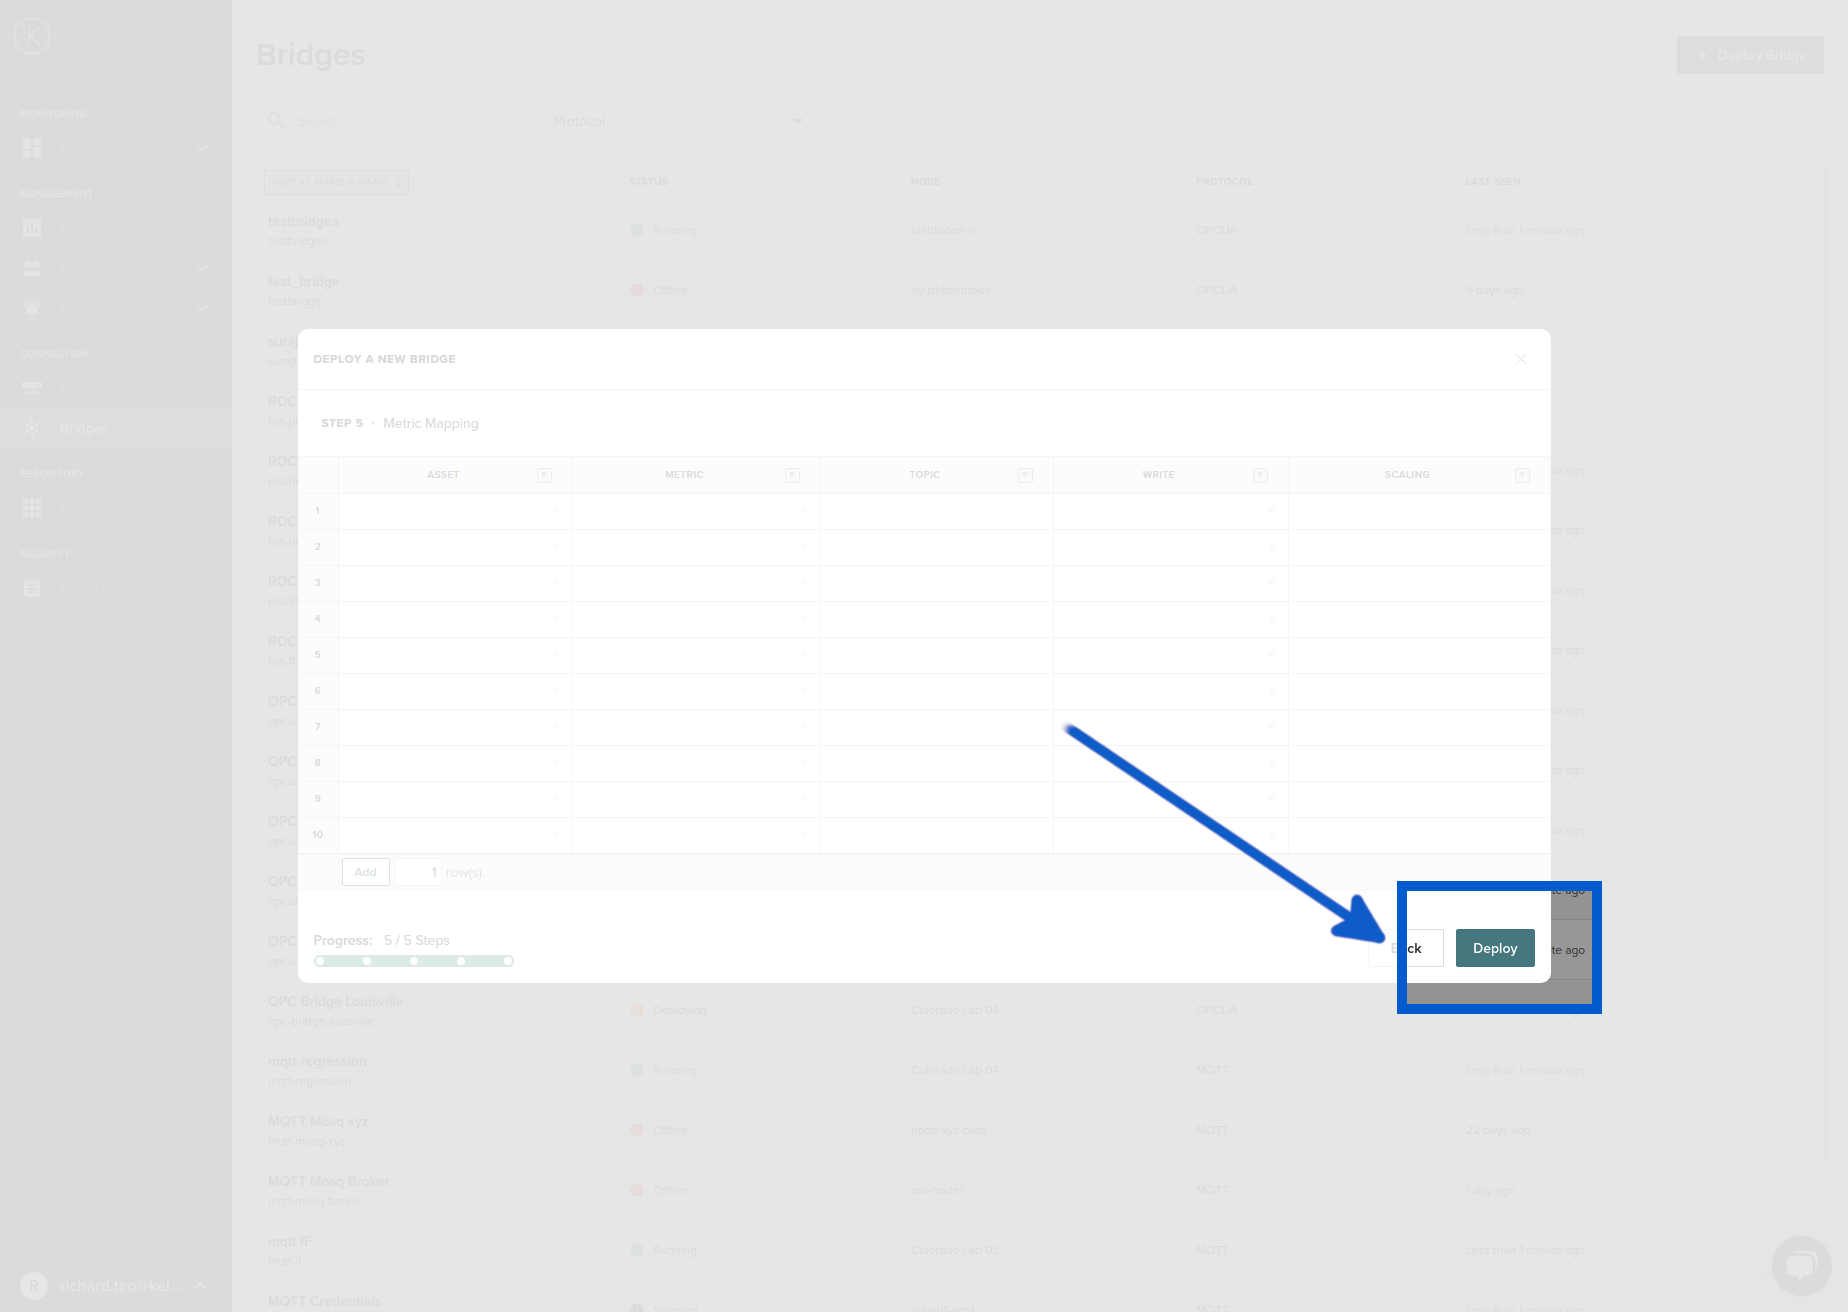
If you click on the close button (x) here at Step 6, you will lose all your work for the new MQTT Bridge. You will not receive a warning.
Step 7 : Confirm Deploy 
After you click Deploy, you will be asked to Confirm or Cancel the deployment.

If you select cancel here you will not lose your work. You will remain at Step 5. You can try and deploy again or cancel the whole process and lose your work.
Deploying with API 
By deploying with the API you can take advantage of the advanced features available.
When editing or redeploying a Kelvin Bridge, you can use a simple hack by sending a /bridges/{bridge_name}/get API request, copying the returned JSON, making your changes, and then using the JSON in a /bridge/deploy API request. The additional keys such as created or updated will be ignored by the deploy API.
We will follow our previous example and deploy an MQTT bridge.
First you need to define the basic information of the bridge.
"name": "demo-bridge",
"title": "Demo Bridge",
"acp_name": "node01",
"protocol": "mqtt"
| Key | Options | Description |
|---|---|---|
| name | Lowercase alphanumeric or the character '-' | A unique name for the Kelvin Bridge |
| title | This can be any upper or lowercase characters and numbers. Spaces are also allowed | A display name for the Kelvin Bridge |
| acp_name | Lowercase alphanumeric or the character '-' | Name of the Kelvin Cluster |
| protocol | opc-ua, mqtt, modbus, roc. |
What protocol to use |
Next you will need to provide a payload key based on the type of protocol you have selected. In our example we will be providing information for an MQTT protocol.
"payload": {
    "configuration": {
        "authentication": {
            "type": "none"
        },
        "connection": {
            "host": "d85585b5a2a04410883158f1cb48970e.s1.eu.hivemq.cloud",
            "port": 8883,
            "tls": true
        },
        "integration": "qtv"
    },
    "logging_level": "INFO",
    "metrics_map": [
        {
            "access": "RO",
            "asset_name": "tank-farm",
            "configuration": {
                "scale_multiplier": 1,
                "topic": "demo/temperature"
                "min": 1.5,
                "max": 47.0
            },
            "data_type": "raw.float64",
            "name": "air-conditioner-temperature"
        }
    ]
}
All the configuration keys are self explanatory. We will only highlight some notable keys below;
| Key | Options | Description |
|---|---|---|
| access | RW and RO | RW allows data writes to the edge devices through the Kelvin Control Manager. |
| min / max | Numerical Value | This is optional. When used it will limit the values that can be read or written to the Kelvin Asset / Kelvin Metric Pair. Any values outside of this range will be ignored. |
The full JSON should look like this;
{
    "name": "demo-bridge",
    "title": "Demo Bridge",
    "acp_name": "node01",
    "protocol": "mqtt"
    "payload": {
        "configuration": {
            "authentication": {
                "type": "none"
            },
            "connection": {
                "host": "d85585b5a2a04410883158f1cb48970e.s1.eu.hivemq.cloud",
                "port": 8883,
                "tls": true
            },
            "integration": "qtv"
        },
        "logging_level": "INFO",
        "metrics_map": [
            {
                "access": "RO",
                "asset_name": "tank-farm",
                "configuration": {
                    "scale_multiplier": 1,
                    "topic": "demo/temperature"
                    "min": 1.5,
                    "max": 47.0
                },
                "data_type": "raw.float64",
                "name": "air-conditioner-temperature"
            }
        ]
    }
}
Understanding Deploy Status 
When you click deploy, the Cloud Server will proceed to connect to the Kelvin Cluster you selected in Step 1 and deploy the MQTT Bridge App with the parameters you have defined here. The MQTT Bridge will then automatically start and connect to the MQTT Broker and start collecting data.
You can start, stop or restart the MQTT Bridge at anytime. Detailed instructions can be found later in this page.
If the Kelvin Cluster is offline when you deploy, the Cloud Server will deploy the MQTT Bridge App automatically when it sees the Kelvin Node come back Online.
Edit and Redeploy MQTT Bridge 
At any time you can reedit and change any parameter of the MQTT Bridge.
You can change any of the parameters while first deploying the MQTT Bridge. For example, you may want to change the Node, change the MQTT Client Publisher, update the security credentials or add some more Metrics Mapping.
To edit an existing MQTT Bridge, go to the overview page on the Kelvin Manager UI. On the left hand side menu, select Bridges.
Click on a MQTT Bridge name.
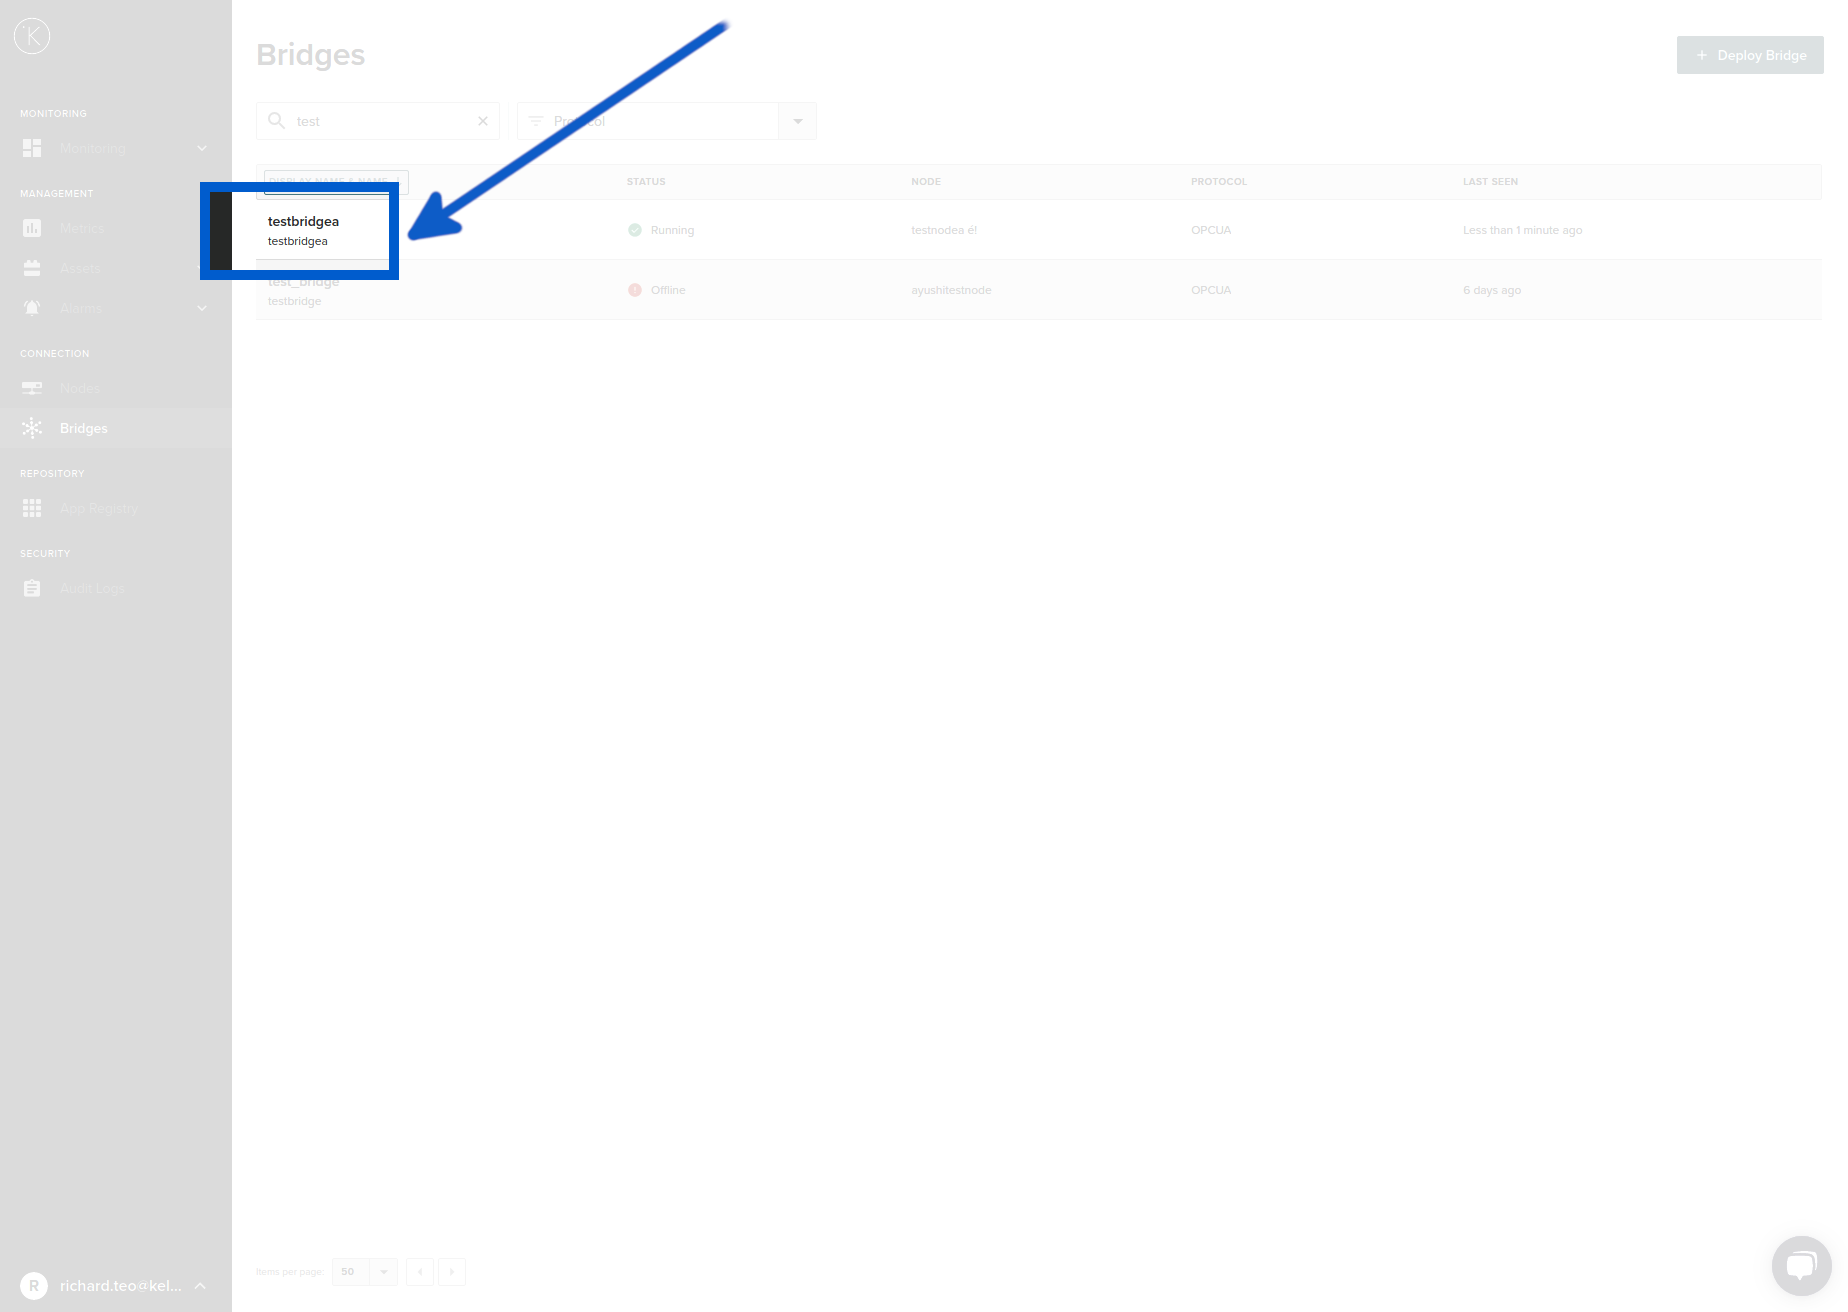
You will see the bridge details and all Assets being collected through this MQTT Bridge. Click on Edit Bridge.
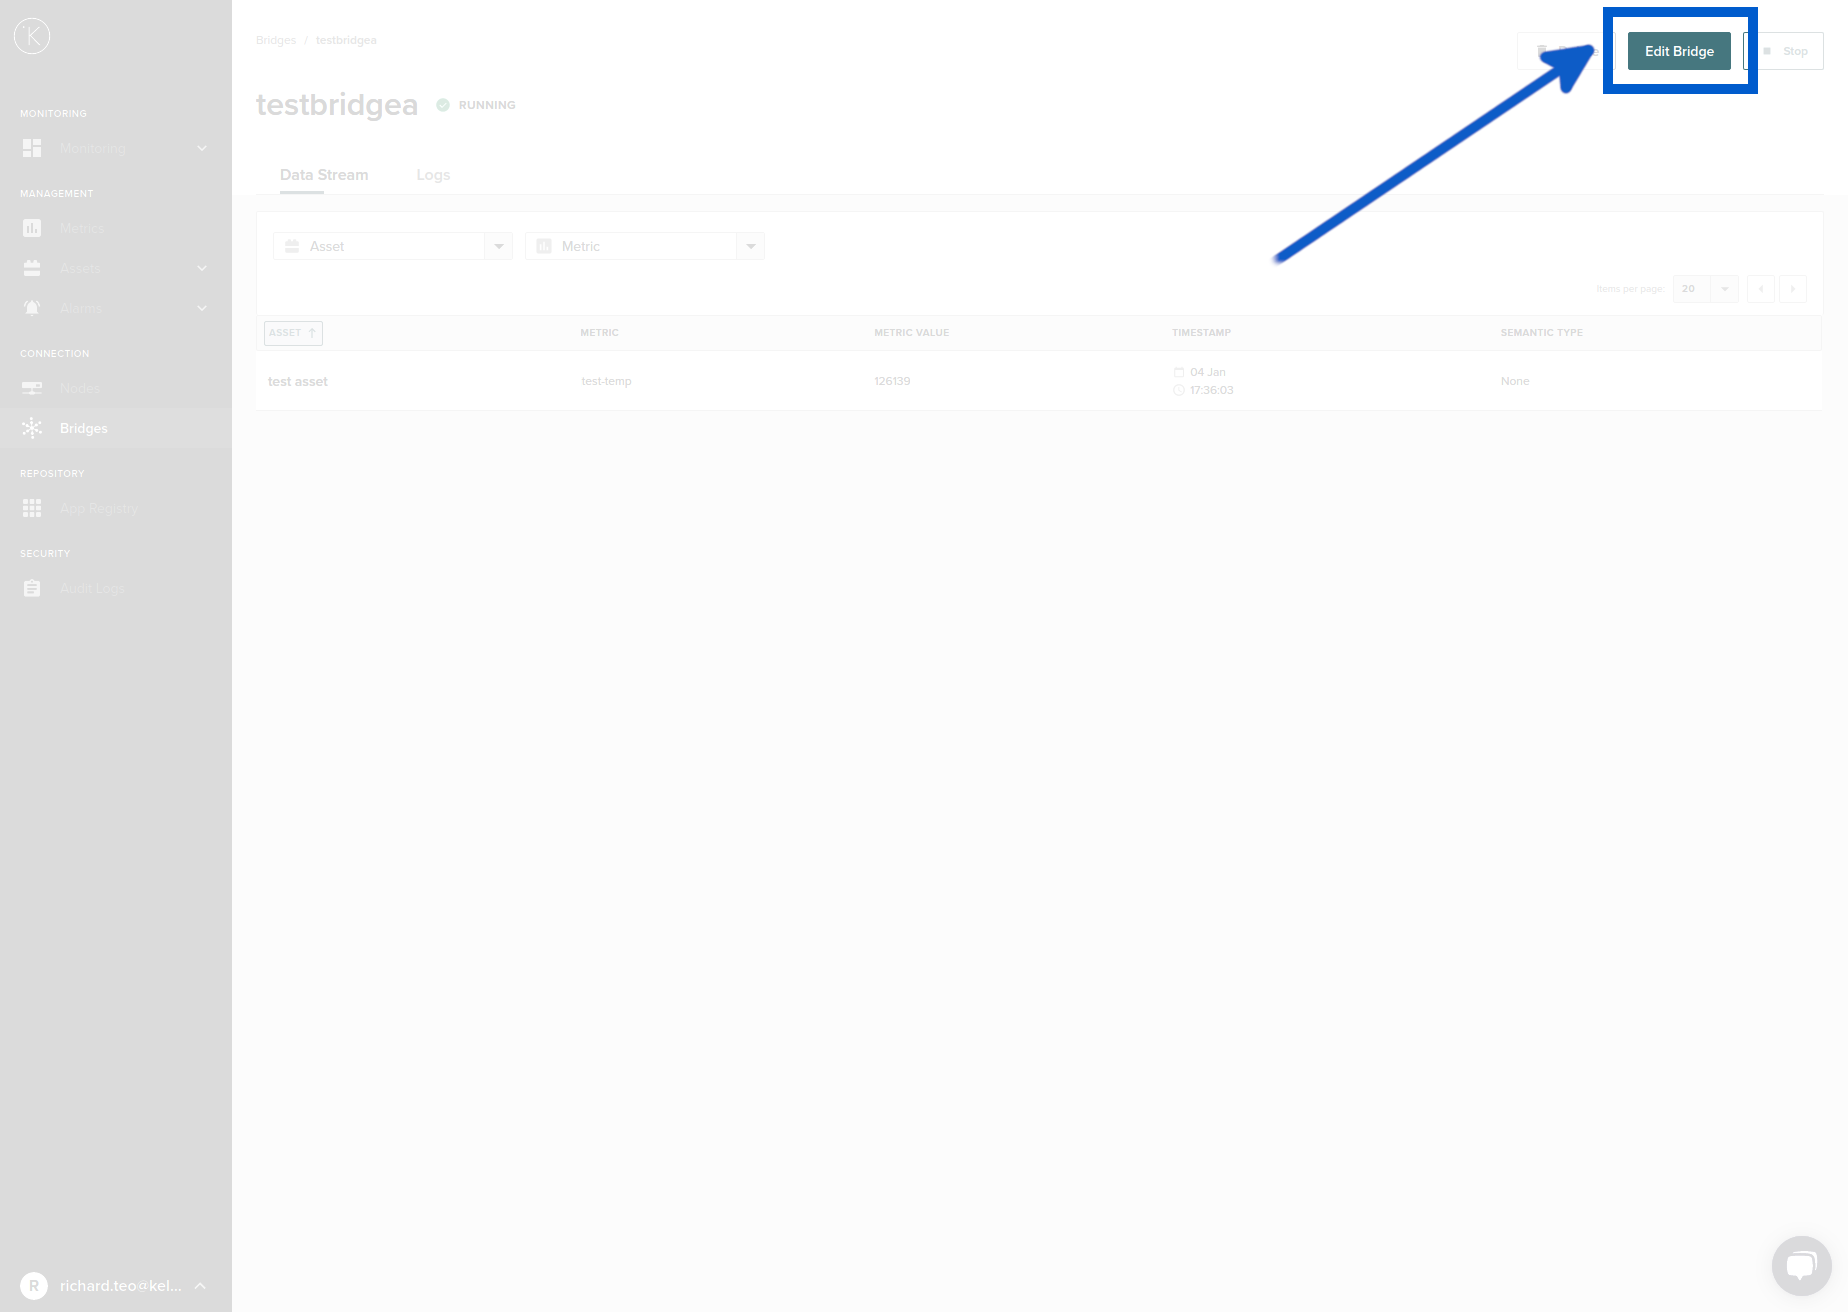
Then you will go through the same steps when you first deployed the MQTT Bridge. The only difference is the current settings will already be entered. See Deploying a New MQTT Bridge for detailed instructions of each step. After you reach Step 6, come back here to continue.
When you are finished, you can click Deploy. You will be asked to confirm Redeploy.

If you select cancel here you will not lose your work. You will remain at Step 5. You can try and deploy again or cancel the whole process and lose your work.
Delete MQTT Bridge 
You can delete MQTT bridges that you no longer need.
This action is permanent. Once an MQTT bridge is deleted, you can not undo. You must deploy a new bridge.
To delete an existing MQTT Bridge, go to the overview page on the Kelvin Manager UI. On the left hand side menu, select Bridges.
Click on an MQTT Bridge name.
You will see the bridge details and all Assets being collected through this MQTT bridge. Click on Delete.

Start, Stop and Restart MQTT Bridge 
You can control each MQTT bridge from the dashboard. You may want to do that in cases where you want to stop listening to the Broker temporarily but don't want to delete the MQTT bridge.
In some cases when the Node temporarily loses connection to the cloud, you may need to restart the MQTT bridge once the connection is restored.
To start, stop or restart an existing MQTT Bridge, go to the overview page on the Kelvin Manager UI. On the left hand side menu, select Bridges.
Click on an MQTT Bridge name.
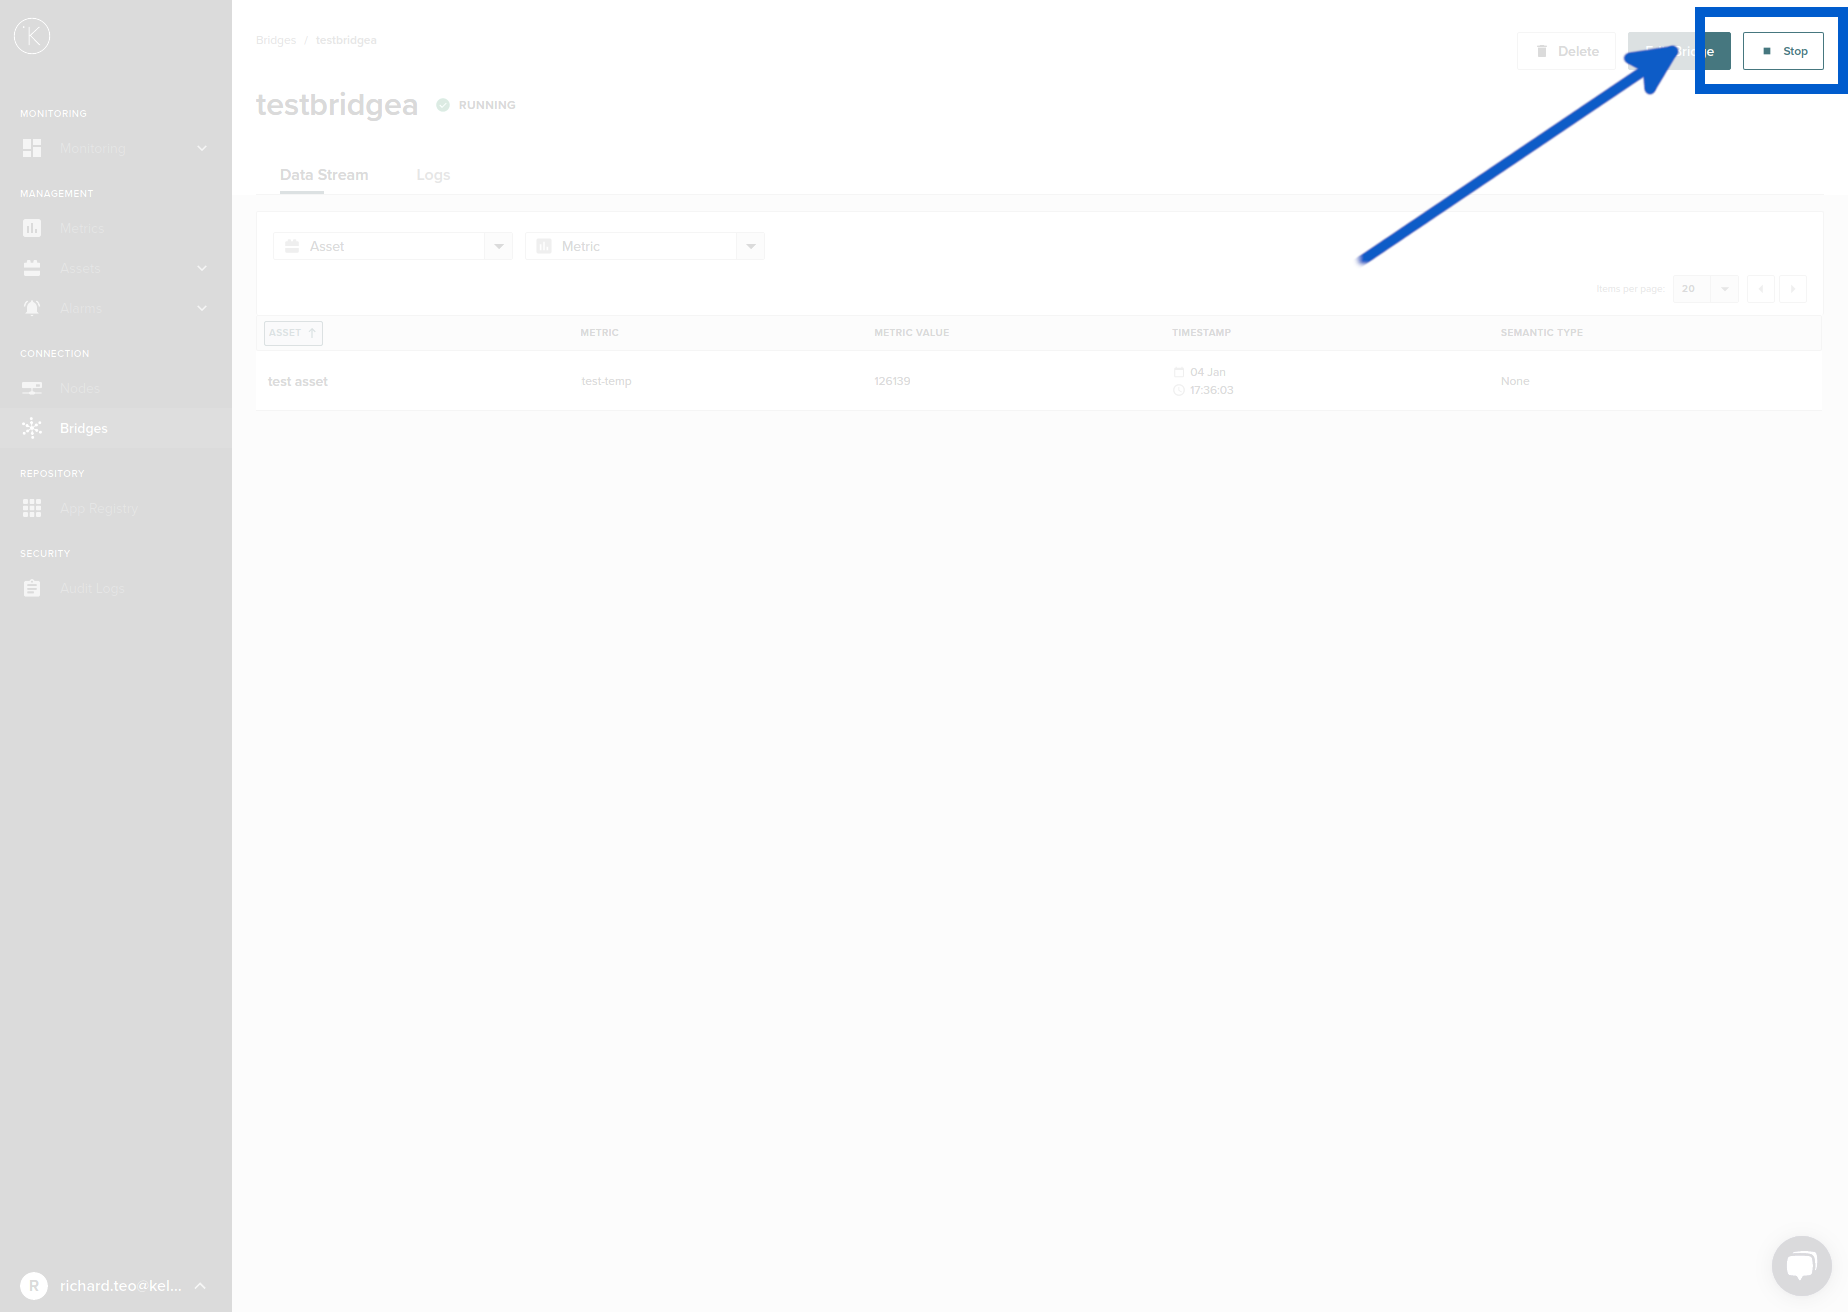
You will see the bridge details and all Kelvin Assets and Kelvin Metrics being collected through this MQTT bridge. On the top right hand corner you will see a button with one of three possible words; Stop, Start or Restart. This will depend on the current status of the MQTT Bridge.
You will only see this option if the Kelvin Cluster is Online. This button will not be visible if the Kelvin Node is Offline.
Click the button to perform the action.
Troubleshooting
Deploying MQTT Bridge 
| Problem | Solutions |
|---|---|
| In Step 1, there are no Nodes in the drop down list | You need to create Nodes first before creating an MQTT Bridge. Go to Nodes and create a Node first. |
| In Step 1, In the Name option, it does not accept the name I have entered | The name must contain only alphanumeric characters and ".". No spaces are allowed. |
| In Step 3, I can not connect to the MQTT Broker |
|
| In Step 4, my certificates are not accepted. | All certificates must be PEM encoded and the client key file is created without a password and unencrypted. |
| In Step 5, there are no Assets in the drop down list | You need to create Assets first before creating an MQTT Bridge. Go to Assets and create all your Assets first. |
| In Step 5, there are no Metrics in the drop down list | You need to create Metrics first before creating an MQTT Bridge. Go to Metrics and create all your Metrics first. |
| Error Message : This Bridge can’t be deleted | You must be connected with the Node before you can delete a bridge. |
| I can not see MQTT protocol as an option. | You need to be using minimum version 3.7+. On older versions you can only setup a bridge with OPC UA. |
MQTT Broker 
| Problem | Solution |
|---|---|
| How to setup an MQTT Broker ? | You can use one of the MQTT cloud solutions such as CloudMQTT or you can setup your own broker on a windows, Linux or mac pc. There are also dedicated industrial gateways that also provide MQTT broker services that can be configured. |
| How do I find my MQTT broker ip address or name ? | If you are using a professional cloud solution, you will find the connection details in their documentation. For example in CloudMQTT, you can find instructions here.
If you are installing and hosting your own on a PC, normally you will use the local IP address of the PC and the port you have selected. For example if you use the popular Eclispe Mosquitto software, you can use your PC IP address and the port number can be found in the mosquitto.conf file. |
| I'm using SSL certificate authentication. How do I find my MQTT Broker Certificates. | If you are using a professional cloud solution, you will the certificate details in their documentation. For example in CloudMQTT, you can find the instructions here. If you are using a dedicated MQTT broker gateway, then read their documentation how to download the certificates. |
Glossary of Terms 
| Term | Definition |
|---|---|
| MQTT Client | This is a program that connects to an MQTT Broker. It has the ability to send or receive Messages. If it sends messages, then it is called an MQTT Client Publisher and if it receives Messages then it is called an MQTT Client Subscriber. |
| MQTT Client Subscriber | This is an MQTT Client that subscribes to an MQTT Broker. Once subscribed, it will receive all the subsequent Messages that have been published to a particular Topic. MQTT Clients can subscribe to a particular Topic or to a group of Topics using wildcards. |
| MQTT Client Publisher | This is an MQTT Client that publishes a Message to a Topic on an MQTT Broker. |
| MQTT Broker | This is the MQTT central server that all MQTT clients connect to. It is important that this remains on and available for all MQTT Clients at all times. The MQTT Broker manages all the Messages between all MQTT Subscribers and all MQTT Publishers. The MQTT Subscribers and MQTT Publishes do not need to know where they come from or where they go. |
| Topics | This is a name that distinguishes between the different Messages. It can also be grouped together by adding a slash "/" between each group name. For example /group1/subgroup1/sensorvalue |
| Messages | The messages is the actual information being transferred. It is also commonly known as the MQTT Payload. It can be anything and contain any format including text, images, json, strings, numbers, etc. |
| Payload | This is the same as Messages. |
| MQTT Bridge | A Bridge is located on the Kelvin Manager UI. It can be configured to use many types of protocols (UPC UA, MQTT, Emerson ROC, etc.) to collect information from the edge. |
| Node | A node is a Kelvin gateway. It is used by the Kelvin Manager UI to deploy programs to the edge and to collect data from the edge. |
| Metrics | Metrics are a group of Assets in the Kelvin Manager UI. |
| Assets | An Asset is one piece of data in the Kelvin Manager UI. This could be a temperature, vibration, position or any useful value. |
| Certificates | These are the SSL files to establish a encrypted and authenticated communication between the MQTT Broker and any MQTT clients. |
| Credentials | This is a login and password. Login is also commonly called user or username. |
Other Related Links
Interesting links related to MQTT Bridge
Credits
- MQTT Publish / Subscribe diagram from https://mqtt.org - 2021
Some icons and graphics used here are sourced from this kind artist;
- Some Icons made by Eucalyp from www.flaticon.com
Last Modified
Last Modified on 7th February 2022
7th February 2022
* Last update before detail updating records started
Kelvin Documentation AI Support
Hi. My name is KevDocBot. How can I help you?