Provision a K3S - How to
On this page you will learn how to setup an edge system with K3S using the cluster installation tools in the Kelvin UI.
If you want Kelvin to install the Kubernetes cluster directly and handle all the management of the cluster, you can choose the K3S option.
For this option you only need to have Ubuntu Server to start the installation process.
This is an effortless, all-encompassing solution for clients indifferent to the Kubernetes flavor used and want to only focus on simplicity and minimal management requirements.
For all other options, you will need to install and manage the Kubernetes cluster yourself. Kelvin will only install and maintain the Kelvin-specific management pods on the existing Kubernetes cluster.
K3S

K3s is a lightweight, fully compliant Kubernetes distribution that includes a range of features such as local storage provider, service load balancer, Helm and Traefik ingress controllers.
K3s is wrapped in a simple launcher, making it secure by default and easy to operate in lightweight environments.
It requires only a modern kernel and cgroup mounts as external dependencies, and all Kubernetes control plane components are encapsulated in a single binary, enabling K3s to automate complex cluster operations. It also packages required dependencies such as containerd, Flannel, CoreDNS, and host utilities.
Requirements
Before running the Kelvin provision script you need to make sure the following requirements are met;
Communications
The following ports will need to be open for outgoing and incoming communications;
| Description | Port Type | Port No. |
|---|---|---|
| Server / Main Node | TCP | 443 |
| TCP | 5000 | |
| TCP | 6443 | |
| Worker Nodes | TCP | 443 |
| TCP | 5000 | |
| UDP | 8472 | |
| Kelvin SmartApp™ Services* | TCP/UDP | 30000 - 32767 |
Kelvin SmartApp™ Services ports only need to be opened if there are plans to provide local services from deployed Kelvin SmartApp™.
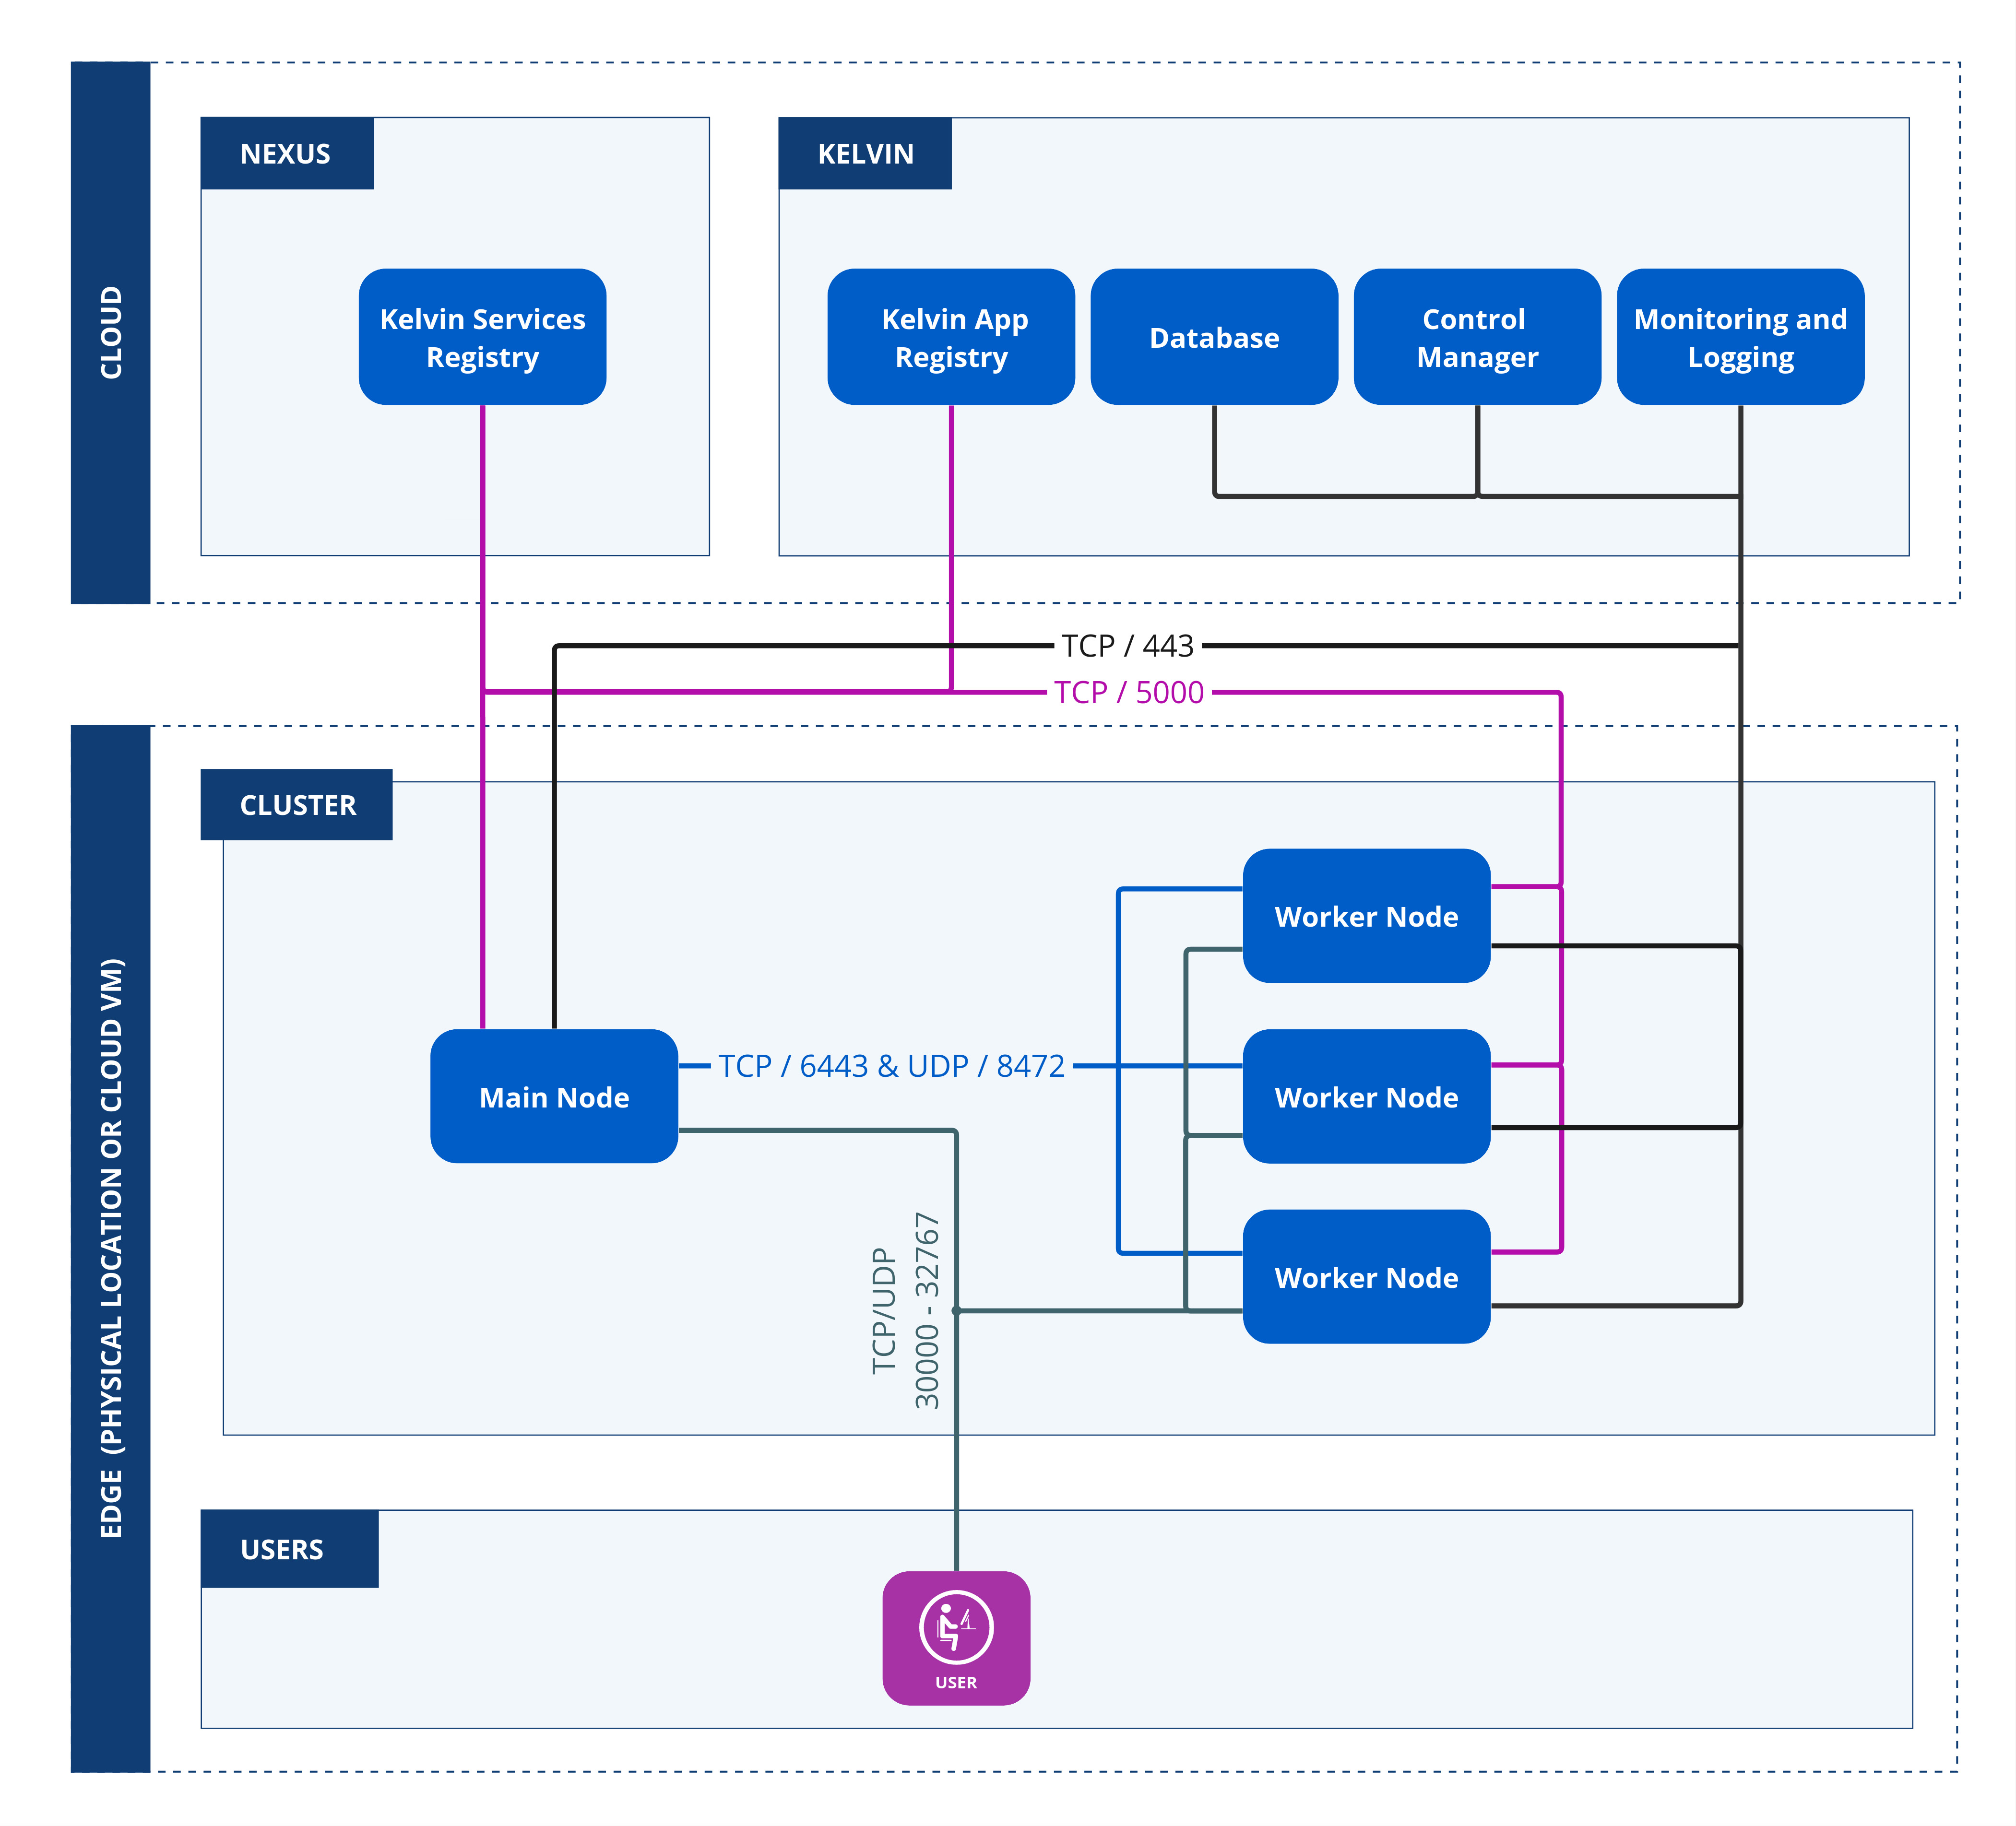
Networking
- If the cluster is more than 1 node, the Main Node must have a static IP address.
Hardware
Actual CPUs and RAM requirements will depend heavily on the requirements and quantity of Kelvin SmartApp™ that you want to deploy.
Resource hungry apps or deploying tens or hundreds of Kelvin SmartApp™ will require more resources.
For physical hardware and assuming each node is a computer, the minimum requirements for each computer will be;
It is strongly recommended to use SSD disks.
| Processor | Min CPU Cores | Min RAM | Min HDD |
|---|---|---|---|
| x86_64 | 2 | 4 GB | 25 GB |
| arm64 | 2 | 2 GB | 25 GB |
For cloud based clusters, the virtual requirements are;
| Deployment Size | No of Nodes | Min No of VCPUS | Min Amount of RAM |
|---|---|---|---|
| Small | 1 | 2 | 4 |
| Medium | 2 - 10 | 4 | 8 |
| Large | 11 - 100 | 8 | 16 |
Limitations/ Fixed Design
When deciding your hardware and infrastructure requirements, it is also important to keep the following limitations in mind.
Cluster
For each cluster there are some limitations and consideration;
- Each node can hold a maximum of 110 pods.
- In each cluster, 16 pods are reserved for core system Kelvin SmartApps™.
- Core system Kelvin SmartApps™ will take 2GB of space.
- Cluster and Node pod reserved CIDR:
10.42.0.0/16 - Node Service CIDR:
10.43.0.0/24
Installation
The installation process is very simple and you can have your new Kelvin Cluster cluster up and running within ten minutes depending on your internet speed.
Install OS
To start you need to install a compatible operating system onto your computer/server.
We recommend using Ubuntu Server version 18.04 or newer. We also strongly advise that you use only long term support versions of Ubuntu server which are released in April every two years. and has security support for 5 years minimum with options to extend it up to ten years with an ESM contract.
At a minimum you only need to install a command line server without a graphic user interface.
You can download Ubuntu Server here.
Install Cluster
This will install Kubernetes and setup the Main Node into a one Node cluster and register the Cluster with the Kelvin Cloud.
After the Cluster has been successfully setup, you can then add additional Nodes to the Cluster.
You can watch this short demo video or read the full step-by step written tutorial below.
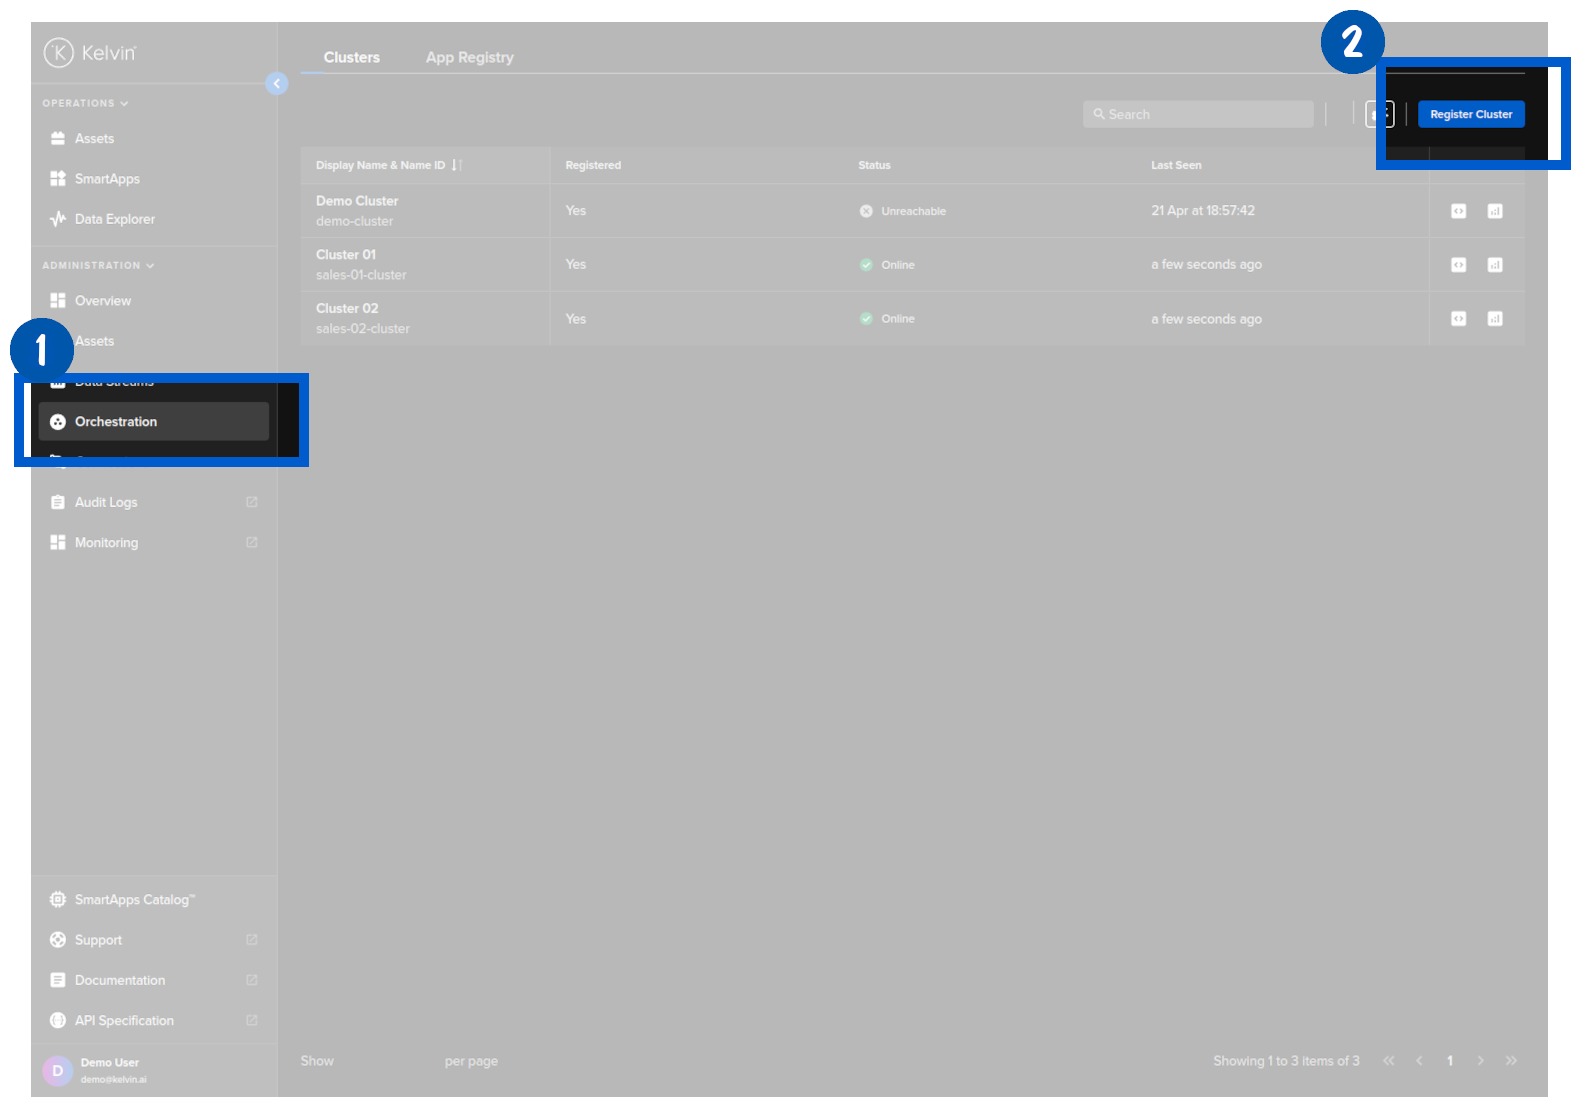
To start, go to the Orchestration page and click on the Register Cluster button;
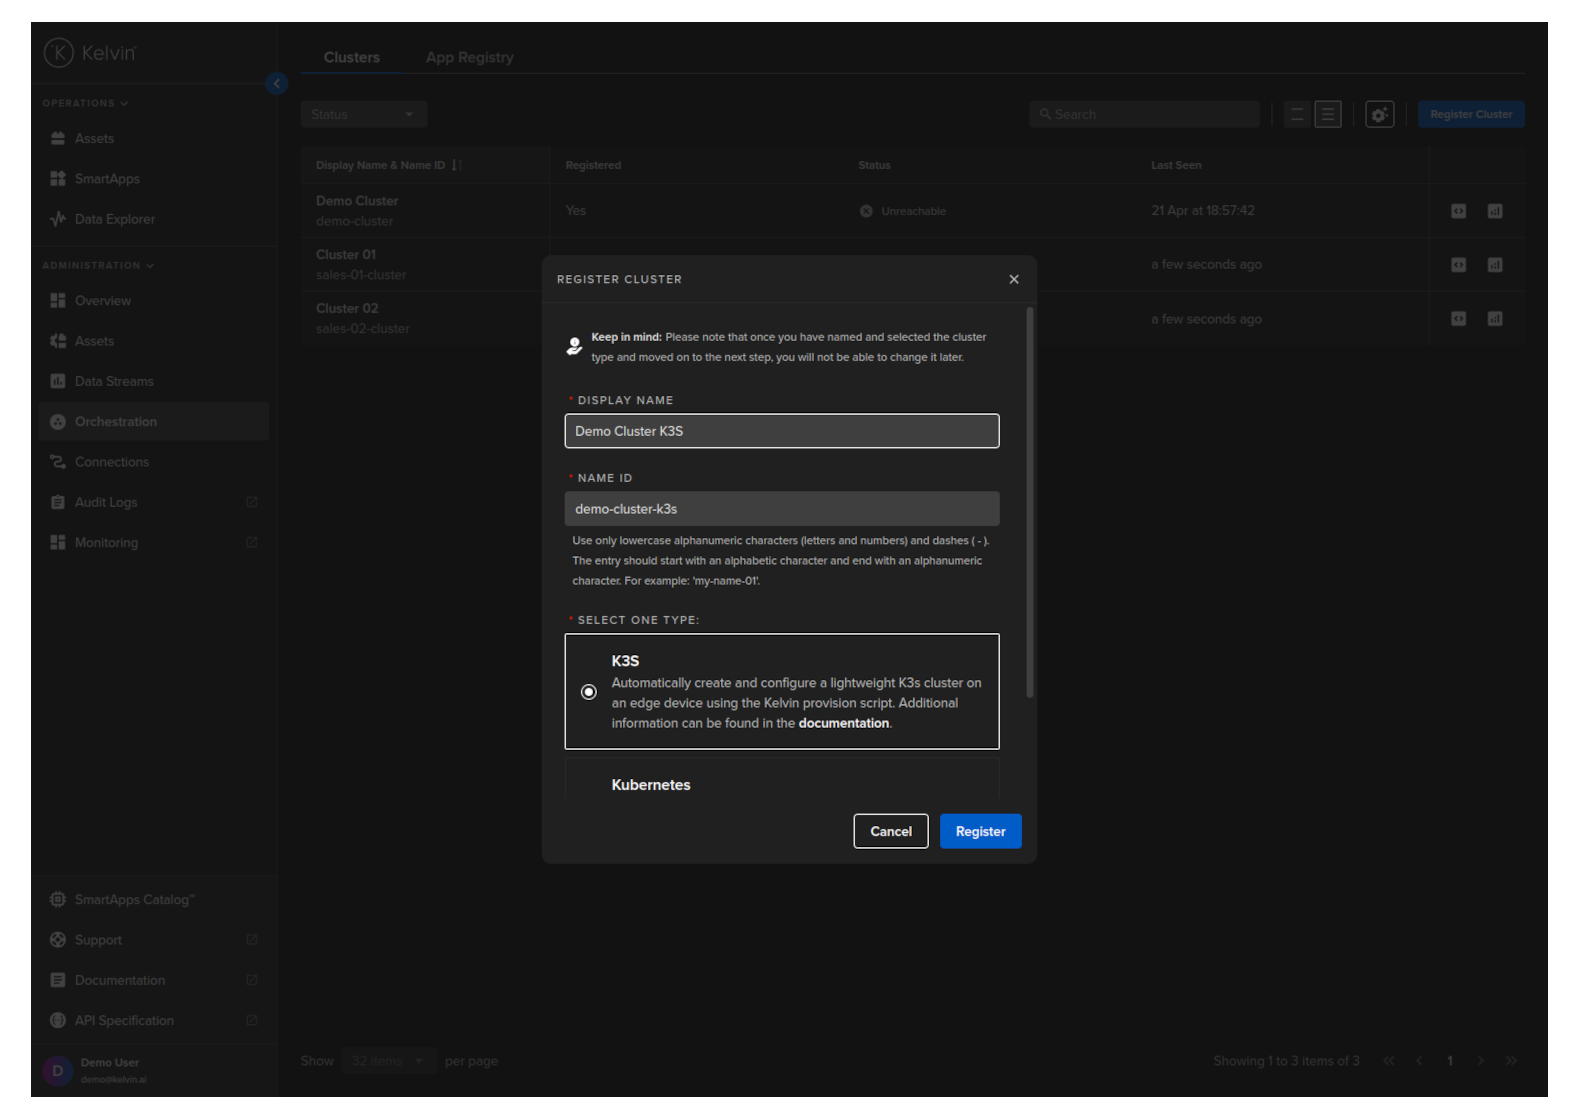
Then in the popup options, select K3S and type in a display name and optionally a name ID for this new kubernetes cluster.
| Display Name | This can be any characters and spaces that gives your cluster a memorable name for reference |
| Name ID | A unique lower-case alphanumeric name which uniquely identifies this cluster. This will be automatically filled in when you type the Display Name. Normally you do not need to change unless the Name ID clashes with another cluster's Name ID. |
The Name ID is the unique identifier name for the cluster. This must contain only lowercase alphanumeric characters. The ., _ and - characters are also allowed to separate words instead of a space BUT can not be at the beginning or end of the name.
When you press next., you will then be given the bash script that you need to run on the new Kelvin Cluster machine.
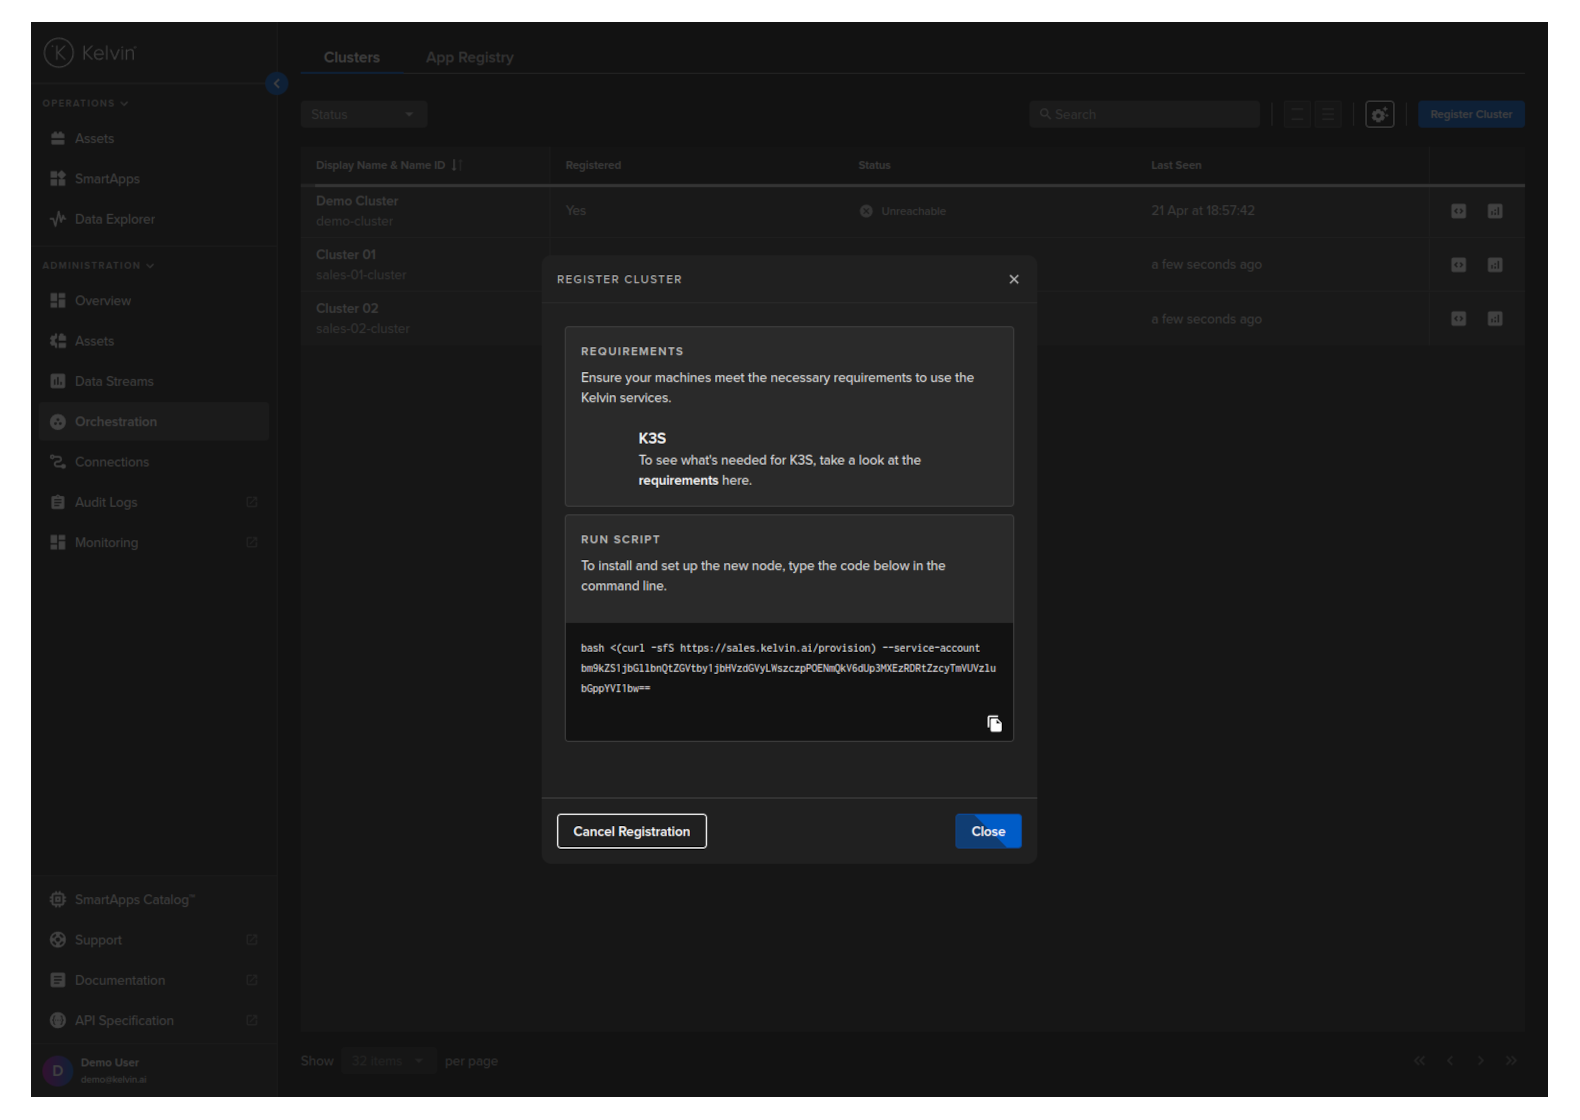
The bash script will look something like this;
bash <(curl -sfS https://<url.kelvin.ai>/provision) --service-account bm9kZS1jbGllbnQtZG9jdW1lbnRhdGlvbi1jbHVzdGVyOmFuRnlZZFJ2WGlHSk83cTFaSFE4OW01QTNEMElsNFVN
Copy and type this into the Ubuntu server terminal. The whole setup procedure is then setup automatically.
Optionally you can ignore the --service-account parameter. When the installation is started you will be asked to give your username and password and the name of the Cluster to install.
bash <(curl -sfS https://{kelvin-platform-url}/provision)
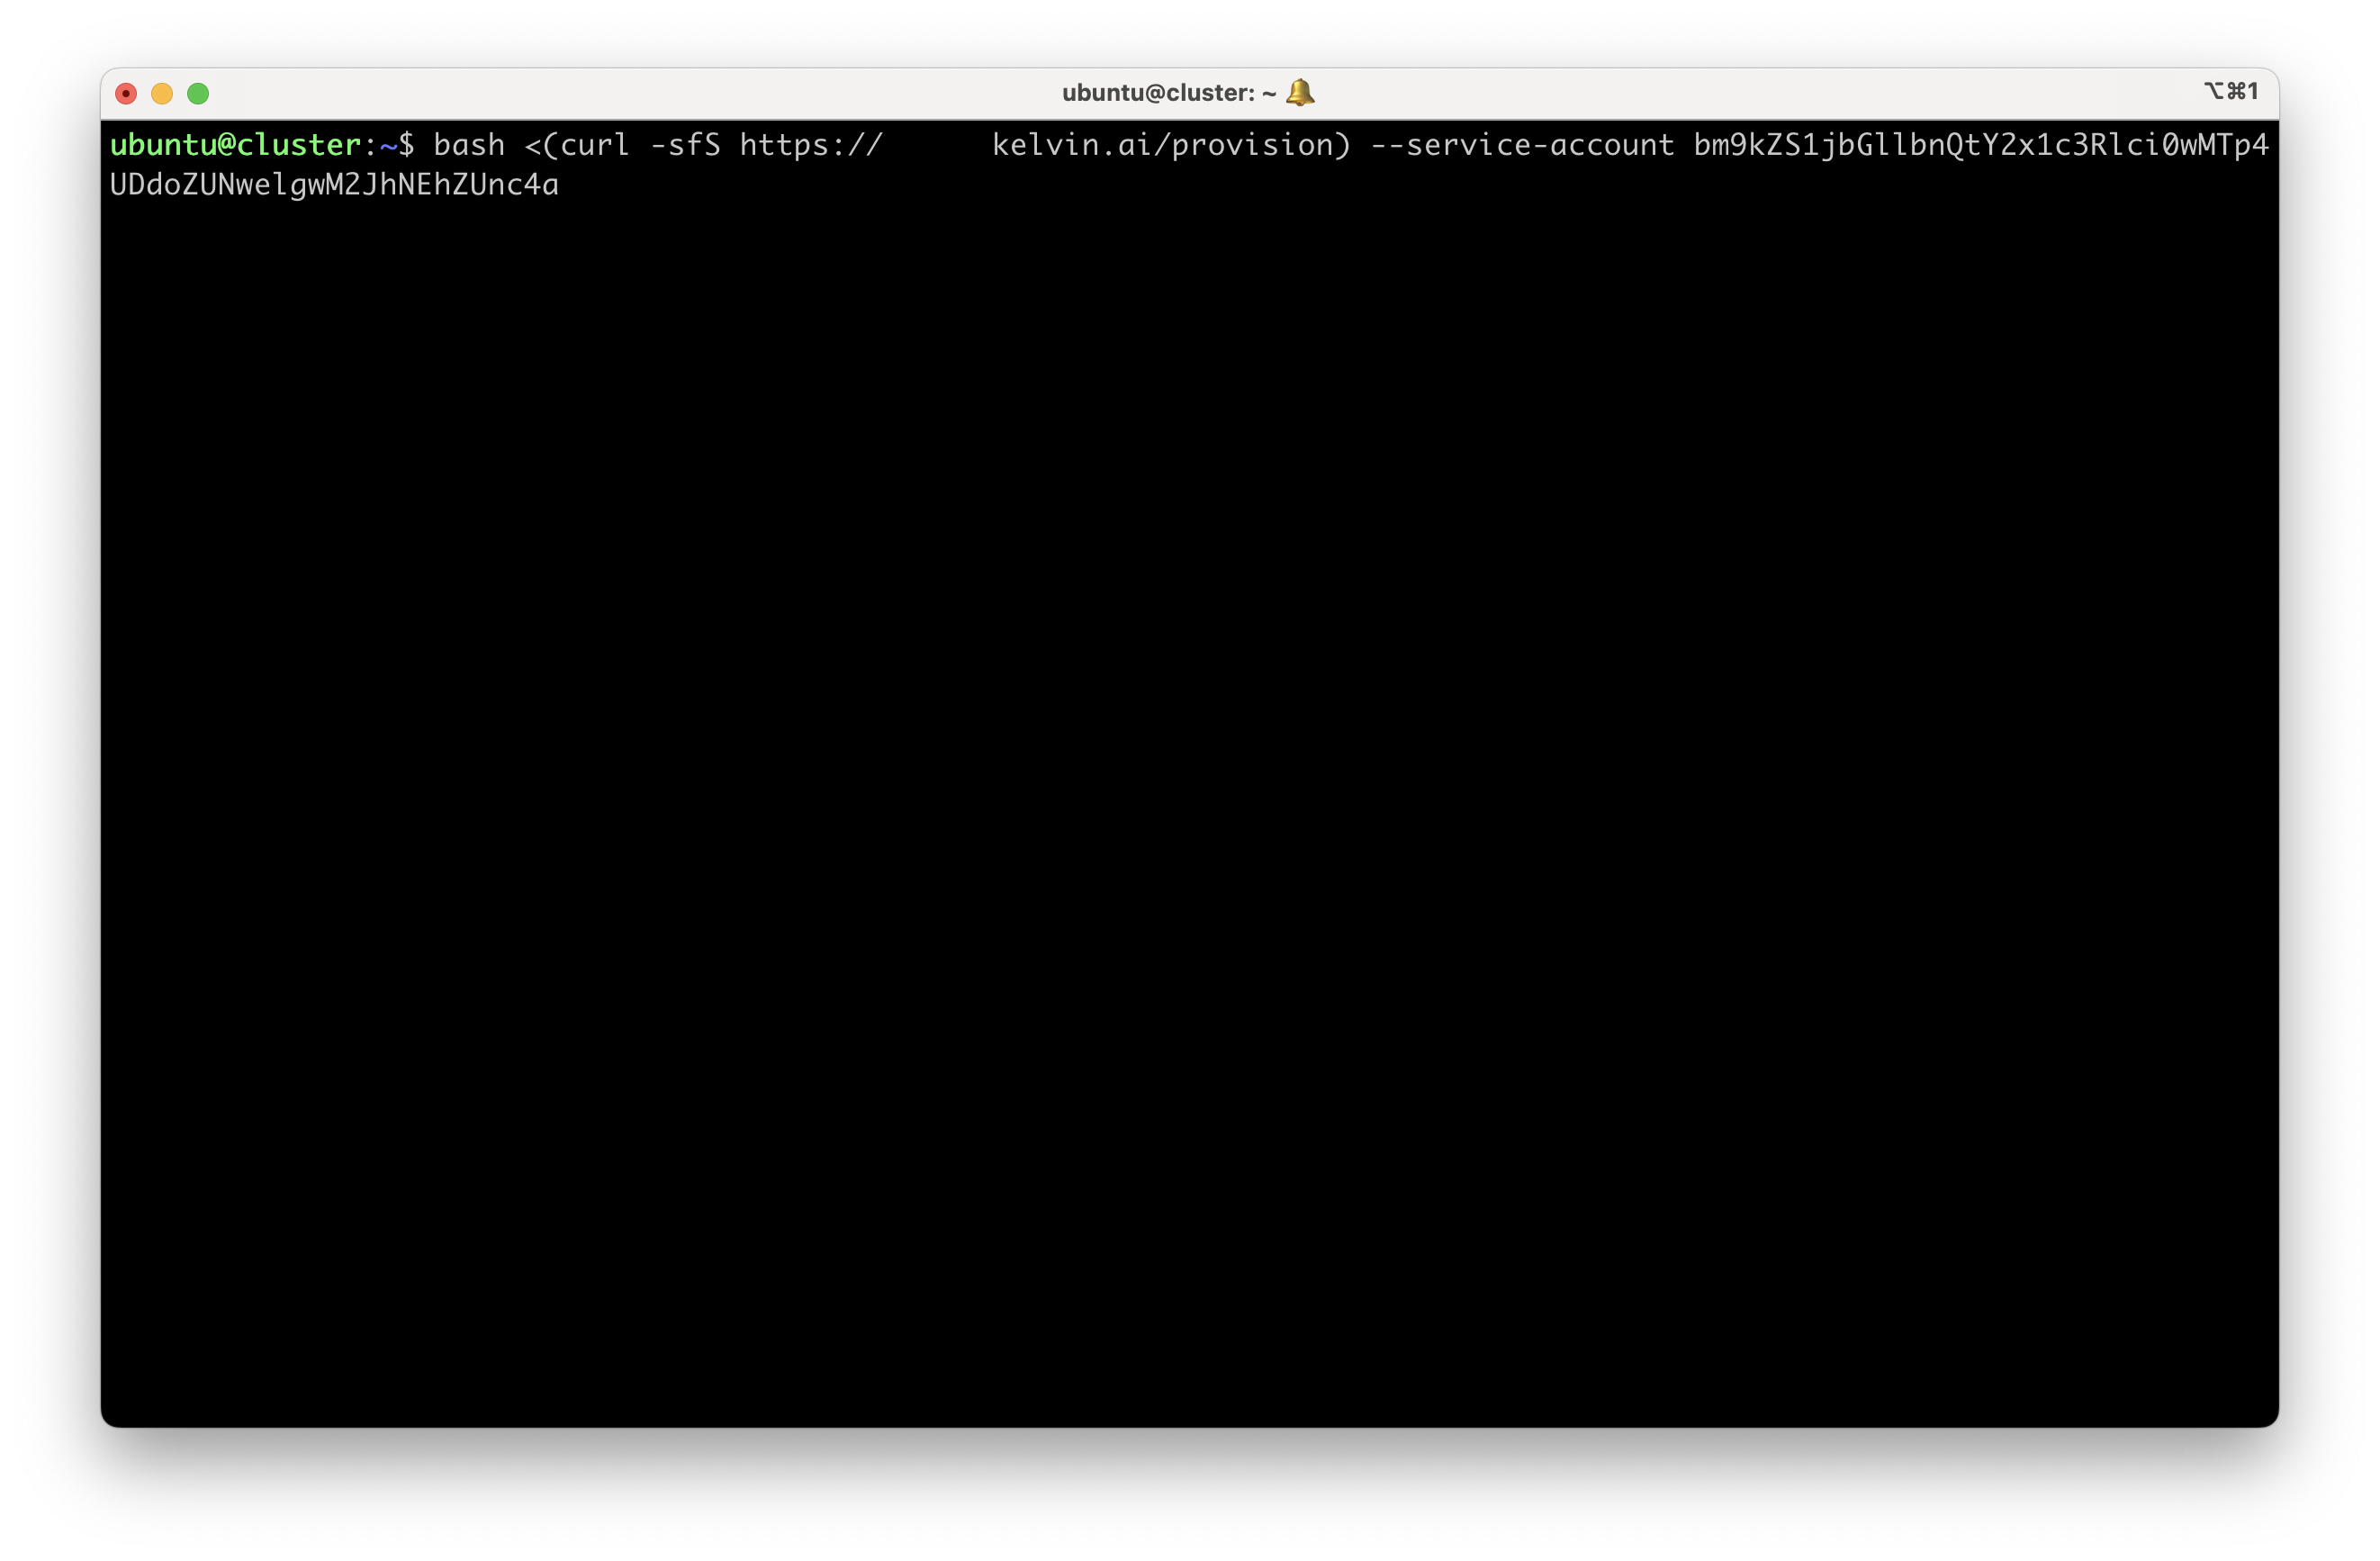
Wait a couple of minutes for the script to finish.
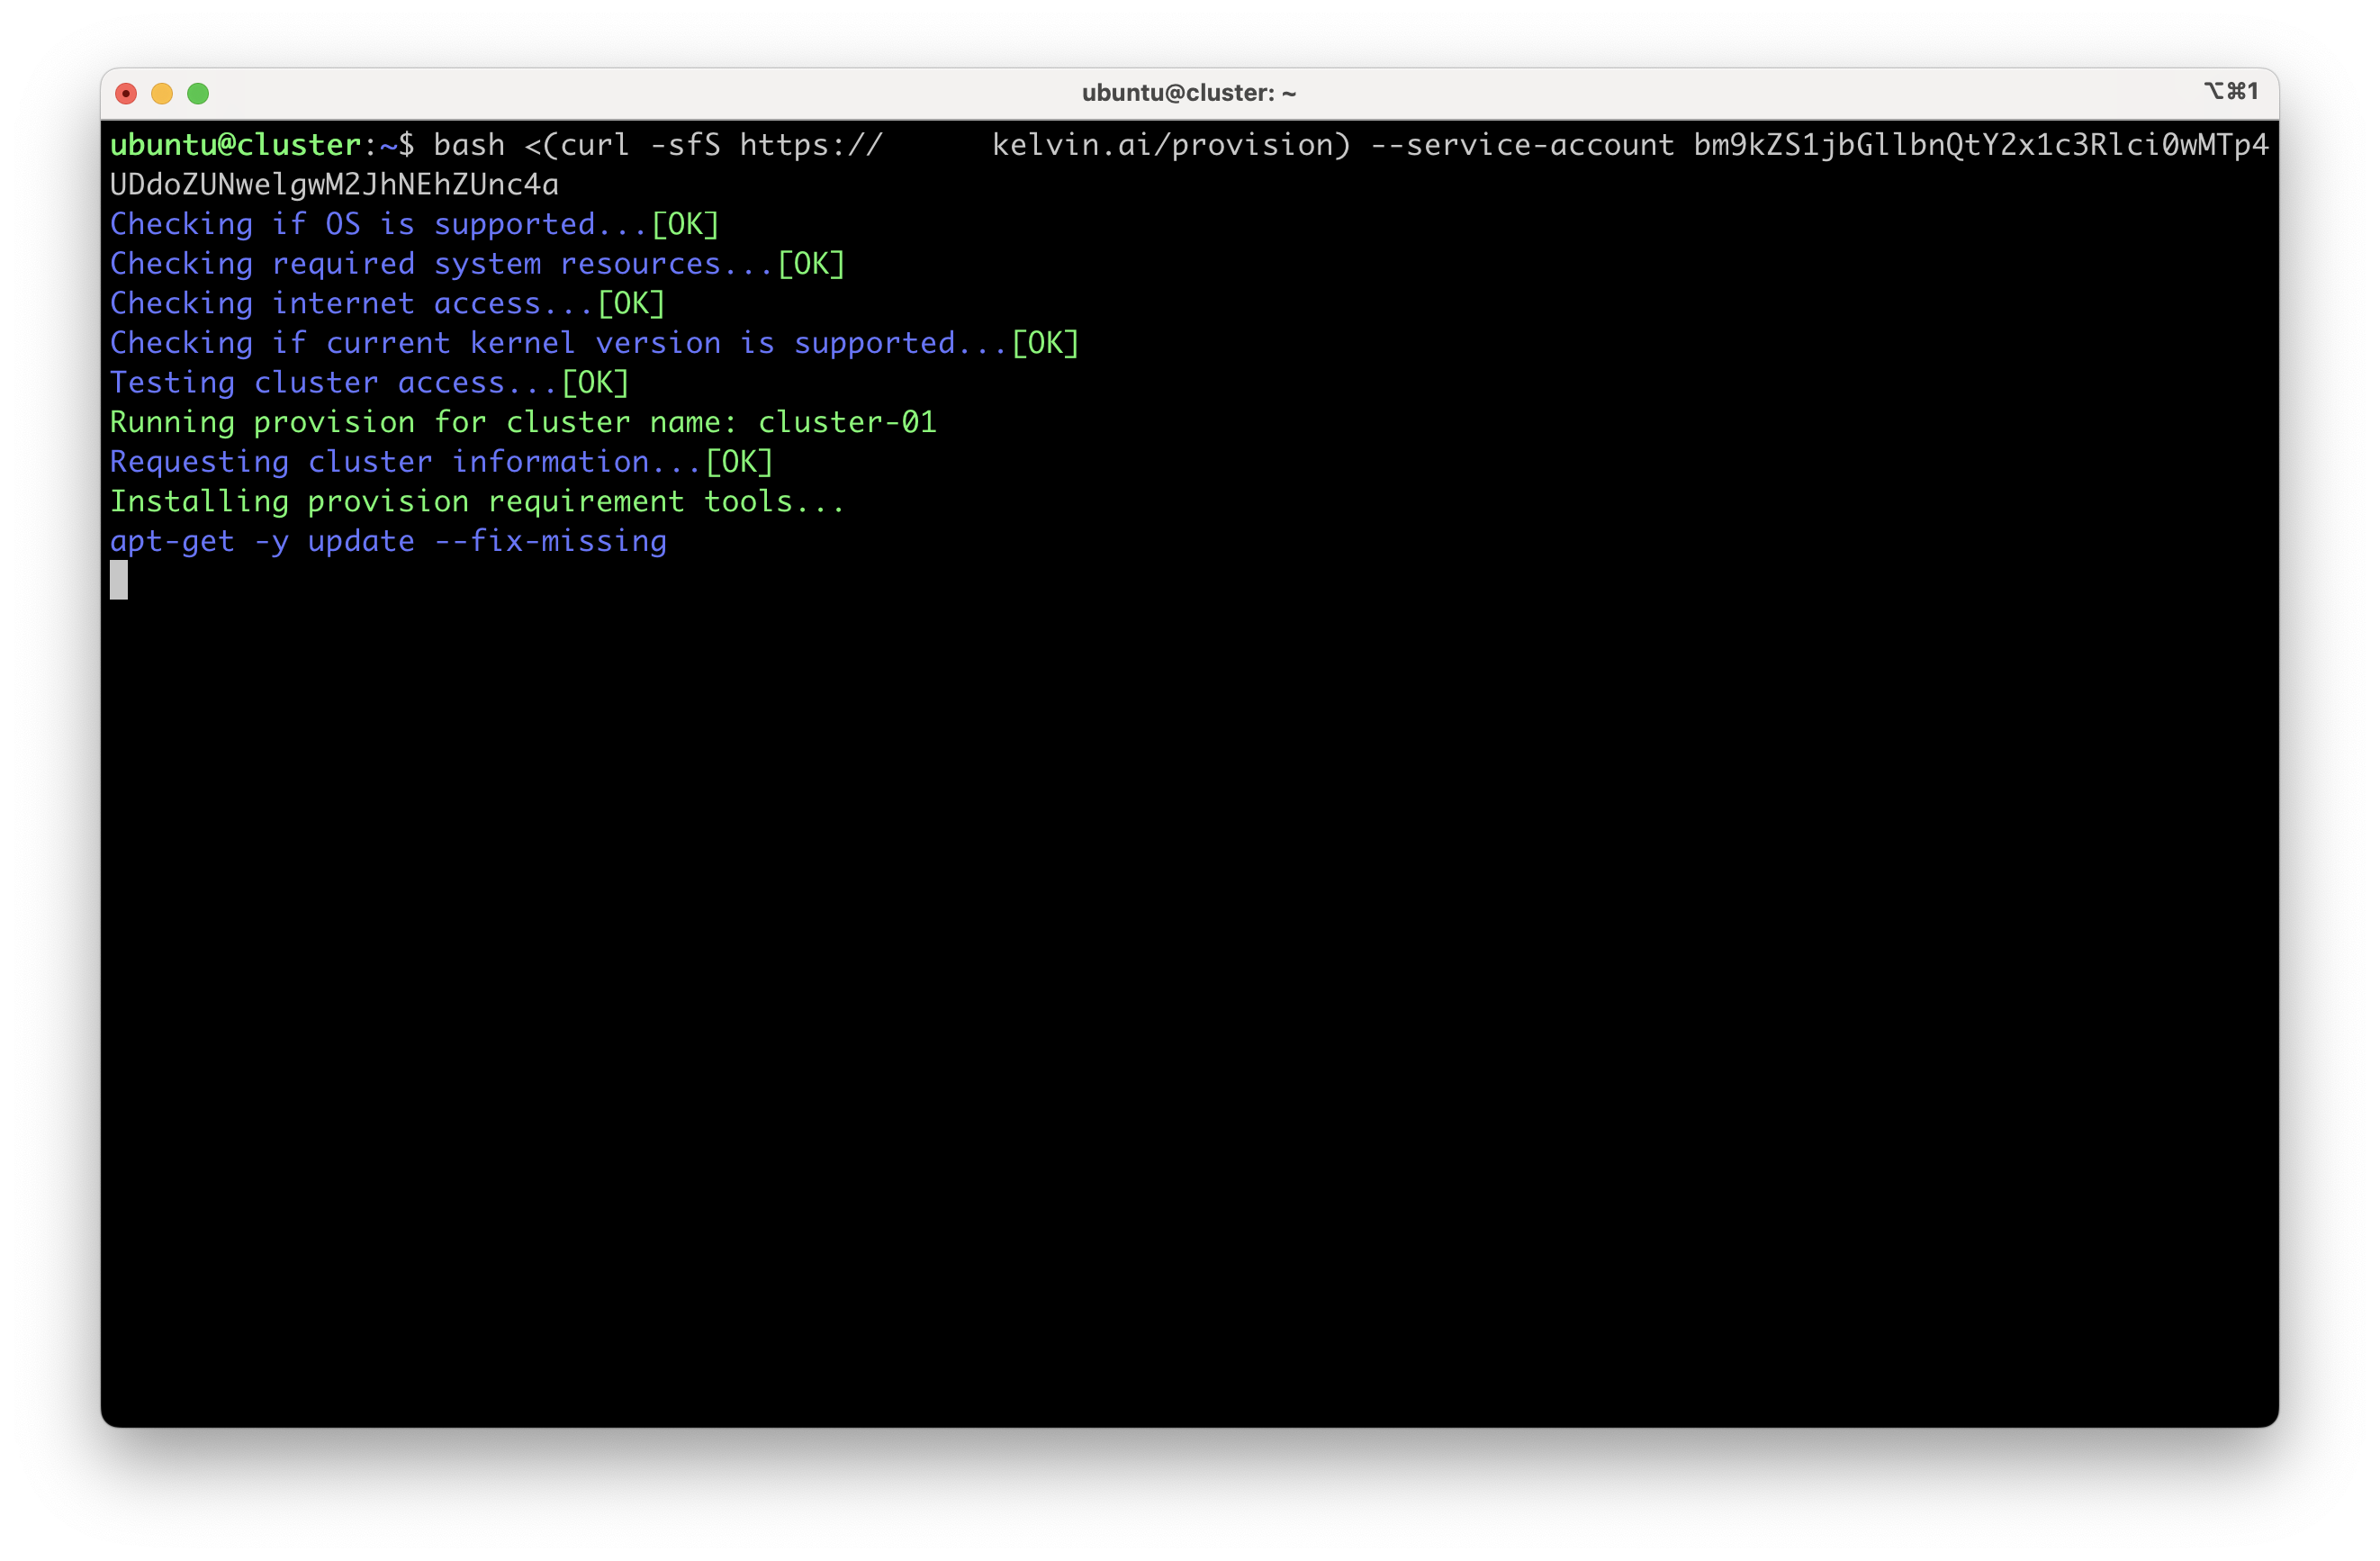
When the script finishes, you will see the following output:
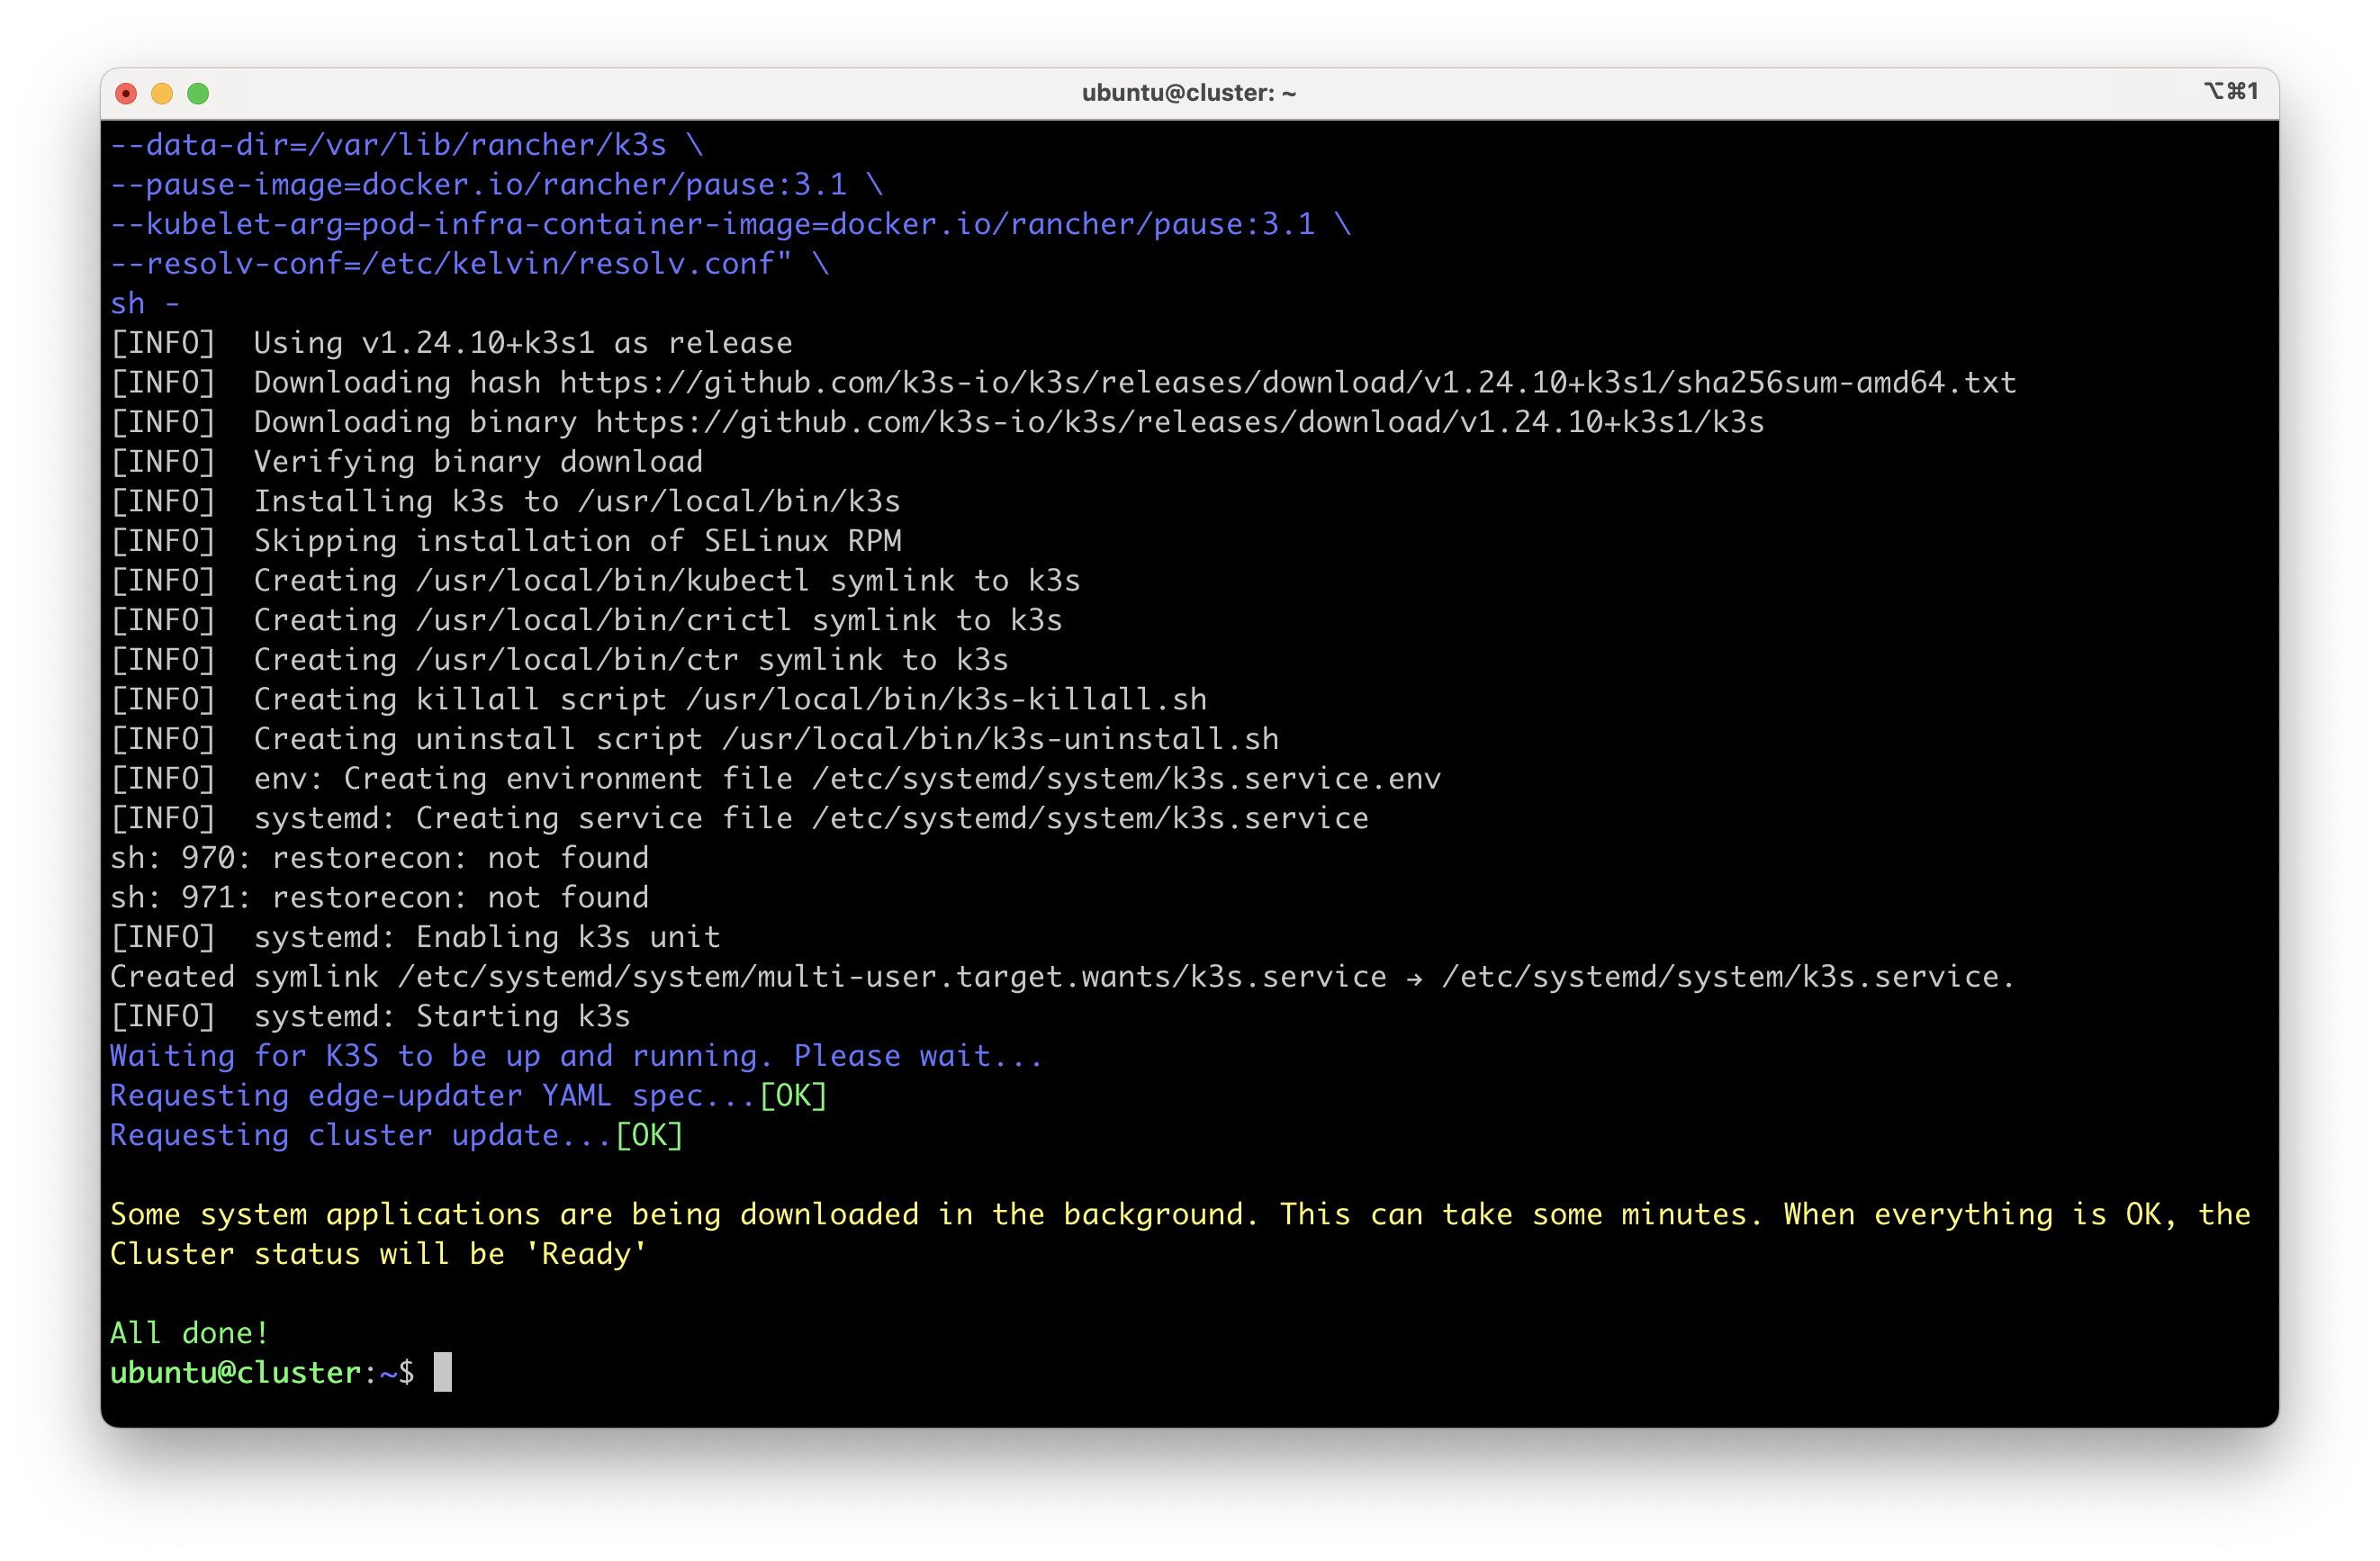
Congratulations, after a few minutes depending on your Internet speed your new cluster is ready for use.
curl -X 'POST' \
'https://<url.kelvin.ai>/api/v4/orchestration/clusters/create' \
-H 'Authorization: Bearer <Your Current Token>' \
-H 'accept: application/json' \
-H 'Content-Type: application/json' \
-d '{
    "name": "doc-demo-cluster-k3s",
    "title": "Doc Demo Cluster K3S",
    "type": "k3s"
}'
The response will look something like this;
{
   "name":"doc-demo-cluster-k3s",
   "title":"Doc Demo Cluster K3S",
   "type":"k3s",
   "ready":false,
   "status":"pending_provision",
   "last_seen":null,
   "sync_scrape_interval":120,
   "manifests_scrape_interval":130,
   "manifests_scrape_enabled":false,
   "version":{
      "k8s_version":"",
      "kelvin_version":""
   },
   "created":"2024-05-23T14:02:03.502407Z",
   "updated":"2024-05-23T14:02:03.502407Z",
   "service_account_token":"bm9kZS1jbGllbnQtZG9jLWRlbW8tY2x1c3Rlci1rM3M6WUw3Rk96UkV1OVRBYWlvbGNEODRCUXhtcnE1NjFaM1g=",
   "provision_script":"bash \u003c(curl -sfS https://<url.kelvin.ai>/provision) --service-account bm9kZS1jbGllbnQtZG9jLWRlbW8tY2x1c3Rlci1rM3M6WUw3Rk96UkV1OVRBYWlvbGNEODRCUXhtcnE1NjFaM1g=",
   "join_script":"bash \u003c(curl -sfS https://<url.kelvin.ai>/provision) --join --ip \u003cmain_cluster_node_ip_address\u003e --token ",
   "telemetry_scrape_interval":110,
   "telemetry_enabled":false,
   "telemetry_buffer_size":10,
   "forward_logs_enabled":false,
   "forward_logs_buffer_size":10,
   "upgrade_status":{
      "state":"idle",
      "message":""
   },
   "upgrade_pre_download":false,
   "upgrade_instantly_apply":true
}
Use the value from the key provision_script which will look something like this;
bash <(curl -sfS https://<url.kelvin.ai>/provision) --service-account bm9kZS1jbGllbnQtZG9jdW1lbnRhdGlvbi1jbHVzdGVyOmFuRnlZZFJ2WGlHSk83cTFaSFE4OW01QTNEMElsNFVN
Copy and type this into the Ubuntu server terminal. The whole setup procedure is then setup automatically.
Optionally you can ignore the --service-account parameter. When the installation is started you will be asked to give your username and password and the name of the Cluster to install.
bash <(curl -sfS https://<url.kelvin.ai>/provision)
Wait a couple of minutes for the script to finish.
When the script finishes, you will see the following output:
Congratulations, after a few minutes depending on your Internet speed your new cluster is ready for use.
from kelvin.api.client import Client

# Login
client = Client(config={"url": "https://<url.kelvin.ai>", "username": "<your_username>"})
client.login(password="<your_password>")

# Set or Update the Default Cluster in an Instance
response = client.orchestration.create_orchestration_clusters(data={
    "name": "doc-demo-cluster-k3s",
    "title": "Doc Demo Cluster K3S",
    "type": "k3s"
    })

print(f'The new cluster "{response.title}" is now registered in Kelvin, run this provision script in your edge computer - "{response.provision_script}"')
You will see an output like this;
The new cluster "Doc Demo Cluster K3S" is now registered in Kelvin, run this provision script in your edge computer - "bash <(curl -sfS https://<url.kelvin.ai>/provision) --service-account bm9kZS1jbGllbnQtZGVtby1jbHVzdGVyLWszczpYdlpZTEQwc2JlU202S2c1ZDk0YzJvbGpQaFIzRjFFQQ=="
Copy and type the provision script into the Ubuntu server terminal of your edge computer. The whole K3s setup procedure is then installed and configured automatically.
Optionally you can ignore the --service-account parameter. When the installation is started you will be asked to give your username and password and the name of the Cluster to install.
bash <(curl -sfS https://<url.kelvin.ai>/provision)
Wait a couple of minutes for the script to finish.
When the script finishes, you will see the following output:
Congratulations, after a few minutes depending on your Internet speed your new cluster is ready for use.