1. Your Workspace
← Introduction ⓪ ② Create SmartApp →

Installation
Before you can start you need to setup your computer with all the development tools required to make Kelvin SmartApps™.
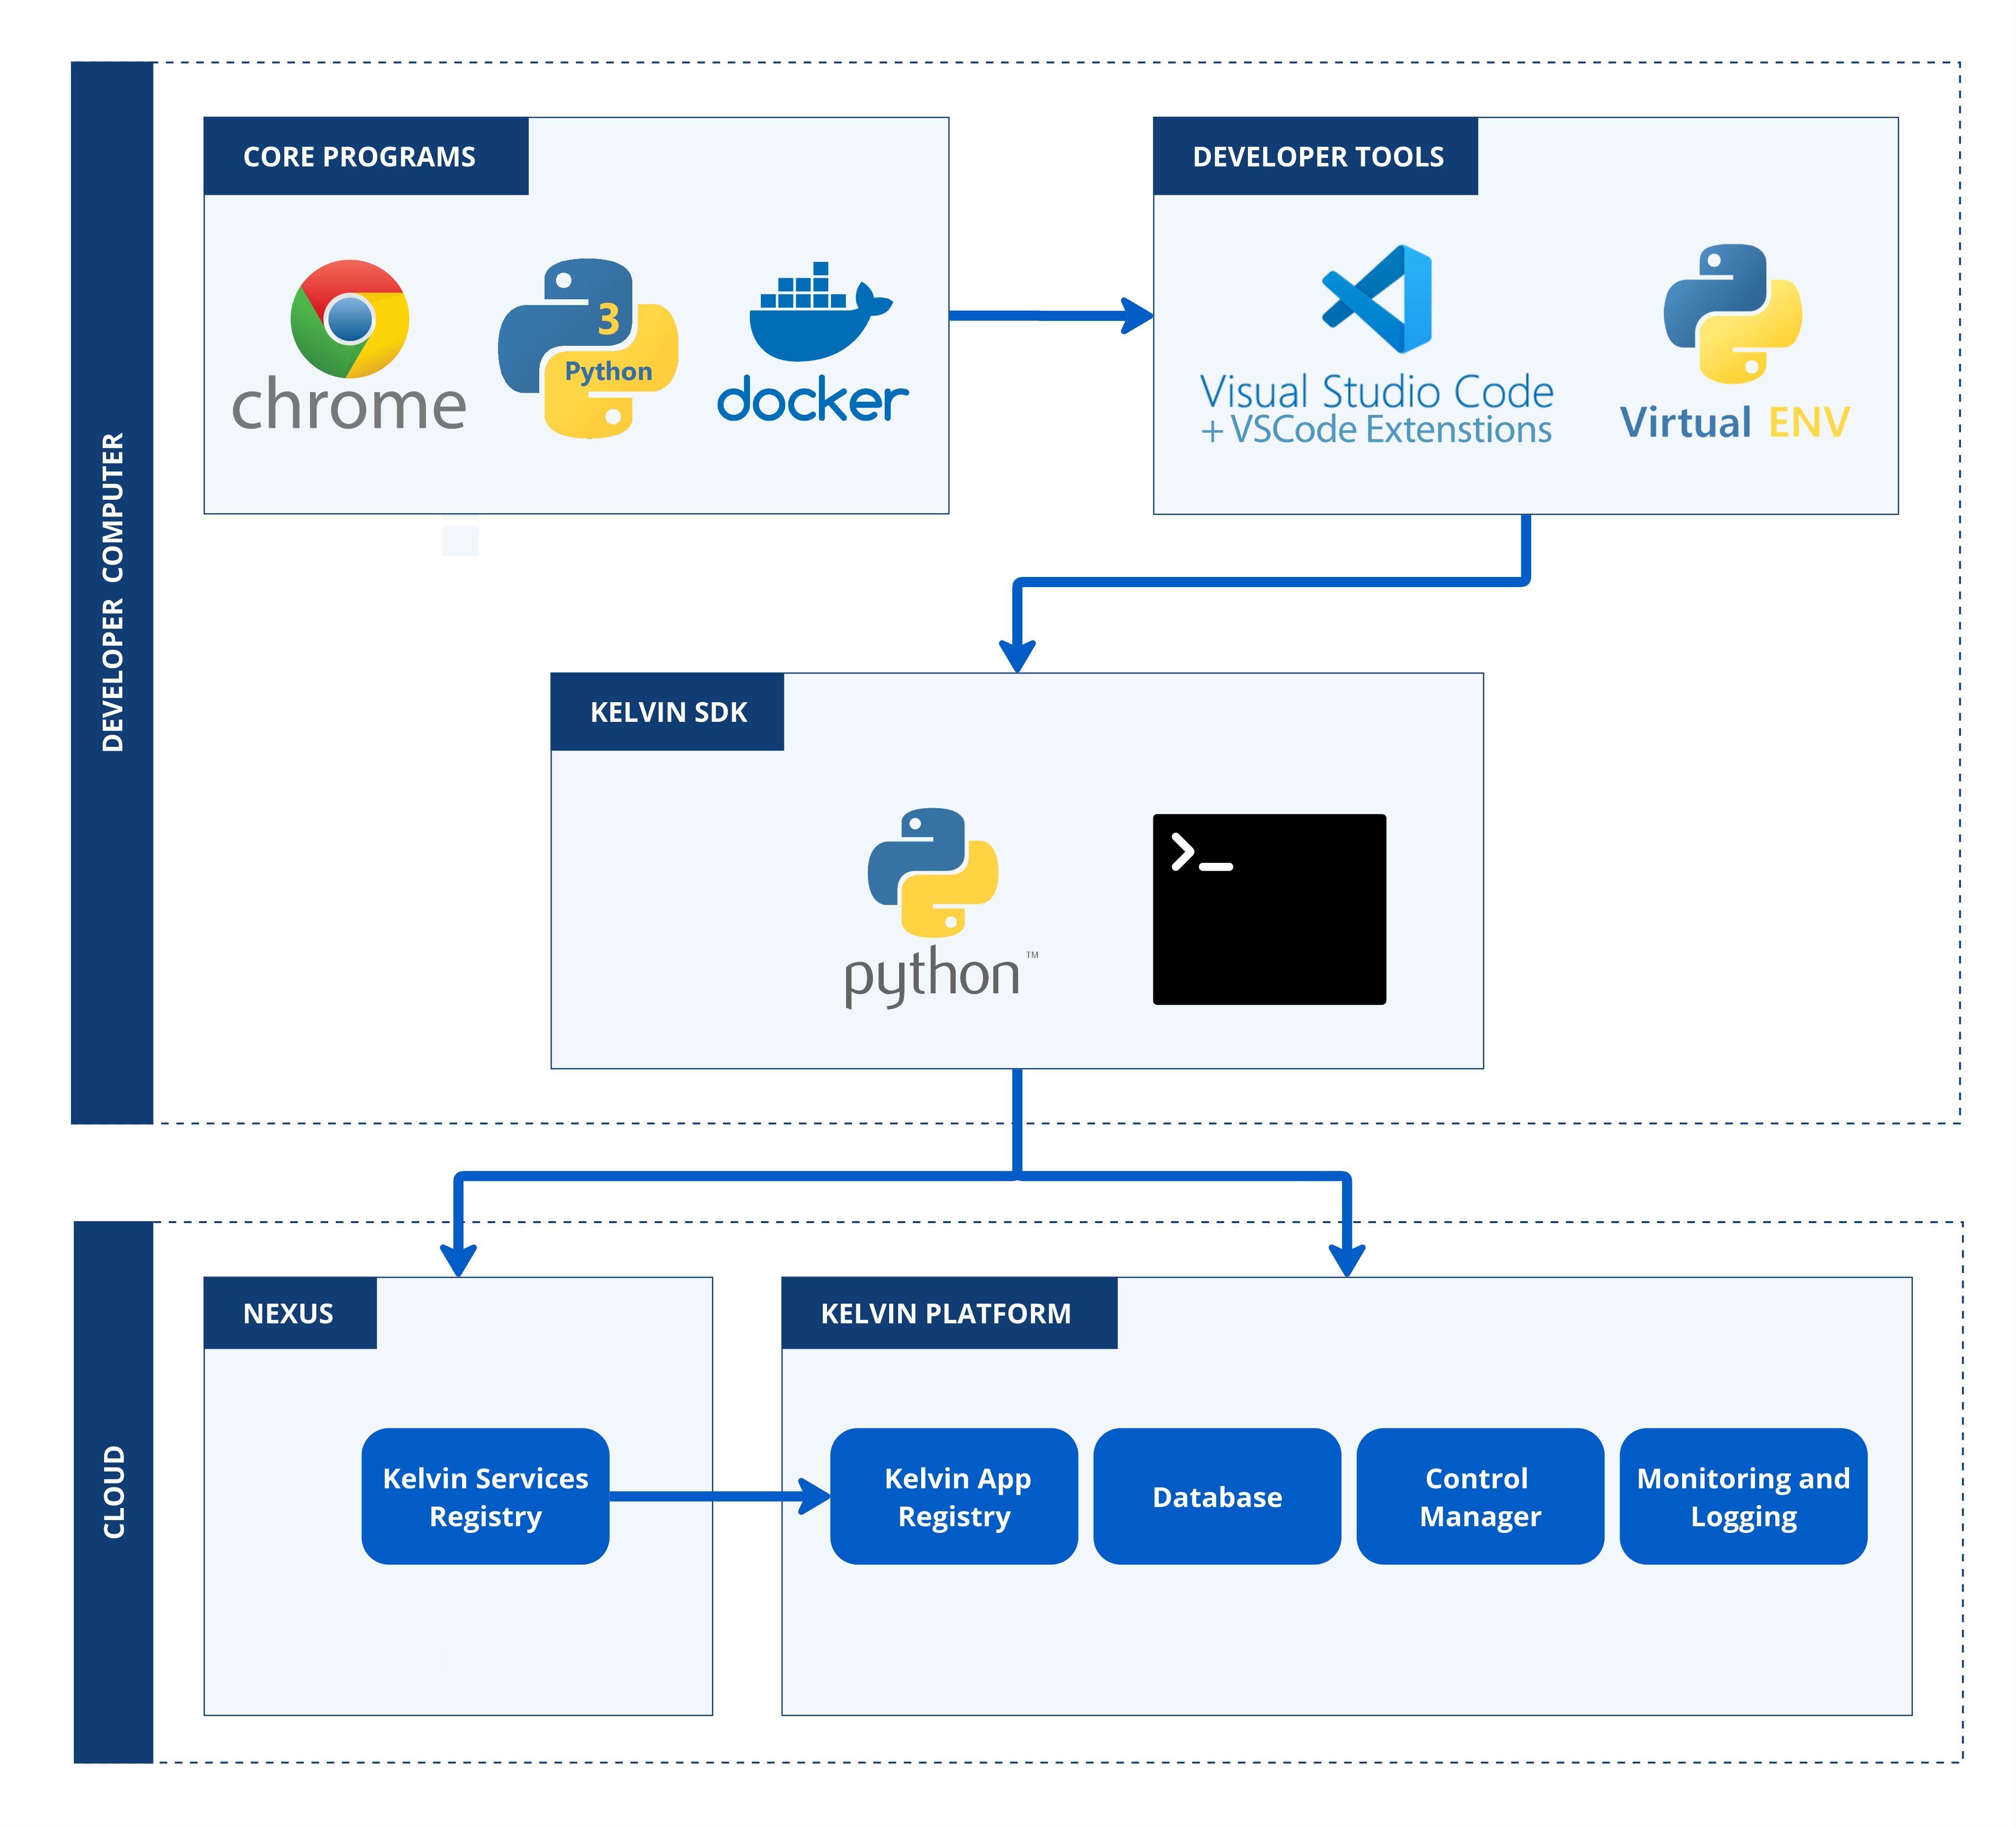
The list of software required for development and testing is;
| Software | Mandatory | Install Method |
|---|---|---|
| Google Chrome | Yes (Kelvin only guarantees on Google Chrome, though most if not all features will work in the other modern browsers) | From website |
| Python 3 | Yes, See Pypi for compatible versions | From website |
| Docker | Yes | From website |
| Visual Studio Code | No, but we now standardize our newer documentation to be shown on VSCode | From website |
| Kelvin SDK | Yes | pip install kelvin-sdk |
There is detailed step-by-step documentation available on how to install all the software and tools required for each OS type.
Login
Once everything is installed, then you need to login to you Kelvin Platform from the terminal.
| CLI Login | |
|---|---|
1 | |
You will be asked for your login, password and 2fa code.
The Kelvin SDK will then attempt to log you into two systems;
Warning
When logging into the Kelvin Docker Registry, you need to have access to Docker with your user. If you don't have this, this step will fail.
To setup local user access to the docker commands;
On Windows and Linux, run this terminal command
| Docker CLI for Local User | |
|---|---|
1 | |
and on MacOS run this command;
| Docker CLI for Local User | |
|---|---|
1 | |
- Kelvin Platform
- Kelvin Docker Registry
When you are logged in you will see the following;
| CLI Login Example | |
|---|---|
1 2 3 4 5 6 7 8 9 10 | |
With your workspace setup, now we can start with creating your first Kelvin SmartApp™.